
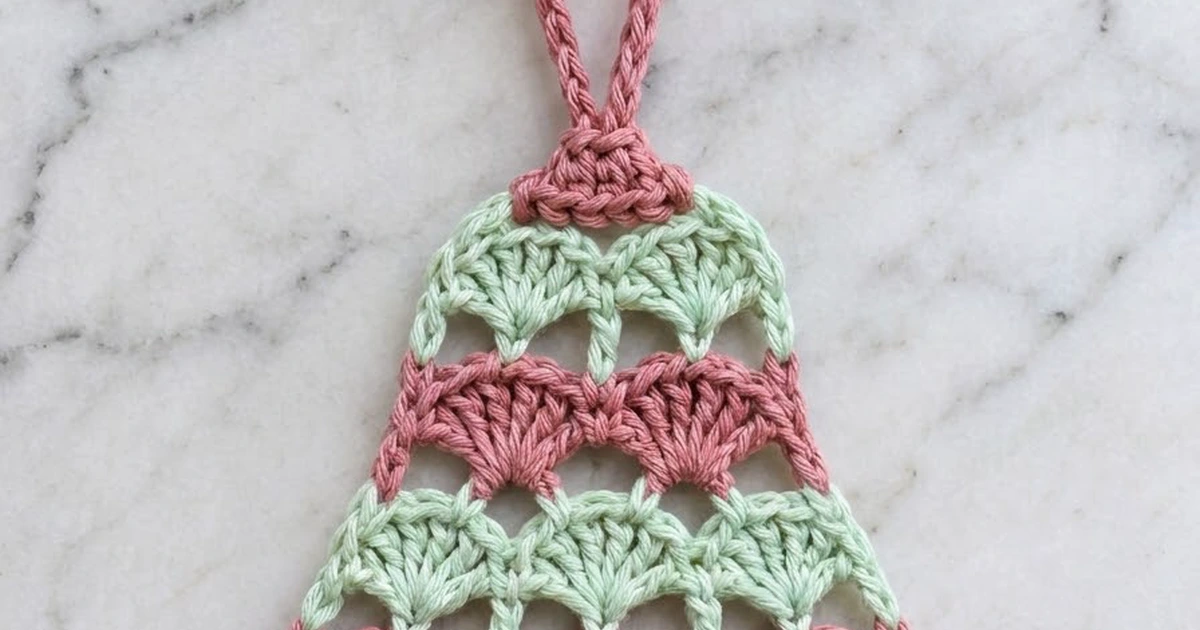
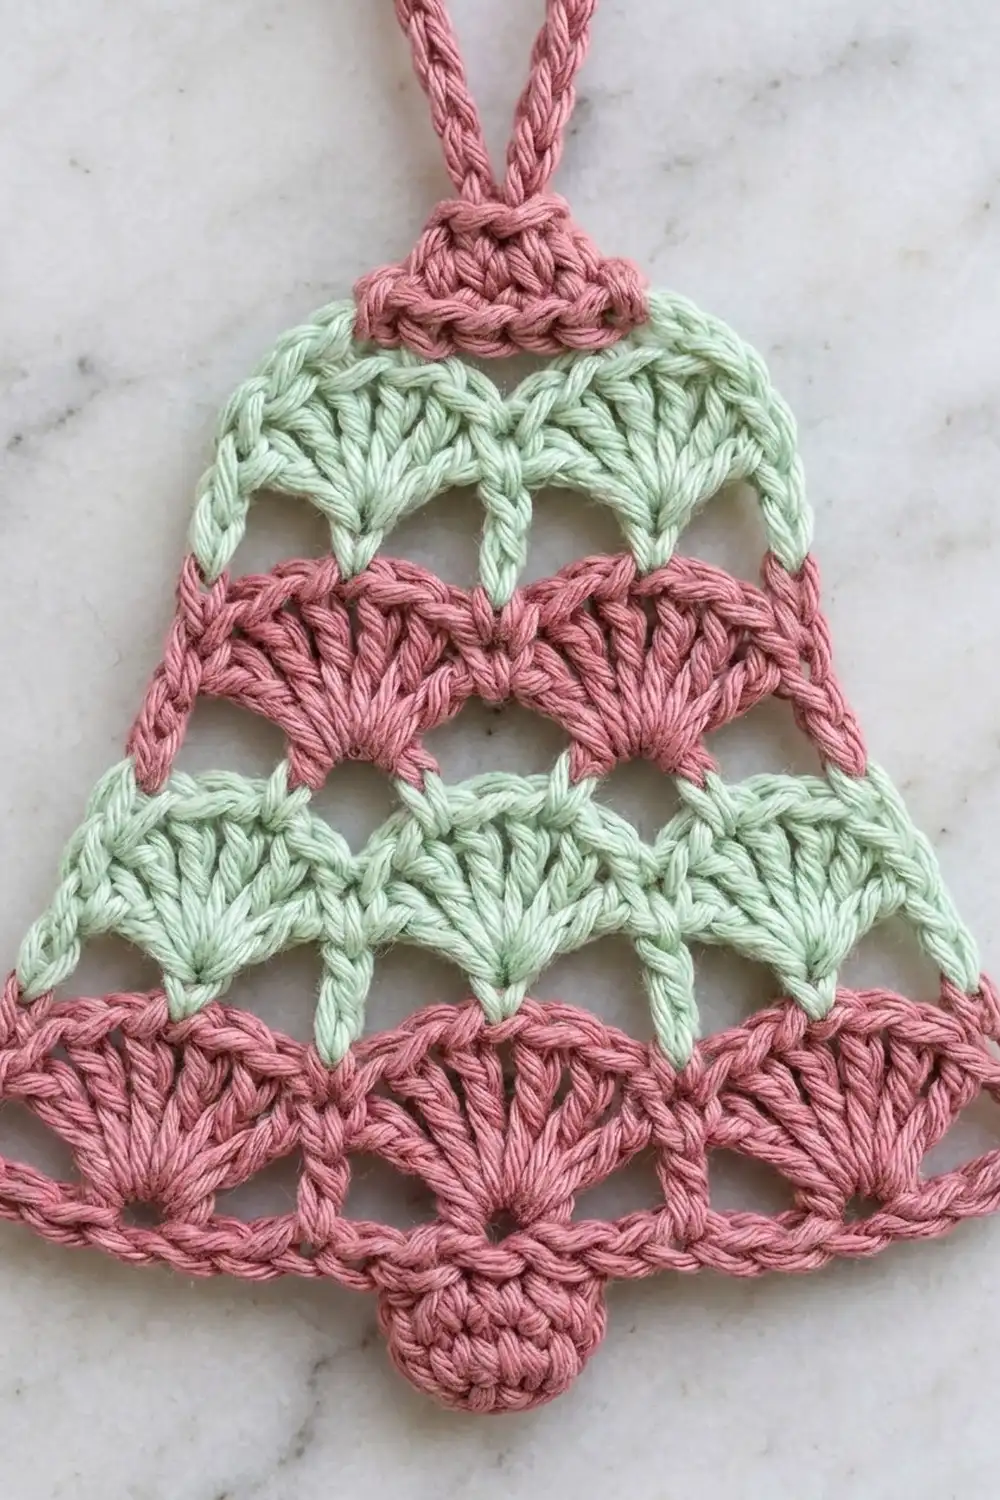
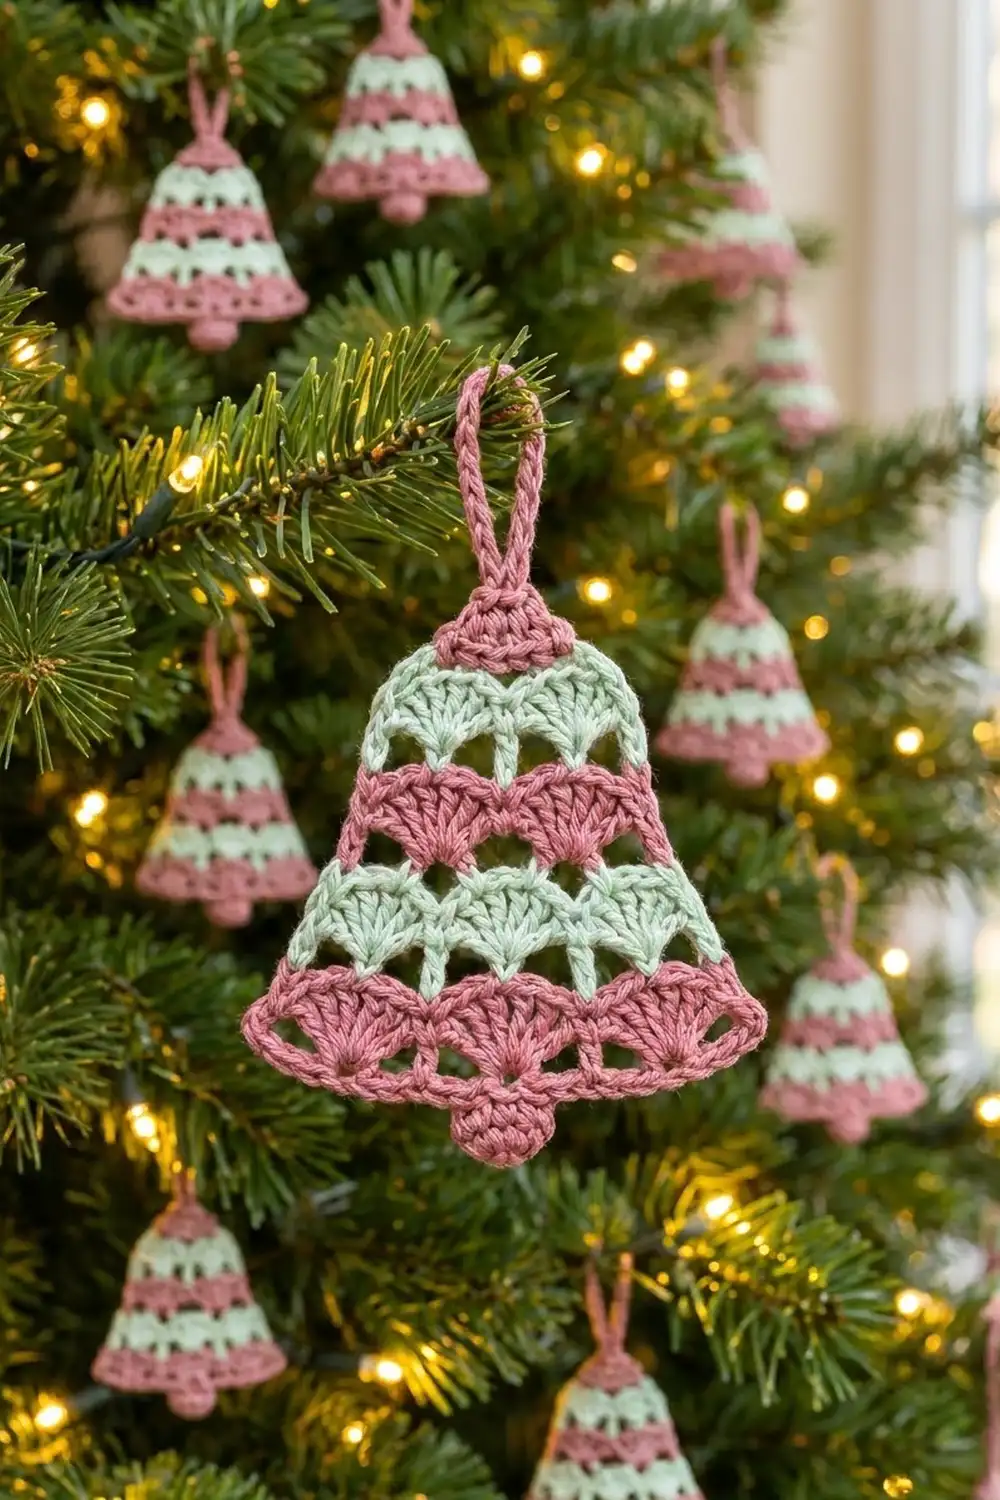
The Sugarplum Shell Bell is a flat, lacy Christmas bell ornament made from rows of rounded fan shells. Dusty rose and mint green stripes alternate up the bell, and straight double crochet posts between the fans leave small open windows that catch the light from the tree.
The shape builds itself as you go. Each shell row has one fewer full fan than the row below, so the sides step inward with no shaping math. A small single crochet cap rounds off the top, a sturdy sc-covered loop takes the hook or ribbon, and a little round clapper finishes the bottom.
This pattern uses US crochet terms. The finished bell is about 4.4 in (11.2 cm) wide and 3.2 in (8.1 cm) tall through the body. With the loop and clapper, it hangs about 5.2 in (13.2 cm) tall.
Here is the order of work: a foundation row of single crochet, four shell rows in alternating colors, four cap rows of single crochet, the hanging loop, one round of border, and a clapper you sew on last.
Finished Size and Construction
- Finished size: 4.4 in (11.2 cm) wide × 3.2 in (8.1 cm) tall (body with border)
- Overall hanging height: 5.2 in (13.2 cm) including loop and clapper
- Skill level: Easy–Intermediate
- Terminology: US crochet terms
- Yarn weight: Light / DK (#3) cotton or cotton blend
- Hook: 3.5 mm (E-4)
- Number of pieces: 1 bell body plus 1 small clapper disc
- Layout: Single flat ornament, worked bottom-up in rows
- Body size before border: 4.2 in (10.7 cm) wide × 3.0 in (7.6 cm) tall
- Border depth: about 0.1 in (0.3 cm) on every edge
Materials
Choose a smooth mercerized or matte cotton in DK weight. Cotton gives crisp shell definition and keeps the bell flat once it’s blocked. Fuzzy acrylic tends to blur the open windows.
- Color A – Dusty Rose: 10 g, about 25 m (27 yd)
- Color B – Mint Green: 5 g, about 12 m (13 yd)
Tools:
- 3.5 mm (E-4) crochet hook
- Tapestry needle
- Scissors
- Rust-proof pins and a blocking mat or folded towel
- Spray bottle with water
- Optional: fabric stiffener, ribbon, or an ornament hook
These quantities include a margin of about 20 percent for your gauge swatch and weaving in ends.
Abbreviations (US Terms)
- ch – chain
- sl st – slip stitch
- sc – single crochet
- sc2tog – single crochet 2 together (insert hook in next st, pull up a loop, insert hook in next st, pull up a loop, yarn over and pull through all 3 loops)
- dc – double crochet
- st(s) – stitch(es)
- RS / WS – right side / wrong side
Special stitches:
- Shell: 5 dc in the same stitch.
- Half shell (row start): ch 3 (counts as 1 dc), 2 dc in the same stitch. This makes 3 sts.
- Half shell (row end): 3 dc in the same stitch. This makes 3 sts.
- Post: a single dc that separates two shells.
Gauge and Checkpoints
Gauge: 20 sc = 4 in (10.2 cm), so 5 sc = 1 in (2.5 cm). One dc shell row is about 0.5 in (1.3 cm) tall. Five sc rows measure about 1 in (2.5 cm).
Make one complete bell before you make a batch. It’s your swatch. Check it at these points:
- After Row 1: 21 sc measure 4.2 in (10.7 cm).
- After Row 2: total height is about 0.7 in (1.8 cm).
- After Row 5: total height is about 2.2 in (5.6 cm).
- After Row 6: the 11-sc cap row is about 2.2 in (5.6 cm) wide.
- After Row 9: the 5-sc knob is about 1.0 in (2.5 cm) wide, and the body is 3.0 in (7.6 cm) tall.
Too big? Go down to a 3.25 mm hook. Too small or stiff? Go up to a 3.75 mm hook. Shell rows tend to come out taller than the sc gauge suggests, so match Row 1’s width first, then check the height.
Bell Body
Row 1 (Color A)
With Color A, ch 22.
Row 1 (WS): Sc in 2nd ch from hook and in each ch across. Turn. (21 sc)
Checkpoint: 4.2 in (10.7 cm) wide.
Row 2 – First Shell Row (Color A, RS)
Row 2: Half shell in the first sc. Skip 1 sc, post in next sc, skip 1 sc, shell in next sc; repeat from * to * 3 more times. Skip 1 sc, post in next sc, skip 1 sc, half shell in the last sc. Fasten off.
(31 dc: 2 half shells of 3 dc, 4 full shells of 5 dc, 5 posts)
Check: 3 + 4×5 + 5 + 3 = 31. The posts sit in sc 3, 7, 11, 15, and 19. The shells sit in sc 5, 9, 13, and 17.
From now on, the shell rows start at the right edge with the RS facing you. You fasten off at the end of each row, so you never have to turn.
Row 3 – Second Shell Row (Color B)
With the RS facing, join Color B with a sl st in the first post (Post 1).
Row 3: Half shell in the same post. Dc in the center (3rd) dc of the next shell, shell in the next post; repeat from * to * 2 more times. Dc in the center dc of the last shell, half shell in the last post. Fasten off.
(25 dc: 2 half shells, 3 full shells, 4 posts)
Check: 3 + 3×5 + 4 + 3 = 25. Starting and ending in the outermost posts moves each edge in by 2 stitches. That’s what makes the first step of the bell shape.
Row 4 – Third Shell Row (Color A)
With the RS facing, join Color A in the first post of Row 3.
Row 4: Half shell in the same post. Dc in the center dc of the next shell, shell in the next post; repeat from * to * once more. Dc in the center dc of the last shell, half shell in the last post. Fasten off.
(19 dc: 2 half shells, 2 full shells, 3 posts)
Check: 3 + 2×5 + 3 + 3 = 19.
Row 5 – Fourth Shell Row (Color B)
With the RS facing, join Color B in the first post of Row 4.
Row 5: Half shell in the same post. Dc in the center dc of the next shell, shell in the middle post, dc in the center dc of the last shell, half shell in the last post. Fasten off.
(13 dc: 2 half shells, 1 full shell, 2 posts)
Check: 3 + 5 + 2 + 3 = 13.
Checkpoint: the body is about 2.2 in (5.6 cm) tall.
Cap – Rows 6 to 9 (Color A)
The cap is worked back and forth in sc, turning at the end of each row.
Row 6 (RS): With the RS facing, join Color A in the first st of Row 5 (the top of the beginning ch-3). Ch 1, sc2tog over the first 2 sts, sc in the next 9 sts, sc2tog. Turn. (11 sc)
This is a decrease row. Count: 13 sts worked as 2 + 9 + 2, giving 1 + 9 + 1 = 11 sc.
Row 7 (WS): Ch 1, sc2tog, sc in the next 7 sts, sc2tog. Turn. (9 sc)
Row 8 (RS): Ch 1, sc2tog, sc in the next 5 sts, sc2tog. Turn. (7 sc)
Row 9 (WS): Ch 1, sc2tog, sc in the next 3 sts, sc2tog. (5 sc) Do not fasten off.
Checkpoint: the knob is 1.0 in (2.5 cm) wide, and the body is 3.0 in (7.6 cm) tall and 4.2 in (10.7 cm) wide at the base.
Hanging Loop (Color A)
Continue from Row 9. Ch 1, turn, and sl st in each of the first 3 sts. You are now in the center stitch (st 3).
Loop: Ch 18, then sl st in the same center st to close the loop.
Cover: Ch 1, work 28 sc into the ch-18 loop, then sl st in the center st. Fasten off.
Covering the chain with sc makes the loop thick and rope-like, so it holds its shape on a branch. The finished loop stands about 1.5 in (3.8 cm) above the knob.
Border
Border gauge: One round of sc in Color A. Use these placements:
- 1 sc in each foundation chain along the bottom
- 3 sc in each bottom corner
- 1 sc in the row-end of each sc row
- 3 sc around the end post of each dc shell row
- 1 sc in each top stitch of the knob
Round 1: With the RS facing, join Color A in the first foundation ch at the bottom right corner, working into the underside of the chain.
- Bottom edge: Ch 1, 3 sc in the same ch, sc in each of the next 19 ch, 3 sc in the last ch. (25 sc, including both corners)
- First side: Rotate the bell. Work 1 sc in the end of Row 1, 3 sc around the end of each of Rows 2 to 5 (12 sc), and 1 sc in the end of each of Rows 6 to 9 (4 sc). (17 sc)
- Top: Sc in each of the 5 sts of Row 9. Work under the slip stitches, and work the center st behind the loop base. (5 sc)
- Second side: Repeat the first side. (17 sc)
- Sl st to the first sc. Fasten off.
Total: 25 + 17 + 5 + 17 = 64 sc.
Why the math works: The bottom edge has 21 foundation chains. Working 3 sc in each end chain and 1 sc in the 19 between gives 21 + 4 = 25 sc, so each corner gets its 2 extra stitches only once. Each shell row steps in about 0.4 in (1.0 cm) and rises about 0.5 in (1.3 cm), so its slanted edge is about 0.6 in (1.5 cm) long. Three sc cover that length without ruffling. Each cap row steps in only 1 stitch, so 1 sc per row lies flat. After the border, the bell measures 4.4 in (11.2 cm) × 3.2 in (8.1 cm).
Clapper
With Color A, make a magic ring.
Round 1: Ch 1, 6 sc in the ring, sl st to the first sc. (6 sc)
Round 2: Ch 1, 2 sc in each st around, sl st to the first sc. (12 sc)
Fasten off and leave a 6 in (15.2 cm) tail. The disc measures about 0.8 in (2.0 cm) across.
Center the disc on the back of the bell at the bottom center. Let about 0.3 in (0.8 cm) overlap the bell so that 0.5 in (1.3 cm) hangs below the border. Whipstitch it to the back loops of the border, then weave in the tail.
Final Blocking
- Weave in all ends on the WS. Weave each color into stitches of the same color.
- Lay the bell RS up on a blocking mat or folded towel.
- Pin the bottom corners first, 4.4 in (11.2 cm) apart.
- Pin the top of the knob 3.2 in (8.1 cm) above the bottom edge, centered.
- Shape each fan into a smooth arch, and open each post window with a pin tip.
- Spray with water until damp, but not soaked.
- For a firmer ornament, brush on diluted fabric stiffener now.
- Let it dry completely, at least 4 hours, before you unpin it.
Final Quality-Control Checklist
- Row stitch counts: 21, 31, 25, 19, 13, 11, 9, 7, 5
- Stripes alternate pink, mint, pink, mint, with a pink cap
- Full shells per band: 4, 3, 2, 1, each with half shells at both ends
- Border is 64 sc with no gaps at the row-ends
- Body is 4.4 in (11.2 cm) × 3.2 in (8.1 cm)
- Loop is centered and stands about 1.5 in (3.8 cm) tall
- Clapper is centered and hangs 0.5 in (1.3 cm) below the bell
- No ends show on the RS
Troubleshooting
Shells cup or curl. Your dc are too tight for the shell. Loosen your tension, or use a hook half a size larger for the shell rows only.
Bottom edge ruffles. Row 1 is too loose compared with the shells. Rework Row 1 with a smaller hook, or work the foundation chain more firmly.
Sides look jagged after the border. Make sure you worked 3 sc around every dc row-end, not 2. Blocking softens the remaining steps.
Bell leans to one side. Check that each shell row started and ended in the outermost posts, and that the cap decreases were worked at both ends.
Loop flops over. Pack all 28 sc tightly onto the chain, or add a few drops of stiffener to the loop.
Holes appear at color joins. Tug the join tail gently before weaving it in, and weave it through the first half shell.
Care
Hand wash in cool water, press out the water in a towel, and dry the bell flat, pinned to shape. If you used stiffener, store it flat and reshape it with a light mist of water.
Final Notes
Everything follows from Row 1. If 21 sc measure 4.2 in (10.7 cm), the shell rows take you to 2.2 in (5.6 cm) tall and the cap finishes the body at 3.0 in (7.6 cm). The border brings the bell to 4.4 in (11.2 cm) × 3.2 in (8.1 cm). The loop and clapper add the rest, for an overall height of 5.2 in (13.2 cm). Check those numbers as you go and every bell in your batch will match.
Happy crocheting!