
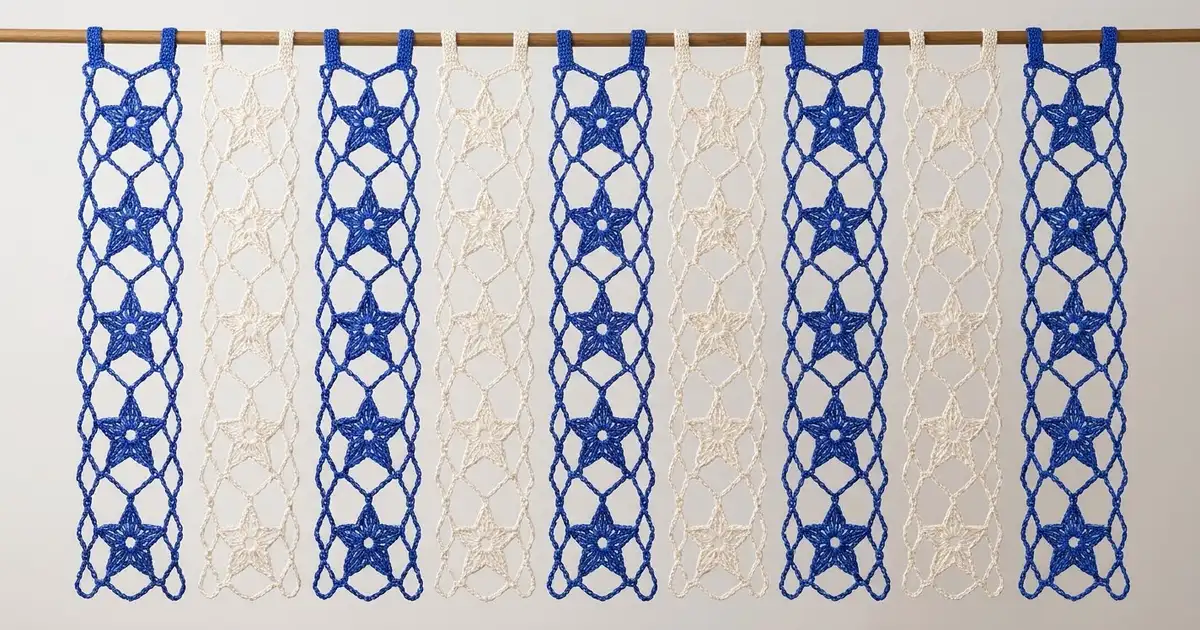
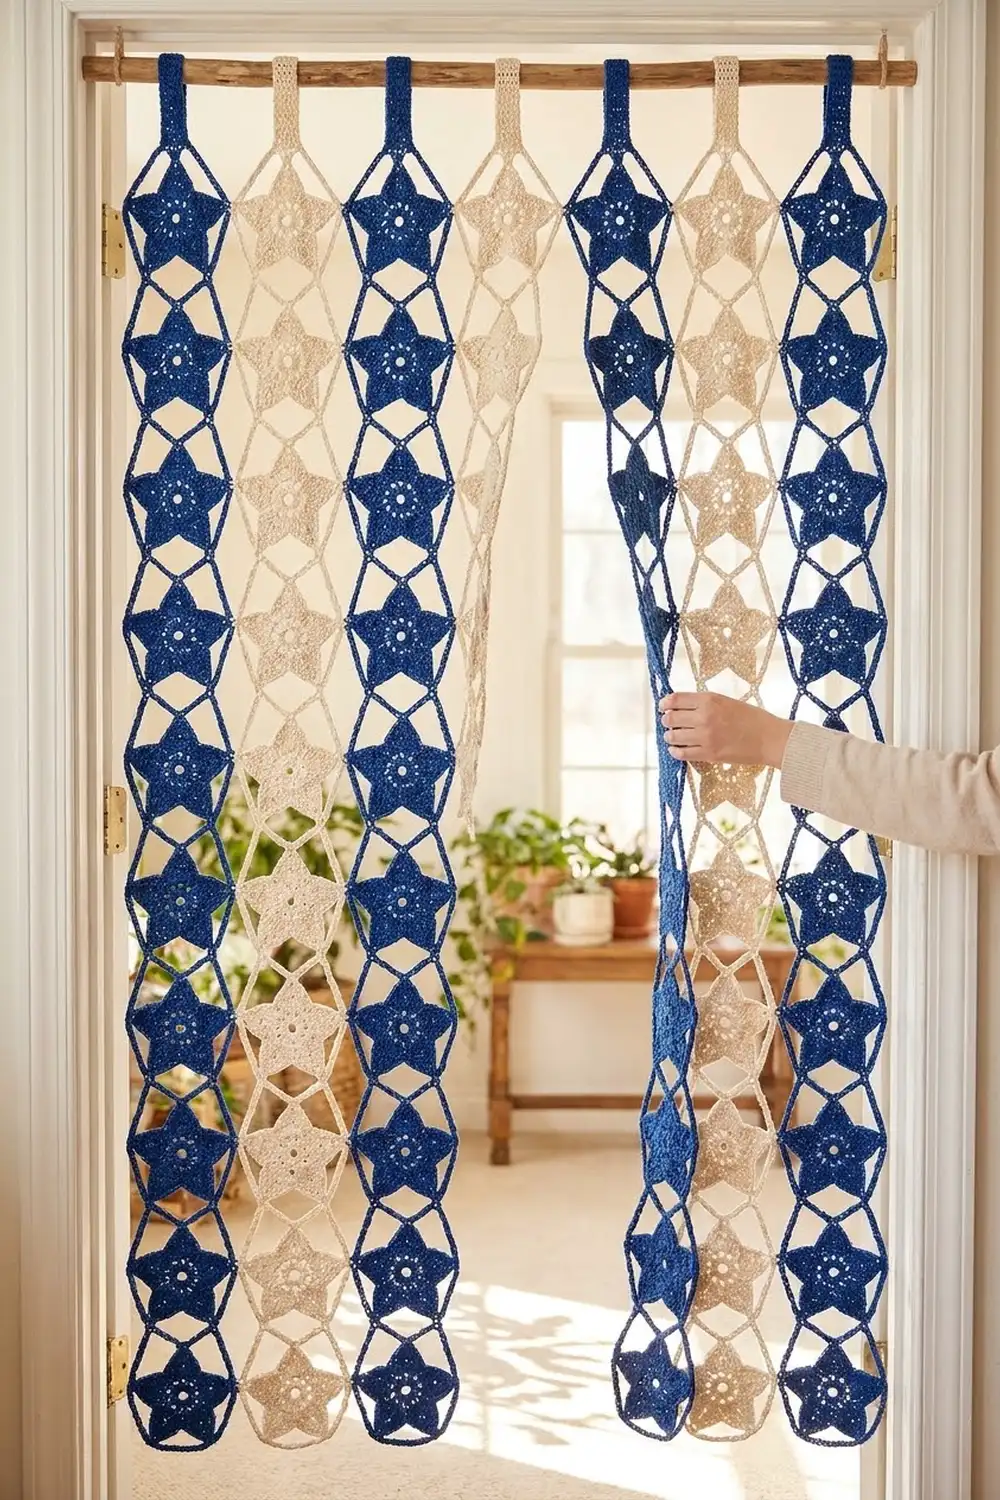
This doorway curtain is made of seven separate lace strips. Each strip is a column of solid five-point stars, and each star sits inside an open diamond mesh made of chain loops. Each strip hangs from a wooden rod by its own folded tab. The strips are not sewn to each other, so they part easily when you walk through.
The sample alternates four cobalt blue strips with three cream strips. The layout is blue, cream, blue, cream, blue, cream, blue. The look is airy and graphic, a little folk and a little coastal. It works in a doorway or a pantry opening, or as a room divider.
This pattern uses US crochet terms. One finished strip measures 6.5 in (16.5 cm) wide by 78 in (198.1 cm) long, not counting the tab. Seven strips hung edge to edge span 45.5 in (115.6 cm).
You work each star unit in four rounds: a dc ring, five star points, a round of chain loops, and a rectangular frame round. From the second unit on, you join each unit to the one above while you work its frame round. Each strip uses eleven units. A two-round sc border straightens the edges, and an 8-stitch tab finishes the top.
Finished Size and Construction
- Finished strip size: 6.5 in x 78 in (16.5 cm x 198.1 cm), plus tab
- Full curtain: 7 strips, 45.5 in (115.6 cm) wide when hung edge to edge
- Skill level: Intermediate
- Terminology: US
- Yarn weight: Worsted (#4) cotton
- Hook: 5.0 mm (H-8)
- Number of pieces: 77 star units joined into 7 strips (11 units per strip)
- Layout: each strip is 1 unit wide by 11 units tall
- Piece (unit) size: 5.5 in x 7 in (14.0 cm x 17.8 cm), blocked
- Strip size before border: 5.5 in x 77 in (14.0 cm x 195.6 cm)
- Border depth: 0.5 in (1.3 cm) on every edge
- Tab: 2 in (5.1 cm) wide, 6 in (15.2 cm) long before folding
Materials
Use a smooth, mercerized or matte worsted cotton. Cotton holds the mesh open and hangs straight, and it is less likely than acrylic to stretch over time. The quantities below assume about 175 m per 100 g.
- Color A, cobalt blue: 500 g (875 m), for 4 strips
- Color B, cream: 375 g (656 m), for 3 strips
Each strip uses about 190 m: roughly 110 m for the units, 67 m for the border and 11 m for the tab.
Tools:
- 5.0 mm (H-8) crochet hook
- Tapestry needle
- Stitch markers
- Rust-proof pins and blocking mats
- Spray bottle
- Measuring tape
- Curtain rod at least 48 in (121.9 cm) long, up to 1.5 in (3.8 cm) in diameter
All yarn quantities include a margin of about 15% for gauge differences and for weaving in ends.
Abbreviations (US Terms)
- ch – chain
- sl st – slip stitch
- sc – single crochet
- hdc – half double crochet
- dc – double crochet
- tr – treble crochet
- st(s) – stitch(es)
- sp – space
- rnd – round
- WS – wrong side
Star point: ch 6, sl st in 2nd ch from hook, sc in next ch, hdc in next ch, dc in next ch, tr in last ch. The ch you skipped at the end becomes the ch-1 tip.
Valley: the sl st that sits between two star points.
Loop numbers (L1–L10): these are the ten ch-7 loops of Rnd 3, counted in the order you work them.
Gauge and Checkpoints
Border gauge: 16 sc and 16 rows = 4 in (10.2 cm), which is 4 sc and 4 rows per inch.
Make one complete unit and block it before you start a full strip. Check it at each stage:
- After Rnd 1: the ring measures 1.5 in (3.8 cm) across.
- After Rnd 2: the star measures 4 in (10.2 cm) from one tip to the opposite valley edge.
- After Rnd 3: the unit measures 4.75 in (12.1 cm) across.
- After Rnd 4, blocked: the unit measures 5.5 in x 7 in (14.0 cm x 17.8 cm).
If the unit is too big, go down 0.5 mm in hook size. If it is too small, go up 0.5 mm. Fix the hook size first. Don’t change the chain counts, because the border math depends on them.
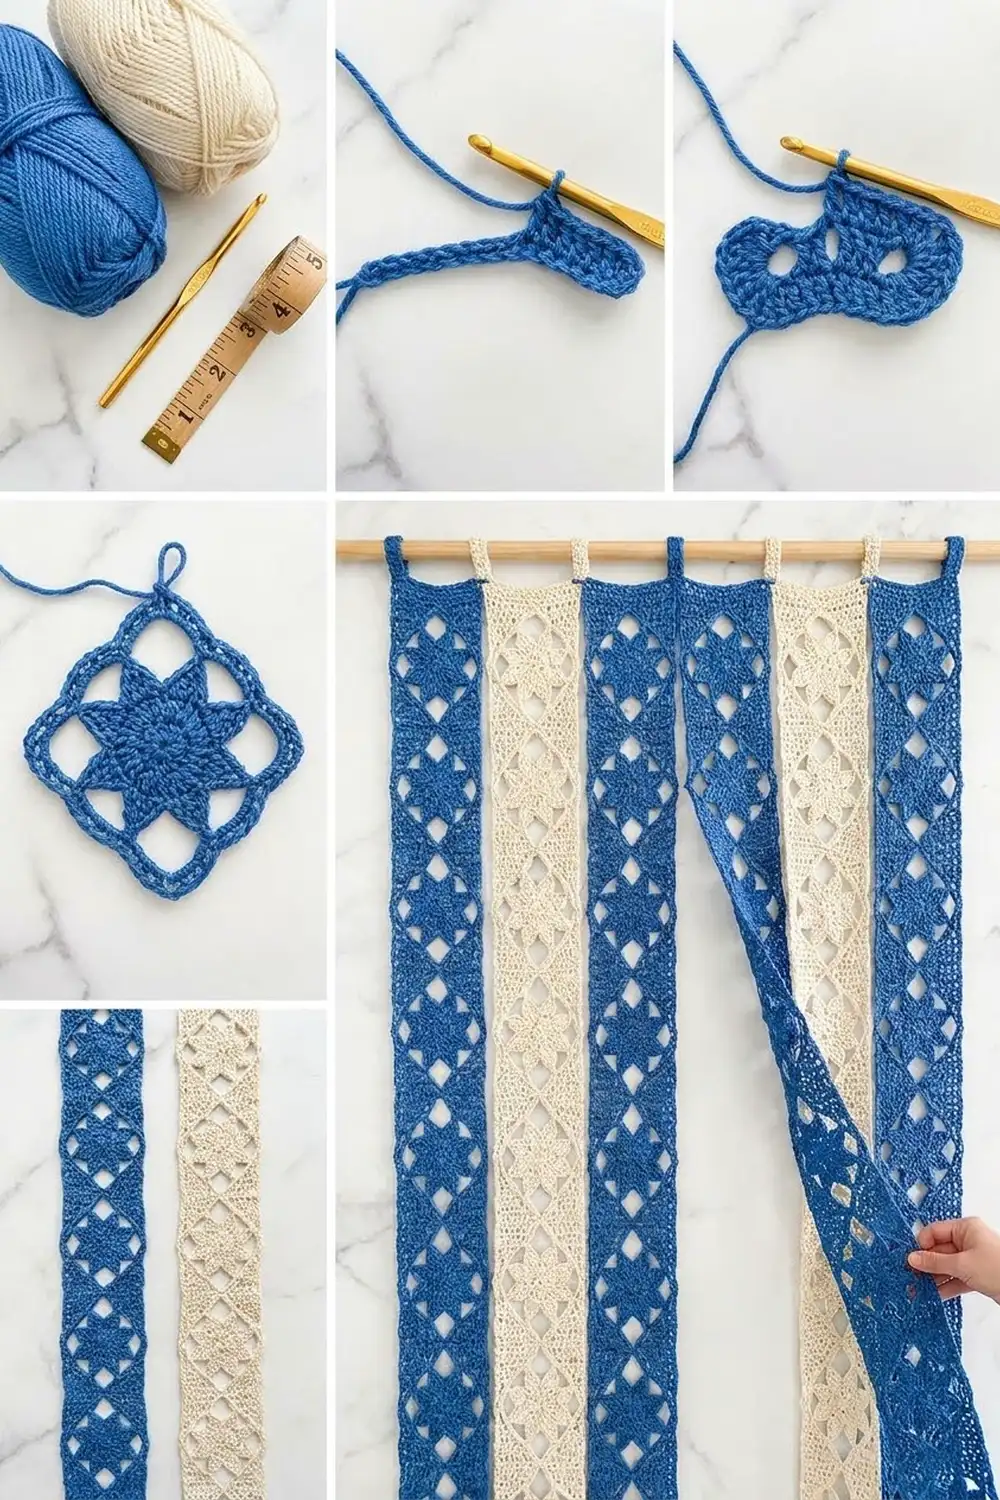
Star Unit (make 77)
Rnd 1: Make a magic ring. Ch 3 (counts as dc), 14 dc in the ring, sl st to the top of the ch-3. Pull the ring tight. (15 dc)
Rnd 2: Make a star point. Skip the next 2 dc and sl st in the next dc. Repeat from * 4 more times. The last sl st lands in the same st as the Rnd 1 join. (5 star points, 5 valleys)
Each point is anchored at both ends and covers 3 dc of the ring, so the points stand evenly around a round open center.
Rnd 3: Ch 1, sc in the same st (this is valley 1). Ch 7, sc in the ch-1 tip of the next point, ch 7, sc in the next valley. Repeat from * 4 more times, but leave out the last sc. Sl st to the first sc. (10 sc, 10 ch-7 loops)
The first loop is L1, which runs from valley 1 to tip 1. L10 runs from tip 5 back to valley 1. These loops form the inner diamond mesh.
Rnd 4 (frame): Sl st in each of the next 4 ch to reach the center of L1. Then work:
- Ch 1, sc around L1.
- Ch 9, sc around L2. (top loop)
- Ch 11, sc around L3. (corner)
- Ch 8, sc around L4.
- Ch 8, sc around L5.
- Ch 11, sc around L6. (corner)
- Ch 9, sc around L7. (bottom loop)
- Ch 11, sc around L8. (corner)
- Ch 8, sc around L9.
- Ch 8, sc around L10.
- Ch 11 (corner), sl st to the first sc.
(10 sc; 2 ch-9 loops, 4 ch-11 loops, 4 ch-8 loops)
Fasten off. Hold the unit with tip 1 pointing up. The top edge is the ch-9 loop centered over tip 1, and the bottom edge is the ch-9 loop under valley 4. Each long side has a corner ch-11, two ch-8 loops and another corner ch-11. Together these make the outer row of diamonds.
Make All Pieces
Make 44 units in Color A and 33 units in Color B. Join them as you go into strips of 11, as described in the next section.
Strip layout, seen from the front with the rod at the top:
Strip:  1   2   3   4   5   6   7
Color:  A   B   A   B   A   B   A
Units:  11  11  11  11  11  11  11
Joining
Method: join-as-you-go during Rnd 4 of each unit.
Work Unit 1 of a strip exactly as written. For Units 2–11, work Rnds 1–3 as usual. Then work Rnd 4 as below, with the new unit lying directly under the previous one and both units’ tip 1 pointing up.
- Ch 1, sc around L1.
- Ch 4, sl st around the bottom ch-9 loop of the previous unit, ch 4, sc around L2.
- Ch 5, sl st around the previous unit’s corner ch-11 between its L5 and L6, ch 5, sc around L3.
- Continue Rnd 4 as written until you reach the last corner.
- Ch 5, sl st around the previous unit’s corner ch-11 between its L7 and L8, ch 5, sl st to the first sc.
Stitch-to-stitch logic: ch 4 + sl st + ch 4 takes up the same length as a ch-9, and ch 5 + sl st + ch 5 takes up the same length as a ch-11. Each joined loop is therefore the same size as a free loop. Each seam has exactly three join points: two corners and the center.
Tension: make each joining sl st snug but not tight. If you pull it hard, the seam puckers and the strip comes out shorter than the math expects.
Size checkpoint: after 3 joined units, the strip should measure 21 in (53.3 cm) when lightly stretched. After 11 units, it should measure 77 in (195.6 cm) blocked.
Border
Work the border on each strip separately, using the strip’s own color.
Border gauge: 4 sc = 1 in (2.5 cm), and each rnd adds 0.25 in (0.6 cm).
Rnd 1: Join with a standing sc around the top ch-9 loop of Unit 1, then work 9 more sc in the same loop (10 sc). Continue around the strip as follows:
- Top strip corner (corner ch-11 of Unit 1): 6 sc, ch 2, 6 sc.
- Down the first long side: 8 sc around each ch-8 loop and 6 sc around each corner ch-11 loop that touches a seam.
- Bottom strip corner (Unit 11): 6 sc, ch 2, 6 sc.
- Bottom ch-9 loop: 10 sc.
- Second bottom strip corner: 6 sc, ch 2, 6 sc.
- Up the second long side: work the same way as the first long side.
- Last top strip corner: 6 sc, ch 2, 6 sc.
- Sl st to the first sc.
Rnd 1 counts (between ch-2 corner spaces):
- Top and bottom edges: 6 + 10 + 6 = 22 sc each.
- Each long side: 6 + (8 + 8 + 6) for Unit 1, plus (6 + 8 + 8 + 6) x 9 for Units 2–10, plus (6 + 8 + 8) + 6 for Unit 11. That is 6 + 22 + 252 + 22 + 6 = 308 sc.
- Rnd 1 total: 660 sc and 4 ch-2 sps.
Rnd 2: Ch 1, sc in each sc around and work (sc, ch 2, sc) in each ch-2 sp. Sl st to the first sc. Each long side becomes 308 + 2 = 310 sc, and the top and bottom edges become 22 + 2 = 24 sc each. (668 sc and 4 ch-2 sps)
Why the math works: each unit is 7 in (17.8 cm) tall, and each unit gives 28 sc to each long side. 28 sc ÷ 4 sc per inch = 7 in. A full long side is 308 sc ÷ 4 = 77 in (195.6 cm), which matches the bordered length. The top edge is 22 sc ÷ 4 = 5.5 in (14.0 cm), which matches the unit width. Because the edges are neither stretched nor gathered, the long sides hang straight.
Hanging tab: With the right side facing, count 8 sc in from the top corner along the 24-sc top edge.
- Row 1: join the yarn in the 9th sc, ch 1, sc in the same st and in each of the next 7 sts. (8 sc) This leaves 8 sc free on each side.
- Rows 2–24: ch 1, turn, sc in each sc across. (8 sc)
Fasten off, leaving a 12 in (30.5 cm) tail. Fold the tab to the WS and whipstitch Row 24 to the back of Border Rnd 2, right behind Row 1. This makes a loop that fits a rod up to 1.5 in (3.8 cm) in diameter.
Final Blocking
- Weave in all ends along the chain loops, splitting the plies so the ends stay hidden.
- Spray the strip until it is evenly damp. Don’t soak it.
- Lay the strip out in sections on blocking mats, about 3 units at a time.
- Pin each unit to 5.5 in x 7 in (14.0 cm x 17.8 cm). Put one pin in each corner join, one in each star tip and one at the center of each ch-8 loop to open the diamonds.
- Pin the long border edges in a straight line at 6.5 in (16.5 cm) wide.
- Let each section dry completely, then move along the strip to the next section.
- Steam the tab lightly so it lies flat.
- Check that the length is 78 in (198.1 cm).
Final Quality-Control Checklist
- Every star has 5 even points and a round open center.
- Every Rnd 3 has 10 ch-7 loops.
- Every Rnd 4 has 10 loops: 2 ch-9, 4 ch-11 and 4 ch-8.
- Each seam has exactly 3 join points.
- Border Rnd 2 has 310 sc on each long side and 24 sc on the top and bottom edges.
- Each strip measures 6.5 in x 78 in (16.5 cm x 198.1 cm).
- All tabs are the same length, so the strips hang level.
- There are 4 blue strips and 3 cream strips.
Troubleshooting
Star points curl forward. The tr at the base is probably too tight. Work the tr more loosely, or block the point with a pin at the tip.
Center hole closes up. You pulled the magic ring too tight. Leave a 0.25 in (0.6 cm) opening before you weave in the end.
Strip is shorter than 77 in. Your joining sl sts are too tight. Loosen them and check again at 3 units.
Long edges wave. You worked too many sc into the seam corners. Check that each seam corner has exactly 6 sc.
Long edges pull in. You skipped a loop. Count 28 sc per unit along each side.
Tab twists. Count each tab row so it always has 8 sc, and fold the tab straight before sewing.
Strips hang at different heights. Make sure every tab has 24 rows and is sewn at the same point.
Care
Hand wash in cool water with a mild detergent. Press out the water in a towel, then lay the strip flat and pin it to dry.
Final Notes
The measurement chain runs like this:
- 15 dc ring = 1.5 in (3.8 cm)
- Star = 4 in (10.2 cm)
- Blocked unit = 5.5 in x 7 in (14.0 cm x 17.8 cm)
- 11 joined units = 77 in (195.6 cm)
- Two border rnds add 0.5 in (1.3 cm) per edge, giving a 6.5 in x 78 in (16.5 cm x 198.1 cm) strip
- Seven strips = 45.5 in (115.6 cm) across the rod
If your first unit matches its checkpoint, every other number in the pattern will follow.
Happy crocheting!