
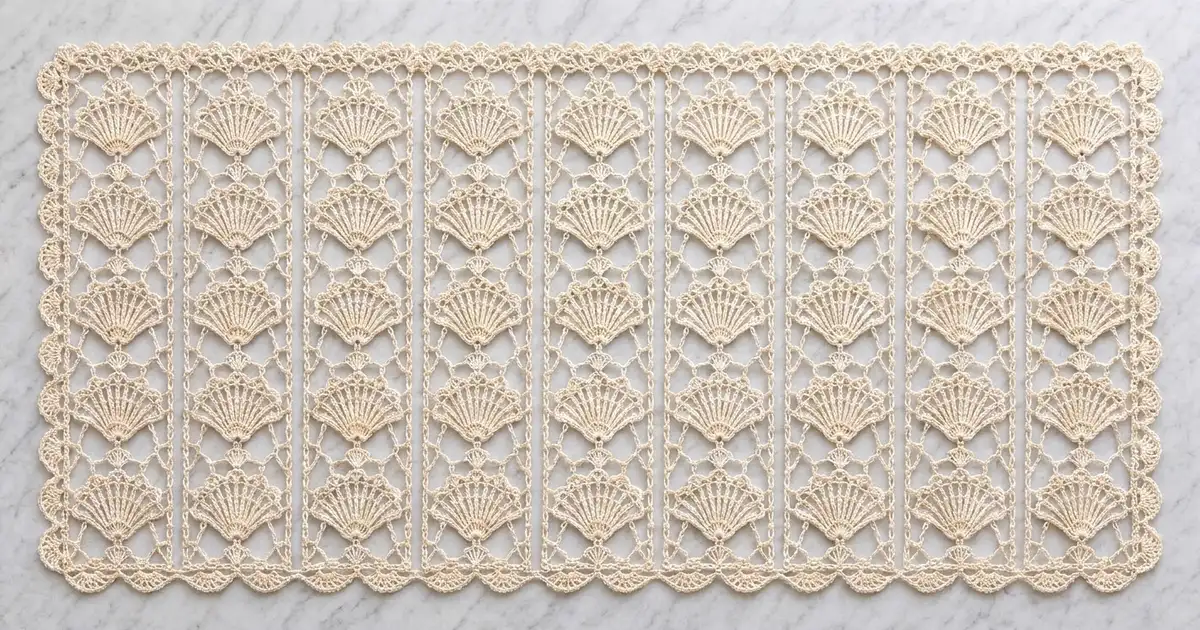
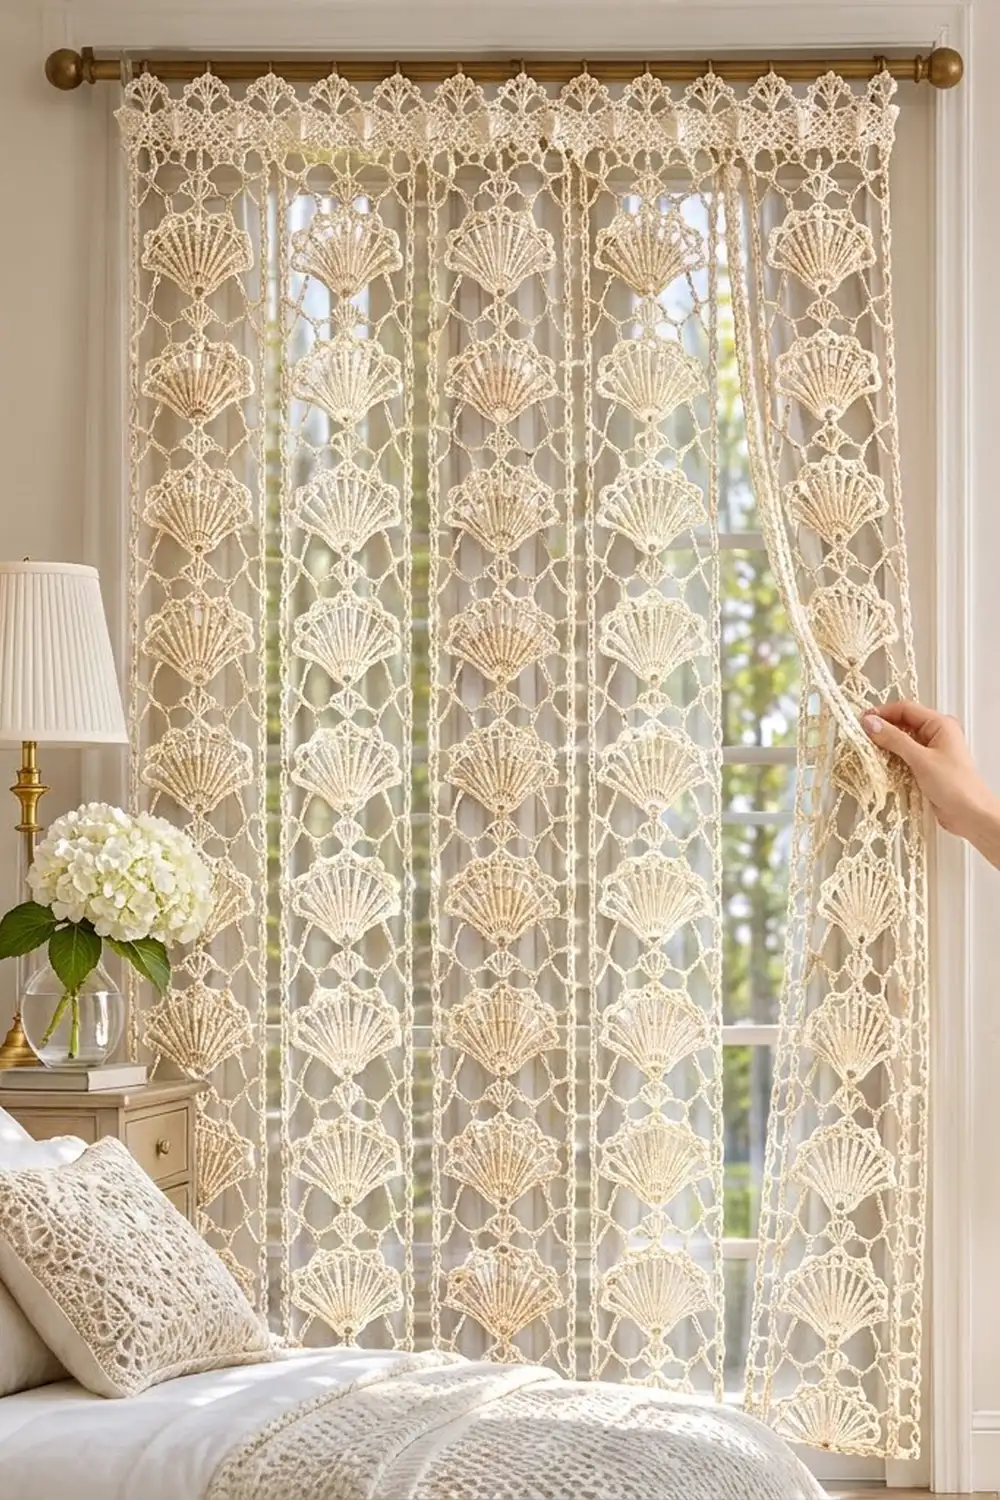
This airy curtain panel is built from upright scallop shells, each one suspended in a light chain frame. When light comes through the window, the long spokes and arches of each shell show up clearly, and the small fans along the edge give the panel a soft finished outline.
The panel is made in one color, warm ivory, in mercerized DK cotton. The style is classic vintage lace: open, symmetrical, and calm. All instructions use US crochet terms.
The finished panel measures 35.75 in x 76.75 in (90.8 cm x 194.9 cm) after the border and blocking.
You make 65 identical blocks. Each block is a shell worked in rows from a center ring, plus two frame rounds that turn it into a rectangle. You then join the blocks into 5 strips of 13 and join the strips side by side. A two-round fan border finishes the panel.
Finished Size and Construction
- Finished size: 35.75 in x 76.75 in (90.8 cm x 194.9 cm)
- Skill level: Intermediate
- Terminology: US crochet terms
- Yarn weight: DK (weight 3) mercerized cotton
- Hook: 4.0 mm (US G-6)
- Number of pieces: 65 shell blocks
- Layout: 5 blocks across x 13 blocks down
- Block size: 6.75 in x 5.75 in (17.1 cm x 14.6 cm)
- Size before border: 33.75 in x 74.75 in (85.7 cm x 189.9 cm)
- Border depth: 1 in (2.5 cm) on every side
Materials
Choose a smooth mercerized cotton in DK weight. It shows stitch definition clearly, holds its shape when blocked, and hangs well in sunlight. Avoid fuzzy or very stretchy yarns, because they blur the spokes and let the panel grow lengthwise.
- Ivory: 1,000 g, about 2,300 m (based on 100 g balls of 230 m)
- Blocks: 65 x 12 g = 780 g
- Joining: 40 g
- Border: 60 g
- Total used: about 880 g. The 1,000 g quantity includes a margin of about 12%.
Tools
- 4.0 mm (US G-6) crochet hook
- 4.5 mm (US 7) hook for seams, if needed
- Tapestry needle
- Stitch markers
- Rust-proof pins and blocking mats big enough for a long panel
- Tape measure
- Spray bottle
Abbreviations (US Terms)
- ch: chain
- sl st: slip stitch
- sc: single crochet
- hdc: half double crochet
- dc: double crochet
- tr: treble crochet
- dtr: double treble crochet
- sp(s): space(s)
- st(s): stitch(es)
- sk: skip
- beg: beginning
- RS: right side
Special stitches
- Scallop: (sc, hdc, 2 dc, ch 2, 2 dc, hdc, sc) all in the same ch-5 loop. The ch-2 at the tip is the scallop’s picot.
- Corner loop: ch 3, sl st in the first of these 3 ch.
- Fan: 5 dc in the same st.
- Corner fan: 7 dc in the same st.
Gauge and Checkpoints
Gauge: 16 sc = 4 in (10.2 cm) along a blocked frame edge, or 4 sc per inch.
Make one complete block and block it before you start the rest. These checkpoints are blocked measurements:
- After Row 1: the fan is about 1.5 in (3.8 cm) across.
- After Row 2: the fan is about 3.25 in (8.3 cm) across.
- After Row 4: the shell is 5 in wide x 3 in tall (12.7 cm x 7.6 cm).
- After Frame Round 2: the block is 6.75 in x 5.75 in (17.1 cm x 14.6 cm).
If your block is too big by more than 0.25 in (0.6 cm), go down one hook size. If it is too small, go up one hook size. Keep the chain loops relaxed but even. Tight chains make the shell cup, and loose chains make the frame sag.
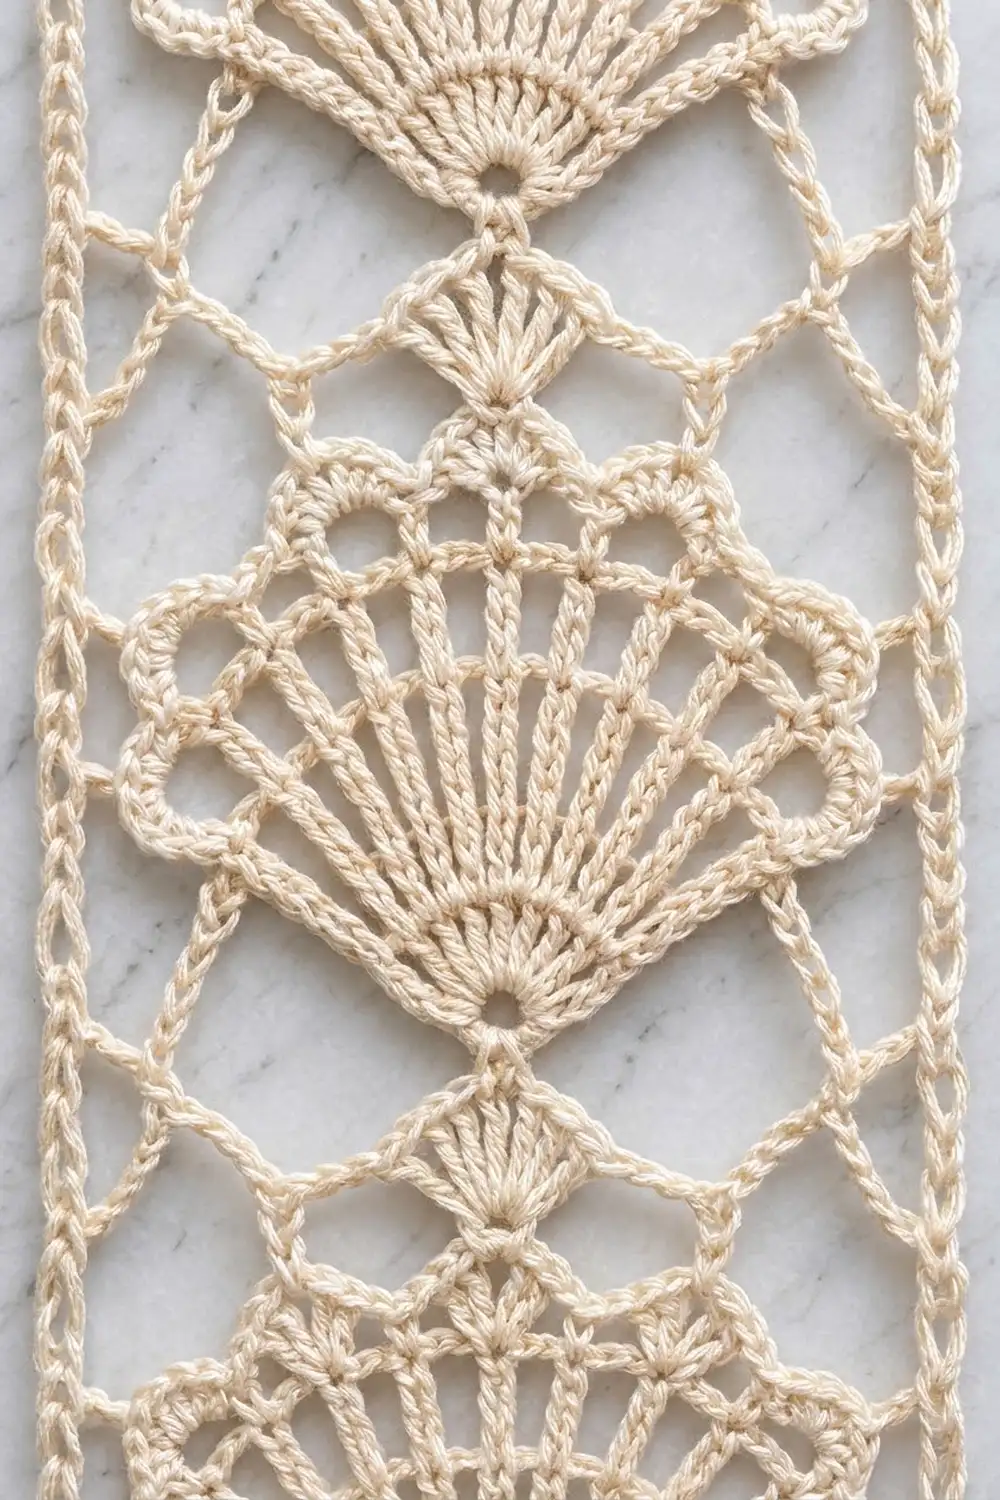
Shell Block (make 65)
The Shell
Ch 6, sl st in first ch to form a ring.
Row 1 (RS): Ch 4 (counts as dc and ch 1), [dc in ring, ch 1] 6 times, dc in ring. Turn. (8 dc, 7 ch-1 sps)
Work only around the upper half of the ring. The lower half stays empty and is used in the frame later.
Row 2: Ch 6 (counts as tr and ch 2), tr in next dc, [ch 2, tr in next dc] 5 times, ch 2, tr in 3rd ch of beg ch-4. Turn. (8 tr, 7 ch-2 sps)
These are the long spokes.
Row 3: Ch 1, sc in first tr, [ch 5, sc in next tr] 6 times, ch 5, sc in 4th ch of beg ch-6. Turn. (8 sc, 7 ch-5 loops)
Row 4: Ch 1, work a Scallop in each ch-5 loop across, sl st in last sc of Row 3. Fasten off. (7 scallops, 56 sts, 7 picots)
Number the scallops 1 to 7 in the order you worked them. Scallops 1 and 7 sit at the ends of the shell, and Scallop 4 sits at the top.
Frame Round 1 (squaring round)
With RS facing, join yarn with sl st in the picot of Scallop 1.
Corner 1: Ch 5 (counts as dtr), ch 3, dtr in same picot.
Top edge: Ch 3, tr in picot of Scallop 2, ch 3, dc in picot of Scallop 3, ch 2, hdc in picot of Scallop 4, ch 2, dc in picot of Scallop 5, ch 3, tr in picot of Scallop 6, ch 3.
Corner 2: (dtr, ch 3, dtr) in picot of Scallop 7.
Side: Ch 18.
Corner 3: Corner loop.
Bottom edge: Ch 11, sc around the empty lower half of the center ring, ch 11.
Corner 4: Corner loop.
Side: Ch 18, sl st in top of beg ch-5.
The graded stitch heights, from dtr down to hdc, raise the low outer scallops up to one straight top line. The single sc at the ring pulls the shell’s point toward the middle of the bottom edge.
Count: each st and each ch counts as 1 st, and corner sps are not counted.
- Top: 7 sts + 16 ch = 23
- Each side: 1 dtr + 18 ch = 19
- Bottom: 11 + 1 + 11 = 23
- Total: 84 sts and 4 corner sps
Frame Round 2 (corded edge)
Sl st in Corner 1 ch-3 sp, ch 1, 3 sc in same sp. Sc in each st and ch across the top (23 sc). Then work 3 sc in the Corner 2 sp, 19 sc down the side, 3 sc in the Corner 3 loop, 23 sc across the bottom, 3 sc in the Corner 4 loop, and 19 sc up the side. Sl st in first sc. Fasten off and weave in the ends.
Count: this is a conversion round. It works 84 sc one per existing st, plus 12 sc in the corners, for 96 sc.
In each 3-sc corner group, the middle sc is the corner st. Counting both corner sts:
- Top and bottom: 27 sts each (1 + 23 + 1, plus 2 corners)
- Sides: 23 sts each (1 + 19 + 1, plus 2 corners)
- Check: 27 + 23 + 27 + 23 – 4 shared corners = 96
At 4 sts per inch, 27 sts = 6.75 in (17.1 cm) and 23 sts = 5.75 in (14.6 cm).
Make All Pieces
- Ivory: 65 blocks, about 12 g each
Block every piece lightly to 6.75 in x 5.75 in (17.1 cm x 14.6 cm) before joining. Pieces that are the same size join much more easily.
Layout grid (S = shell block, upright with the ring at the bottom):
        Col1 Col2 Col3 Col4 Col5
Row 1    S    S    S    S    S     (top)
Row 2    S    S    S    S    S
...      (Rows 3-12 identical)
Row 13   S    S    S    S    S     (bottom)
Joining
Method: flat slip-stitch seam with the 4.0 mm hook. Hold two blocks RS up and edge to edge. Insert the hook through the outer loop of one block, then through the matching outer loop of the other, and sl st.
Step 1, strips: Join the bottom of one block to the top of the next, 27 sts to 27 sts, corner st to corner st. Do this for 13 blocks to make one strip, then make 5 strips.
- Each strip has a long side of 13 x 23 = 299 sts.
- Each strip measures 6.75 in x 74.75 in (17.1 cm x 189.9 cm).
Step 2, panel: Join the strips along their long sides, 299 sts to 299 sts. Match block seams first and pin them, then fill in between.
Stitch logic: every st meets exactly one partner st. The seam adds no stitches, and the corner sts of neighboring blocks stay in place as normal stitches.
Tension: each seam should be as long as a block edge. If a seam pulls shorter, switch to the 4.5 mm hook for seams only.
Checkpoint: the joined panel measures 33.75 in x 74.75 in (85.7 cm x 189.9 cm).
Border
Border gauge: 4 sc per inch (2.5 cm), the same as the block edges. Each fan repeat uses 4 sts and covers 1 in (2.5 cm).
Starting counts:
- Top and bottom: 5 blocks x 27 sts = 135 sts
- Sides: 13 blocks x 23 sts = 299 sts
- The panel’s 4 outer corner sts are shared, so the perimeter is 2 x 135 + 2 x 299 – 4 = 864 sts.
Round 1: With RS facing, join yarn with sc in the top-right outer corner st, then 2 more sc in the same st. Sc in each st to the next outer corner st, and work 3 sc in each outer corner st. Sl st in first sc.
- Count: a conversion round of 864 sc worked one per existing st, plus 8 sc added at the corners, for 872 sc.
- Per side, counting both corner sts: 137 sts at top and bottom, and 301 sts on each side.
- Between corner sts: 135 sts at top and bottom, and 299 sts on each side.
Round 2 (fans): Sl st in the corner st. Ch 3 (counts as dc), 6 dc in the same st (first corner fan). Then on each side:
- Sk 1 st, sc in next st.
- *Sk 1 st, Fan in next st, sk 1 st, sc in next st. Rep from * across.
- Sk 1 st, then work a corner fan in the corner st.
Top and bottom take 33 fan repeats each, and each side takes 74. End with sl st in top of beg ch-3. Fasten off.
Count: 4 corner fans, 33 fans each on top and bottom, and 74 fans on each side. That is 218 fans in total.
Why the math works: between corner sts, the sequence uses 1 skip + 1 sc + (4 x repeats) + 1 skip = 3 + 4n stitches.
- Top: 3 + 4 x 33 = 135 ✓
- Sides: 3 + 4 x 74 = 299 ✓
Because both counts fit exactly, every side ends with a skip right before the corner, and the fans stay symmetrical.
Round 1 adds about 0.25 in (0.6 cm) and the fans add about 0.75 in (1.9 cm), for a 1 in (2.5 cm) border. The finished size is 33.75 + 2 = 35.75 in (90.8 cm) wide and 74.75 + 2 = 76.75 in (194.9 cm) long.
Final Blocking
- Weave in all ends, following the sc lines of the frame.
- Soak the panel in cool water for 15 minutes, then press the water out. Do not wring it.
- Roll the panel in towels to remove extra water.
- Lay it flat on mats and pin it to 35.75 in x 76.75 in (90.8 cm x 194.9 cm). Pin the corners first, then the centers of each edge.
- Pin the tip of each fan along all four edges.
- Open each shell: straighten the spokes and pin the scallop picots into a smooth arc.
- Check that the frame lines run straight in both directions.
- Let it dry completely, at least 24 hours, before unpinning.
Final Quality-Control Checklist
- [ ] 65 blocks, each 6.75 in x 5.75 in (17.1 cm x 14.6 cm)
- [ ] Each block has 96 sc in Frame Round 2: 27 on top and bottom, 23 on each side
- [ ] All shells sit upright, with the ring at the bottom
- [ ] Block and strip seams line up across the panel
- [ ] Border Round 1 has 872 sc
- [ ] Border Round 2 has 218 fans: 33 on top and bottom, 74 on each side, and 4 corner fans
- [ ] Finished size is 35.75 in x 76.75 in (90.8 cm x 194.9 cm)
- [ ] All ends are hidden and secure
Troubleshooting
- The shell cups or curls: the Row 3 chains are too tight. Work them looser or add 1 ch to each loop, then re-block.
- The shell ruffles: the chains are too loose. Use a smaller hook for Rows 2 and 3.
- The top edge of the frame dips in the middle: check that you used hdc only at Scallop 4 and dc at Scallops 3 and 5.
- The block is not rectangular: your corner loops are uneven. Pin the block to size while it is damp.
- A seam puckers: your sl sts are too tight. Use the 4.5 mm hook for seams.
- The fans don’t land on the corner: recount Border Round 1 between corner sts. It must be 135 or 299.
- The panel grows when hung: this is normal for cotton lace. Re-block it, and support the top with clip rings every 3 in (7.6 cm).
Care
Hand wash in cool water with mild soap, press out the water, and dry flat, reshaping to the blocked size. Do not tumble dry, because heat can distort the lace.
Final Notes
The measurement chain is what makes this panel come out right:
- The shell is 5 in x 3 in (12.7 cm x 7.6 cm).
- The block is 27 x 23 sts, or 6.75 in x 5.75 in (17.1 cm x 14.6 cm).
- Each strip has 299 sts per long side and measures 74.75 in (189.9 cm).
- The joined panel is 135 x 299 sts, or 33.75 in x 74.75 in (85.7 cm x 189.9 cm).
- The border adds 1 in (2.5 cm) per side, for a finished size of 35.75 in x 76.75 in (90.8 cm x 194.9 cm).
Check your first block carefully, and the rest of the panel will line up.
Happy crocheting!