
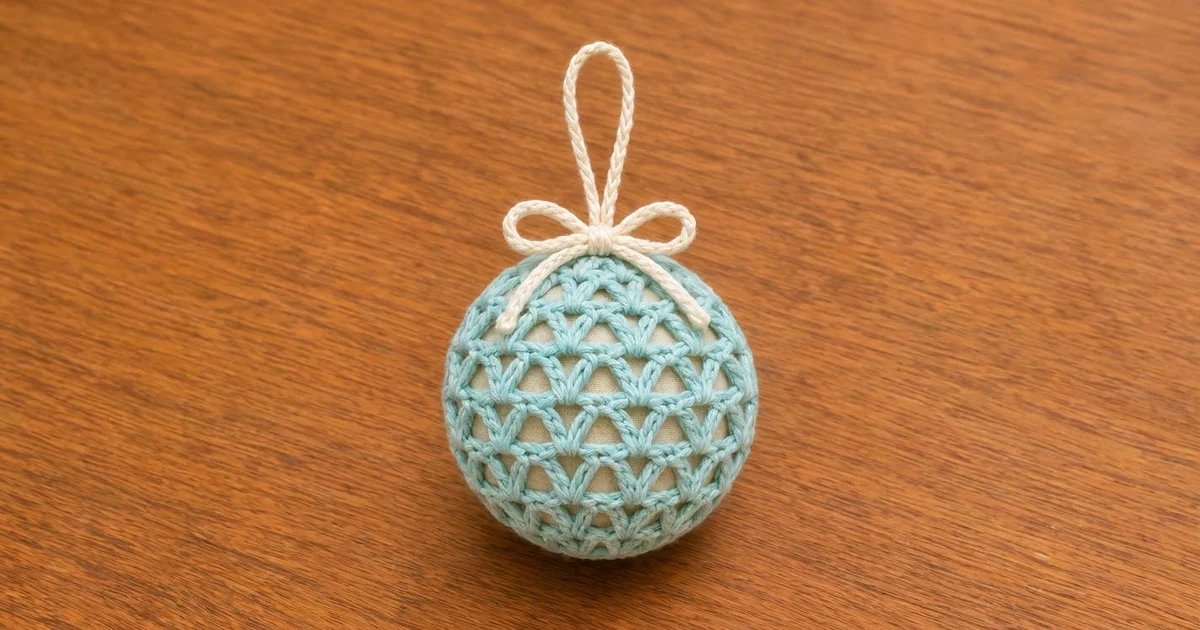
The Frosted Lattice Ball Ornament is a 3-inch lace bauble. A soft triangle-mesh cover is pulled snugly over a cream fabric ball, so the pale fabric shows through every opening, and a cream cord loop and bow finish the top. The result is light and textured, and it looks hand-made in the best way.
The sample is aqua over cream. The design also works well in blush pink, lilac, or cream-on-cream. Because each ornament takes very little yarn, you can make a whole pastel set from leftovers.
This pattern uses US crochet terms. The finished ornament is 3 in (7.6 cm) in diameter, and about 5.5 in (14.0 cm) tall including the hanging loop.
Construction is simple. You crochet one flat lace rectangle, seam the short edges into a tube and add a single round of edging to each opening. Then you gather the bottom, insert a stuffed fabric ball, gather the top and add the cord loop and bow.
Finished Size and Construction
- Finished size: 3 in (7.6 cm) diameter ball; 5.5 in (14.0 cm) tall with loop
- Skill level: Easy
- Terminology: US crochet terms
- Yarn weight: DK (light worsted, #3) cotton or cotton blend
- Hook: 3.5 mm (E-4)
- Number of pieces: 1 lace cover, plus the fabric ball and cord trims
- Layout: one flat rectangle, seamed into a tube
- Piece size before border: 9.4 in x 4.9 in (23.9 cm x 12.4 cm)
- Border depth: 0.2 in (0.5 cm) on the top and bottom edges only
- Piece size after border: 9.4 in x 5.3 in (23.9 cm x 13.5 cm)
The tube’s circumference, 9.4 in (23.9 cm), matches the circumference of a 3 in (7.6 cm) ball, which is 9.42 in (23.9 cm). The cover hugs the ball without stretching open.
Materials
Yarn: Use a smooth, mercerized or soft-spun DK cotton. Cotton shows the V-stitches crisply and holds the triangles open, while fuzzy yarns blur the lattice. The quantities below assume roughly 115 m per 50 g.
- Color A (aqua, or pink, lilac or cream): 12 g / 28 m, for the lace cover
- Color B (cream): 4 g / 9 m, for the hanging loop and bow
All quantities include a margin of about 25% for swatching and tails.
Tools and notions:
- 3.5 mm (E-4) crochet hook
- Tapestry needle
- Scissors
- Cream cotton fabric, 9 in x 9 in (22.9 cm x 22.9 cm)
- Polyester fiberfill, about 10 g
- Sewing needle and cream thread
- Stitch marker
- Optional: a 3 in (7.6 cm) foam ball instead of the fabric ball
Abbreviations (US Terms)
- ch – chain
- sl st – slip stitch
- sc – single crochet
- dc – double crochet
- sp – space
- st(s) – stitch(es)
- RS – right side
Special stitch: V-stitch (V-st). Work (dc, ch 1, dc) in the stitch or space indicated. Each V-st has 3 parts: dc, ch-1 sp, dc.
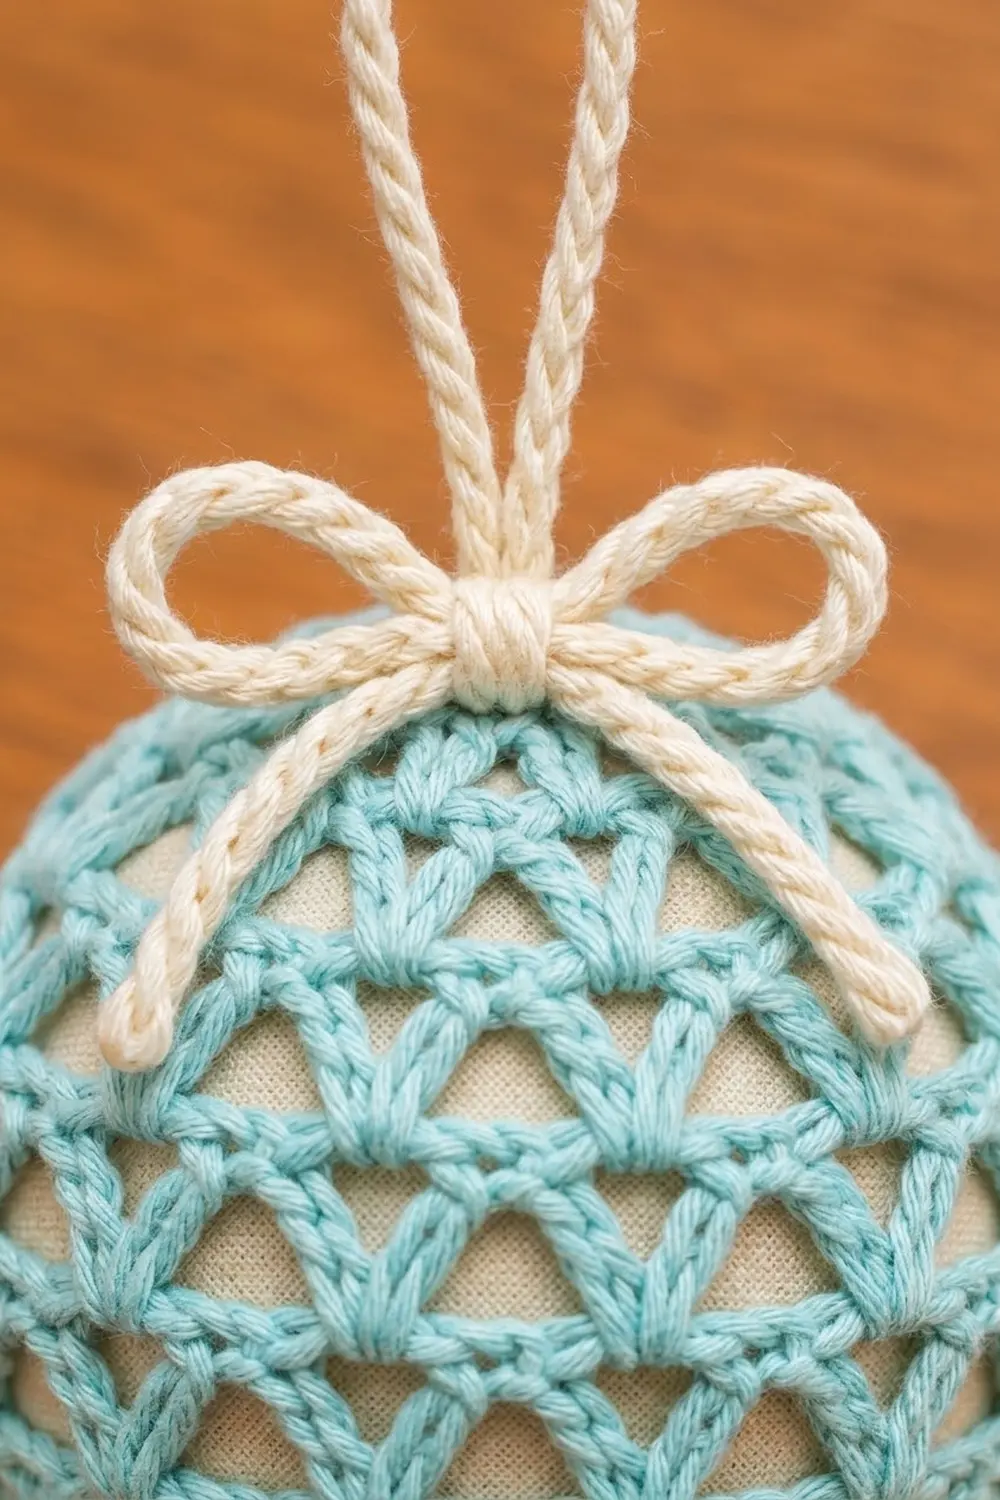
Back-bump slip stitch cord. Make a chain. Then sl st into the back bump of the 2nd ch from the hook and each ch across. This makes a firm, rounded cord that looks plaited.
Gauge and Checkpoints
Gauge:
- 5 sc = 1 in (2.5 cm)
- 5 V-st repeats (15 sts) = 3 in (7.6 cm)
- 4 V-st rows = 2 in (5.1 cm)
Test piece first. Ch 24. Work Row 1 as written, giving 23 sc. Then work Row 2 (V at sc 3, 6, 9 and so on up to 21), which gives 7 V-sts plus 2 edge dc. Continue until you have 6 V-st rows. The swatch should be 4.6 in (11.7 cm) wide, and the 4 middle V-st rows should measure 2 in (5.1 cm).
Checkpoints for the cover:
- After Row 1: 9.4 in (23.9 cm) wide
- After Row 6: 2.7 in (6.9 cm) tall
- After Row 11: 4.9 in (12.4 cm) tall, still 9.4 in (23.9 cm) wide
- After the border: 5.3 in (13.5 cm) tall
If your piece is too big: go down to a 3.25 mm (D-3) hook. A cover that is too loose will slide and bunch on the ball.
If your piece is too small: go up to a 3.75 mm (F-5) hook. A cover that is too tight will stretch the triangles into thin slits.
Width matters most, so match it first. Height is forgiving because the extra is gathered in at the top and bottom.
Lace Cover
Work in Color A, flat, turning at the end of every row. The beginning ch-3 counts as a dc throughout.
Foundation: Ch 48.
Row 1 (RS): Sc in 2nd ch from hook and in each ch across. Turn. (47 sc)
Row 2: Ch 3 (counts as dc in first sc). Skip next sc, V-st in next sc. Skip 2 sc, V-st in next sc. Repeat from * 13 more times. Skip next sc, dc in last sc. Turn. (15 V-sts + 2 edge dc)
The V-sts sit in sc 3, 6, 9 and so on up to sc 45. The edges are balanced, with one skipped sc at each end.
Row 3: Ch 3. V-st in the sp between the next 2 V-sts. Repeat from * 13 more times. Dc in top of turning ch. Turn. (14 V-sts + 2 edge dc)
Each new V now sits in the gap between two V-sts from the row below. This offset is what forms the triangular openings.
Row 4: Ch 3. V-st in the sp between the edge dc and the first V-st. V-st in the sp between the next 2 V-sts. Repeat from * 12 more times. V-st in the sp between the last V-st and the turning ch, then dc in top of turning ch. Turn. (15 V-sts + 2 edge dc)
Rows 5–10: Repeat Rows 3 and 4 three more times.
- Odd rows (5, 7, 9): 14 V-sts + 2 edge dc
- Even rows (6, 8, 10): 15 V-sts + 2 edge dc
You now have 9 V-st rows in total (Rows 2–10), and Row 10 is a 15-V row.
Row 11 (trim row): Ch 1. Sc in the first dc. Sc in the first dc of the V-st, sc in the ch-1 sp, sc in the second dc of the V-st. Repeat from * across all 15 V-sts. Sc in top of turning ch. Fasten off and leave a 12 in (30.5 cm) tail.
Row 11 count: 45 sc worked 1 per existing V-st part (15 V x 3) + 2 sc on the edge stitches = 47 sc. This matches Row 1 exactly, so the top and bottom edges are the same width.
Size check: 9.4 in x 4.9 in (23.9 cm x 12.4 cm).
Seaming the Tube
Fold the rectangle with the RS together, bringing the two short edges side by side. Using the Row 11 tail, whipstitch the edges together row end to row end. That is 11 rows: 2 sc rows and 9 dc rows, with 2 whipstitches per dc row and 1 per sc row.
Keep the stitches snug but not tight. The seam should lie flat and add no width. Turn the tube RS out.
Border (Top and Bottom Edges)
Border gauge: 5 sc = 1 in (2.5 cm), the same as Rows 1 and 11. Each border round adds 0.2 in (0.5 cm) of height.
Bottom border round: With RS facing, join Color A at the seam in a free loop of the foundation chain. Ch 1. Sc in each of the 47 free loops around. Sl st to the first sc. Fasten off and leave a 10 in (25.4 cm) tail. (47 sc)
Top border round: With RS facing, join Color A at the seam in a Row 11 sc. Ch 1. Sc in each sc around. Sl st to the first sc. Fasten off and leave a 10 in (25.4 cm) tail. (47 sc)
Why the math works: Each opening is the 47-stitch edge of one piece, closed into a ring. No stitches are added at the seam, so the border count stays at 47 = 1 piece x 47 sts. At 5 sc per inch, 47 sc measure 9.4 in (23.9 cm), the same as the ball’s circumference.
The cover is 5.3 in (13.5 cm) tall, while the ball’s half-circumference from pole to pole is 4.71 in (12.0 cm). The extra 0.6 in (1.5 cm) is taken up when you gather the two openings.
Fabric Ball and Assembly
- Cut an 8 in (20.3 cm) circle from the cream fabric.
- Using doubled thread, sew a running stitch 0.2 in (0.5 cm) from the raw edge.
- Pull the thread to form a pouch. Stuff it firmly with fiberfill until it is a round 3 in (7.6 cm) ball. Pull the thread tight, then knot it.
- Thread the bottom border tail onto the tapestry needle. Weave it in and out through every sc of the bottom round. Pull it until the opening closes to about 0.5 in (1.3 cm), knot it securely and hide the tail inside.
- Put the fabric ball into the cover, with the gathered fabric seam at the top.
- Weave the top tail through every sc of the top round in the same way. Pull it snug around the fabric gather, knot it and hide the tail.
- Roll the ball between your palms so the triangles spread evenly around it.
Hanging Loop and Bow
Work in Color B.
Loop: Ch 31. Make a back-bump sl st cord across, giving 30 sl st, about 5 in (12.7 cm) long. Fasten off. Fold the cord in half and sew both ends to the top gather, which makes a 2.5 in (6.4 cm) loop.
Bow: Ch 61. Make a back-bump sl st cord across, giving 60 sl st, about 10 in (25.4 cm) long. Fasten off. Wrap the cord once around the base of the loop and tie a bow. Each bow loop should be about 1.25 in (3.2 cm), with tails about 1 in (2.5 cm). Tack the knot to the ball with a few stitches and trim the yarn tails.
Final Blocking
- Lightly mist the finished ornament with water. Do not soak it, because the fabric ball and stuffing would hold the moisture.
- Roll it gently between your palms to settle the stitches.
- Ease each triangle open with your fingertips so the rows run in neat horizontal bands.
- Hold the cords straight and pinch the bow loops into even shapes.
- Hang the ornament by its loop and let it dry completely, about 4–6 hours.
Final Quality-Control Checklist
- Each opening’s border round has 47 sc.
- Rows 2–10 alternate 15 and 14 V-sts.
- The seam is flat and lines up row for row.
- The ball measures 3 in (7.6 cm) across.
- The bottom gather is closed and centered.
- The top gather hides the fabric seam.
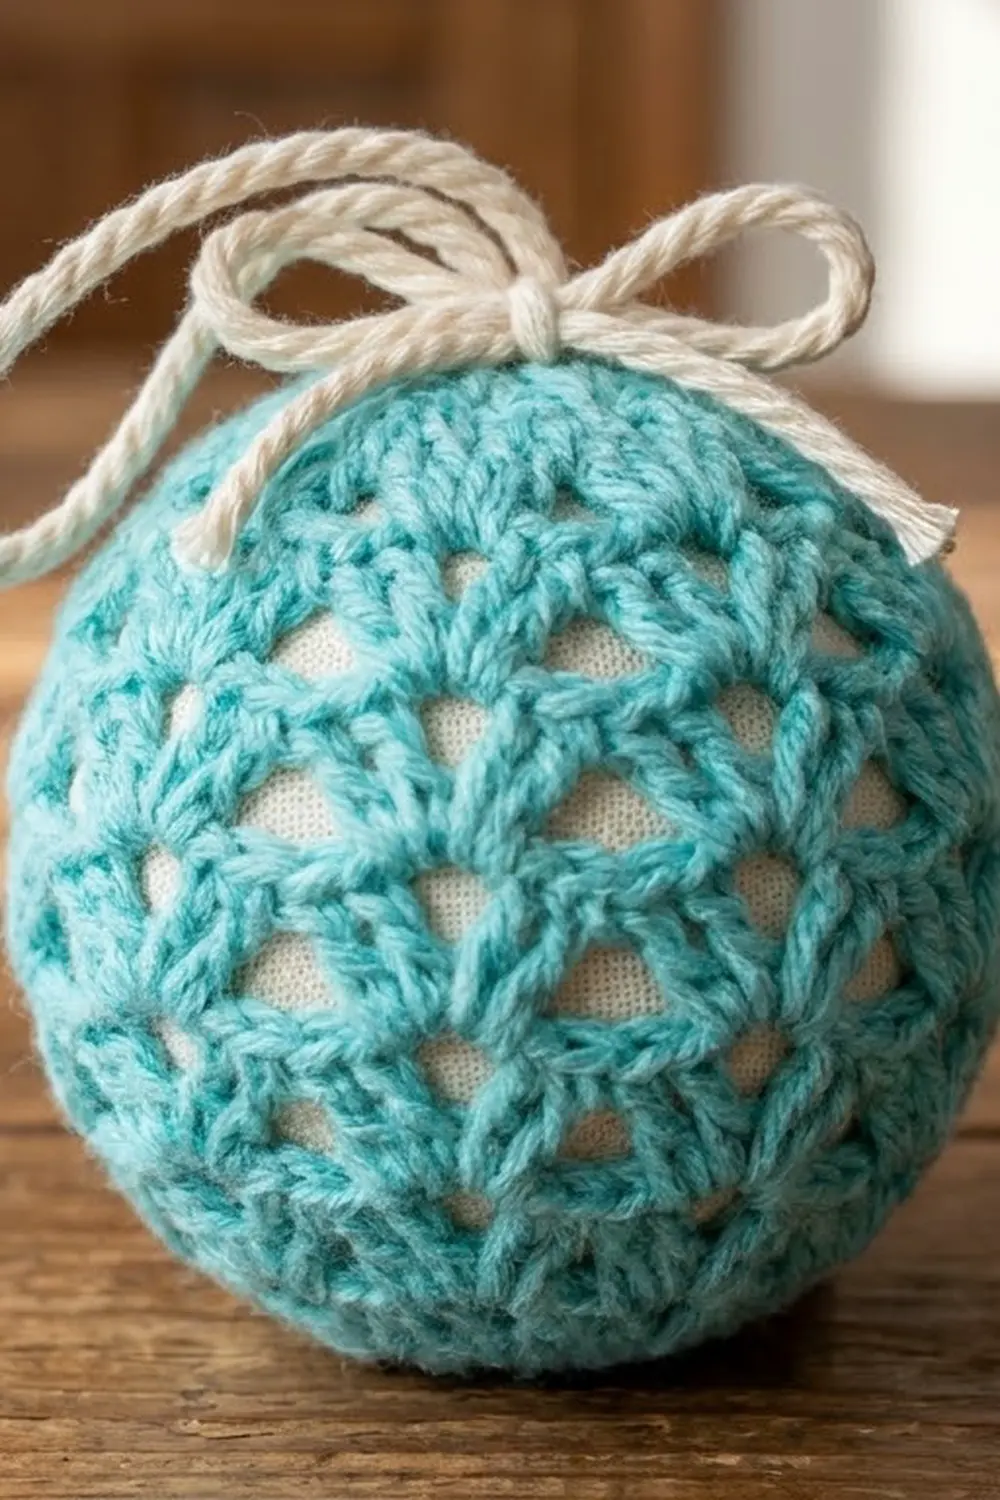
- The triangles are evenly spaced and the cream fabric shows through each one.
- The loop and bow are sewn on securely.
- All tails are hidden inside.
Troubleshooting
- The triangles look like slits. The cover is too small. Remake it with a larger hook, or use a slightly smaller fabric ball.
- The cover bags or wrinkles. The cover is too big. Remake it with a smaller hook, or add more stuffing.
- The V-sts lean to one side. Make sure each V goes into the space between V-sts, never into the ch-1 sp.
- The row counts drift. Recount after each row. Odd rows have 14 V-sts and even rows have 15.
- The seam shows a ridge. Whipstitch through the edge loops only, with matching yarn.
- The bottom has a hole. Pull the gather tighter and add a second pass of the tail.
Care
Spot clean with a damp cloth and mild soap, then reshape and air dry. Do not machine wash, because the fabric ball and stuffing can lose their shape.
Final Notes
The measurement chain is short:
- Gauge: 5 sc = 1 in (2.5 cm)
- 47 sts = 9.4 in (23.9 cm) wide
- 9 V-st rows plus 2 sc rows = 4.9 in (12.4 cm) tall
- Two 47-sc border rounds bring the cover to 5.3 in (13.5 cm)
- The tube’s circumference fits a 3 in (7.6 cm) ball exactly
Get the width right, and everything else falls into place. Make one in each pastel shade for a soft, frosty tree.
Happy crocheting!