
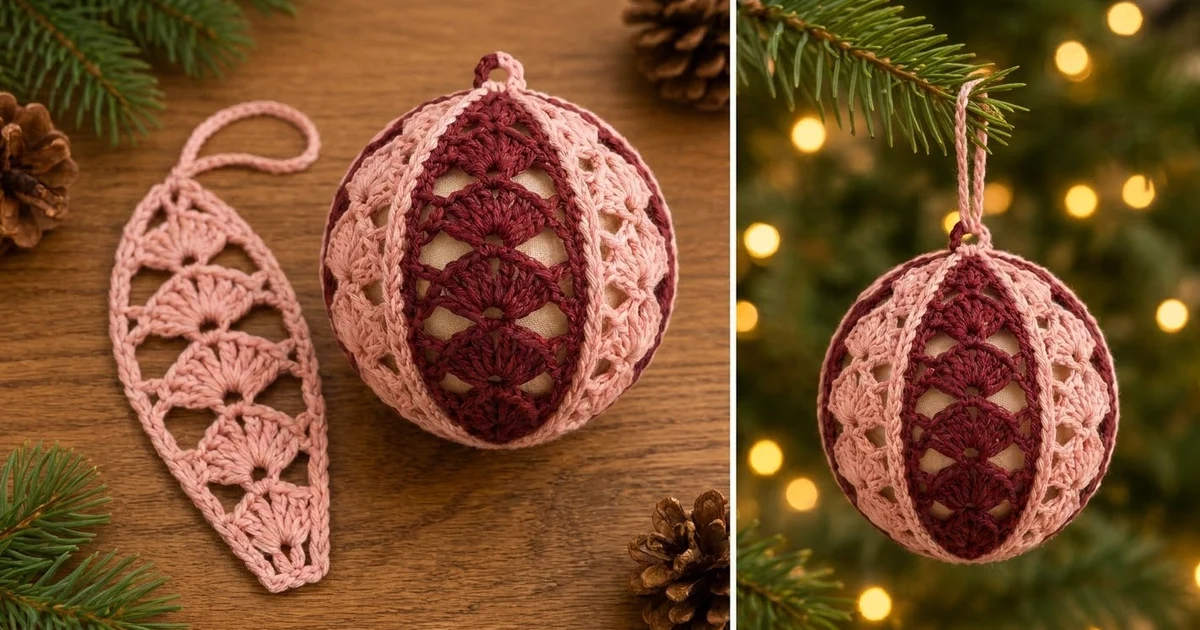
This lace ornament cover is made from six slim, pointed segments that hug a plain 3 in (7.6 cm) ball. Each segment holds five shell fans stacked one above the other. The fans open upward from small eyelets, and the open spaces between them let the cream ball show through.
The colors alternate between dusty pink and deep burgundy. Every segment gets a pink edging, and the segments are joined with pink slip stitches. That gives the cover crisp pink ridges that run from pole to pole like the lines on a vintage glass bauble. A small pink ring closes the top and a pink chain loop finishes it.
The pattern uses US crochet terms. The finished ornament measures about 3.2 in (8.1 cm) across, and the loop adds 2 in (5.1 cm) above it. Each segment measures 4.7 in (11.9 cm) long and 1.5 in (3.8 cm) at its widest after edging.
Construction is simple. You work six identical gores flat in rows from the bottom tip to the top, edge each one in pink, and join five seams flat. Then you close the bottom, insert the ball, close the last seam and finish the top with a gathering ring and hanging loop.
Finished Size and Construction
- Finished size: about 3.2 in (8.1 cm) diameter, plus a 2 in (5.1 cm) hanging loop
- Skill level: Intermediate
- Terminology: US crochet terms
- Yarn weight: DK (light worsted / 3) cotton
- Hook: 3.5 mm (E-4)
- Number of pieces: 6 gores (3 Pink, 3 Burgundy)
- Layout: one ring of 6 gores, alternating Pink and Burgundy
- Piece size (edged): 4.7 in (11.9 cm) long × 1.5 in (3.8 cm) at widest
- Piece size before edging: 4.5 in (11.4 cm) long × 1.3 in (3.3 cm) at widest
- Edging depth: about 0.1 in (0.3 cm) on each side and end
Materials
Use a smooth mercerized or combed DK cotton. Cotton holds the lace shape and shows the fan stitches clearly. Fuzzy or very stretchy acrylic will blur the eyelets and can sag on the ball.
- Pink (Color A): 15 g, about 38 m
- Burgundy (Color B): 10 g, about 25 m
These quantities include a margin of about 20% for gauge swatching and tails.
Tools:
- 3.5 mm (E-4) crochet hook
- One 3 in (7.6 cm) ball. A cream satin ball, foam ball or capless shatterproof ornament all work.
- Tapestry needle
- Scissors
- 6 stitch markers
- Spray bottle with water and pins for blocking
Abbreviations (US Terms)
- ch – chain
- sl st – slip stitch
- sc – single crochet
- dc – double crochet
- sc2tog – single crochet 2 together
- sk – skip
- sp(s) – space(s)
- st(s) – stitch(es)
- RS / WS – right side / wrong side
Special stitches
- V-st (V-stitch): (dc, ch 3, dc) in the stitch indicated. The ch-3 space becomes the eyelet at the base of the next fan.
- Fan: the stated number of dc all worked into one ch-3 space.
Gauge and Checkpoints
Base gauge: 20 dc and 9 rows = 4 in (10.2 cm) square with a 3.5 mm hook.
Make one complete gore before you commit to all six. This first gore is your real gauge test. Measure it flat, without stretching, at each of these checkpoints:
- After Row 1: 0.5 in (1.3 cm) tall
- After Row 3: 1.4 in (3.6 cm) long
- After Row 5: 2.3 in (5.8 cm) long, 1.3 in (3.3 cm) wide across the fan
- After Row 7: 3.2 in (8.1 cm) long
- After Row 9: 4.1 in (10.4 cm) long
- After Row 10: 4.5 in (11.4 cm) long
- After edging: 4.7 in (11.9 cm) long, 1.5 in (3.8 cm) wide
Each fan tier (one V row plus one fan row) should add 0.9 in (2.3 cm).
If your gore is too big by more than 0.25 in (0.6 cm) in length, go down to a 3.25 mm hook. A long gore will leave the cover baggy at the poles.
If your gore is too small, go up to a 3.75 mm hook. Alternatively, use a slightly smaller ball. A 2.75 in (7.0 cm) ball suits a gore of about 4.3 in (10.9 cm).
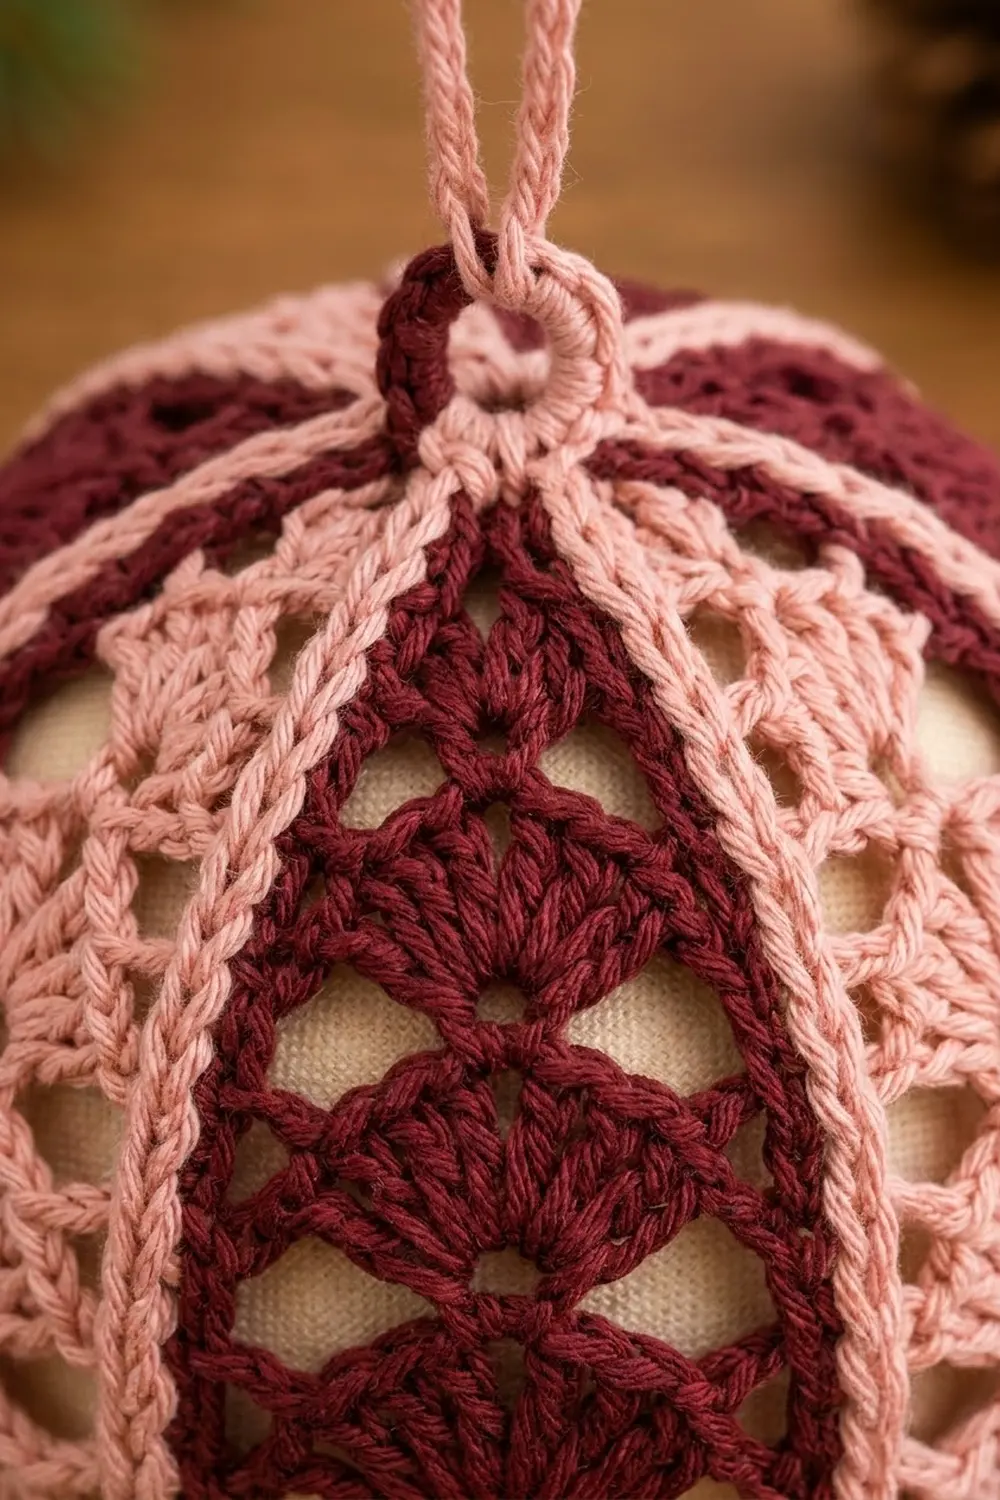
Gore (Make 6)
Make 3 gores in Pink and 3 in Burgundy for Rows 1–10. The edging is always worked in Pink.
The turning ch-5 at the start of Rows 2–9 counts as 1 dc plus ch 2. The turning ch-3 in Row 1 counts as 1 dc.
Foundation: With the gore color, ch 5. Sl st in the first ch to form a ring.
Row 1 (RS): Ch 3 (counts as dc), work 6 dc in the ring. Turn. (7 dc)
This is the first, smallest fan. The ring forms the blunt bottom tip.
Row 2 (WS, V row): Ch 5, sk the next 2 dc, V-st in the next dc (the center, 4th st), ch 2, sk 2 dc, dc in the top of the turning ch. Turn. (4 dc, 2 ch-2 sps, 1 ch-3 sp)
Row 3 (RS, fan row): Ch 5, sk the ch-2 sp and the next dc, work 9 dc in the ch-3 sp, ch 2, sk the next dc and the ch-2 sp, dc in the 3rd ch of the turning ch. Turn. (11 dc: 9 fan dc + 2 edge dc; 2 ch-2 sps)
The ch-2 spaces make the open triangles at the sides of the fan.
Row 4 (V row): Ch 5, sk the ch-2 sp and 4 dc, V-st in the next dc (the 5th fan dc, the center of 9), ch 2, sk 4 dc and the ch-2 sp, dc in the 3rd ch of the turning ch. Turn. (4 dc, 2 ch-2 sps, 1 ch-3 sp)
Row 5 (fan row): Ch 5, sk the ch-2 sp and the next dc, work 11 dc in the ch-3 sp, ch 2, sk the next dc and the ch-2 sp, dc in the 3rd ch of the turning ch. Turn. (13 dc: 11 fan dc + 2 edge dc; 2 ch-2 sps)
Row 6 (V row): Ch 5, sk the ch-2 sp and 5 dc, V-st in the next dc (the 6th fan dc, the center of 11), ch 2, sk 5 dc and the ch-2 sp, dc in the 3rd ch of the turning ch. Turn. (4 dc, 2 ch-2 sps, 1 ch-3 sp)
Row 7 (fan row): Repeat Row 5. (13 dc)
This is the widest point of the gore.
Row 8 (V row): Repeat Row 6. (4 dc, 2 ch-2 sps, 1 ch-3 sp)
Row 9 (fan row): Repeat Row 3. (11 dc: 9 fan dc + 2 edge dc)
The gore begins to narrow toward the top.
Row 10 (top arches): Ch 6, sk the ch-2 sp and 4 dc, sc in the next dc (the 5th fan dc, the center of 9), ch 6, sk 4 dc and the ch-2 sp, sl st in the 3rd ch of the turning ch. (1 sc, 2 ch-6 arches)
The two arches meet at the center sc and form the open oval and the rounded point at the top. Fasten off and weave in the tail.
You now have five fans stacked up the gore, with 7, 9, 11, 11 and 9 dc. The middle fans are largest, which gives the teardrop outline.
Edging (Pink, all 6 gores)
In this pattern, a gore’s “side” means the stitches between the bottom tip and the top tip. The tip stitches are counted separately.
Round 11: With RS facing, join Pink with a sl st around the ring at the bottom tip. Work the edging as follows:
- Bottom tip: Ch 1, 1 sc around the ring. Place a marker in this sc.
- Side A: Work 2 sc around each row-end post of Rows 1–9 (18 sc), then 7 sc in the ch-6 arch (25 sc for this side).
- Top tip: (Sc, ch 3, sc) in the center sc of Row 10.
- Side B: Work 7 sc in the next ch-6 arch, then 2 sc around each row-end post of Rows 9 down to 1 (25 sc for this side).
Sl st in the first sc. Fasten off.
Round 11 total: 53 sc and 1 ch-3 sp. That is 1 bottom-tip sc, 25 sc on Side A, 2 top-tip sc and 25 sc on Side B.
Check that each side has exactly 25 sc. Matching sides are what make the seams lie flat.
Make All Pieces
- Pink: 3 gores (Rows 1–10), plus edging on all 6
- Burgundy: 3 gores (Rows 1–10)
Layout (one ring, read left to right and wrapping back to the start):
| P1 | B1 | P2 | B2 | P3 | B3 | -> back to P1
Number the gores with markers so the colors keep alternating.
Joining
Method: slip-stitch seams in Pink, worked from the RS so they form a raised ridge.
- Hold P1 and B1 wrong sides together, with the bottom tips matched. Their Side B and Side A edges should line up.
- Join Pink in the first side sc after the bottom tip of both gores, working through both loops of both pieces.
- Sl st through each matched pair of side stitches, one stitch to one stitch, for 25 sl st. Stop at the last side sc before the top tip.
- Leave the tip stitches unjoined. They are used for the top and bottom rounds.
Repeat this for B1–P2, P2–B2, B2–P3 and P3–B3. That gives 5 seams with 25 sl st each, and you now have a flat fan-shaped strip.
Tension: Keep each sl st as tall as the sc underneath it. Tight seams will pucker and pull the ridges into curves. If needed, go up half a hook size for the seams only.
Size checkpoint: Lay the strip flat with each gore at its widest. Across the six widest points it should measure about 9 in (22.9 cm), or 6 × 1.5 in (3.8 cm), with no extra width added at the seams. A 3 in (7.6 cm) ball has a circumference of 9.4 in (23.9 cm). That gives about 0.4 in (1.0 cm) of negative ease, so the lace sits snugly.
Border: Bottom Ring, Final Seam and Top Ring
Border gauge: 5 sc = 1 in (2.5 cm) in Pink.
Bottom ring: Join Pink in the bottom-tip sc of P1.
– Rnd 1: Ch 1, sc in the same st, then sc in the bottom-tip sc of each remaining gore. Sl st in the first sc. (6 sc = 6 gores × 1 tip sc)
– Fasten off, leaving a 6 in (15.2 cm) tail. Weave the tail through the 6 sc and pull it closed. Secure the tail.
Insert the ball: Ease the ball in through the open side between B3 and P1.
Final seam: Join B3 to P1 with 25 sl st, exactly as for the other seams.
Top ring: Join Pink in the ch-3 tip sp of P1.
– Rnd 1: Ch 1, 2 sc in each ch-3 tip sp around. Sl st in the first sc. (12 sc = 6 gores × 2 sc)
– Rnd 2: Ch 1, sc2tog 6 times. Sl st in the first sc. (6 sc)
Hanging loop: Ch 30, which is about 4 in (10.2 cm) of chain. Sl st in the 4th sc of Rnd 2, across the ring. Fasten off and weave the tail down into a seam.
Why the math works: Each gore has 25 sc per side, so every seam pairs 25 stitches with 25 and nothing is added. The tips stay outside the seams. That leaves exactly 6 bottom-tip stitches and 6 top-tip spaces where the gores meet at the poles. Doubling the top tips to 12 sc gives a ring of about 2.4 in (6.1 cm) that sits flat over the ball. Decreasing it to 6 sc closes it to the small eyelet that holds the loop.
Final Blocking
- Lightly mist the whole cover on the ball with water.
- Using your fingers, center each gore between its two seams so every pink ridge runs straight from pole to pole.
- Open each fan eyelet and the side triangles with a fingertip.
- Push the top-arch ovals into neat points.
- Let the cover dry completely on the ball.
- Hang the ornament by its loop for an hour so the loop sets straight.
Final Quality-Control Checklist
- Each gore measures 4.7 in (11.9 cm) × 1.5 in (3.8 cm) after edging
- Each fan count is correct: 7, 9, 11, 11, 9 dc
- Each edging has 25 sc per side and 53 sc in total
- Six seams of 25 sl st each, with colors alternating
- Bottom ring is closed with no gap
- Top ring has 6 sc and the loop is centered
- All tails are woven into seams, not into the lace
Troubleshooting
- Fans cup or ruffle: Your fan dc are too loose. Go down a hook size or shorten the dc.
- Gore twists: You worked a V-st off center. Count to the center fan dc again.
- Seams pucker: The sl st are too tight. Re-work them looser.
- Cover slides around on the ball: The gores are too long. Use a smaller hook or a slightly larger ball.
- Gap at a pole: Pull the gathering tail tighter, or add one sc2tog round at the top.
- Side counts don’t match: Check that both posts of each row end got 2 sc.
Care
Hand wash in cool water and lay flat to dry, or spot clean while the cover is on the ball. Store the ornament in tissue so the lace keeps its shape.
Final Notes
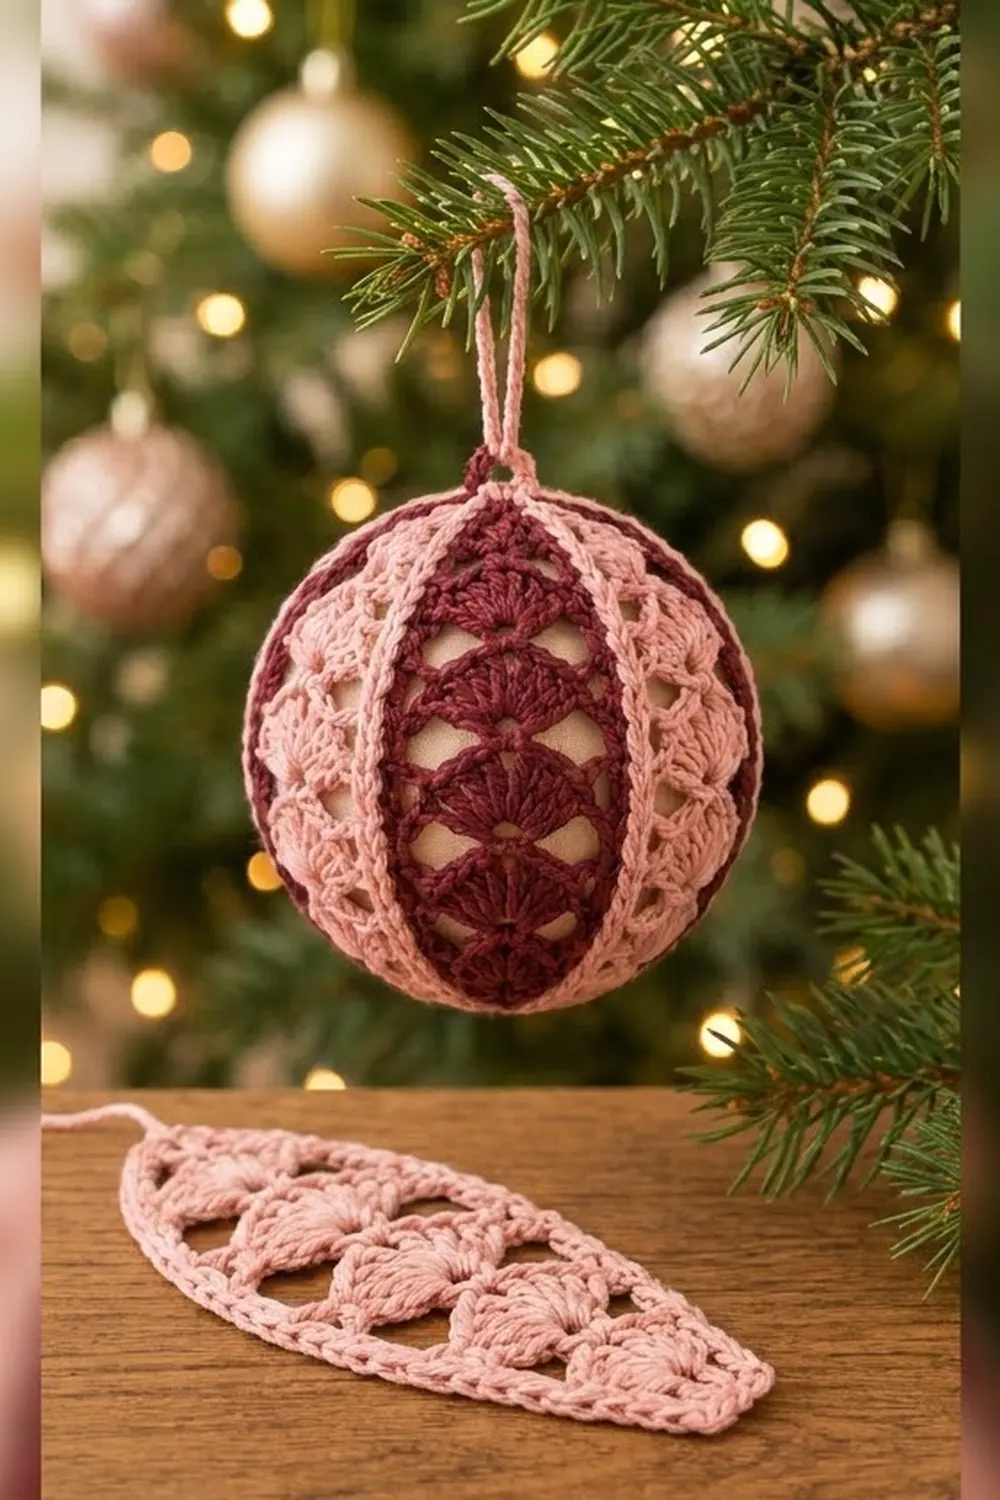
The measurement chain is short. Each fan tier adds 0.9 in (2.3 cm), Rows 1–10 give 4.5 in (11.4 cm), and the edging brings each gore to 4.7 in (11.9 cm) × 1.5 in (3.8 cm). Six gores with 25 sc per side make a 9 in (22.9 cm) ring that hugs a 3 in (7.6 cm) ball. If your first gore hits its checkpoints, the rest of the ornament follows.
Happy crocheting!