

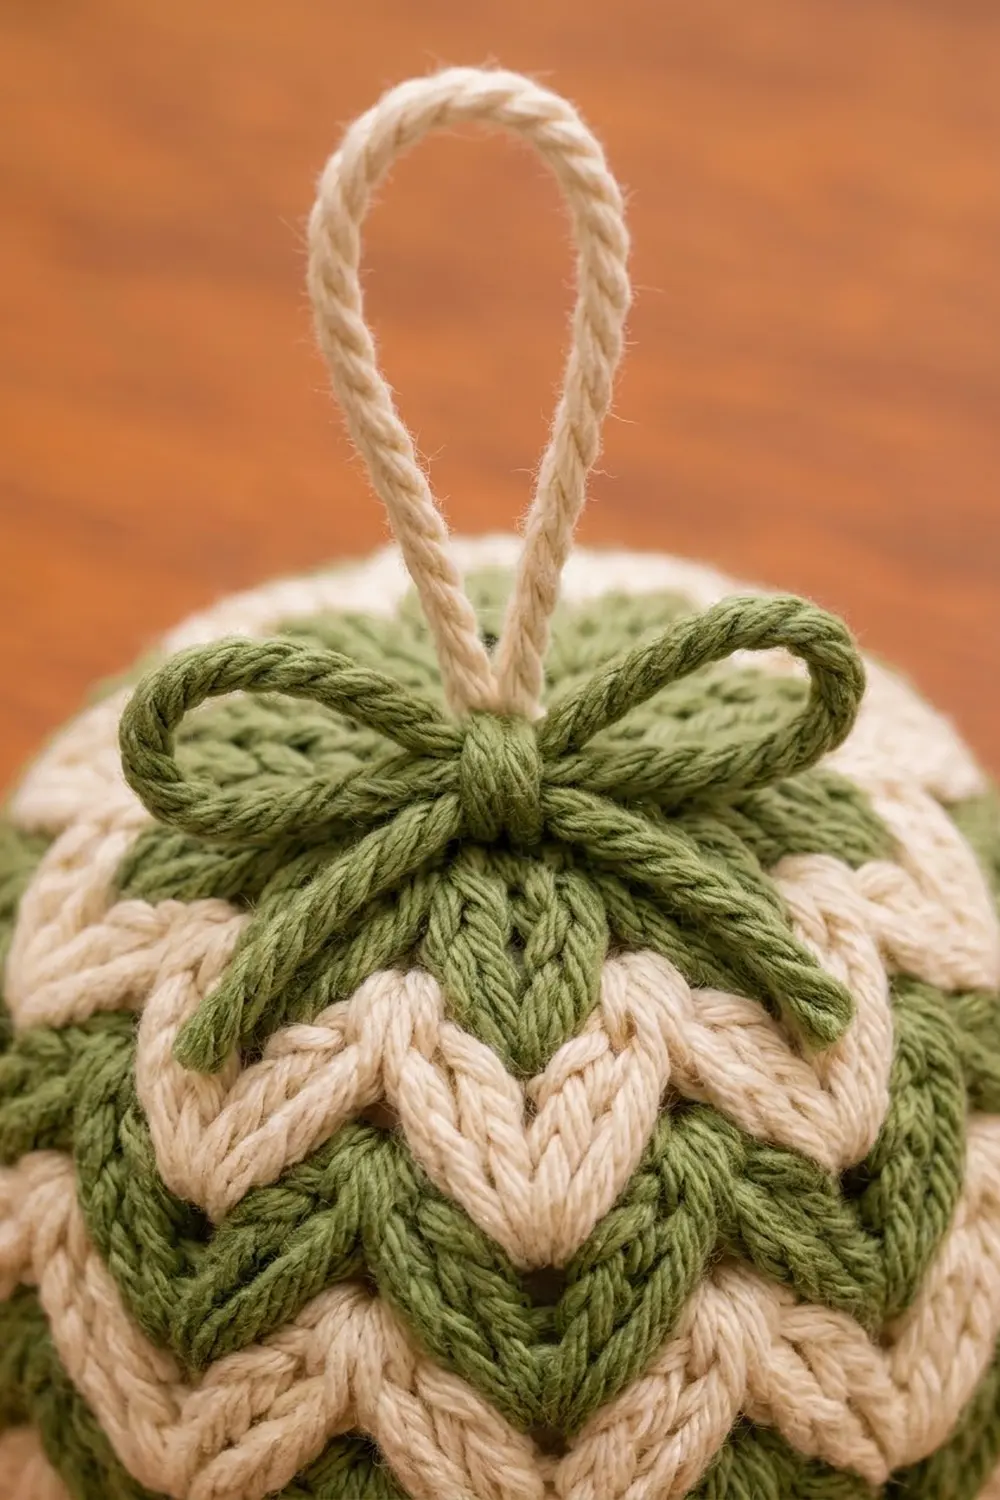
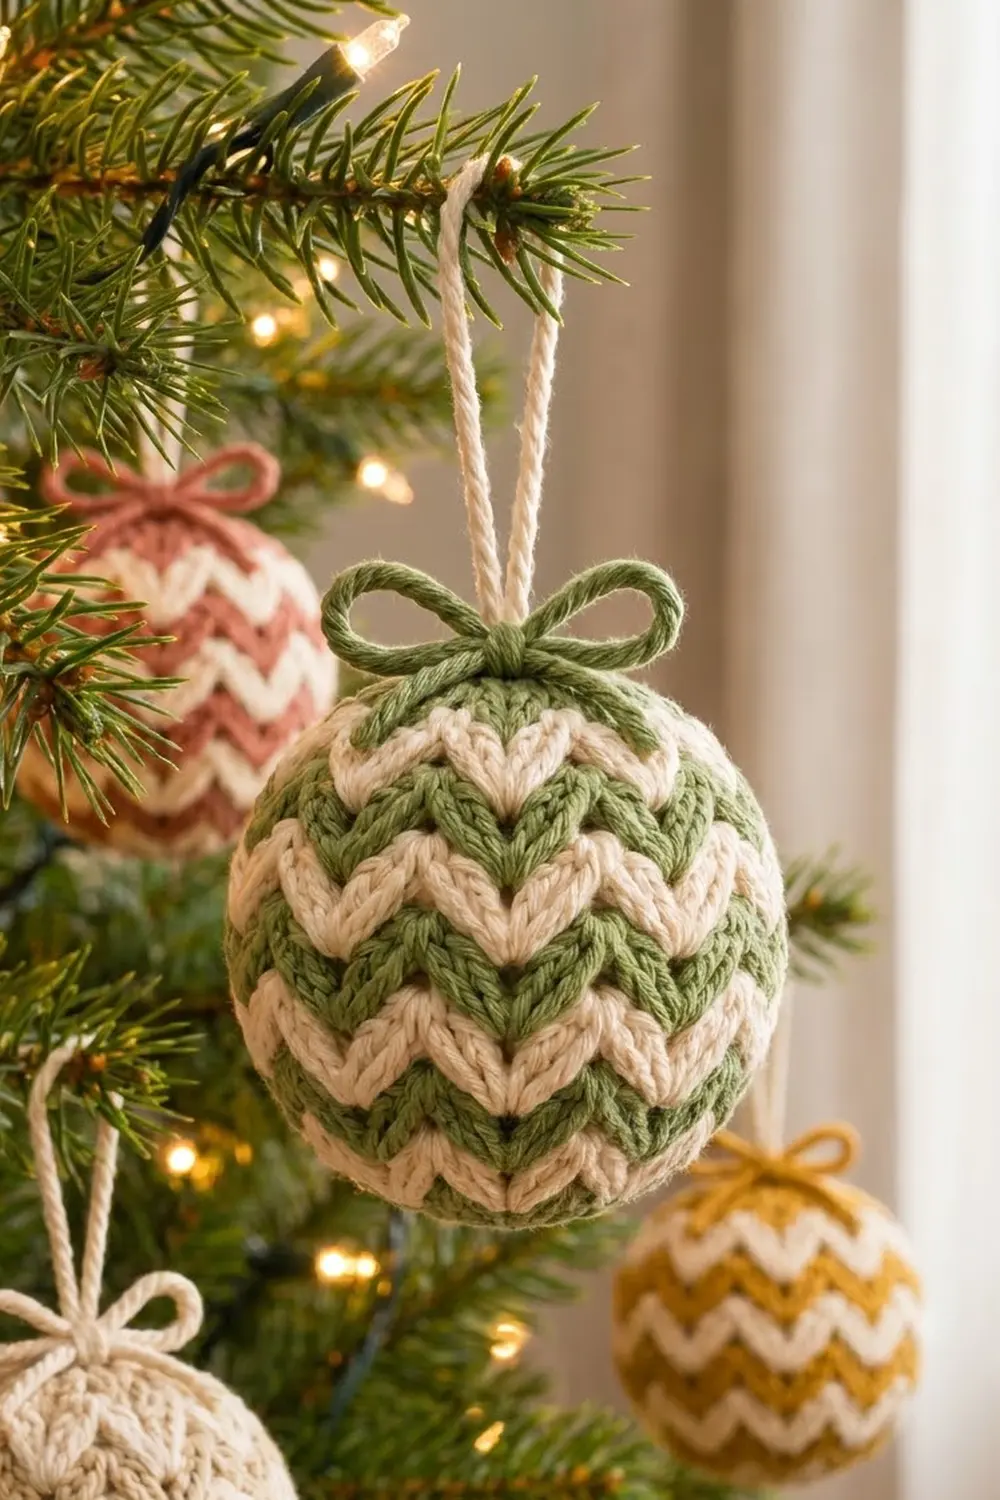
The Evergreen Chevron Ball is a round, firmly stuffed Christmas ornament. It is covered in a knit-look stitch, so every stitch shows as a tidy little “V”. Sage green and cream form zigzag chevron bands around the middle, with solid green at the base and crown. A cream twisted-cord hanging loop and a plump green bow finish the top.
The style is cozy and Scandinavian-inspired. It looks good on a natural tree and makes a great gift-topper. Once you know the method, it’s easy to switch colorways: teal, dusty rose, mustard, or tone-on-tone cream all work well with cream.
This pattern uses US crochet terms. The finished ornament is about 3 1/4 in (8.3 cm) in diameter and about 10 in (25.4 cm) around the widest point. The hanging loop adds about 3 in (7.6 cm).
You crochet the ball in one piece from the bottom up. You increase from a magic ring to 60 stitches, then work 12 even rounds of two-color chevron colorwork. After that you decrease in green to close the top, stuffing as you go. Finally, you add a twisted-cord loop and bow.
Finished Size and Construction
- Finished size: 3 1/4 in (8.3 cm) diameter; 10 in (25.4 cm) circumference
- Skill level: Intermediate (simple colorwork in the round)
- Terminology: US crochet terms
- Yarn weight: DK (light #3)
- Hook: 3.5 mm (US E-4)
- Number of pieces: 1 (single seamless ball)
- Layout: Worked in continuous rounds, bottom to top
- Piece size: 31 rounds; 60 stitches at the widest point
- Size before closing: Open cup about 2 1/2 in (6.4 cm) tall after Round 22
- Top closure depth: 9 decrease rounds, about 1 1/2 in (3.8 cm) of surface
Materials
Yarn: Use a smooth DK yarn in cotton, a cotton blend, or acrylic. A firm, round, plied yarn gives the crispest V stitches. Avoid fuzzy or brushed yarns, because they blur the chevrons.
- Color G – Sage Green: 10 g (about 25 m), including the bow
- Color C – Cream: 8 g (about 20 m), including the hanging loop
All quantities include a safety margin of about 20%.
Tools:
– 3.5 mm (US E-4) crochet hook
– Polyester fiberfill, about 8 g
– Tapestry needle
– Stitch marker
– Scissors
– Measuring tape
Abbreviations (US Terms)
- MR – magic ring
- st(s) – stitch(es)
- sl st – slip stitch
- ksc – knit-look single crochet (see below)
- inc – 2 ksc in the same stitch
- dec – ksc2tog (see below)
- G / C – Green / Cream
- rnd(s) – round(s)
- ( ) x6 – repeat the steps in parentheses the stated number of times
Special stitch – knit-look single crochet (ksc), also called waistcoat stitch:
1. Look at a stitch in the round below. You’ll see two vertical legs forming a “V”.
2. Insert your hook from front to back between those two legs, right through the center of the V and below the top loops.
3. Yarn over and pull up a loop.
4. Yarn over and pull through both loops on the hook.
Stacked rounds of ksc line up into columns of V’s that look like knitting.
ksc2tog (dec): Insert the hook through the center of the next stitch and pull up a loop. Repeat in the following stitch. Yarn over and pull through all 3 loops.
Color changes: Work the final yarn over of the last stitch before a change in the new color. Carry the unused color along the tops of the stitches and work over it so it’s hidden inside the ball. Keep the carried strand relaxed.
Gauge and Checkpoints
Gauge: 6 sts and 6 rnds = 1 in (2.5 cm) in ksc worked in the round.
Knit-look stitch can’t be swatched flat in the usual way, so your test piece is the start of the ball itself.
Test piece: Work Rounds 1–5 (30 sts). Lay the circle flat and measure across.
– Target: 1 5/8 in (4.1 cm) diameter.
– If larger: Go down to a 3.25 mm or 3.0 mm hook, or tighten your pull-up loops. Gaps let stuffing show through.
– If smaller: Go up to a 3.75 mm hook. Very tight ksc is hard to work into.
Checkpoints:
– After Round 5: flat circle 1 5/8 in (4.1 cm) across
– After Round 10: shallow bowl with a circumference of 10 in (25.4 cm)
– After Round 22: open cup about 2 1/2 in (6.4 cm) tall, still 10 in (25.4 cm) around
– Finished and stuffed: 3 1/4 in (8.3 cm) diameter
Pattern: Base and Chevron Body
Work in continuous spiral rounds. Don’t join or turn. Place a marker in the first stitch of each round and move it up as you go.
Ksc can’t be worked into a magic ring. Round 1 therefore uses ordinary single crochet, and ksc starts in Round 2.
Base (Color G)
Rnd 1: With G, make an MR and work 6 sc into the ring. Pull the ring closed. (6)
Rnd 2: Inc in each st around. (12)
Rnd 3: (Ksc 1, inc) x6. (18)
Rnd 4: (Ksc 2, inc) x6. (24)
Rnd 5: (Ksc 3, inc) x6. (30)
Checkpoint: flat circle about 1 5/8 in (4.1 cm) across.
Rnd 6: (Ksc 4, inc) x6. (36)
Rnd 7: (Ksc 5, inc) x6. (42)
Rnd 8: (Ksc 6, inc) x6. (48)
Rnd 9: (Ksc 7, inc) x6. (54)
Rnd 10: (Ksc 8, inc) x6. (60)
The piece now starts to curve up into a bowl. Checkpoint: circumference 10 in (25.4 cm).
Chevron Body (Colors G and C)
Each of Rounds 11–22 has 60 ksc with no increases. Every round is a 6-stitch color repeat worked 10 times (6 x 10 = 60).
The cream stitches start in the center of each repeat and spread outward. As a result, each band of color dips in the middle of the repeat, which makes the downward-pointing V’s that you see when the ball hangs.
Join C at the start of Round 12 and carry both colors through Round 22.
Rnd 11: With G, ksc in each st around. (60: 60 G)
Rnd 12: (2 G, 2 C, 2 G) x10. (60: 20 C, 40 G)
Rnd 13: (1 G, 4 C, 1 G) x10. (60: 40 C, 20 G)
Rnd 14: With C, ksc in each st around. (60: 60 C)
Rnd 15: (2 C, 2 G, 2 C) x10. (60: 40 C, 20 G)
Rnd 16: (1 C, 4 G, 1 C) x10. (60: 20 C, 40 G)
Rnds 17–22: Repeat Rounds 11–16 once. (60 in every round)
At the end of Round 22, cut C, leaving a 6 in (15.2 cm) tail. Weave this tail in on the inside later.
You now have two cream chevron bands with green between them. The green base and the green top frame the pattern. Checkpoint: open cup about 2 1/2 in (6.4 cm) tall and 10 in (25.4 cm) around.
Alignment check: Each repeat’s V point (the two center stitches in Rounds 12 and 13, and the four centers in Round 13) should sit straight above the V point of the round before. If the V’s lean or zigzag out of line, you have skipped or added a stitch. Count the round (it must be 60) before you continue.
Top Closure (In Place of a Border)
A ball has no flat edge to border. Instead, these decrease rounds finish the top edge, mirroring the base exactly. Work them with G only.
Gauge for this section: Use the same hook and tension as the body, 6 sts and 6 rnds = 1 in (2.5 cm). If you tighten up here, the top will look smaller than the bottom.
Rnd 23: (Ksc 8, dec) x6. (54)
Rnd 24: (Ksc 7, dec) x6. (48)
Rnd 25: (Ksc 6, dec) x6. (42)
Rnd 26: (Ksc 5, dec) x6. (36)
Rnd 27: (Ksc 4, dec) x6. (30)
Rnd 28: (Ksc 3, dec) x6. (24)
Stuff now. Add fiberfill in small pieces and press it out toward the widest part. Stuff firmly enough that the V stitches open slightly, but not so firmly that the fiberfill shows between stitches.
Rnd 29: (Ksc 2, dec) x6. (18)
Rnd 30: (Ksc 1, dec) x6. (12)
Top off the stuffing so the crown stays round.
Rnd 31: Dec 6 times. (6)
Cut G, leaving an 8 in (20.3 cm) tail. Thread the tail through the front loop of each of the 6 remaining stitches. Pull tight to close the hole, then secure the tail and bury it inside the ball.
Why the math works: Every increase round from Round 3 to Round 10 adds exactly 6 sts, using 6 sections of (ksc n, inc). Every decrease round from Round 23 to Round 31 removes exactly 6 sts, using 6 sections of (ksc n, dec). Each section is the round’s total divided by 6:
- Round 23: 6 x (8 + 1) = 54
- Round 24: 6 x (7 + 1) = 48
- and so on down to Round 31: 6 x 1 = 6
There are 8 shaping rounds at the base after Round 2 and 8 above Round 23. Together with Round 1 at the base and Round 23 at the top, that gives 31 rounds in all.
At 6 rounds per inch, 31 rounds measure about 5 1/8 in (13.0 cm) from pole to pole over the surface. Half the circumference of a 3 1/4 in (8.3 cm) sphere is about 5 1/8 in (13.0 cm). That match is why the ball comes out round rather than egg-shaped.
Finishing: Hanging Loop and Bow
Hanging loop (C):
1. Cut one 30 in (76.2 cm) strand of C and fold it in half.
2. Anchor the fold, then twist the loose ends tightly in one direction until the strand kinks back on itself.
3. Fold it in half again and let it twist together. Knot the ends. You’ll get a cord about 7 in (17.8 cm) long.
4. Thread both knotted ends down through the center of the crown and out about 1/2 in (1.3 cm) away. Then bring them back up and knot them inside the ball, below the surface.
5. Adjust so the loop stands about 3 in (7.6 cm) tall.
Bow (G):
1. Cut one 40 in (101.6 cm) strand of G and make a twisted cord the same way. The cord will be about 10 in (25.4 cm) long.
2. Wrap it once around the base of the hanging loop and tie it in a bow. Each bow loop should be about 1 in (2.5 cm), so the bow is about 2 in (5.1 cm) wide.
3. Trim the ends to about 1 in (2.5 cm) and knot each tip so it doesn’t untwist.
4. Tack the center of the bow to the crown with a few stitches of G so it stays upright.
Final Blocking
- Roll the stuffed ball firmly between your palms for 30 seconds to spread the fiberfill evenly.
- Hold it about 1 in (2.5 cm) above a steam source (a steam iron on hover, for example) for a few seconds at a time. Don’t press it. For acrylic, use light steam only.
- While the ball is warm, shape it with your fingers. Push down any flat spots and line the V columns up vertically.
- Let it cool and dry completely, resting on a small glass so it keeps its round shape.
- Fluff the bow loops and straighten the hanging loop. Steam the bow briefly so it holds its shape.
- Measure across. You should get 3 1/4 in (8.3 cm).
Final Quality-Control Checklist
- [ ] Final round counts: 60 for Rounds 10–22, and 6 at Round 31
- [ ] Ten even V-shaped chevron repeats in each cream band
- [ ] V points stack in straight vertical lines
- [ ] No carried strands visible on the outside
- [ ] No stuffing showing between stitches
- [ ] Diameter 3 1/4 in (8.3 cm); circumference 10 in (25.4 cm)
- [ ] Top and bottom poles closed neatly and evenly rounded
- [ ] Hanging loop 3 in (7.6 cm), firmly anchored
- [ ] Bow centered, about 2 in (5.1 cm) wide
- [ ] All tails woven in and buried
Troubleshooting
The ball is egg-shaped. Your rounds are taller than 6 per inch, or the stuffing is uneven. Use a smaller hook, and work the closure at the same tension as the body. Re-roll the ball to redistribute the stuffing.
Ksc is hard to insert. Your tension is too tight. Go up a hook size, or pull each loop up a little taller before you finish the stitch.
The chevrons look ragged at color changes. Make sure you’re changing color on the final yarn over of the previous stitch. Tug the carried strand gently every few stitches.
The carried color peeks through. The float is too loose, or the yarn is very thin. Work over the carried strand on every stitch.
The V’s spiral sideways. This is normal for spiral rounds, but it should be slight. Keep your hook insertion exactly in the center of each V.
A visible hole at the pole. Before cinching, run the closing tail through the 6 stitches twice.
The bow flops. Add a second tack stitch, or steam the bow loops into shape.
Care
Spot clean with mild soap and cool water, then reshape and air dry. Don’t machine wash or tumble dry, because the stuffing can lump and the bow can come untwisted.
Final Notes
Here is the measurement chain that makes this ornament work:
- Gauge of 6 sts and 6 rnds = 1 in (2.5 cm).
- The test circle reaches 1 5/8 in (4.1 cm) at Round 5.
- At 60 stitches the circumference is 10 in (25.4 cm), and it stays there through the twelve chevron rounds.
- The cup is 2 1/2 in (6.4 cm) tall at Round 22.
- The decrease rounds mirror the base.
- The result is a 3 1/4 in (8.3 cm) ball with a 3 in (7.6 cm) hanging loop.
If each checkpoint matches, the finished ornament will too. Make one in sage and cream, then try teal, rose, or mustard for a matching set on the tree.
Happy crocheting!