

The Snowy Pine Tree Ornament is a small, flat Christmas tree. Fans of double crochet are stacked into four tiers, and each tier is separated by a crisp single-crochet ridge. Small open gaps between the fans let light through, so the tree looks lacy even though it is sturdy.
You need three colors. Forest green makes the tree, cream makes six snow-dusted tips at the tier corners, and chocolate brown makes the trunk. A green chain loop at the top lets you hang it on a branch, a gift tag or a window hook.
The pattern uses US crochet terms. The finished ornament measures about 4 in (10.2 cm) wide at the base and about 3.9 in (9.9 cm) tall from the top point to the bottom of the trunk. The loop adds about 1.5 in (3.8 cm).
This is a single piece. You work the tree from the top point down in turning rows. Fan rows alternate with single-crochet bar rows, and the cream tips are worked as color changes at the ends of the fan rows. The trunk is then worked into the center of the last row. There is no joining.
Finished Size and Construction
- Finished size: 4 in (10.2 cm) wide × 3.9 in (9.9 cm) tall, not counting the loop
- Skill level: Easy-intermediate (simple color changes)
- Terminology: US crochet terms
- Yarn weight: Sport (#2)
- Hook: 3.25 mm (US D/3)
- Number of pieces: 1
- Layout: Single ornament, no assembly
- Piece size: Tree body 4 in (10.2 cm) wide × 2.6 in (6.6 cm) tall; trunk 1.25 in (3.2 cm) × 1.25 in (3.2 cm)
- Size before border: 4 in (10.2 cm) × 3.9 in (9.9 cm)
- Border depth: 0 in (0 cm). The fan ends and bar rows form the finished edge.
Materials
Choose a smooth sport-weight yarn with good stitch definition. Mercerized cotton or a cotton blend gives the sharpest fans and the flattest finish. Acrylic also works but may need firmer blocking. Plan for about 300 m per 100 g (roughly 330 yd per 3.5 oz).
- Color A, forest green (body, bar rows, loop): 8 g / 24 m (26 yd)
- Color B, cream (snow tips): 2 g / 6 m (7 yd)
- Color C, chocolate brown (trunk): 3 g / 9 m (10 yd)
Tools:
– 3.25 mm (US D/3) crochet hook
– Tapestry needle
– Scissors
– Stitch marker (optional)
– Blocking mat, rust-proof pins and a spray bottle
All quantities include a margin of about 25% for your gauge swatch and tails.
Abbreviations (US Terms)
- ch: chain
- sl st: slip stitch
- sc: single crochet
- dc: double crochet
- st(s): stitch(es)
- sk: skip
- yo: yarn over
- RS / WS: right side / wrong side
- rep: repeat
Special stitches:
- Fan: 3 dc in the same stitch.
- Edge fan: a fan worked into the first or last stitch of a row. At the start of a row, work it as ch 3 (counts as 1 dc) plus 2 dc in the first stitch.
- Color change: work the last dc in the old color until 2 loops remain on the hook, yo with the new color and pull it through.
Gauge and Checkpoints
Gauge: 13 sc and 13 rows = 2 in (5.1 cm) in sc with a 3.25 mm hook. One dc row is about 0.5 in (1.3 cm) tall.
Make a 15-st swatch in sc first, then work Rows 1–4 of the tree as a test before you continue. Check these measurements, laid flat and unstretched:
- After Row 2: 8 sc wide = about 1.25 in (3.2 cm); total height about 0.7 in (1.8 cm)
- After Row 4: 14 sc wide = about 2.2 in (5.6 cm); height about 1.3 in (3.3 cm)
- After Row 6: 20 sc wide = about 3.1 in (7.9 cm); height about 2 in (5.1 cm)
- After Row 8: 26 sc wide = 4 in (10.2 cm); height about 2.6 in (6.6 cm)
Too big? Go down to a 3.0 mm hook. Too small? Go up to a 3.5 mm hook.
A difference of up to 1/8 in (0.3 cm) per checkpoint is fine. Anything more will add up by the base. Width is the measurement that matters most, because it sets the angle of the tree.
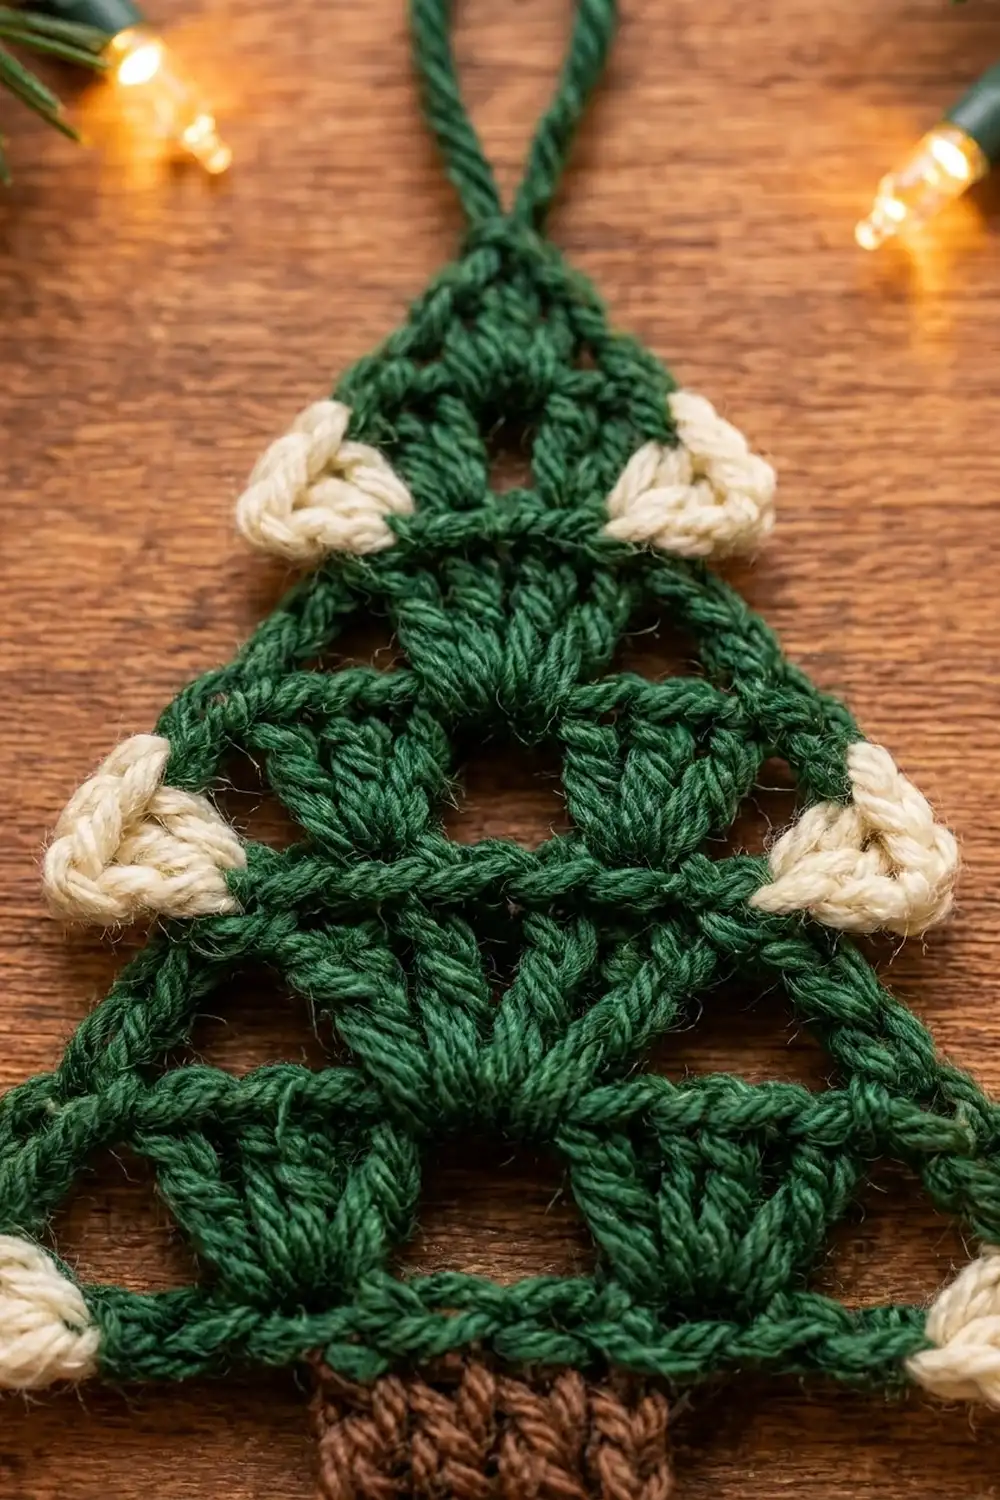
Tree Body
You work top-down in turning rows. Row 1 is a RS row. The ch 3 at the start of a fan row counts as 1 dc. The ch 1 at the start of a bar row does not count as a stitch.
Every fan row adds 4 dc (one extra fan per edge). Every bar row adds 2 sc (one increase at each end). Each new tier therefore holds 2 more full fans than the one above it.
Row 1 (RS, Color A): Ch 4, 5 dc in 4th ch from hook. Turn. (6 dc; the skipped ch 3 counts as 1 dc)
This is the single top fan. It opens downward from the point.
Row 2 (bar row): Ch 1, 2 sc in first dc, sc in each of next 4 dc, 2 sc in top of turning ch. Turn. (8 sc)
On the final yo of the last sc, pull through Color B (cream). Leave a 4 in (10.2 cm) cream tail and keep green attached.
Row 3 (fan row with snow tips):
1. With B, ch 3, 2 dc in first st, working over the green strand. On the last yo, change to A. Cut B, leaving a 4 in (10.2 cm) tail. (cream edge fan made)
2. With A, *sk 1 st, fan in next st, sk 1 st; rep from * once more. This places fans in sts 3 and 6 and skips sts 2, 4, 5 and 7.
3. On the final yo of the last fan, change to a new strand of B. Work an edge fan (3 dc) in the last st (st 8), working over A.
4. On the final yo of the last cream dc, pull A through. Cut B. Turn.
(12 dc: 3 cream + 6 green + 3 cream)
The skipped stitches between fans leave the small triangular gaps.
Row 4 (bar row, A): Ch 1, 2 sc in first dc, sc in each of next 10 dc, 2 sc in last dc. Turn. (14 sc)
On the final yo, pull through B, as at the end of Row 2.
Row 5:
1. With B, ch 3, 2 dc in first st over A, then change to A. Cut B.
2. With A, *sk 1, fan in next st, sk 1; rep from * 3 more times. This places fans in sts 3, 6, 9 and 12.
3. Change to new B. Edge fan in last st (st 14), working over A.
4. Pull A through on the final yo. Cut B. Turn.
(18 dc: 3 cream + 12 green + 3 cream)
Row 6 (bar row, A): Ch 1, 2 sc in first dc, sc in each of next 16 dc, 2 sc in last dc. Turn. (20 sc)
Change to B on the final yo.
Row 7:
1. With B, ch 3, 2 dc in first st over A, then change to A. Cut B.
2. With A, *sk 1, fan in next st, sk 1; rep from * 5 more times. This places fans in sts 3, 6, 9, 12, 15 and 18.
3. Change to new B. Edge fan in last st (st 20).
4. Pull A through. Cut B. Turn.
(24 dc: 3 cream + 18 green + 3 cream)
Row 8 (bottom bar row, A): Ch 1, 2 sc in first dc, sc in each of next 22 dc, 2 sc in last dc. (26 sc)
Fasten off A, leaving a 6 in (15.2 cm) tail.
Count check: Each fan row uses its bar row as 1 + (3 × number of full fans) + 1 stitches:
– 8 = 1 + 6 + 1
– 14 = 1 + 12 + 1
– 20 = 1 + 18 + 1
Trunk
Hold the tree upside down so the tops of Row 8 face you. Count 9 sts in from either end. The trunk sits on the center 8 sts, which are sts 10–17, leaving 9 sts on each side.
Row 1: Join Color C with a sl st in st 10. Ch 1, sc in same st and in each of next 7 sts. Turn. (8 sc)
Rows 2–8: Ch 1, sc in each st across. Turn. (8 sc each row)
Fasten off after Row 8. The trunk measures 1.25 in (3.2 cm) wide and 1.25 in (3.2 cm) tall: 8 sts and 8 rows at 6.5 per inch.
Checkpoint: The whole tree now measures about 3.9 in (9.9 cm) tall, which is 2.6 in (6.6 cm) of body plus 1.25 in (3.2 cm) of trunk.
Hanging Loop
With Color A, join with a sl st in the foundation chain at the top point, where the 5 dc of Row 1 meet. Ch 20, then sl st in the same st. Fasten off.
Pull the loop’s two tails to the back through the top fan and knot them together securely. Laid flat, the loop stands about 1.5 in (3.8 cm) tall.
Border
This design deliberately has no added border round. The border gauge is the body gauge itself (6.5 sc per inch), and the edge is already finished:
- Bottom edge: 26 sc, giving 4 in (10.2 cm) at 6.5 sc per inch, with the trunk centered on sts 10–17
- Each diagonal side: 8 row-ends (4 dc row-ends and 4 sc row-ends). The edge fans at the ends of Rows 3, 5 and 7 sit at the tier corners as the cream tips.
- Top point: the foundation ch of Row 1, with the hanging loop attached
Why the math works: each fan row adds 2 dc at each end, and each bar row adds 1 sc at each end. That gives 3 stitches of growth per edge per tier, which is exactly the width of one fan repeat (sk 1, fan, sk 1). Each new tier therefore has 2 more full fans than the last, and the side edges stay straight at a steady angle.
A sc border would cover the cream tips and soften the tier corners. If you want a firmer edge, use a green sl st surface chain along the diagonal sides only. It adds no width.
Final Blocking
- Weave in all ends on the WS. Run the cream tails back into their own cream fans so no cream shows through the green.
- Mist the ornament lightly until it is damp, not soaked.
- Lay it RS up on the blocking mat.
- Pin the bottom edge straight at 4 in (10.2 cm).
- Pin the top point so that the distance from the point to the bottom bar is 2.6 in (6.6 cm).
- Pin each of the six cream tips outward slightly so the corners look crisp.
- Pin the trunk square at 1.25 in (3.2 cm) on each side.
- Gently open each triangular gap with a fingertip.
- Let it dry completely, at least 6 hours, before you unpin it.
Final Quality-Control Checklist
- Row stitch counts were 6, 8, 12, 14, 18, 20, 24, 26
- Six cream tips: two at each of the three lower tiers
- No green dots showing inside the cream fans (the carried strand is hidden)
- Bottom edge is 4 in (10.2 cm) wide and straight
- Trunk is centered, with 9 sts free on each side
- Both diagonal sides are straight and the same length
- Loop is secure and centered on the top point
- All tails are woven in and trimmed
Troubleshooting
The sides bow outward: Your bar rows are probably too loose. Tighten your sc, or check that you made only one 2-sc increase at each end.
The tree cups instead of lying flat: The fans are too tight for the bar rows. Loosen your dc, or go up 0.25 mm on the fan rows only.
The fans don’t line up: Recount the bar row before the fan row. Fans must land in sts 3, 6, 9 and so on.
Green shows through the cream: Keep the carried green strand snug along the tops of the stitches, and work the cream dc fully over it.
The trunk is off-center: Count 9 sts from both ends of Row 8 before you join brown.
The tips look floppy: Block them with pins and let them dry fully, or use cotton for a crisper result.
Care
Hand wash in cool water with mild soap, roll it in a towel to remove the water and dry it flat, pinning it back to shape if needed. Store the ornament flat so the loop and tips keep their shape.
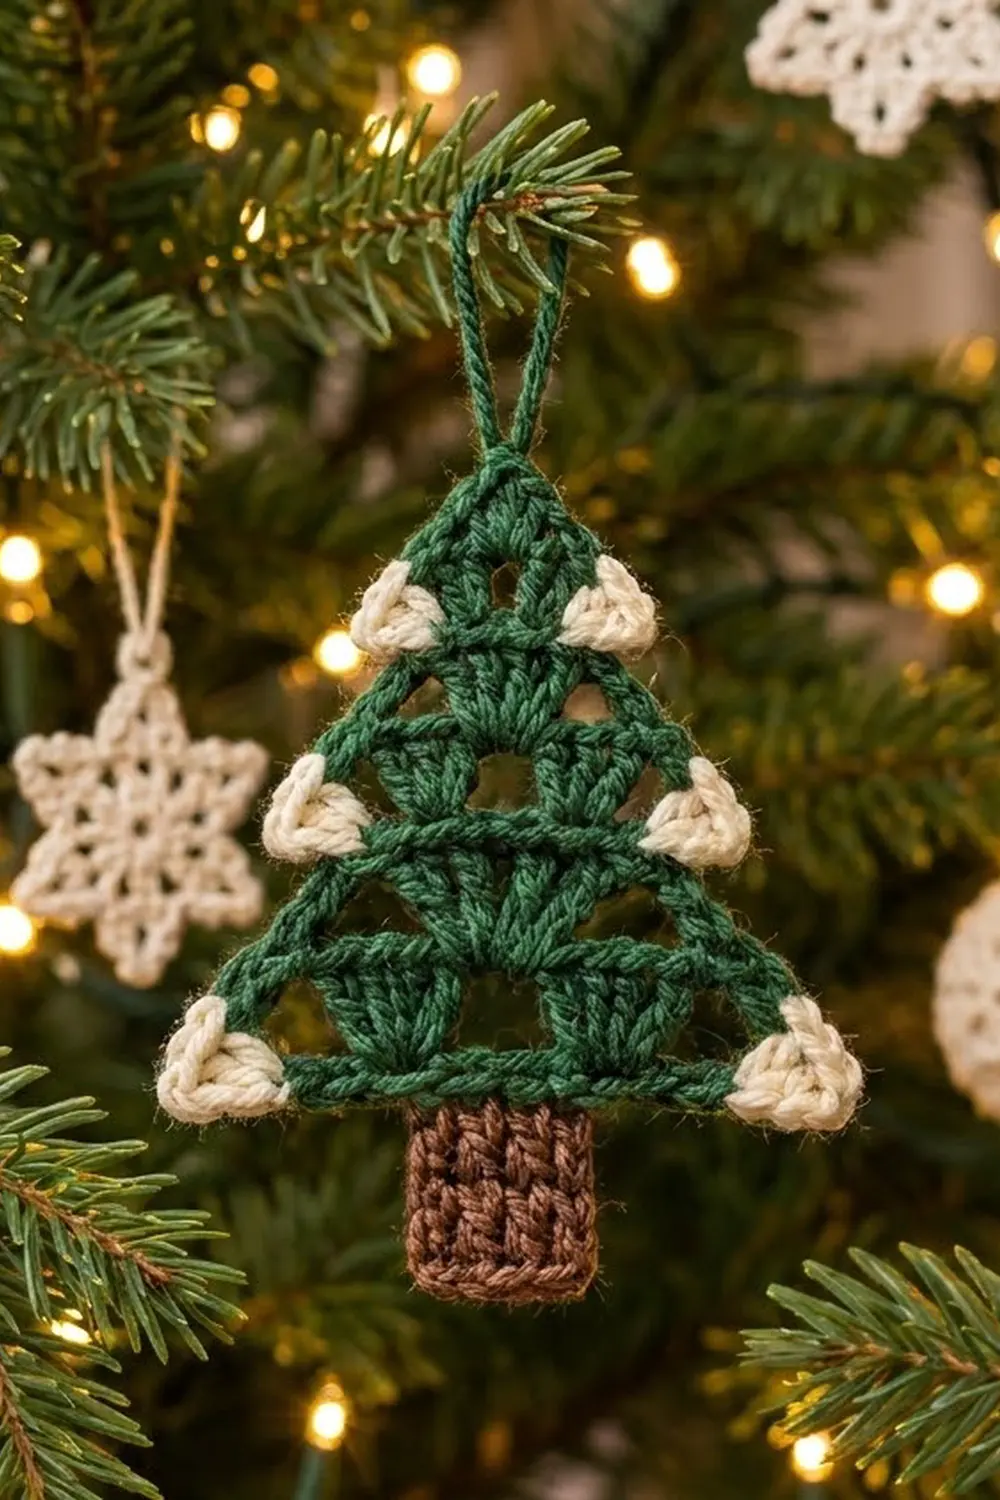
Final Notes
The measurement chain is short and reliable:
– Gauge of 13 sc = 2 in (5.1 cm)
– Row 2 = 1.25 in (3.2 cm)
– Row 4 = 2.2 in (5.6 cm)
– Row 6 = 3.1 in (7.9 cm)
– Row 8 = 4 in (10.2 cm) wide and 2.6 in (6.6 cm) tall
– Trunk = 1.25 in (3.2 cm)
– Finished tree = 3.9 in (9.9 cm), plus a 1.5 in (3.8 cm) loop
If you check your width at each bar row, the tiers, gaps and snow tips will fall into place. Make one for the tree, a few for gift toppers, and enjoy the snowy little pines.
Happy crocheting!