
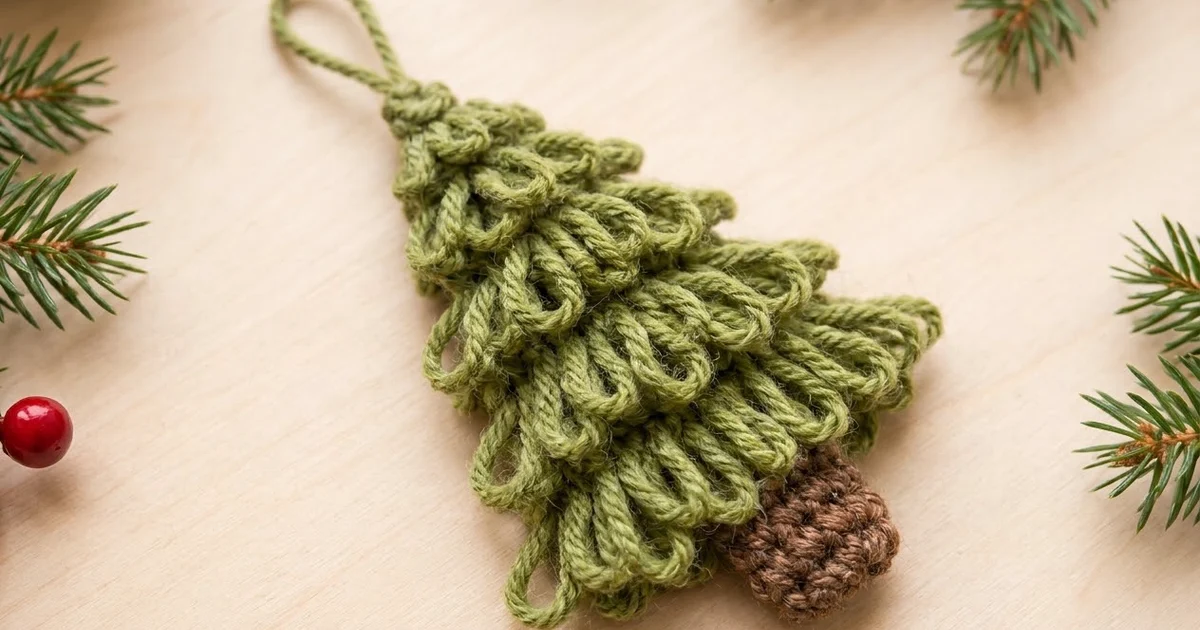
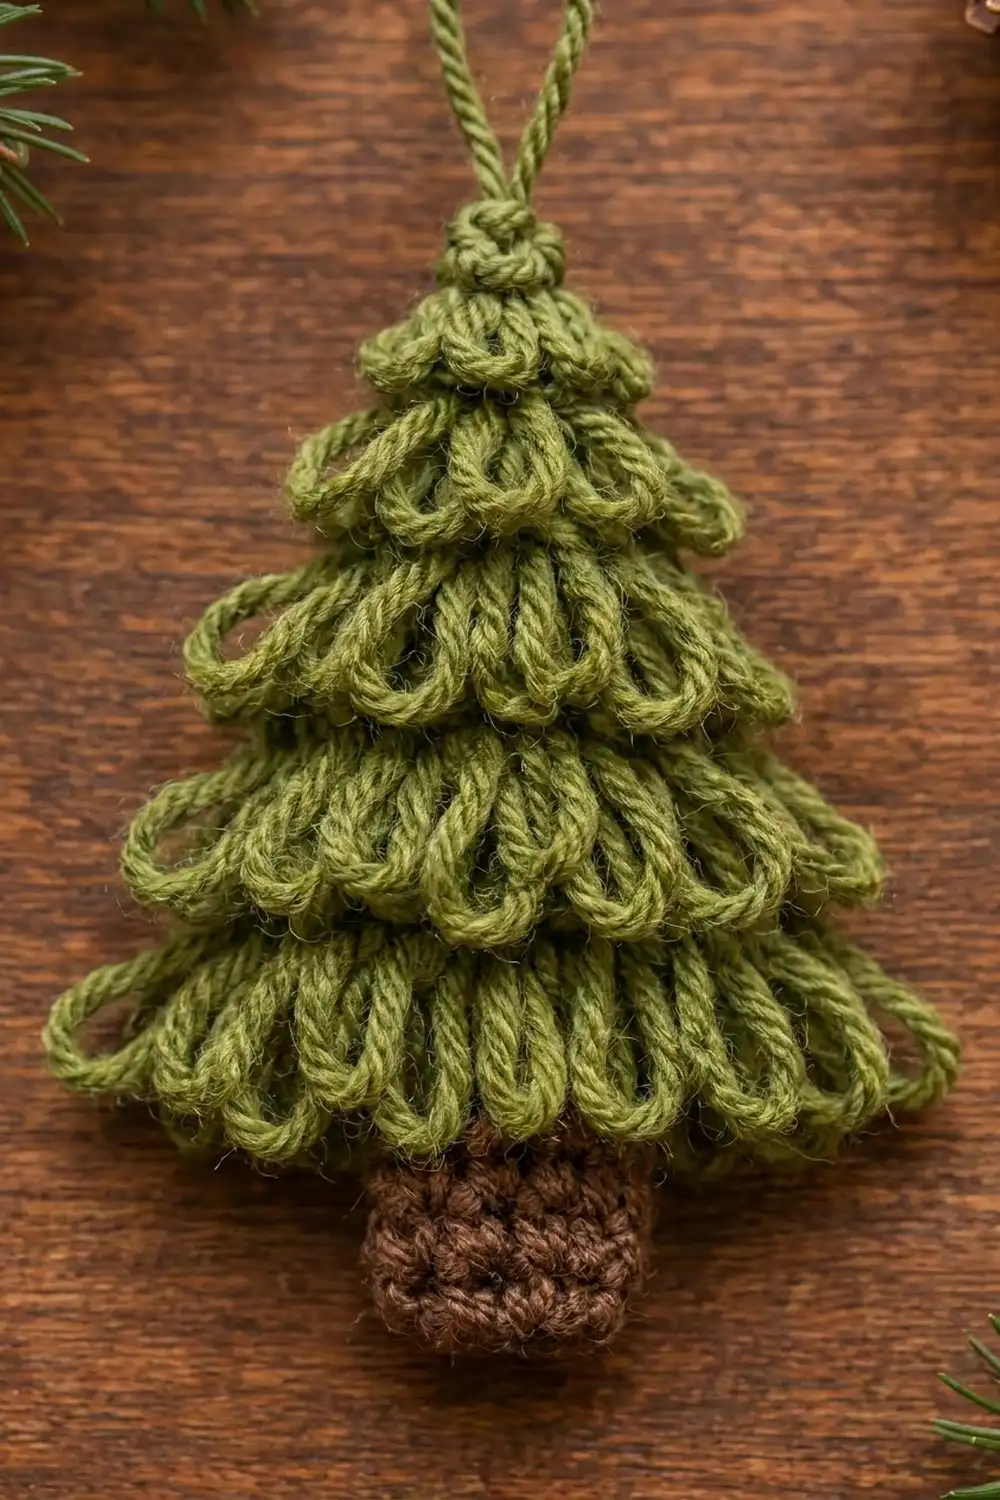
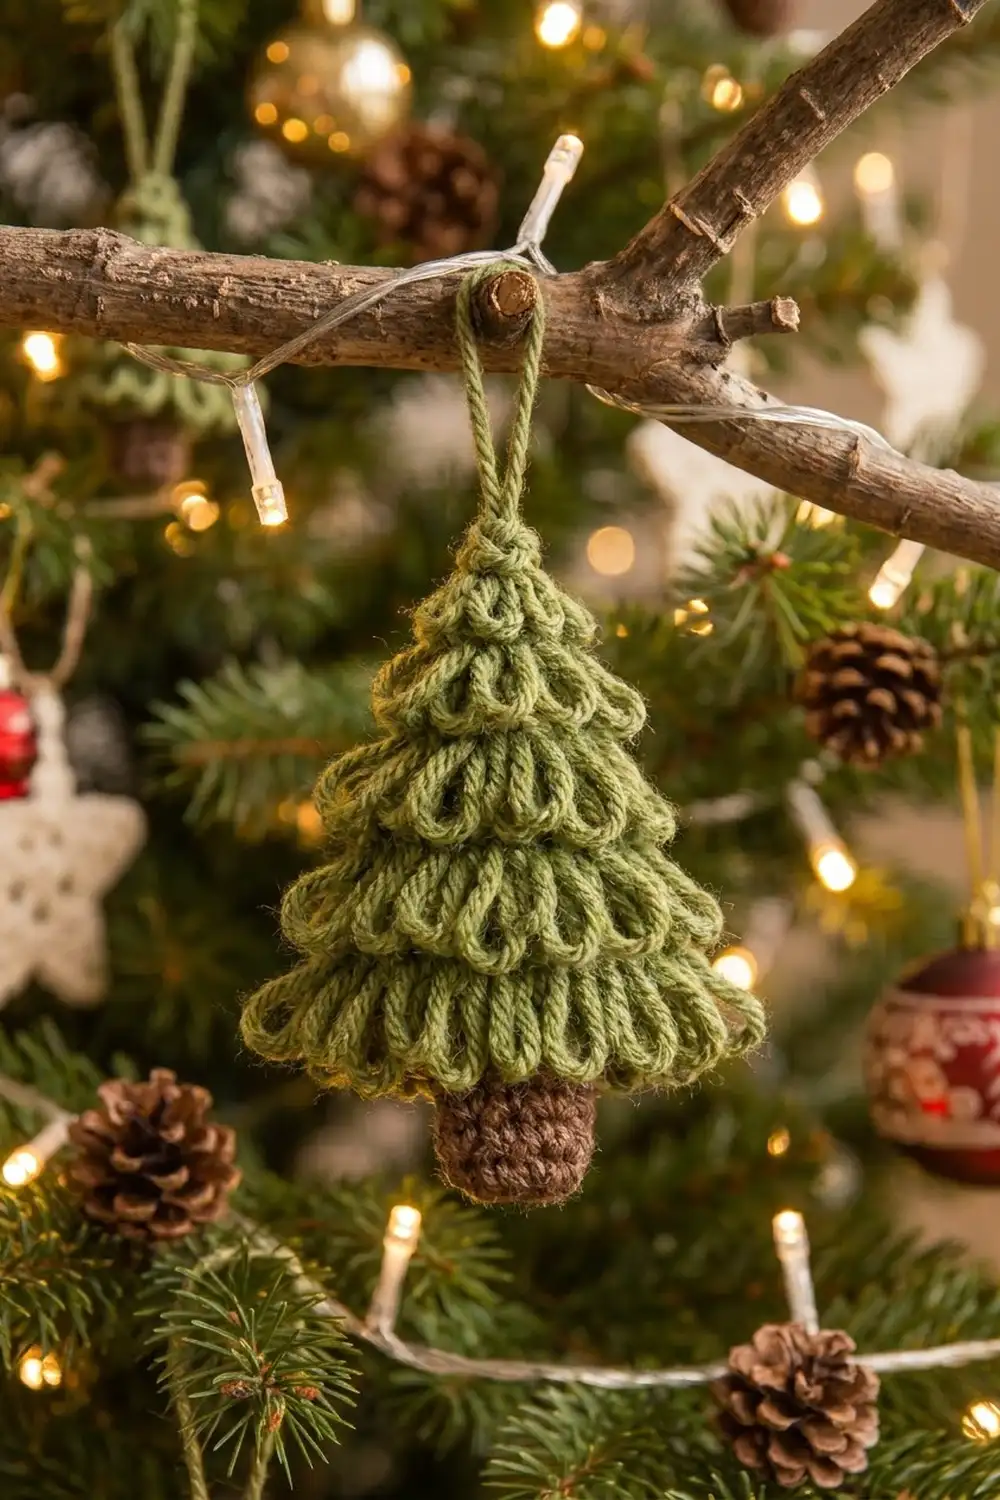
This little evergreen ornament gets its texture from rows of loop stitch. Each green tier is a row of soft, rounded loops that hangs over the row below, so the tree looks like layered pine boughs. A dense brown trunk sits below, and a slim green chain loop at the top lets it hang from a branch, a gift tag, or a garland hook.
The palette is two colors: a muted sage or olive green for the boughs and a warm chocolate brown for the trunk. The look is rustic and cozy, and it suits natural decor, kraft-paper gift wrap, and real greenery.
The pattern uses US crochet terms. The finished ornament measures about 3.6 in (9.1 cm) tall without the hanger and about 3.25 in (8.3 cm) wide across the loops of the bottom tier. The hanging loop adds about 1.4 in (3.6 cm).
Construction is simple and flat. You start with a single crochet foundation row at the base of the tree. Then you alternate loop-stitch rows (worked on the wrong side, so the loops land on the right side) with single crochet decrease rows until the tree comes to a point. The hanger is chained at the top. The trunk is worked downward from the free loops of the foundation chain. A slip-stitch edging tidies all the outer edges.
Finished Size and Construction
- Finished size: 3.6 in (9.1 cm) tall × 3.25 in (8.3 cm) wide at the loops
- Skill level: Easy (advanced beginner)
- Terminology: US crochet terms
- Yarn weight: Worsted (#4 medium)
- Hook: 4.0 mm (G-6)
- Number of pieces: 1 (single flat ornament)
- Layout: One triangle-shaped tree with a trunk; no joining
- Piece size before border: green body 2.9 in (7.4 cm) wide at the foundation × 2.6 in (6.6 cm) tall; trunk 1.1 in (2.8 cm) wide × 1.0 in (2.5 cm) tall
- Border depth: slip-stitch edging only, about 1/8 in (0.3 cm); it adds no measurable width
Materials
Use a smooth, plied worsted-weight yarn in wool, a wool blend, or soft acrylic. Plied yarn gives loops that stay rounded and defined. Avoid splitty or fuzzy yarns, because the loops will blur together and you’ll lose the layered bough effect.
- Green (sage or olive): about 12 g / 22 m (24 yd)
- Brown (chocolate): about 4 g / 7 m (8 yd)
Loop stitch uses a lot more yarn than plain single crochet, so don’t use up the very end of a scrap ball for the green. Both quantities include a margin of about 25% for gauge swatching and weaving in.
Tools:
- 4.0 mm (G-6) crochet hook
- A strip of stiff cardboard 1/2 in (1.3 cm) wide, as a loop gauge (optional; you can use your finger instead)
- Tapestry needle
- Scissors
- Stitch marker
- Pins and a foam blocking mat
Abbreviations (US Terms)
- ch – chain
- sc – single crochet
- sc2tog – single crochet 2 together (1 decrease)
- sc3tog – single crochet 3 together (2 decreases)
- sl st – slip stitch
- lp st – loop stitch (see below)
- st(s) – stitch(es)
- RS / WS – right side / wrong side
Special stitch – Loop Stitch (lp st): With the WS facing you, hold the working yarn behind the work and wrap it from front to back around your index finger (or the 1/2 in / 1.3 cm cardboard strip). Insert the hook into the next stitch. Catch both strands of yarn behind your finger and pull them through the stitch, so you have 3 loops on the hook. Yarn over and pull through all 3 loops. Keep the loop on your finger until the next stitch is started, then slide it off. The loop forms on the side facing away from you, which is the RS. Each finished loop hangs about 1/2 in (1.3 cm) long.
Gauge and Checkpoints
Gauge: 18 sc and 20 rows = 4 in (10.2 cm) in sc, which works out to 4.5 sc and 5 rows per 1 in (2.5 cm).
Make one complete test tree before you make a batch. It takes about 30 minutes, and it’s the most reliable gauge check, because loop stitch tension behaves differently from plain sc.
Checkpoints:
- After Row 1: the foundation row of 13 sc measures 2.9 in (7.4 cm) across.
- After Row 7: the row of 7 sc measures 1.6 in (4.1 cm) across.
- After Row 13: the green body is 2.6 in (6.6 cm) tall from the foundation edge to the top point.
- After the trunk: the trunk is 1.1 in (2.8 cm) wide × 1.0 in (2.5 cm) tall, and the whole tree is 3.6 in (9.1 cm) tall.
If your piece is too big, go down to a 3.75 mm (F-5) hook. If it’s too small, go up to a 4.5 mm (7) hook. If only the loops look wrong (floppy, or too tight to separate), adjust the loop gauge, not the hook. Keep every loop the same length by wrapping around the same finger or strip every time.
Tree Body (Green)
The odd-numbered rows are RS sc rows and the even-numbered rows are WS loop rows. At the start of each row, the ch 1 does not count as a stitch.
Foundation: With green, ch 14.
Row 1 (RS): Sc in the 2nd ch from the hook and in each ch across. Turn. (13 sc)
Place a marker on this side to show the RS. Leave the free loops on the underside of the chain unworked; the trunk goes there later.
Row 2 (WS): Ch 1, lp st in each st across. Turn. (13 lp st)
This is Tier 1. The loops hang on the RS and fall over the foundation edge.
Row 3 (RS): Ch 1, sc2tog, sc in the next 9 sts, sc2tog. Turn. (11 sc)
Work into the tops of the loop stitches and push the loops toward the RS so they don’t get caught.
Row 4 (WS): Ch 1, lp st in each st across. Turn. (11 lp st)
This is Tier 2.
Row 5 (RS): Ch 1, sc2tog, sc in the next 7 sts, sc2tog. Turn. (9 sc)
Row 6 (WS): Ch 1, lp st in each st across. Turn. (9 lp st)
This is Tier 3.
Row 7 (RS): Ch 1, sc2tog, sc in the next 5 sts, sc2tog. Turn. (7 sc)
Check that the row measures 1.6 in (4.1 cm) across.
Row 8 (WS): Ch 1, lp st in each st across. Turn. (7 lp st)
This is Tier 4.
Row 9 (RS): Ch 1, sc2tog, sc in the next 3 sts, sc2tog. Turn. (5 sc)
Row 10 (WS): Ch 1, lp st in each st across. Turn. (5 lp st)
This is Tier 5.
Row 11 (RS): Ch 1, sc2tog, sc in the next st, sc2tog. Turn. (3 sc)
Row 12 (WS): Ch 1, lp st in each st across. Turn. (3 lp st)
This is Tier 6, the small top cluster.
Row 13 (RS): Ch 1, sc3tog. (1 sc)
This draws the top loops together into the knotted tip you see in the photo.
Check the count: each sc row loses exactly 2 sts (13 → 11 → 9 → 7 → 5 → 3 → 1). Every loop row matches the sc row before it. That gives 13 rows in total, which is 2.6 in (6.6 cm) tall at 5 rows per inch.
Hanging Loop
Do not fasten off. Ch 14, then sl st into the top of the sc3tog to form a loop. Fasten off and leave a 6 in (15.2 cm) tail.
The 14 chains make a loop about 1.4 in (3.6 cm) tall. Thread the tail through the base of the loop twice to secure it, then weave it in down the back of the tree.
Trunk (Brown)
Turn the tree upside down with the RS facing you. You’ll work into the free loops of the foundation chain, which has 13 free loops in total.
Row 1 (RS): Skip the first 4 free loops. Join brown with a sl st in the 5th free loop, ch 1, then sc in the same loop and in the next 4 free loops. Turn. (5 sc)
This uses loops 5–9 and leaves 4 unworked loops on each side, so the trunk is centered.
Rows 2–5: Ch 1, sc in each st across. Turn. (5 sc per row)
At the end of Row 5, don’t turn; go straight into the border.
The trunk measures 5 sts ÷ 4.5 = 1.1 in (2.8 cm) wide and 5 rows ÷ 5 = 1.0 in (2.5 cm) tall. Push the Tier 1 loops down over it: they should cover the top 1/4 in (0.6 cm) or so of the trunk, as in the photo.
Border
The border is a flat slip-stitch edging. It firms up the row-end edges so they don’t flare, and it keeps the outline crisp. It adds no width.
Border gauge: work 1 sl st per row end and 1 sl st per stitch. That matches the gauge of the piece one-for-one, so the edge neither ruffles nor pulls in.
Trunk edging (brown): Continuing from the end of trunk Row 5, with the RS facing:
- Down the first side: sl st in each row end, 5 sl st.
- Across the bottom: sl st into the free loops of trunk Row 1 is not possible here (that row is attached to the tree). Instead, turn the corner and work along the last row: sl st in each st across trunk Row 5, 5 sl st.
- Up the second side: sl st in each row end, 5 sl st.
Wait: because you finished Row 5 at one corner, work the edging in this order instead: up the side you’re on (5 sl st), then fasten off. Rejoin at the bottom corner of the other side and work up that side (5 sl st). Then sl st across the bottom edge (5 sl st), placing 1 extra sl st in each bottom corner stitch.
Trunk total: 5 + 5 + 5 = 15 sl st, plus 2 corner sl st, for 17 sl st. Fasten off and weave in the end.
Tree edging (green): Join green at the bottom right corner of the green body (the end of foundation Row 1). With the RS facing:
- Up the right side: sl st in each row end, 13 sl st, ending at the tip.
- Down the left side: sl st in each row end, 13 sl st.
Tree total: 26 sl st. Fasten off.
Why the math works: the body has 13 rows, so each slanted side has 13 row ends, and one sl st in each gives 13 per side. The trunk has 5 rows and 5 sts, so each of its sides takes 5. The edging follows the piece’s own row and stitch counts, so it stays flat. Keep the slip stitches loose enough that the sides don’t pucker; if they tighten, go up a hook size for the border only.
Final Blocking
- Weave in all the remaining tails on the WS. Run each one back and forth through 3–4 stitches so it doesn’t show between the loops.
- Lightly mist the ornament with cool water until it’s just damp. Don’t soak it, because heavy wetting can flatten the loops.
- Lay it RS up on the blocking mat.
- Pin the foundation corners 2.9 in (7.4 cm) apart and the tip 2.6 in (6.6 cm) above the foundation edge. Pin the trunk to 1.1 in (2.8 cm) wide × 1.0 in (2.5 cm) tall.
- With your fingertips, arrange each tier’s loops so they hang straight down and sit evenly side by side. Spread the outermost loops of each tier slightly outward to sharpen the triangle silhouette.
- Straighten the hanging loop above the tip.
- Let it dry completely, which usually takes 2–4 hours. Check that the overall height is 3.6 in (9.1 cm) and the loop width is 3.25 in (8.3 cm).
For acrylic yarn, steam it lightly from 1 in (2.5 cm) above instead of misting. Never press the iron onto the loops.
Final Quality-Control Checklist
- Foundation row has 13 sc and measures 2.9 in (7.4 cm).
- Six loop tiers: 13, 11, 9, 7, 5, and 3 loops.
- All loops sit on the RS and are a uniform 1/2 in (1.3 cm) long.
- The tip is a neat sc3tog cluster with no gaps.
- The hanging loop is 1.4 in (3.6 cm) tall and firmly secured.
- The trunk is centered, with 4 free foundation loops on each side.
- The trunk is 5 sts × 5 rows, 1.1 in × 1.0 in (2.8 cm × 2.5 cm).
- Tier 1 loops overlap the top of the trunk.
- The edging lies flat, with no rippling or puckering.
- No tails are visible from the RS.
Troubleshooting
The loops are on the wrong side. You worked loop stitch on a RS row. Loops always form on the side facing away from you, so loop rows must be worked with the WS facing.
The loops are uneven lengths. Wrap around the same finger every time, or switch to the 1/2 in (1.3 cm) cardboard strip for consistent loops.
The loops pull out of the work. Make sure you’re catching both strands behind your finger before you yarn over and finish the stitch.
The tree leans or is lopsided. Check that every decrease row has a sc2tog at both ends and that the counts follow 13, 11, 9, 7, 5, 3, 1.
The trunk is off-center. Count again: skip exactly 4 free loops before joining, and leave 4 after.
The sides curl. Your slip-stitch edging is too tight. Redo it more loosely or with a larger hook.
The tiers look flat or crowded. Your yarn may be too fuzzy, or the loops too short. Try a smoother yarn or a slightly longer wrap.
Care
Hand wash in cool water, gently press out the water in a towel, and lay flat to dry, fluffing the loops back into place. Store the ornament flat or hanging, not crushed in a box, so the tiers keep their shape.
Final Notes
The whole ornament comes down to one chain of measurements. A gauge of 4.5 sc and 5 rows per inch gives a 13-stitch foundation of 2.9 in (7.4 cm). Six loop tiers, each decreasing by 2 stitches, build a body 2.6 in (6.6 cm) tall. A centered 5 × 5 trunk adds 1.0 in (2.5 cm), for a finished height of 3.6 in (9.1 cm). The loops widen the bottom tier to 3.25 in (8.3 cm), and a 14-chain hanger tops it off at 1.4 in (3.6 cm). Make one, check it against the checkpoints, and then make a whole forest for your tree, your gift wrap, or your neighbors.
Happy crocheting!