

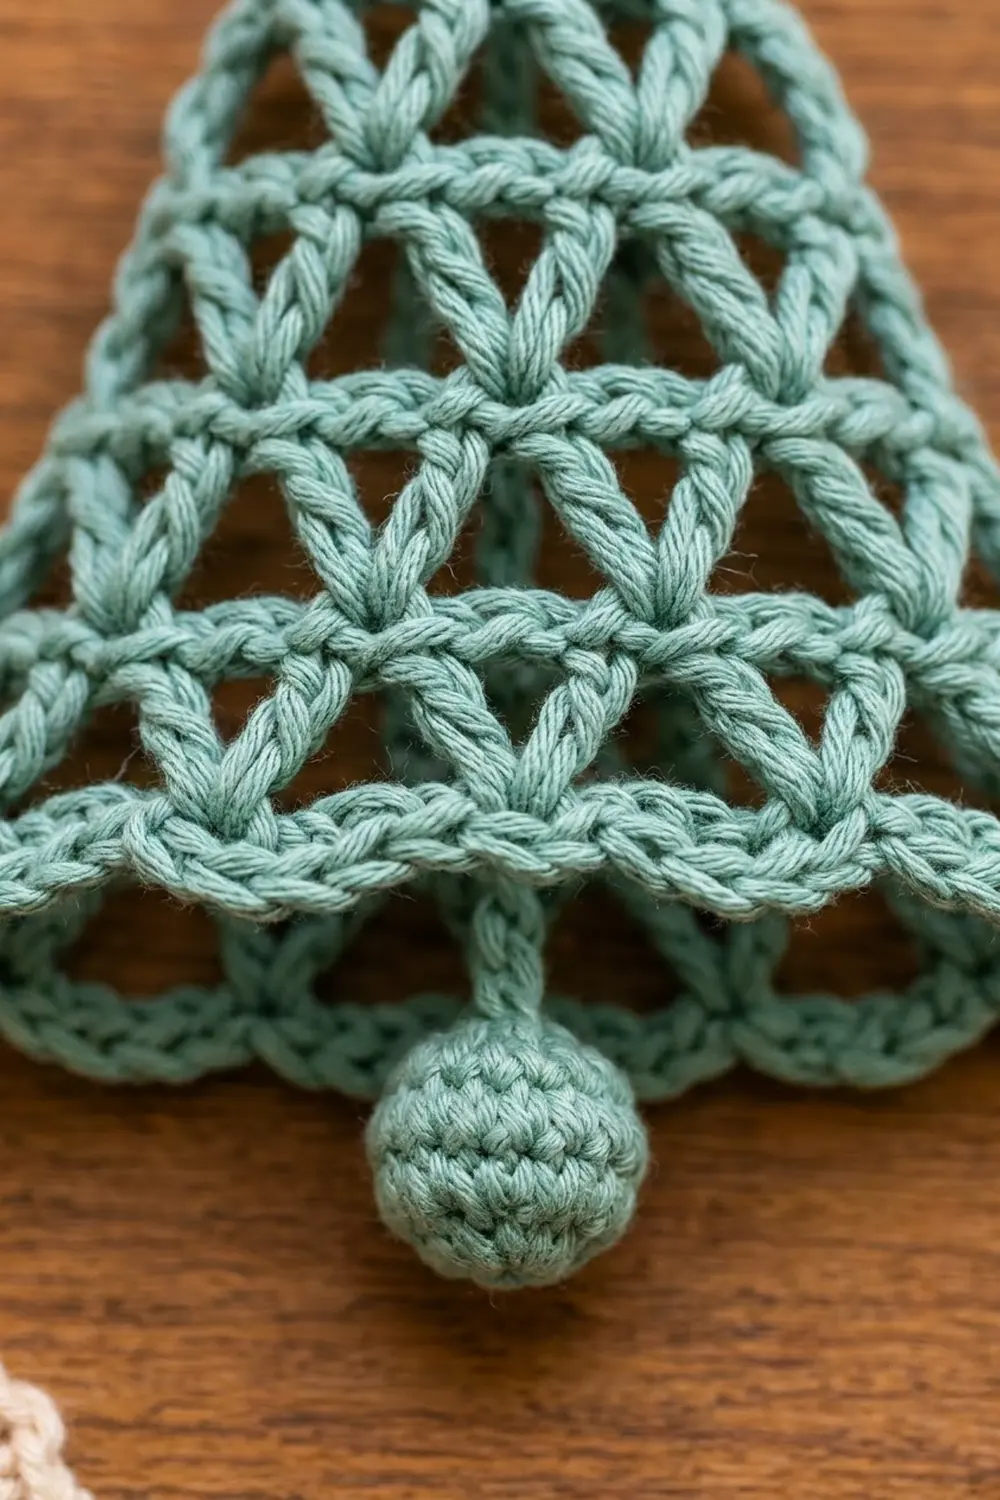
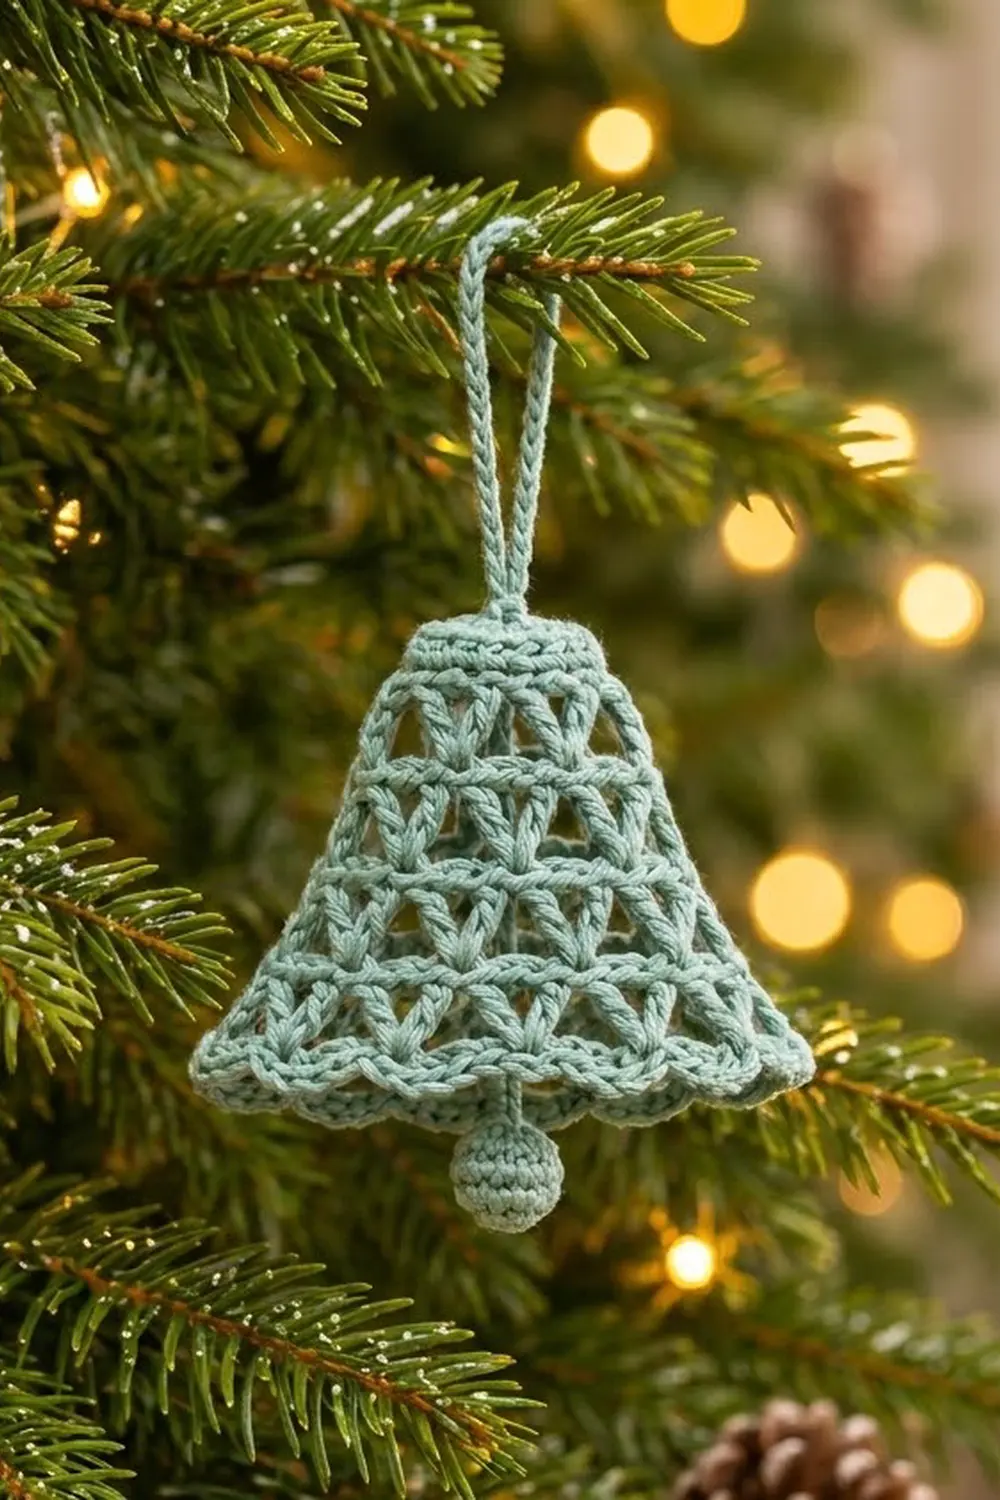
This little bell is a flat, lacy ornament with an open lattice body. Rows of V-stitches open into small triangles, and the bell widens toward a softly scalloped hem. A tiny stuffed clapper hangs from the center and a slim loop at the top lets you hang it on a branch.
The sample is worked in one color, a muted sage or seafoam green cotton. The single color keeps the lace easy to see and gives the bell a calm, vintage look on the tree. It also looks good in cream, deep red, or metallic thread.
The pattern uses US crochet terms. The finished bell body measures about 4 in (10.2 cm) wide at the hem and 2.75 in (7.0 cm) tall. With the clapper it is about 3.25 in (8.3 cm) tall, not counting the hanging loop.
You work the bell flat in rows from the top down. A short sc band comes first, then four V-stitch rows that each gain one V. A shell row makes the scalloped hem, and one sc round outlines the whole shape. You finish with a separate ball clapper and a hanging loop.
Finished Size and Construction
- Finished size: 4 in (10.2 cm) wide at hem × 2.75 in (7.0 cm) tall (body)
- With clapper: 3.25 in (8.3 cm) tall; the loop adds 1.5 in (3.8 cm)
- Skill level: Easy / Advanced Beginner
- Terminology: US crochet terms
- Yarn weight: DK (#3), cotton or cotton blend
- Hook: 3.5 mm (E-4)
- Number of pieces: 1 bell body plus 1 small clapper ball (sewn on)
- Layout: Single flat motif; no joining
- Piece size (before border): 3.5 in (8.9 cm) wide × 2.25 in (5.7 cm) tall
- Border depth: about 0.5 in (1.3 cm) at the hem (shells plus outline), about 0.1 in (0.3 cm) on the sides and top
Materials
Yarn: Choose a smooth, tightly plied DK cotton. Mercerized cotton shows the V-stitches crisply and blocks into sharp triangles. Fuzzy or very splitty yarn will blur the lace.
- Sage green: 12 g, about 30 m (33 yd) per bell
These quantities include a margin of roughly 20% for swatching and tails. One 50 g ball makes four bells comfortably.
Tools:
- 3.5 mm (E-4) crochet hook
- Tapestry needle
- Scissors
- A small pinch of fiberfill or matching yarn scraps for the clapper
- Rust-proof pins and a blocking mat or folded towel
- Spray bottle with water
- Optional: fabric stiffener or starch for a crisper ornament
Abbreviations (US Terms)
- ch – chain
- sl st – slip stitch
- sc – single crochet
- dc – double crochet
- sc2tog – single crochet 2 together
- sp – space
- st(s) – stitch(es)
- MR – magic ring
Special stitches
- V-st (V-stitch): (dc, ch 1, dc) in the same stitch or space. The ch-1 in the middle is the V center.
- Shell: 5 dc in the same space.
- Between-space: the ch-1 space that sits between two V-sts, or between an edge dc and a V-st.
Gauge and Checkpoints
Gauge: 5 sc = 1 in (2.5 cm). Each V-st row is about 0.5 in (1.3 cm) tall.
Gauge matters here mainly for the final size and for how open the lace looks. Make one bell completely before you buy yarn for a batch. Measure it at each checkpoint below.
- After Row 1: the band is 1.75 in (4.4 cm) wide.
- After Row 3: the bell is about 2.5 in (6.4 cm) wide at the bottom edge and 1.25 in (3.2 cm) tall.
- After Row 5: the bell is 3.5 in (8.9 cm) wide and 2.25 in (5.7 cm) tall.
- After the border: the bell is 4 in (10.2 cm) wide at the hem and 2.75 in (7.0 cm) tall.
If your bell is too big, go down to a 3.25 mm (D-3) hook. If it is too small or the lace looks crowded, go up to a 3.75 mm (F-5) hook. A different hook size doesn’t change the stitch counts, only the measurements.
Bell Body
Top Band
Row 1: Ch 10. Sc in the 2nd ch from the hook and in each ch across. Turn. (9 sc)
Leave a 6 in (15.2 cm) starting tail for weaving in later.
V-Stitch Rows
Each V-stitch row sets its V-sts into the between-spaces of the row below. The V-sts are offset, which creates the triangular openings. Because there is always one more between-space than V-sts, every row gains exactly one V.
Row 2: Ch 4 (counts as dc + ch-1 sp), skip next sc, V-st in next sc, ch 1, skip next sc, V-st in next sc. Repeat from * to * once more. Ch 1, skip next sc, dc in last sc. Turn.
The turning chain sits on sc 1, the V-sts land in sc 3, 5, and 7, and the final dc sits on sc 9.
(3 V-sts, 2 edge dc, 4 between-spaces)
Row 3: Ch 4 (counts as dc + ch-1 sp). V-st in next between-space, ch 1. Repeat from * to * in each between-space across. Dc in the 3rd ch of the turning ch. Turn.
(4 V-sts, 2 edge dc, 5 between-spaces)
Skip the V centers in this row. You only work into the between-spaces.
Row 4: Repeat Row 3.
(5 V-sts, 2 edge dc, 6 between-spaces)
Row 5: Repeat Row 3.
(6 V-sts, 2 edge dc, 7 between-spaces)
Checkpoint: 3.5 in (8.9 cm) wide × 2.25 in (5.7 cm) tall. The sides should slant evenly outward and look like a straight-sided trapezoid. Do not fasten off.
Clapper Ball
Work in continuous rounds without joining. Mark the first stitch of each round.
Rnd 1: 6 sc in MR. Pull the ring closed. (6 sc)
Rnd 2: 2 sc in each st around. (12 sc)
Rnd 3: Sc in each st around. (12 sc)
Stuff the ball firmly with a small pinch of fiberfill or yarn scraps.
Rnd 4: Sc2tog 6 times. (6 sts)
Clapper chain: Ch 8 (about 1 in / 2.5 cm). Fasten off and leave a 6 in (15.2 cm) tail. Thread the tail through the front loops of the last round to close the hole. Then run the tail back up through the ball and out at the base of the chain.
The ball measures about 0.6 in (1.5 cm) across. Set it aside until the bell is bordered and blocked.
Make All Pieces
Not needed. This is a single-piece ornament.
Joining
Not needed. The clapper is sewn on during finishing (see the Border and Finishing steps below).
Border
The border has two parts: the scalloped hem row and an sc outline round. Together they add about 0.5 in (1.3 cm) of depth at the hem and about 0.25 in (0.6 cm) of width on each side at the flare.
Border gauge: Each shell spreads to about 0.6 in (1.5 cm) wide. Along the straight top, outline sc should match the gauge of 5 sc = 1 in (2.5 cm).
Row 6 – Scalloped Hem (Trim Row)
With the last row of the body still on the hook, ch 1.
Sc in the first dc, then sc in the first between-space. Shell in the V center of the next V-st, sc in the next between-space. Repeat from * to * 5 more times (6 shells in total). Sc in the 3rd ch of the turning ch.
Count: 9 sc (1 in each edge st + 1 in each of the 7 between-spaces) + 30 dc (6 shells × 5 dc) = 39 sts.
Each shell sits on top of a V-st, which makes each V flare out into a rounded scallop. The sc between the shells anchor the valleys.
Checkpoint: The hem should be about 3.75 in (9.5 cm) wide before outlining and should ripple slightly. Blocking flattens the ripple.
Round 7 – Outline Round (Conversion Round)
Do not turn. Ch 1 and rotate the work so you can go up the side edge.
- First side: 2 sc around the post of each edge dc row end for Rows 5, 4, 3, and 2 (8 sc). Then 1 sc in the row end of Row 1 (1 sc). Side total: 9 sc.
- Top: Work into the 9 free foundation-chain loops on the underside of Row 1. Make 3 sc in the first loop, 1 sc in each of the next 7 loops, and 3 sc in the last loop. Count: 9 sts worked 1 per loop + 4 extra corner sc = 13 sc.
- Second side: 1 sc in the row end of Row 1, then 2 sc around each edge dc row end for Rows 2, 3, 4, and 5. Side total: 9 sc.
- Hem: 1 sc in each of the 39 sts of Row 6. Hem total: 39 sc.
Join with sl st to the first sc. Round total: 9 + 13 + 9 + 39 = 70 sc.
Why the math works:
- A dc row end is about the height of two sc, so 2 sc per row end keeps the side edges flat. They won’t pull in or ruffle.
- The 3-sc groups at the top corners turn the sharp corners without cupping.
- On the hem, one sc per stitch follows the shells exactly. The scallops keep their shape and get a neat rolled edge.
- The bottom corners need no extra stitches because the end sc of Row 6 already act as soft corners.
Hanging Loop
Count to the 7th sc of the 13 top sc. This is the center stitch, sitting directly above sc 5 of Row 1.
Sl st into it, then ch 24 (about 3 in / 7.6 cm). Sl st into the same center stitch to form the loop. Then sl st into the back bump of each of the 24 ch to thicken and firm the loop.
Sl st into the center st once more and fasten off. The loop stands about 1.5 in (3.8 cm) tall.
Attach the Clapper
Find the middle V-st of Row 4. It is the 3rd of the 5 V-sts.
Pass the clapper tail through the V center from front to back. Adjust the chain so the ball hangs just below the hem, with its top overlapping the scallops by about 0.1 in (0.3 cm). Knot the tail securely on the back and weave it in.
The ball should drop about 0.5 in (1.3 cm) below the hem line.
Final Blocking
- Weave in all tails before blocking. Work along the back of the outline round so they stay hidden.
- Pin the bell face up on a blocking mat. Place the top center pin first, then pin the two top corners 0.85 in (2.2 cm) on either side of it.
- Pin the two hem corners 2 in (5.1 cm) on either side of the center line. This gives a 4 in (10.2 cm) wide hem.
- Check that the distance from the top edge to the hem valleys is 2.75 in (7.0 cm), and adjust if needed.
- Pin out each scallop at its tip so all 6 shells look the same.
- Push a pin into each triangular opening to open it up. Use small pins so the V-sts aren’t stretched.
- Mist with water until the bell is damp but not soaked. If you want a stiffer ornament, brush on diluted fabric stiffener now.
- Lift the clapper away from the mat so it dries round.
- Leave the bell until it is completely dry, at least 8 hours. Unpin it.
Final Quality-Control Checklist
- [ ] Row 1 has 9 sc.
- [ ] Rows 2–5 have 3, 4, 5, and 6 V-sts.
- [ ] Each V-st sits in a between-space, not in a V center.
- [ ] Row 6 has 6 shells and 39 sts in total.
- [ ] The outline round has 70 sc: 9 + 13 + 9 + 39.
- [ ] The hanging loop is centered on the 7th top sc.
- [ ] The clapper hangs from the middle V of Row 4 and drops about 0.5 in (1.3 cm) below the hem.
- [ ] The bell measures 4 in (10.2 cm) wide × 2.75 in (7.0 cm) tall.
- [ ] All tails are woven in on the back and none show through the lace.
Troubleshooting
The bell is lopsided.
You probably missed the edge dc on one side. Every V-stitch row starts with ch 4 and ends with a dc in the turning chain.
A row has too many V-sts.
You worked into a V center as well as the between-spaces. Pull back and work only into the between-spaces.
The sides ripple.
Use 2 sc per dc row end, not 3, and keep your hook tension relaxed.
The sides pull in.
Check that you didn’t skip a row end. Each side needs exactly 9 sc.
The scallops look flat.
Make sure each shell is worked into a V center and has all 5 dc.
The clapper ball is lumpy.
Stuff it more firmly before Rnd 4, and pull the closing tail snug.
The loop twists or stretches.
Slip stitch back along the chain with even tension. Then block the loop straight.
Care
Hand wash in cool water with mild soap, roll in a towel, and lay flat to dry. Re-pin to the blocking measurements if needed. If you used stiffener, spot clean only.
Final Notes
Check each stage of the measurement chain as you go:
- The 9-sc band measures 1.75 in (4.4 cm).
- Four V-stitch rows widen it, half an inch per row, to 3.5 in (8.9 cm) wide × 2.25 in (5.7 cm) tall.
- Six shells and a 70-sc outline bring it to 4 in (10.2 cm) wide × 2.75 in (7.0 cm) tall.
- The clapper takes the full height to 3.25 in (8.3 cm), and the loop adds 1.5 in (3.8 cm) on top.
If each checkpoint matches, your bell will match too. Once you’ve made one, you can make a whole batch for gifts, tree trimming, or package toppers.
Happy crocheting!