

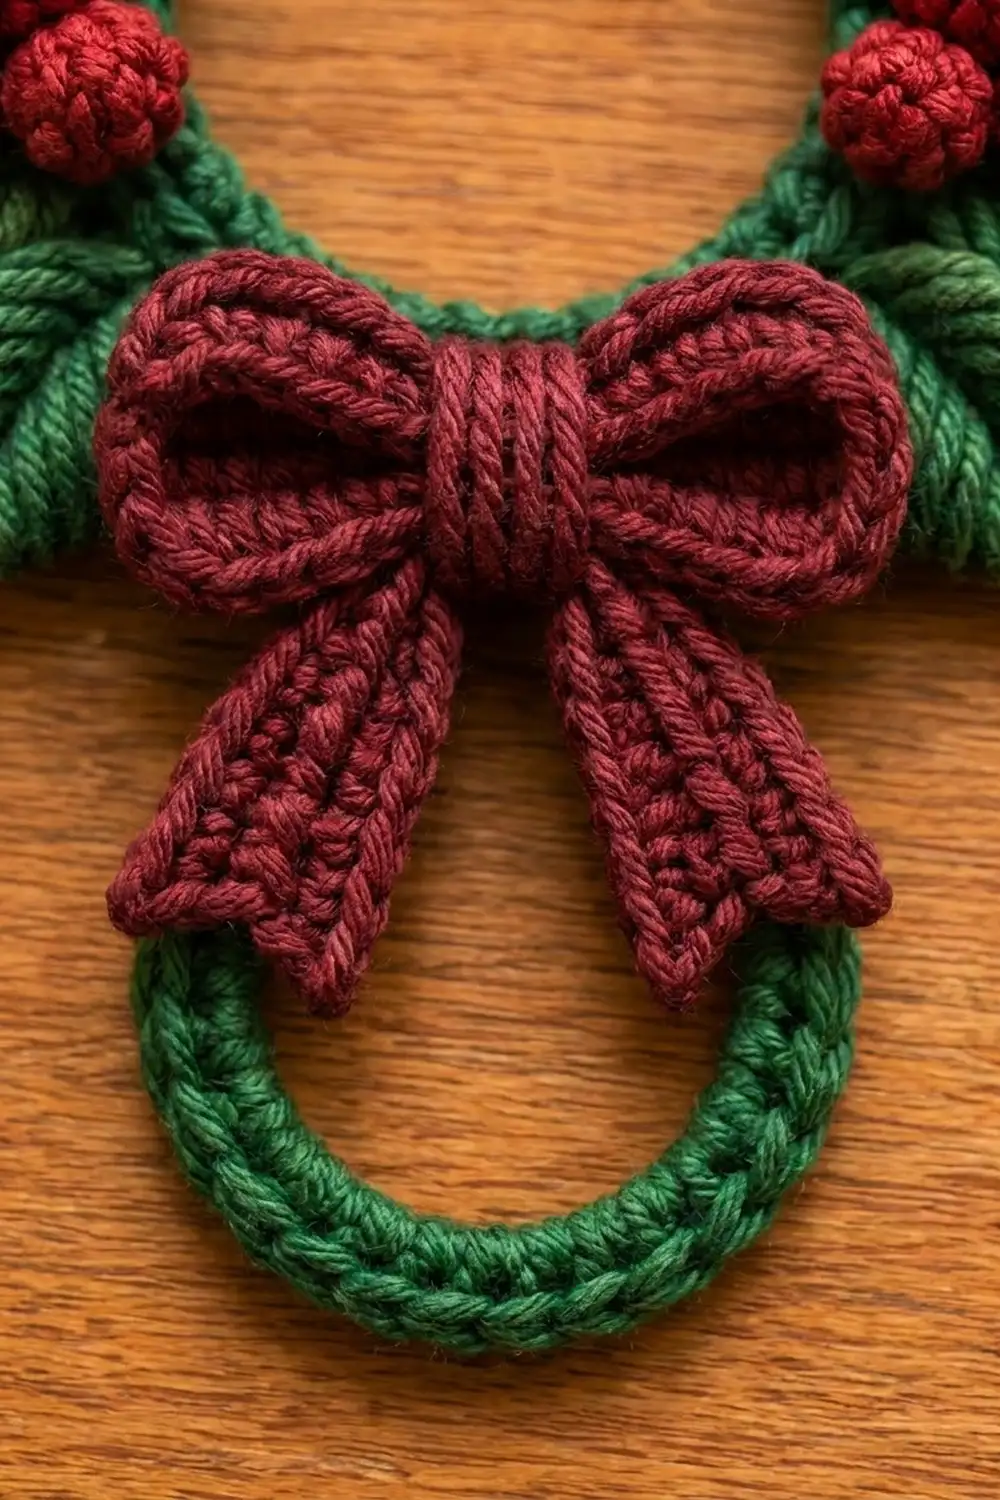
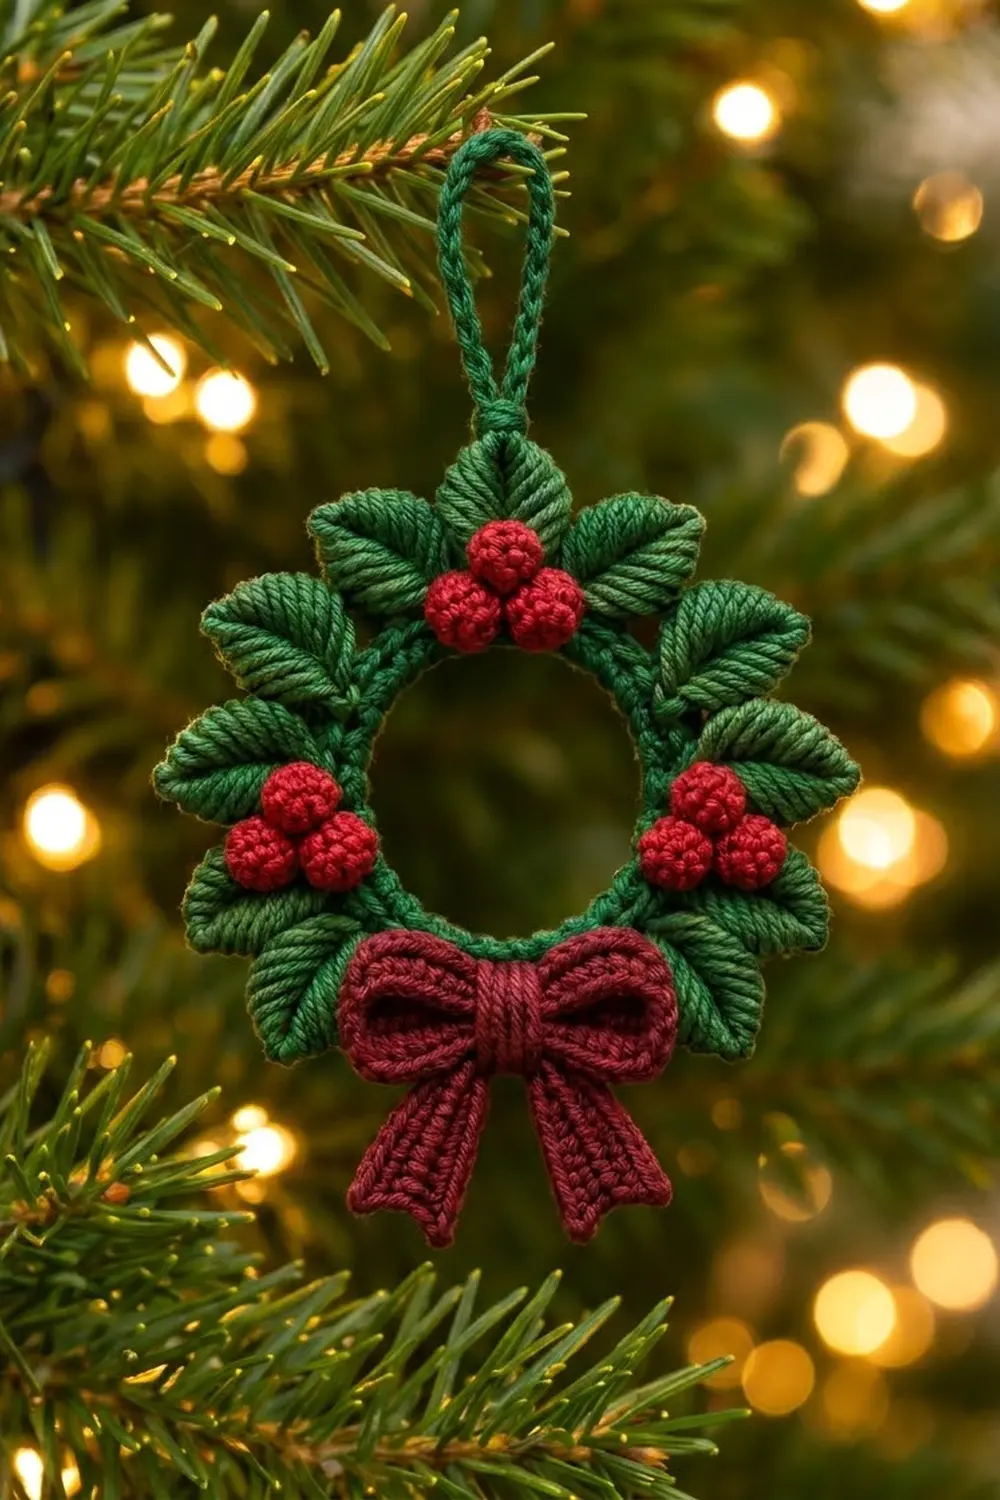
This little holly wreath is one of those ornaments people pick up and turn over in their hands. A firm green ring is surrounded by sixteen ridged leaves set in splayed pairs. Three clusters of round red berries and a burgundy bow with notched tails finish it off.
The palette is classic Christmas: deep forest green for the ring, leaves, and hanging loop, bright cherry red for the berries, and a darker burgundy for the bow. Using two different reds keeps the berries and the bow from blending together.
The pattern uses US crochet terms. The finished wreath is about 4.5 in (11.4 cm) wide and 5 in (12.7 cm) tall, or about 6.5 in (16.5 cm) tall including the hanging loop.
Here’s how it goes together: you cover a 2 in (5.1 cm) plastic ring with single crochet, add a second round, and then work a leaf border that joins pre-made leaves in pairs as you go. After that you sew on the berries, the bow, and the hanging loop. The ornament is one single piece, built from small parts attached to one ring.
Finished Size and Construction
- Finished size: 4.5 in (11.4 cm) wide × 5 in (12.7 cm) tall; 6.5 in (16.5 cm) tall with loop
- Skill level: Intermediate (small pieces, neat sewing)
- Terminology: US crochet terms
- Yarn weight: Sport (2), cotton or cotton blend
- Hook: 3.0 mm (C/2–D/3)
- Number of pieces: 1 finished ornament (ring + 16 leaves + 9 berries + 4 bow parts + loop)
- Layout: Leaves in 8 pairs around the ring; berry clusters at top, left, and right; bow at bottom center
- Ring size before border: 2.75 in (7.0 cm) outer diameter
- Border depth (leaves): about 0.875 in (2.2 cm) beyond the ring on each side
Materials
Use a smooth, tightly plied cotton so the leaf ridges and berries hold their shape. Mercerized cotton gives the slight sheen you see in the photo. Acrylic will work, but the ornament will be softer and less crisp.
- Forest green: 15 g, about 46 m (ring, leaves, hanging loop)
- Cherry red: 4 g, about 12 m (berries)
- Burgundy: 6 g, about 19 m (bow)
These amounts include a margin of about 25% for gauge swatches and sewing tails.
Tools:
– 3.0 mm crochet hook
– 1 plastic ring, 2 in (5.1 cm) outer diameter
– Tapestry needle
– Scissors
– Stitch markers (at least 8)
– Rust-proof pins and a blocking mat or folded towel
– Optional: a small amount of fiberfill (the tails are usually enough)
Abbreviations (US Terms)
- ch – chain
- sl st – slip stitch
- sc – single crochet
- hdc – half double crochet
- dc – double crochet
- sc2tog – single crochet 2 together
- BLO – back loop only
- MR – magic ring
- st(s) – stitch(es)
Special stitch – Leaf Join (LJ): Hold two finished leaves base-to-base with their tips angled about 60° apart, like a V. Insert the hook through the indicated ring stitch, then through the base chain of both leaves. Yarn over and complete a sc. This counts as 1 sc.
Gauge and Checkpoints
Gauge: 7 sc and 7 rows = 1 in (2.5 cm) in sc worked in BLO rows.
Make one leaf before anything else. It is your best test piece:
- Leaf checkpoint: 1 in (2.5 cm) long, base to tip
- Ring checkpoint (after Rnd 1): 48 sc cover the ring with no gaps and no crowding
- Ring checkpoint (after Rnd 2): 2.75 in (7.0 cm) outer diameter
- Berry checkpoint: about 0.5 in (1.3 cm) across
- Bow checkpoint: band 3.5 in (8.9 cm) long × 1 in (2.5 cm) tall before folding
If your leaf is longer than 1 in (2.5 cm), switch down to a 2.75 mm hook. If it’s shorter than 0.875 in (2.2 cm), go up to a 3.25 mm hook. The ring count stays at 48 either way because the plastic ring fixes the size.
Pattern
Part 1: Ring (Forest Green)
Rnd 1: Make a slipknot on the hook. Working over the plastic ring, insert the hook through the center of the ring, yarn over, pull up a loop, and complete a sc. Work 48 sc over the ring. Join with a sl st to the first sc. (48 sc)
Push the stitches together as you go so the plastic is completely covered.
Rnd 2: Ch 1. Sc in BLO of each st around, rotating the stitches slightly toward the outer edge of the ring. Join with a sl st to the first sc. (48 sc)
The BLO round forms a tidy ridge on the front and makes a firm base for the leaves. Don’t fasten off. Leave the loop on a stitch marker and set the ring aside.
Checkpoint: 2.75 in (7.0 cm) outer diameter.
Part 2: Leaves (Forest Green) – Make 16
Ch 8.
Rnd 1: Sc in 2nd ch from hook, hdc in next ch, dc in next 3 ch, hdc in next ch, 3 sc in last ch (tip). Rotate and work along the opposite side of the foundation chain: hdc in next ch, dc in next 3 ch, hdc in next ch, sc in last ch (the same ch as the first sc). Join with a sl st to the first sc. (15 sts)
Fasten off and weave in both tails. The skipped first chain makes a small stem at the base, and you’ll work through it when joining. The two halves meet along the foundation chain to form a center vein. The dc in the middle give the leaf its plump, pointed shape.
Make 16 leaves and pin them flat to the same 1 in (2.5 cm) length.
Part 3: Berries (Cherry Red) – Make 9
Rnd 1: Work 6 sc in a MR. Pull the ring closed. (6 sc)
Rnd 2: 2 sc in each st around. (12 sc)
Rnd 3: Sc2tog 6 times. (6 sts)
Tuck the starting tail and a short length of yarn inside to fill the berry. Fasten off with a 6 in (15.2 cm) tail. Weave the tail through the front loops of the last 6 stitches and pull tight to close. Leave this tail for sewing.
Group the berries into 3 clusters of 3. Sew the berries in each cluster together in a triangle, through their sides. Each cluster ends up about 1 in (2.5 cm) across.
Part 4: Bow (Burgundy)
Bow band:
Ch 26.
Row 1: Sc in 2nd ch from hook and in each ch across. (25 sc)
Rows 2–7: Ch 1, turn. Sc in BLO of each st across. (25 sc)
Fasten off. The band measures 3.5 in (8.9 cm) × 1 in (2.5 cm).
Tails (make 2):
Ch 6.
Row 1: Sc in 2nd ch from hook and in each ch across. (5 sc)
Rows 2–12: Ch 1, turn. Sc in BLO of each st across. (5 sc)
Row 13 (first point): Ch 1, turn. Sc in first 2 sts. Leave the remaining 3 sts unworked. (2 sc)
Row 14: Ch 1, turn. Sc2tog. (1 st) Fasten off.
Row 13 (second point): Skip the middle st of Row 12 and join yarn in the 4th st. Ch 1, sc in the 4th and 5th sts. (2 sc)
Row 14: Ch 1, turn. Sc2tog. (1 st) Fasten off.
The skipped middle stitch forms the dovetail notch. Each tail measures about 2 in (5.1 cm) long × 0.7 in (1.8 cm) wide.
Center wrap:
Ch 8.
Row 1: Sc in 2nd ch from hook and in each ch across. (7 sc)
Row 2: Ch 1, turn. Sc in BLO of each st across. (7 sc)
Fasten off with a 10 in (25.4 cm) tail.
Assemble the bow: Fold both short ends of the band to the center back and overlap them by 0.25 in (0.6 cm). Pinch the center to form two loops. Place the two tails behind the pinch, angled down and outward in an inverted V. Wrap the center wrap around the pinch and the tops of the tails, then sew its ends together at the back. The finished bow is about 1.75 in (4.4 cm) wide.
Part 5: Hanging Loop (Forest Green)
Ch 21. Sl st in the 2nd ch from hook and in each ch across. (20 sl st)
This gives a firm cord about 3 in (7.6 cm) long. Fasten off and leave a tail for sewing. The loop gets attached after the border.
Border: Leaf Round
This border joins all 16 leaves to the ring in a single round.
Border gauge: The border keeps the ring’s count of 48 sts, with 1 sc per Rnd 2 stitch. The leaves add depth, not stitches.
Sections: Hold the ring face up with the joining point at about 5 o’clock. In the direction you crochet, number the Rnd 2 stitches 1–48 from the joining point. Sts 1–20 run up the first side to the top, sts 21–40 run down the second side, and sts 41–48 cross the bottom.
– First side: sts 1–20
– Second side: sts 21–40
– Bottom (bow area): sts 41–48
Place markers in sts 3, 8, 13, 18, 23, 28, 33, and 38. These are the leaf positions.
Rnd 3: Put the live loop back on the hook. Ch 1 and work:
– First side: Sc in sts 1–2, LJ in st 3, sc in sts 4–7, LJ in st 8, sc in sts 9–12, LJ in st 13, sc in sts 14–17, LJ in st 18, sc in sts 19–20. (20 sts: 16 sc + 4 LJ)
– Second side: Sc in sts 21–22, LJ in st 23, sc in sts 24–27, LJ in st 28, sc in sts 29–32, LJ in st 33, sc in sts 34–37, LJ in st 38, sc in sts 39–40. (20 sts: 16 sc + 4 LJ)
– Bottom: Sc in sts 41–48. (8 sc)
Join with a sl st to the first sc. Fasten off. Total: 48 sts (40 sc + 8 LJ), with 16 leaves attached.
Why the math works: Each LJ is a single sc, so the round matches Rnd 2 exactly (20 + 20 + 8 = 48), and the ring stays flat. The leaf pairs sit 5 sts apart on each side. The top center falls between sts 20 and 21, and the nearest pairs, at sts 18 and 23, are each 2.5 sts away from it, so the top is symmetrical. The bottom center falls between sts 44 and 45, which leaves an open stretch from st 39 to st 2 for the bow. At 1 in (2.5 cm) long, each leaf extends about 0.875 in (2.2 cm) past the ring. That gives 2.75 + 0.875 + 0.875 = 4.5 in (11.4 cm) of total width.
Finishing the Ornament
- Berries: Sew one cluster to the front of the top leaf area, centered over sts 20–21. Sew the side clusters over sts 8–9 and sts 32–33 so they rest on the leaf bases.
- Bow: Center the bow over sts 44–45 and sew through the center wrap into the ring. Add a few stitches at the top of each bow loop to keep it lying flat.
- Hanging loop: Fold the cord in half. Sew both ends to the back of the ring between sts 20 and 21. The loop stands about 1.5 in (3.8 cm) above the wreath.
- Weave in all the remaining ends on the back.
Final Blocking
- Lightly mist the wreath with water. Don’t soak it, because the berries will lose their shape.
- Lay it face up on a blocking mat.
- Pin the ring into a true circle with a 2.75 in (7.0 cm) outer diameter.
- Pin each leaf tip outward, keeping the pairs in even V shapes.
- Pin the bow loops flat and the tails at a matching angle. Pin each dovetail point open.
- Leave the berries unpinned and pinch them round with your fingers.
- Check the total width: 4.5 in (11.4 cm).
- Let it dry completely, then remove the pins.
Final Quality-Control Checklist
- Ring has 48 sts in each round, with no plastic showing
- 16 leaves, each 1 in (2.5 cm) long, joined in 8 pairs
- Leaf pairs evenly spaced, 5 sts apart
- 9 berries, closed tightly, grouped in 3 triangles
- Bow 1.75 in (4.4 cm) wide, tails with 2 neat points each
- Hanging loop centered at the top and sewn securely
- Width 4.5 in (11.4 cm); height 5 in (12.7 cm) without the loop
- No loose ends on the front
Troubleshooting
- Plastic shows through Rnd 1: Push the stitches together, or add up to 2 extra sc. If you do, add the same number of plain sc to the bottom section in Rnd 3.
- Ring ruffles after Rnd 2: Your tension is loose. Redo the round with a 2.75 mm hook.
- Leaves look flat or thin: Make sure the 3 dc are worked in separate chains, and work the tip into a single chain.
- Leaf pairs flop forward: Work the LJ through both leaf base chains, not just the front loops.
- Berries are lumpy: Pack more yarn inside before closing, then roll each berry between your palms.
- Bow tails are uneven: Count the 12 rows before shaping. Points only match when both tails start the notch at the same row.
- Wreath tilts when hanging: The loop is off-center. Re-sew it exactly between sts 20 and 21.
Care
Spot clean with cool water and mild soap, then reshape and dry flat. Store it flat or hanging, not crushed in a box, so the leaves and bow keep their shape.
Final Notes
The measurements build on each other. Each leaf is 1 in (2.5 cm) long. The ring is 2.75 in (7.0 cm) after Rnd 2. The leaf border adds 0.875 in (2.2 cm) on each side, for 4.5 in (11.4 cm) of total width. The 48-st count stays the same from Rnd 1 to Rnd 3. That’s why the leaf pairs land in symmetrical spots and the bow fits neatly over the 8-st gap at the bottom. Check the leaf length first, keep the stitch count at 48, and the rest of the wreath falls into place.
Make one for your own tree, a set for gift toppers, or one in different colors for each person in the family.
Happy crocheting!