
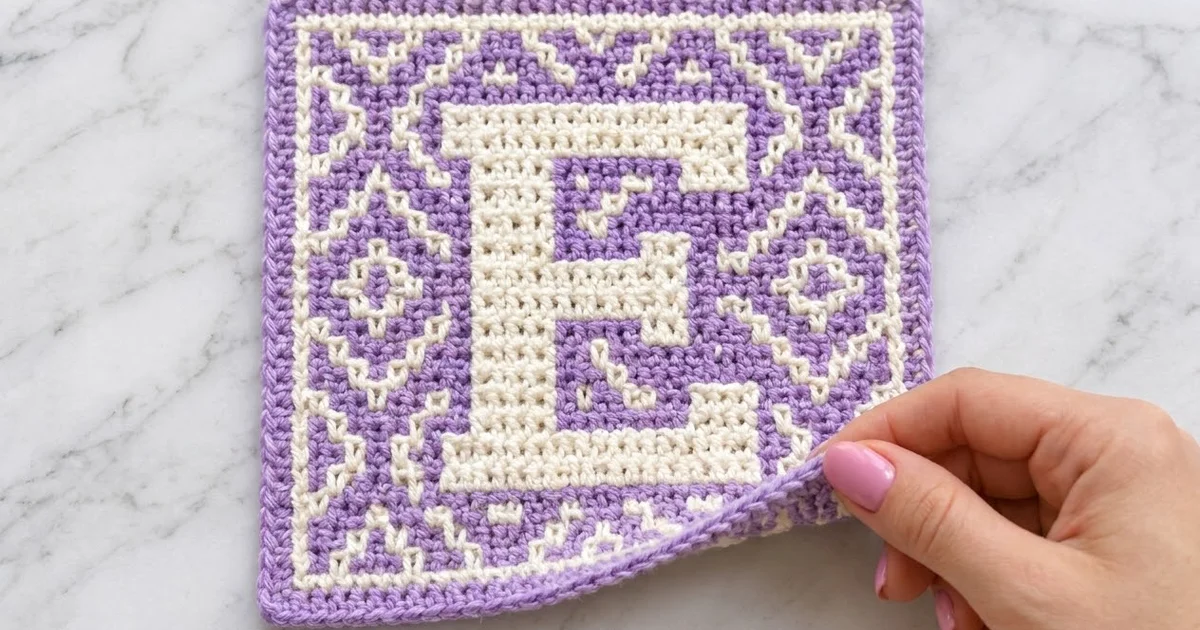
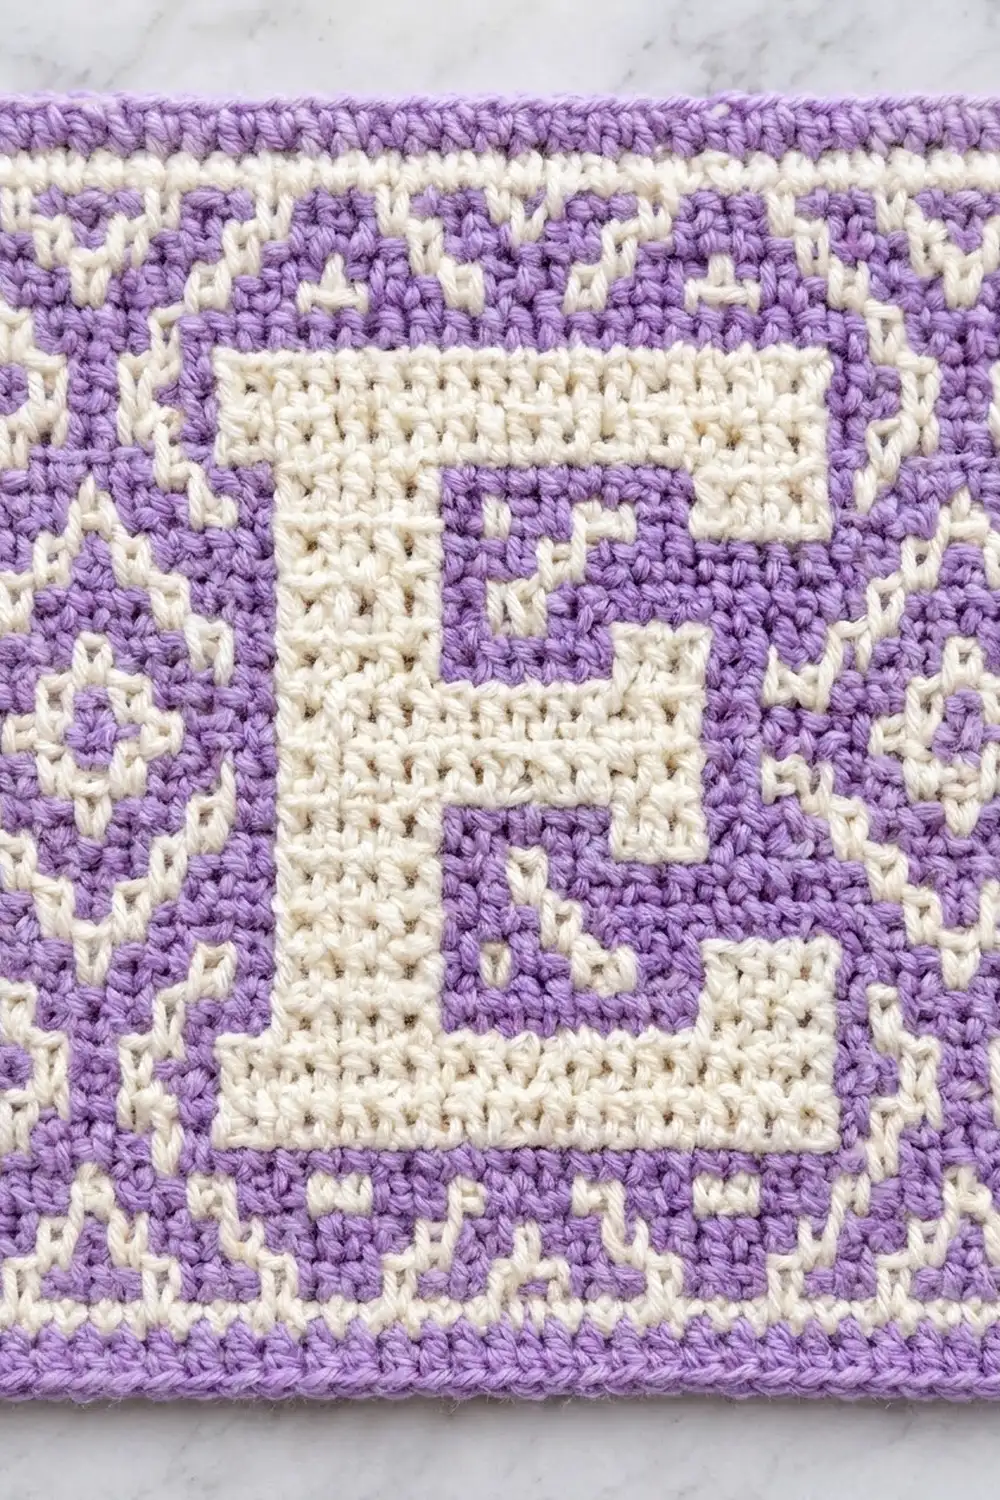
The Lilac Lattice Monogram E Square is a two-color crochet square with a bold cream capital “E” at its center. Lavender diamonds, small triangle bands and a slim cream frame line surround the letter, and a neat lavender border finishes the edge.
The colors are lavender and cream, and the fabric is dense. It works as a personalized coaster, a mug rug, a framed nursery initial or a small gift.
This pattern uses US crochet terms. The finished square measures 9 in × 9 in (22.9 cm × 22.9 cm) after blocking.
You work the square in tapestry single crochet, back and forth in rows, carrying the unused color inside the stitches. The colorwork panel is 41 stitches wide and 41 rows tall. Two rounds of lavender single crochet then frame the panel.
Finished Size and Construction
- Finished size: 9 in × 9 in (22.9 cm × 22.9 cm)
- Skill level: Intermediate
- Terminology: US crochet terms
- Yarn weight: DK (light worsted, #3), cotton or cotton blend
- Hook: 3.5 mm (E-4)
- Number of pieces: 1
- Layout: one single square; no joining
- Panel size: 41 sts × 41 rows = 8.2 in × 8.2 in (20.8 cm × 20.8 cm)
- Size before border: 8.2 in × 8.2 in (20.8 cm × 20.8 cm)
- Border depth: 2 rounds = 0.4 in (1.0 cm) per side
Materials
Choose a smooth, mercerized or matte DK cotton. Cotton shows the stitch pattern clearly and holds a flat shape. Avoid fuzzy or very splitty yarn, because the carried strand can show through it.
- Lavender (L): 45 g, about 100 m
- Cream (C): 35 g, about 80 m
These quantities include a margin of roughly 15 percent for swatching and weaving in ends.
Tools:
– 3.5 mm (E-4) crochet hook
– Tapestry needle
– Scissors
– 2 stitch markers
– Measuring tape
– Blocking mat and rust-proof pins
– Spray bottle
Abbreviations (US Terms)
- ch – chain
- sc – single crochet
- sl st – slip stitch
- st(s) – stitch(es)
- RS / WS – right side / wrong side
- Rnd – round
- C# – work # sc in cream
- L# – work # sc in lavender
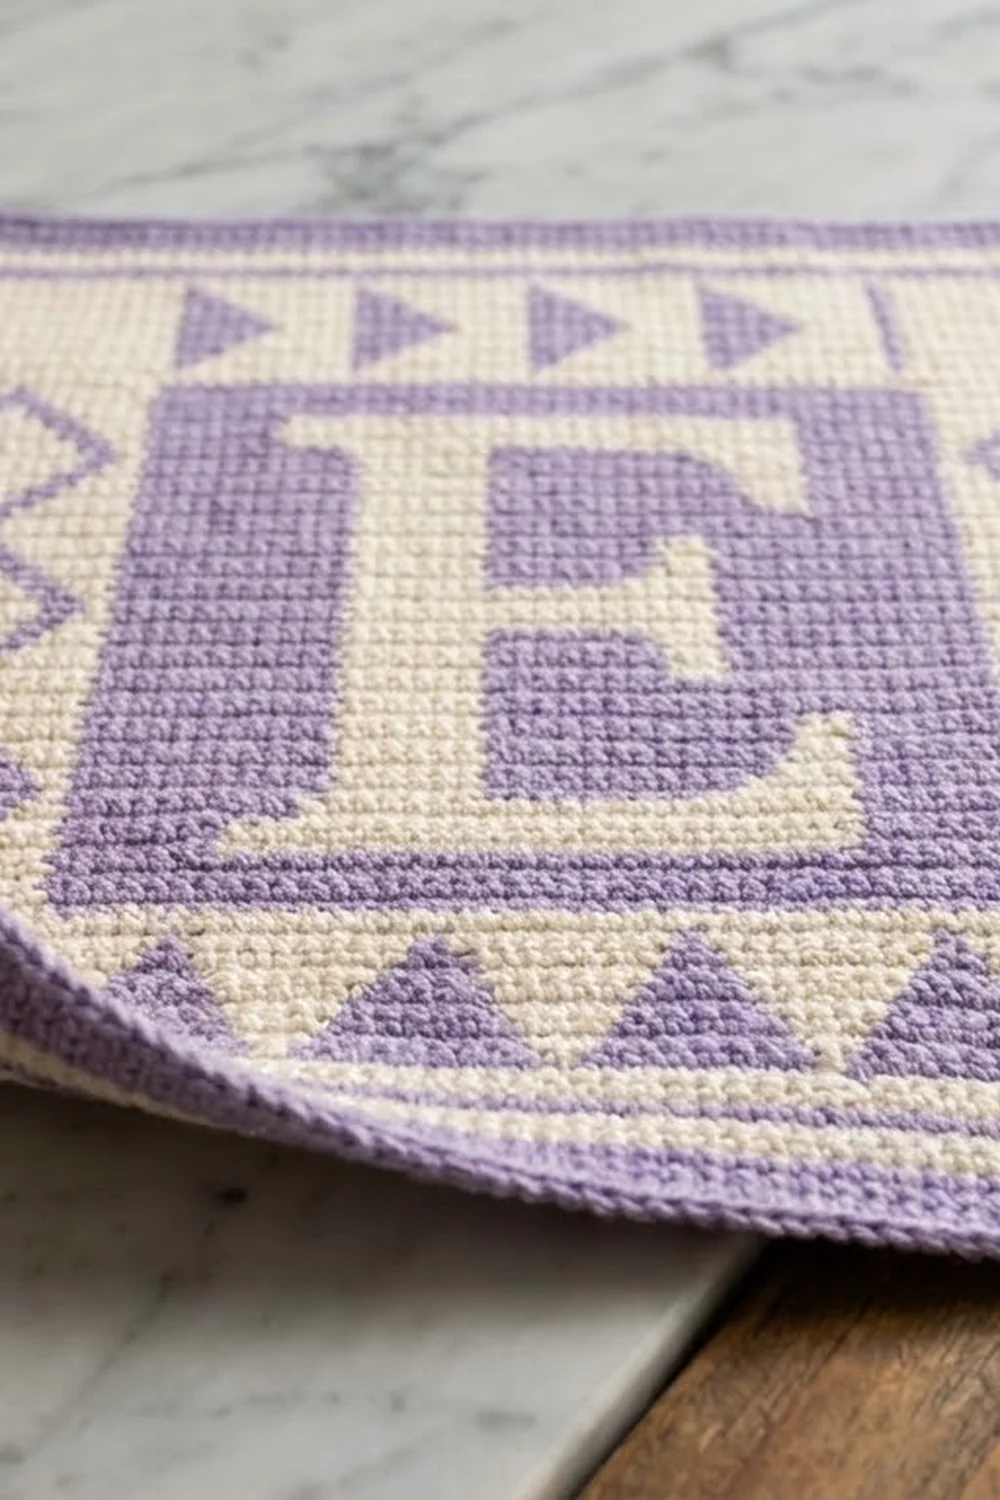
Special technique – tapestry sc color change: Work the last sc before the color change until 2 loops are on the hook. Yarn over with the new color and pull through. Lay the unused color along the top of the row and work over it, so it is hidden inside every stitch. Carry both colors across every row, including rows that use only one color, so the fabric thickness stays even.
Gauge and Checkpoints
Gauge: 20 sts and 20 rows = 4 in (10.2 cm) in tapestry sc, with both colors carried.
Before you start the square, make a test swatch. Ch 25, then work 24 sc for 24 rows, switching colors every 4 sts. Measure the central 4 in (10.2 cm) after a light steam.
Checkpoints:
– Row 1: 41 sts = 8.2 in (20.8 cm) wide
– After Row 7: 1.4 in (3.6 cm) tall
– After Row 21: 4.2 in (10.7 cm) tall, still 8.2 in (20.8 cm) wide
– After Row 41: 8.2 in × 8.2 in (20.8 cm × 20.8 cm)
– After Rnd 1: 8.6 in (21.8 cm)
– After Rnd 2: 9.0 in (22.9 cm)
If your gauge is off:
– Too many sts per 4 in (piece too small): go up 0.5 mm in hook size.
– Too few sts per 4 in (piece too big): go down 0.5 mm.
– Rows don’t match stitches: tapestry sc is usually close to square. If your rows run short, loosen your yarn-overs slightly instead of changing hooks.
Colorwork Panel
How to read the rows:
– Read each row from the start of the row, in the order you work it.
– RS rows are odd-numbered. WS rows are even-numbered.
– Ch 1 at the start of each row does not count as a stitch.
– Every row has 41 sts. The two numbers in brackets after each row are its lavender and cream totals.
– The design is symmetrical top to bottom, so Rows 22–41 repeat Rows 20–1 in reverse order.
With cream, ch 42.
Row 1 (RS): Sc in 2nd ch from hook and in each ch across, working over the lavender strand. Turn. C41. (41 sts) [L 0, C 41]
Row 2 (WS): Ch 1, C1, L39, C1. Turn. [L 39, C 2]
Row 3 (RS): Ch 1, C1, L7, C1, L7, C1, L7, C1, L7, C1, L7, C1. Turn. [L 35, C 6]
Row 4: Ch 1, C1, L6, C3, L5, C3, L5, C3, L5, C3, L6, C1. Turn. [L 27, C 14]
Row 5: Ch 1, C1, L1, C1, L3, C5, L3, C5, L3, C5, L3, C5, L3, C1, L1, C1. Turn. [L 17, C 24]
Row 6: Ch 1, C1, L1, C2, L1, C7, L1, C7, L1, C7, L1, C7, L1, C2, L1, C1. Turn. [L 7, C 34]
Rows 3–6 make the inward-pointing triangle band.
Row 7: Ch 1, C1, L1, C37, L1, C1. Turn. [L 2, C 39]
Checkpoint: 1.4 in (3.6 cm) tall.
Row 8: Ch 1, C1, L1, C4, L1, C4, L19, C4, L1, C4, L1, C1. Turn. [L 23, C 18]
Row 9: Ch 1, C1, L1, C3, L3, C3, L19, C3, L3, C3, L1, C1. Turn. [L 27, C 14]
Row 10: Ch 1, C1, L1, C2, L2, C1, L2, C2, L2, C15, L2, C2, L2, C1, L2, C2, L1, C1. Turn. [L 14, C 27]
The cream bottom arm of the “E” begins in Row 10.
Row 11: Ch 1, C1, L1, C1, L2, C3, L2, C1, L2, C15, L2, C1, L2, C3, L2, C1, L1, C1. Turn. [L 14, C 27]
Row 12: Ch 1, C1, L3, C2, L1, C2, L4, C15, L4, C2, L1, C2, L3, C1. Turn. [L 16, C 25]
Row 13: Work as Row 11.
Row 14: Work as Row 10.
Row 15: Ch 1, C1, L1, C3, L3, C3, L11, C6, L2, C3, L3, C3, L1, C1. Turn. [L 21, C 20]
Row 15 is the first row of the vertical bar alone. On RS rows the bar appears near the end of the row.
Row 16: Ch 1, C1, L1, C4, L1, C4, L2, C6, L11, C4, L1, C4, L1, C1. Turn. [L 17, C 24]
Row 17: Ch 1, C1, L1, C4, L1, C4, L11, C6, L2, C4, L1, C4, L1, C1. Turn. [L 17, C 24]
Row 18: Ch 1, C1, L1, C3, L3, C3, L2, C6, L11, C3, L3, C3, L1, C1. Turn. [L 21, C 20]
Row 19: Ch 1, C1, L1, C2, L2, C1, L2, C2, L4, C13, L2, C2, L2, C1, L2, C2, L1, C1. Turn. [L 16, C 25]
Row 20: Ch 1, C1, L1, C1, L2, C3, L2, C1, L2, C13, L4, C1, L2, C3, L2, C1, L1, C1. Turn. [L 16, C 25]
Row 21 (center row): Ch 1, C1, L3, C2, L1, C2, L6, C13, L4, C2, L1, C2, L3, C1. Turn. [L 18, C 23]
Checkpoint: 4.2 in (10.7 cm) tall. The middle arm of the “E” should sit exactly on this row.
Rows 22–41: Work Row (42 − row number). For example:
– Row 22 = Row 20
– Row 23 = Row 19
– Row 24 = Row 18
– Continue the same way to Row 41 = Row 1, worked as C41 over the carried lavender.
Each mirrored row keeps the same RS/WS direction as its source row, so the letter and diamonds line up exactly.
Fasten off both colors after Row 41.
Checkpoint: 8.2 in × 8.2 in (20.8 cm × 20.8 cm).
Border
Border gauge: 5 sc per inch (2.5 cm), the same as the panel. Work 1 sc into each stitch and 1 sc into each row-end. Corners are worked as 3 sc in one stitch, and the middle sc of each corner group is the corner center.
Rnd 1: With RS facing, join lavender in the first st of Row 41.
1. Ch 1, then work 3 sc in the same st (corner).
2. Sc in the next 39 sts, then 3 sc in the last st (corner).
3. Sc in the 39 row-ends of Rows 40–2.
4. Work 3 sc in the first free loop of the foundation chain (corner).
5. Sc in the next 39 free loops, then 3 sc in the last free loop (corner).
6. Sc in the 39 row-ends of Rows 2–40.
7. Sl st to the first sc.
Count: 43 sts per side, counting both corner centers. Total: (4 × 3 corner sts) + (4 × 39 side sts) = 168 sts.
Place a marker in each corner center.
Rnd 2:
1. Ch 1, sc in the first sc, then 3 sc in the next sc (corner center).
2. Sc in each of the next 41 sc, then 3 sc in the corner center. Repeat from * 2 more times.
3. Sc in each of the next 40 sc and sl st to the first sc.
Count: 45 sts per side, counting both corner centers. Total: 168 + (4 corners × 2) = 176 sts.
Fasten off.
Why the math works: The panel edge has 41 positions per side, 39 between the 2 corner stitches. Because gauge is square, one sc per stitch or row-end keeps the edge flat on all four sides. Each 3-sc corner adds exactly 2 sts per side per round, which matches the extra length each round needs to turn the corner. Two rounds add 0.4 in (1.0 cm) per side: 8.2 + 0.4 + 0.4 = 9.0 in (22.9 cm).
Final Blocking
- Weave in all ends on the WS, running each end through stitches of its own color.
- Soak the square in cool water for 10 minutes, then press out the water gently in a towel. Do not wring.
- Lay the square on the blocking mat RS up.
- Pin the four corners to a 9 in × 9 in (22.9 cm × 22.9 cm) square.
- Pin the middle of each side, then add pins every 1 in (2.5 cm), keeping the border straight.
- Check that the middle arm of the “E” is level, and that each column of diamonds is straight and runs parallel to the border.
- Let the square dry completely before unpinning.
Final Quality-Control Checklist
- The square measures 9 in × 9 in (22.9 cm × 22.9 cm), corner to corner along each side.
- The letter reads correctly from the RS, with the vertical bar on the left.
- Each side has three complete diamonds, each with a center dot.
- The triangle bands at the top and bottom match each other.
- A continuous cream frame line runs just inside the lavender border.
- Border Rnd 2 has 176 sts and its corners lie flat.
- No carried strands show on the RS.
- All ends are secure and invisible.
Troubleshooting
- Panel slants or leans: This is normal in tapestry sc. Blocking corrects most of it. Next time, keep your tension even and always insert the hook under both loops.
- Lavender shows through cream stitches: Hold the carried strand slightly to the back and keep it snug along the top of the row.
- Panel is narrower than it is tall: Your rows are too tall. Pull each loop up less before the final yarn-over.
- Border ruffles: You worked extra sts on the sides. Recount to 39 sts per side between corners in Rnd 1.
- Border cups: Your tension is too tight, or you skipped some row-ends. Rework Rnd 1 with a hook 0.5 mm larger.
- Diamonds misaligned: A row was probably read in the wrong direction. Check the RS/WS label of each row.
Care
Hand wash cool with mild soap, press flat in a towel and dry flat. Cotton can be steamed lightly from the WS to refresh the shape.
Final Notes
The measurement chain is simple:
– 20 sts and 20 rows per 4 in (10.2 cm) gives a panel of 41 sts × 41 rows = 8.2 in (20.8 cm).
– Two border rounds add 0.4 in (1.0 cm) per side, for a finished 9 in × 9 in (22.9 cm × 22.9 cm).
– If your counts are 41, then 168, then 176, and your checkpoints match, the square will block out flat and true.
Happy crocheting!