
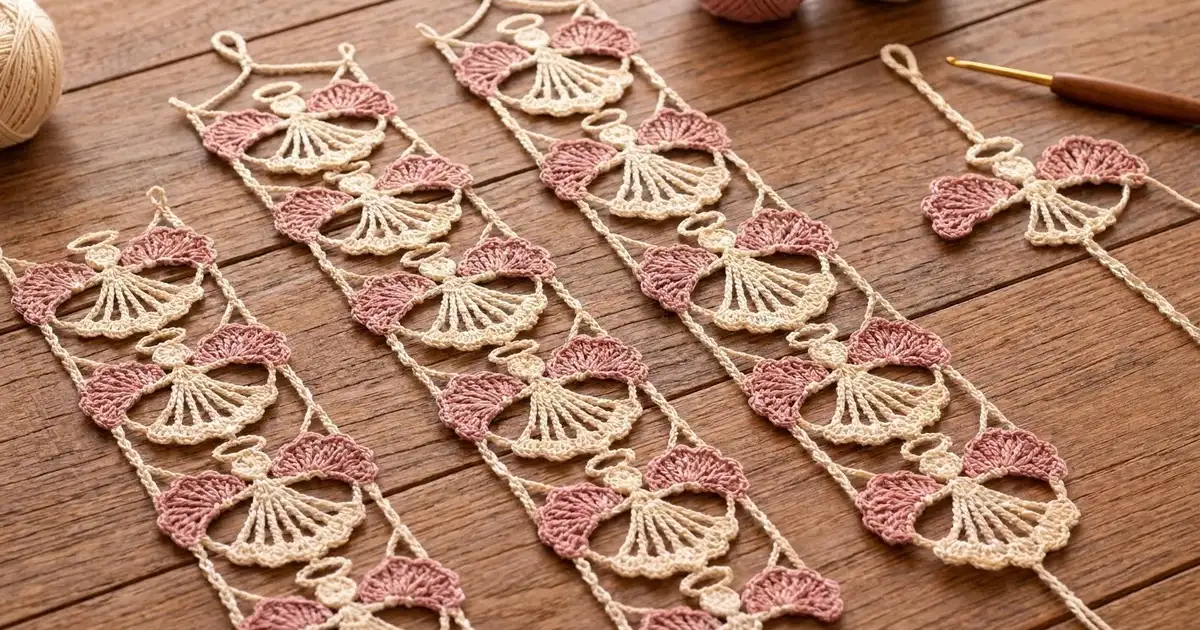
The Rosewing Angel Hanging Strip is a light, airy column of six lace angels framed by slim cream rails. Each angel has a small round head, an oval halo, dusty-rose shell wings, and a cream skirt of long open spokes that ends in a soft scalloped hem.
The palette is just two colors: warm cream and dusty rose. The look is vintage and romantic. The open lace lets light shine through when the strip hangs in a window, on a door, or as one panel of a larger curtain.
This pattern uses US crochet terms. The finished strip measures 4.25 in (10.8 cm) wide and 24 in (61.0 cm) along the rails. It is about 26 in (66.0 cm) overall, including the hanging loop and bottom tail.
You will make six separate angel motifs and link them center to center with short chain connectors. Then you work the rails as a border: a chain foundation that touches every wing tip and hem corner, covered with single crochet.
Finished Size and Construction
- Finished strip size: 4.25 in x 24 in (10.8 cm x 61.0 cm) along the rails; about 26 in (66.0 cm) overall
- Skill level: Intermediate
- Terminology: US crochet terms
- Yarn weight: DK (#3) cotton
- Hook: 3.5 mm (E-4)
- Number of pieces: 6 angel motifs
- Layout: 1 column x 6 angels
- Single angel size: 4 in (10.2 cm) wide x 3.5 in (8.9 cm) tall
- Size before border: 4 in x 23.5 in (10.2 cm x 59.7 cm)
- Border depth: about 0.125 in (0.3 cm) per side
Materials
Choose a smooth, mercerized DK cotton. It shows the stitches clearly, blocks crisply, and keeps the spokes straight. Avoid fuzzy or very stretchy yarns, because they blur the lace.
- Color A, Cream: 25 g, about 58 m
- Color B, Dusty Rose: 15 g, about 35 m
These quantities include a generous margin for gauge swatching and weaving in ends.
Tools
- 3.5 mm (E-4) crochet hook
- Tapestry needle
- Scissors
- Rust-proof pins and a blocking board
- Spray bottle
- Ruler or tape measure
Abbreviations (US Terms)
- ch – chain
- sl st – slip stitch
- sc – single crochet
- dc – double crochet
- tr – treble crochet
- dtr – double treble crochet (yarn over 3 times, insert hook, pull up a loop, [yarn over, pull through 2 loops] 4 times)
- sp(s) – space(s)
- st(s) – stitch(es)
Special stitch – Shell: 5 dc worked in the same stitch.
Gauge and Checkpoints
Make one complete angel before starting the others. Lace is forgiving, but across six motifs plus rails, any size difference adds up.
- Chain gauge: 6 ch = 1 in (2.5 cm), relaxed and unstretched.
- Head checkpoint: after the head round, the circle measures 0.75 in (1.9 cm) across.
- Skirt checkpoint: a single dtr spoke measures about 1.1 in (2.8 cm).
- Finished angel checkpoint: after pinning, the angel measures 4 in (10.2 cm) from wing tip to wing tip and 3.5 in (8.9 cm) from halo top to hem center.
If your angel is too big, go down a half hook size. If it is too small, go up a half hook size. Check the chain gauge too, because the rails depend on it: 24 ch should measure 4 in (10.2 cm).
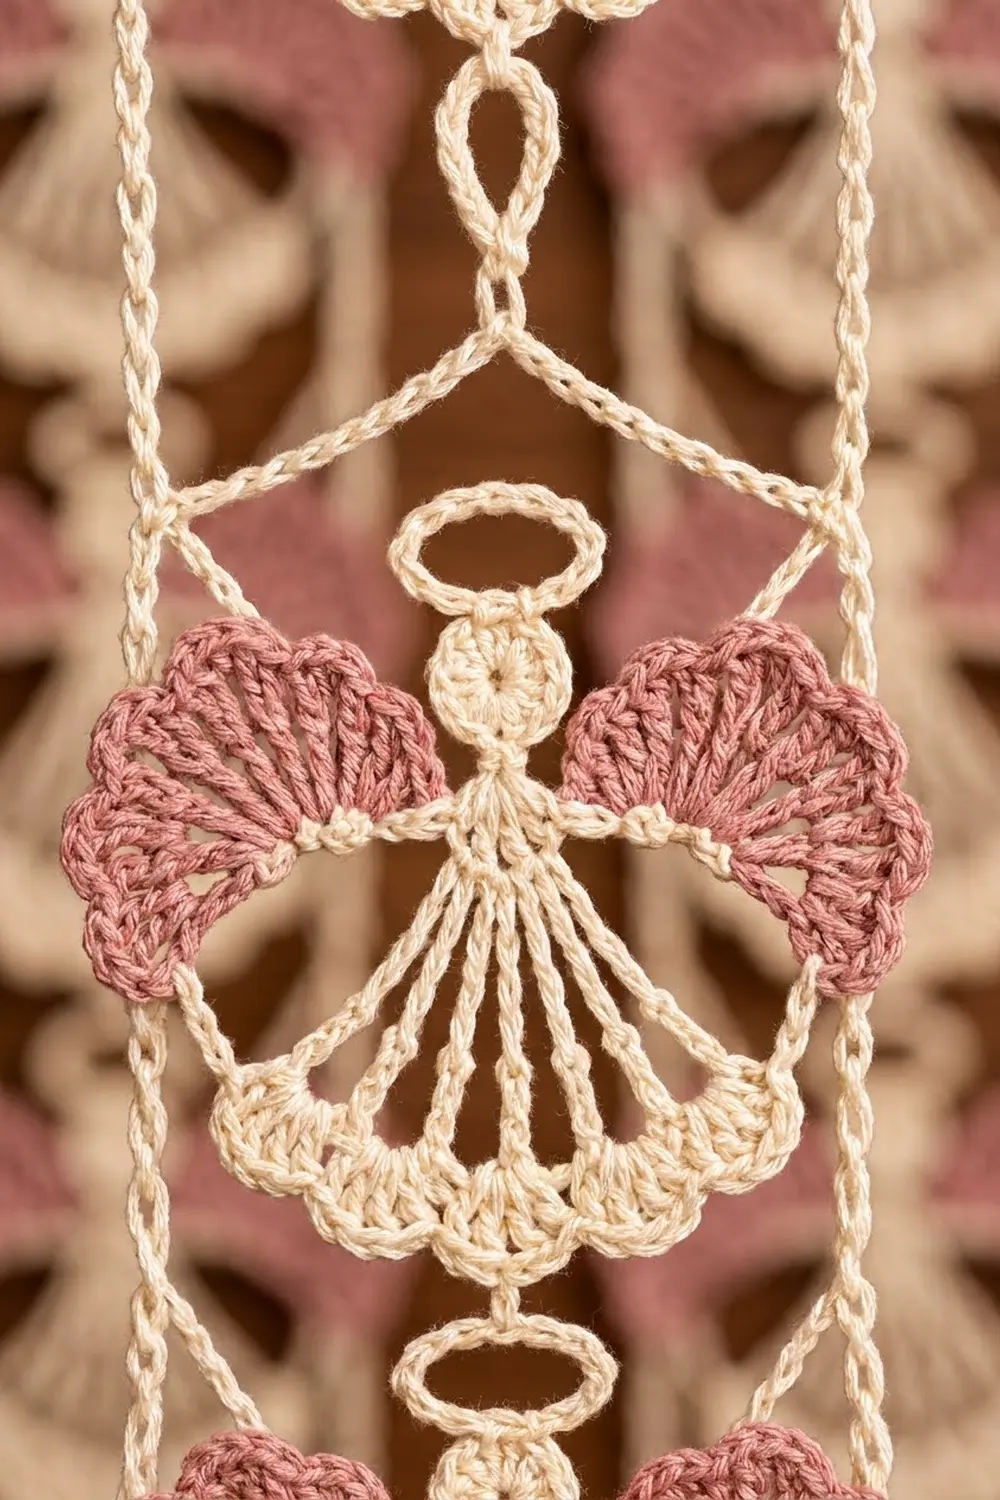
Angel Motif (Make 6)
Head and Halo
With Color A, make a magic ring.
Rnd 1: Ch 3 (counts as dc), 11 dc in ring, sl st to top of beginning ch-3. Pull the ring closed. (12 dc)
Number the stitches clockwise: st 1 is the beginning ch-3 at the top, st 4 is the right side, st 7 is the bottom, and st 10 is the left side.
Halo: From st 1, ch 2 for the stem. Ch 14 and sl st in the 14th ch from hook to form a ring. Work 20 sc into the ring, sl st to the first sc. (20 sc) Sl st in each of the 2 stem ch, then sl st in st 1 of the head.
The halo sits as a flattened oval about 1 in (2.5 cm) wide above the head. Mark the sc directly opposite the stem. This is the halo top center, which you will use for joining.
Skirt
Setup: Sl st in each of the next 6 dc to arrive at st 7.
Row 1: Ch 5 (counts as dtr), [ch 2, dtr in st 7] 6 times. Turn. (7 dtr, 6 ch-2 sps)
The spokes fan out from one point to form the open skirt.
Row 2: Ch 1, 2 sc in first dtr, [2 sc in next ch-2 sp, sc in next dtr] 5 times, 2 sc in last ch-2 sp, 2 sc in last dtr (top of turning ch). Turn. (21 sc)
Row 3: Ch 1, sc in first sc, *skip 1 sc, shell in next sc, skip 1 sc, sc in next sc; repeat from * 4 more times. (5 shells, 6 sc; 31 sts) Fasten off.
The 5 shells form the scalloped hem. The outer dc of the first shell and the outer dc of the last shell are the hem corners. The 3rd dc of shell 3 is the hem center.
Wings (Make 2 per Angel)
Row 1: Join Color B with a sl st in st 4 of the head. Ch 5 (counts as tr and ch 1), [tr, ch 1] 5 times in same st, tr in same st. Turn. (7 tr, 6 ch-1 sps)
Row 2: Ch 3 (counts as dc), dc in same tr, [3 dc in next ch-1 sp] 6 times, dc in top of turning ch. Turn. (21 dc)
Row 3: Ch 1, sc in first dc, *skip 1 dc, shell in next dc, skip 1 dc, sc in next dc; repeat from * 4 more times. (5 shells, 6 sc; 31 sts) Fasten off.
Repeat in st 10 for the second wing. The 3rd dc of shell 3 is the wing tip, the wing’s outermost point.
Side Arches
Join Color A with a sl st in the end sc of the wing nearest the skirt. Ch 9, sl st in the nearest hem corner. Fasten off. Repeat on the other side.
These cream arches give each angel its curved outline between wing and skirt.
Pin the first angel now and confirm it measures 4 in x 3.5 in (10.2 cm x 8.9 cm) before you make the rest.
Make All Pieces
- Angels: 6
- Color A per angel: about 2 g (head, halo, skirt, arches)
- Color B per angel: about 1.5 g (both wings)
Weave in all ends on each angel before joining, and pin each one to size.
Layout grid (one column, top to bottom):
[ Angel 1 ]
     |
[ Angel 2 ]
     |
[ Angel 3 ]
     |
[ Angel 4 ]
     |
[ Angel 5 ]
     |
[ Angel 6 ]
     |
   tail
Joining
The angels are joined center to center with one short chain connector per seam. Six angels need 5 connectors.
Connector: Join Color A with a sl st in the hem center (3rd dc of shell 3) of Angel 1. Ch 3, sl st in the halo top center sc of Angel 2. Fasten off. Repeat between Angels 2 and 3, 3 and 4, 4 and 5, and 5 and 6.
Stitch-to-stitch logic: Each connector runs from exactly one hem stitch to exactly one halo stitch, so both angels stay centered on the same line. Each connector adds 0.5 in (1.3 cm) between angels. One angel unit, from halo top to the next halo top, is 3.5 in + 0.5 in = 4 in (10.2 cm).
Bottom tail: Join Color A in the hem center of Angel 6, ch 6, then sl st back along the 6 ch. Fasten off.
Tension: Keep the 3 connector ch relaxed and even. Tight connectors pull the angels together and shorten the strip. Loose ones let the angels sag.
Size checkpoint: Lay the column flat. From the top of Angel 1’s halo to Angel 6’s hem center, it should measure 5 x 4 in + 3.5 in = 23.5 in (59.7 cm). It should be 4 in (10.2 cm) wide at the wings.
Border (Rails)
Border gauge: 24 ch = 4 in (10.2 cm). Working 1 sc per ch keeps the same length.
Each angel contributes 24 ch per side: 10 ch from a top corner or hem corner to the next wing tip, plus 14 ch from that wing tip down to the hem corner. With 6 angels along each side, each rail starts with 6 x 24 = 144 ch. The sl sts that attach the rail to the angels are not counted as chains.
Rnd 1: Chain Foundation
Work this as one continuous path with Color A.
Left side (worked upward): Join with a sl st in the left hem corner of Angel 6. *Ch 14, sl st in the left wing tip of the same angel, ch 10, sl st in the left hem corner of the angel above; repeat from * 4 more times, ending at Angel 1’s left hem corner. Ch 14, sl st in Angel 1’s left wing tip, then ch 10 for the top-left corner. (6 x 14 + 6 x 10 = 144 ch)
Top bar: Ch 12. Ch 3, sl st in the halo top center of Angel 1, then sl st in each of the 3 ch just made. This 3-ch drop is not counted. Ch 12. (24 ch across the top)
Right side (worked downward): From the top-right corner, *ch 10, sl st in the right wing tip of the next angel, ch 14, sl st in the right hem corner of the same angel; repeat from * 5 more times, ending at Angel 6. (6 x 10 + 6 x 14 = 144 ch) Fasten off.
Rnd 2: Single Crochet Cover
Join Color A in the first ch above Angel 6’s left hem corner.
Left side: Sc in each ch up to the top-left corner, skipping over the joining sl sts. (144 sc)
Corner: Ch 1.
Top bar: Sc in each of the next 12 ch, ch 12 for the hanging loop, sc in each of the next 12 ch. (24 sc plus loop)
Corner: Ch 1.
Right side: Sc in each ch down to Angel 6’s right hem corner. (144 sc) Fasten off.
Total: 144 + 24 + 144 = 312 sc, plus 2 corner ch-1 and the ch-12 loop.
Why the math works: Each rail starts with 6 angels x 24 ch per angel = 144 ch. At 6 ch per inch, 144 ch = 24 in (61.0 cm). That matches the 23.5 in (59.7 cm) column plus the top bar, which sits about 0.4 in (1.0 cm) above the first halo. The top bar has 24 ch = 4 in (10.2 cm), the same as the wingspan, so the rails hang straight instead of flaring. Working 1 sc per ch keeps the rail length unchanged. The ch-1 at each top corner turns the corner without pulling.
Final Blocking
- Weave in all remaining ends along the rails or inside the shells.
- Spray the strip until it is evenly damp, but not dripping.
- Lay it flat and pin the top bar straight at 4.25 in (10.8 cm) wide.
- Pin both rails straight and parallel, 24 in (61.0 cm) long.
- Pin each wing tip to the rail and open every wing shell into a round scallop.
- Pull each skirt spoke straight and pin the hem shells into even scallops.
- Shape the halos into flat ovals.
- Leave the strip pinned until it is completely dry.
Final Quality-Control Checklist
- Each angel has a 12-dc head, a 20-sc halo, 7 skirt spokes, and 5 hem shells.
- Each wing has 7 tr spokes and 5 edge shells.
- Both side arches are present on every angel.
- There are 5 connectors and one bottom tail.
- Each rail has 144 sc, and the top bar has 24 sc with a centered loop.
- The strip measures 4.25 in x 24 in (10.8 cm x 61.0 cm) along the rails.
- No ends show on the front.
Troubleshooting
Skirt cups instead of lying flat: The dtr spokes are too short. Loosen your yarn-overs or go up a half hook size.
Hem ruffles too much: Work Row 2 more firmly, or use 4-dc shells instead of 5 in Row 3.
Wings curl upward: Block them harder, pinning each shell flat.
Rails pull the angels inward: The chain is too tight. Rework that rail segment, using a larger hook for the chains only.
Strip twists when hung: Block it again, and make sure both rails have exactly 144 sc.
Halo flops forward: Shorten the stem to ch 1, or tack the halo lightly to the head.
Care
Hand wash in cool water with mild soap, press the water out in a towel, and dry flat, pinned to shape. Do not wring it, tumble dry it, or hang the strip while it is wet.
Final Notes
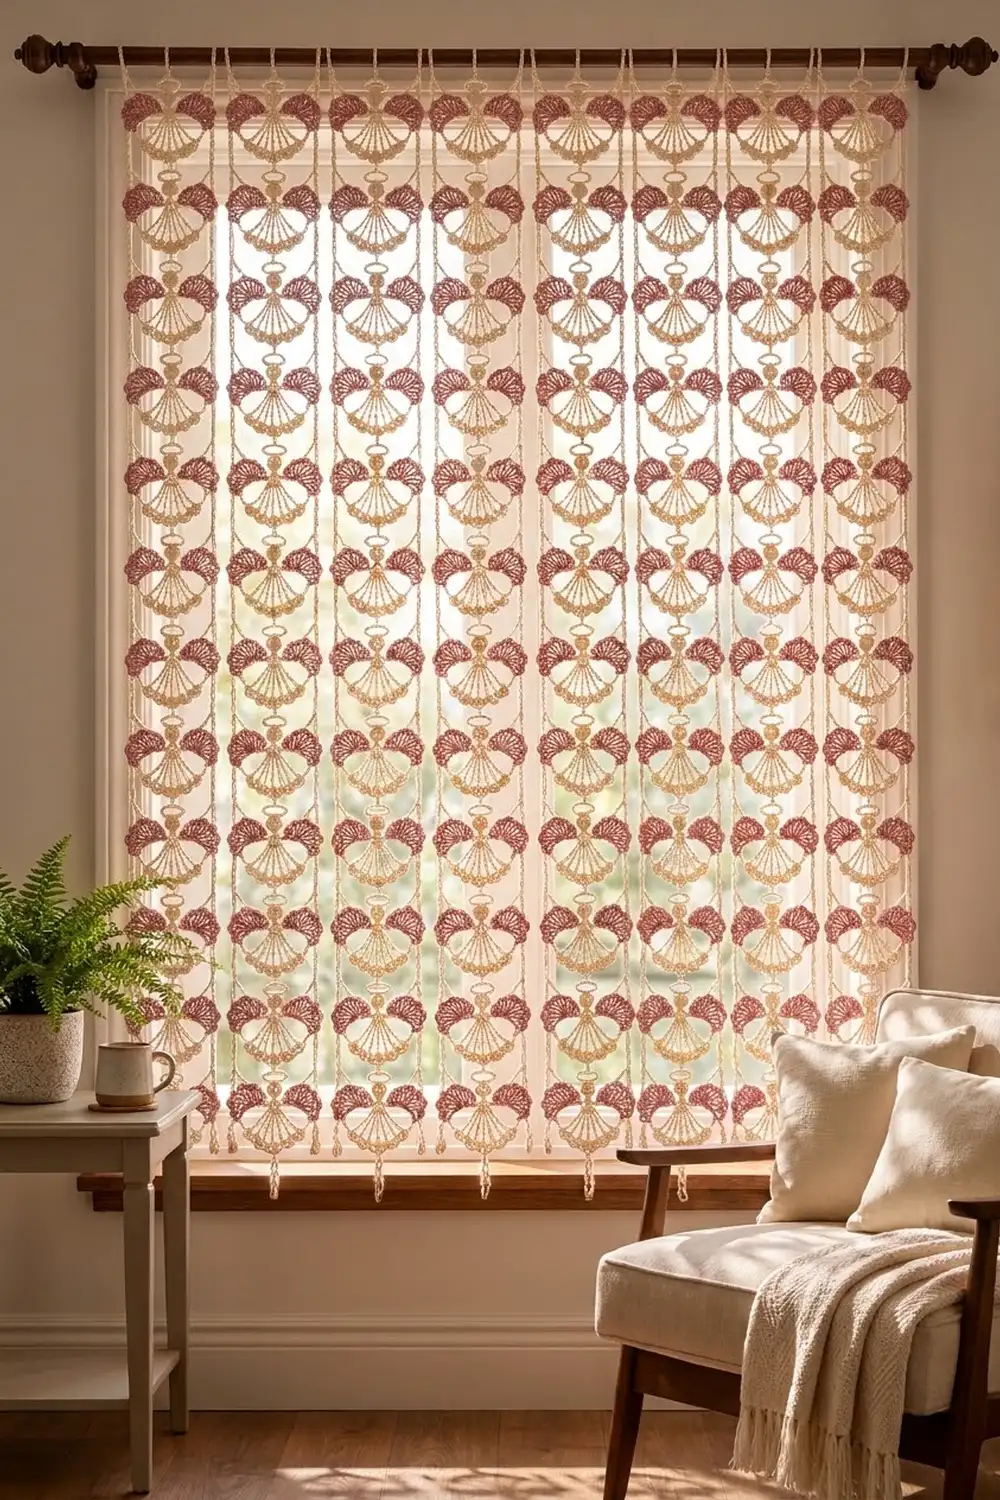
The measurement chain is simple. A 0.75 in (1.9 cm) head leads to a 4 in x 3.5 in (10.2 cm x 8.9 cm) angel. Six angels with 0.5 in (1.3 cm) connectors make a 23.5 in (59.7 cm) column. Rails of 144 sc per side bring the finished strip to 4.25 in x 24 in (10.8 cm x 61.0 cm). For a full curtain like the one in the photo, make as many identical strips as your rod needs and hang them side by side.
Happy crocheting!