
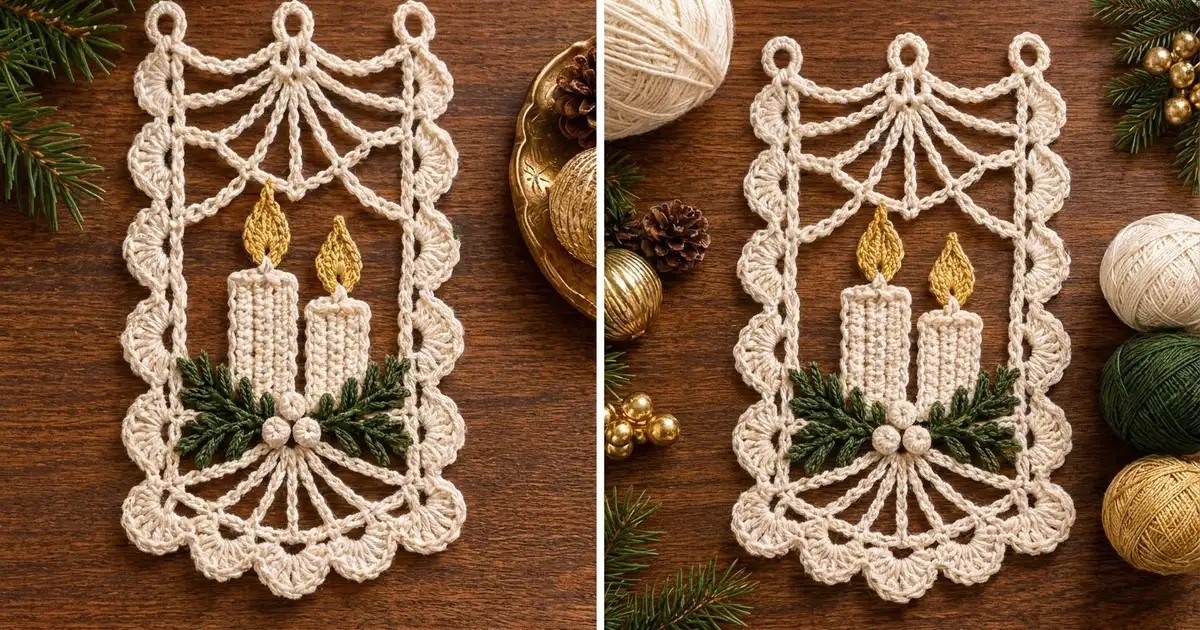
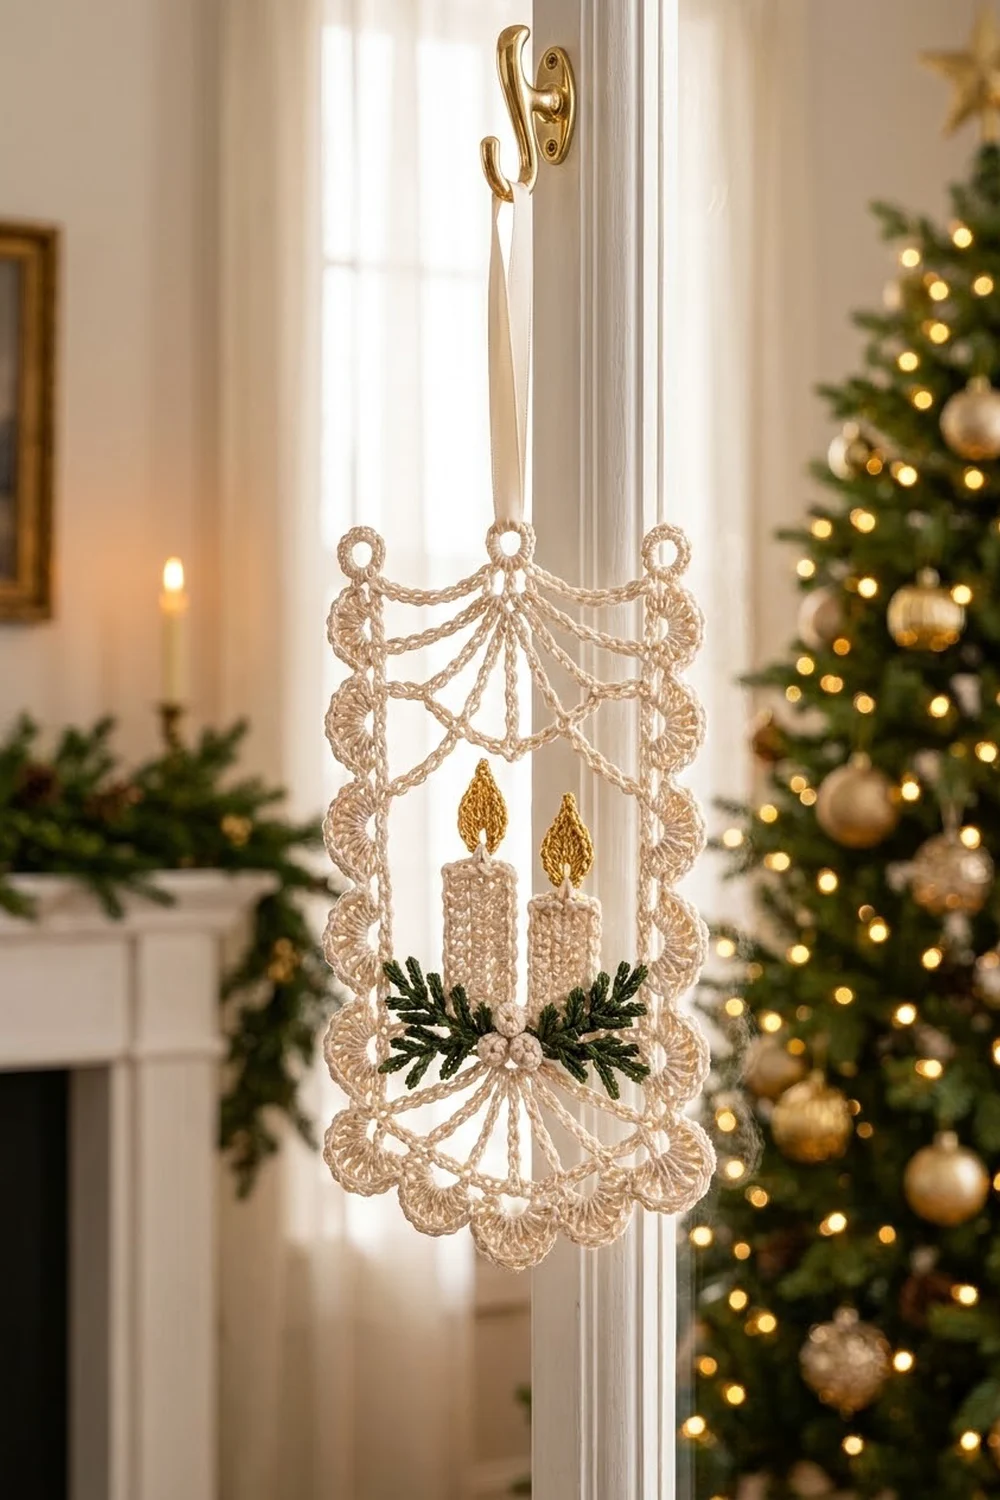
This little hanging panel pairs open lace swags with two ribbed cream candles, gold flames and a spray of green pine. It’s a quiet, old-fashioned Christmas design that looks lovely on a door, in a window or on a cabinet knob.
The palette is mostly cream, with gold for the two flames and deep green for the pine. The lace background stays airy, so the candles stand out as the clear focal point. Three tiers of chain swags sit under the straight top bar, and three mirrored tiers of arches fan out below the berries.
The pattern uses US crochet terms. The finished panel measures 6 in (15.2 cm) wide by 9 in (22.9 cm) tall, including the scalloped border and hanging rings.
You’ll work the lace panel in 17 rows from the top down, add a two-row shell border along the sides and bottom, and then work three rings into the top edge. Last, you’ll make the small appliqués (candles, flames, pine sprigs and berries) and sew them onto the mesh.
Finished Size and Construction
- Finished size: 6 in x 9 in (15.2 cm x 22.9 cm), including rings
- Skill level: Intermediate
- Terminology: US
- Yarn weight: Fingering / Super Fine (#1) mercerized cotton
- Hook: 2.75 mm (US C-2)
- Number of pieces: 1 lace panel plus 11 sewn-on appliqués (2 candles, 2 flames, 4 sprigs, 3 berries)
- Layout: one single vertical panel, with nothing to join
- Panel size before border: 5 in x 8 in (12.7 cm x 20.3 cm)
- Border depth: 0.5 in (1.3 cm) on the sides and bottom
- Rings: 0.5 in (1.3 cm) above the top bar
Materials
Use a smooth mercerized cotton. It gives crisp stitch definition, holds the swags in shape after blocking and won’t fuzz near warm decorations. Stick with one yarn line for all three colors so the stitch heights match.
- Cream: 35 g / 120 m (panel, border, rings, candles, berries)
- Gold: 3 g / 10 m (flames)
- Dark green: 6 g / 20 m (pine sprigs)
Tools:
- 2.75 mm (US C-2) crochet hook
- Tapestry needle
- Rust-proof pins and a blocking mat
- Spray bottle
- Small scissors
- Measuring tape
All quantities include a margin of about 20 percent for gauge swatching and sewing tails.
Abbreviations (US Terms)
- ch = chain
- sl st = slip stitch
- sc = single crochet
- hdc = half double crochet
- dc = double crochet
- tr = treble crochet
- sk = skip
- BLO = back loop only
- sc2tog = single crochet 2 together
- st(s) = stitch(es)
Special stitch: Shell. Work 5 dc in the same stitch.
Corner shell: Work 7 dc in the same stitch.
Half shell: Work 3 dc in the same stitch. At the start of a row, ch 3 counts as the first of these dc.
Gauge and Checkpoints
- Panel gauge: Row 1 (41 dc) measures 5 in (12.7 cm) wide. Two tr rows measure 1 in (2.5 cm) tall.
- Appliqué gauge: 8 sc and 8 BLO sc rows = 1 in (2.5 cm).
Since this is a single panel, it doubles as its own test piece. Work Rows 1–5 and then stop to measure.
Checkpoints:
- After Row 1: 5 in (12.7 cm) wide.
- After Row 5: about 2.25 in (5.7 cm) tall.
- After Row 9: about 4.25 in (10.8 cm) tall.
- After Row 13: about 6.25 in (15.9 cm) tall.
- After Row 17: 8 in (20.3 cm) tall, before blocking stretch is added.
If Row 1 is wider than 5 in (12.7 cm), go down 0.25 mm in hook size. If it’s narrower, go up 0.25 mm. If the width is right but the rows run short, loosen up on the tr stitches rather than changing hooks.
Lace Panel
Use cream. The panel is worked from the top edge down, and the foundation chain becomes the top bar.
Row structure note: “A rows” have 9 full loops. “B rows” have 8 full loops plus a ch-3 half loop at each end. Each side column is always 3 tr (or 3 dc in the bars).
Row 1 (top bar): Ch 43. Dc in the 4th ch from hook (the skipped 3 ch count as the first dc) and in each ch across. Turn. (41 dc)
Row 2 (swag tier 1, A row): Ch 4 (counts as tr), tr in the next 2 dc, [ch 6, sk 3 dc, sc in next dc] 8 times, ch 6, sk 3 dc, tr in the last 3 dc. Turn.
(6 tr, 8 sc, 9 ch-6 loops. Stitches used: 3 + 32 + 3 + 3 = 41.)
Row 3 (swag tier 2, B row): Ch 4, tr in the next 2 tr, ch 3, sc in the first ch-6 loop, [ch 8, sc in next ch-6 loop] 8 times, ch 3, tr in the last 3 tr. Turn.
(6 tr, 9 sc, 8 ch-8 loops, 2 ch-3 half loops)
Row 4 (swag tier 3, A row): Ch 4, tr in the next 2 tr, skip the ch-3 half loop, [ch 10, sc in next ch-8 loop] 8 times, ch 10, tr in the last 3 tr. Turn.
(6 tr, 8 sc, 9 ch-10 loops)
The longer loops cover the same width as the shorter ones, so they droop into the layered swags.
Row 5 (B row): Ch 4, tr in the next 2 tr, ch 3, sc in the first ch-10 loop, [ch 6, sc in next ch-10 loop] 8 times, ch 3, tr in the last 3 tr. Turn.
(6 tr, 9 sc, 8 ch-6 loops, 2 ch-3 half loops)
Row 6 (A row): Ch 4, tr in the next 2 tr, [ch 6, sc in next ch-6 loop] 8 times, ch 6, tr in the last 3 tr. Turn.
(6 tr, 8 sc, 9 ch-6 loops)
Row 7 (B row): Ch 4, tr in the next 2 tr, ch 3, sc in the first ch-6 loop, [ch 6, sc in next ch-6 loop] 8 times, ch 3, tr in the last 3 tr. Turn.
(6 tr, 9 sc, 8 ch-6 loops, 2 ch-3 half loops)
Rows 8–13: Repeat Rows 6 and 7 three more times. Row 13 is a B row.
This is the open center mesh where the candles will sit.
Row 14 (arch tier 1, A row): Ch 4, tr in the next 2 tr, [ch 10, sc in next ch-6 loop] 8 times, ch 10, tr in the last 3 tr. Turn.
(6 tr, 8 sc, 9 ch-10 loops)
Row 15 (arch tier 2, B row): Ch 4, tr in the next 2 tr, ch 3, sc in the first ch-10 loop, [ch 8, sc in next ch-10 loop] 8 times, ch 3, tr in the last 3 tr. Turn.
(6 tr, 9 sc, 8 ch-8 loops, 2 ch-3 half loops)
Row 16 (arch tier 3, A row): Ch 4, tr in the next 2 tr, [ch 6, sc in next ch-8 loop] 8 times, ch 6, tr in the last 3 tr. Turn.
(6 tr, 8 sc, 9 ch-6 loops)
Row 17 (bottom bar, conversion row): Ch 3 (counts as dc), dc in the next 2 tr, [3 dc in next ch-6 loop, dc in next sc] 8 times, 3 dc in the last ch-6 loop, dc in the last 3 tr. Do not fasten off.
(41 dc = 3 side dc + 8 x 4 dc + 3 dc + 3 side dc. This matches the top bar exactly.)
Rows 14–16 mirror Rows 2–4, so the bottom arches fan out below the area where the berries will go.
Border
The border runs down the left side, across the bottom and up the right side. The top bar stays plain.
Border gauge:
- Sides: 3 sc per tr row-end, or about 6 sc per inch (2.5 cm).
- Bottom: 1 sc per dc, or about 8 sc per inch (2.5 cm).
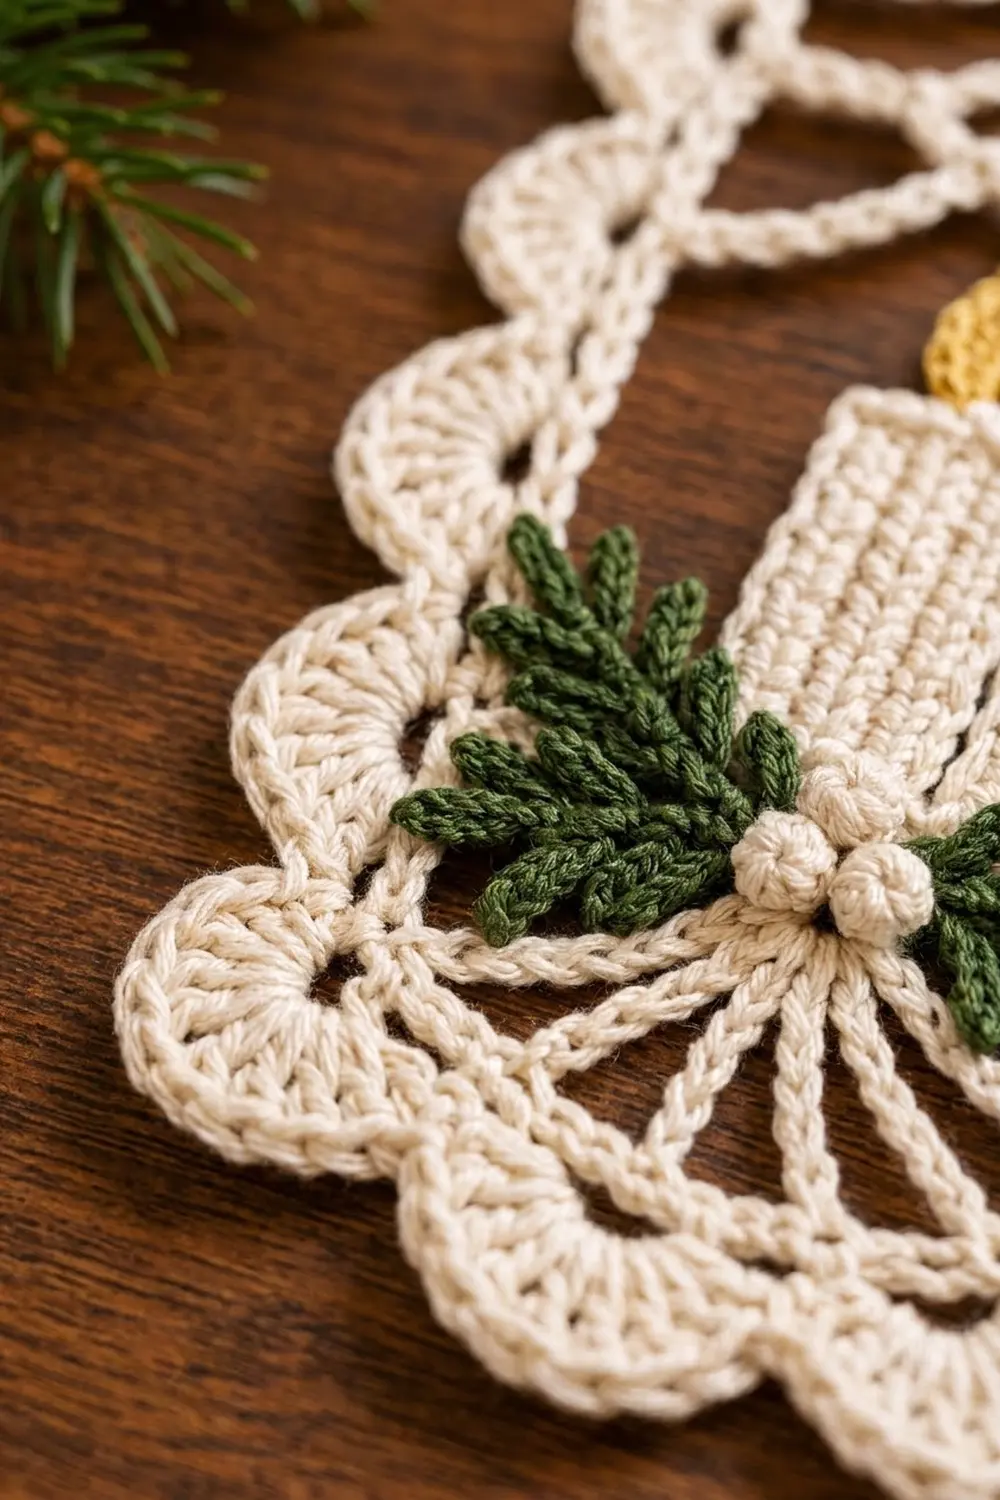
- One 6-stitch shell repeat covers about 1 in (2.5 cm) on the sides and about 0.75 in (1.9 cm) on the bottom.
Border Row 1 (sc foundation): With the last loop of Row 17 still on your hook, turn the work to put the left edge on top. Ch 1. Then work the counts below, with the stitches spread evenly along each edge:
- Left side: Starting at the bottom-left corner, sc in each row-end up the left edge (3 per tr row-end of Rows 16–2), then 2 sc in the Row 1 row-end.
Rotate the work so you go back down the other way instead. Here is the clearer version, which is the counting order this pattern uses:
- Fasten off the panel yarn.
- Join cream at the top-left corner (the Row 1 row-end). Ch 1, then work 2 sc in that row-end.
- Work 3 sc in each tr row-end of Rows 2–16 (45 sc).
- Work 3 sc in the first dc of Row 17. The middle one of these is the corner st.
- Sc in each of the next 39 dc.
- Work 3 sc in the last dc of Row 17 (middle one = corner st).
- Work 3 sc in each tr row-end of Rows 16–2 (45 sc).
- Work 2 sc in the Row 1 row-end.
- Turn.
Counts per side, including the shared corner stitches:
- Left side: 2 + 45 + 1 + corner = 49
- Bottom: corner + 1 + 39 + 1 + corner = 43
- Right side: corner + 1 + 45 + 2 = 49
- Row total: 49 + 43 + 49 − 2 shared corners = 139 sc
Border Row 2 (shells):
- Ch 3 (counts as dc), 2 dc in the first sc (half shell).
- Sk 2, sc in next, sk 2, shell in next. Repeat from * to * until 1 st remains before the corner.
- Sk 2 is already built into the repeat, so you land exactly on the corner st: work a corner shell there.
- Continue across the bottom: [sk 2, sc in next, sk 2, shell in next], working a corner shell in the second corner st.
- Continue up the right side in pattern, ending with sk 2, sc in next, sk 2, 3 dc in the last sc (half shell).
- Fasten off.
Per side:
- Each side: 7 shells, 8 sc, 1 corner shell, 1 half shell
- Bottom: 6 shells and 7 sc between the 2 corner shells
- Row total: 6 (half shells) + 14 (corners) + 100 (20 shells) + 23 sc = 143 sts
Why the math works: Each shell repeat uses 6 stitches. Every side count is a multiple of 6 plus 1 (49 = 6 x 8 + 1, and 43 = 6 x 7 + 1). That means each side starts and ends on a shell position, so the corners land exactly on corner shells and the top ends land on half shells.
Hanging rings (make 3):
- Join cream in the foundation chain at st 1 of Row 1. Ch 8, sl st in the same st to form a loop.
- Work 12 sc into the loop and sl st to the first sc. Fasten off.
- Repeat at st 21 (the center) and st 41.
Appliqués
Use the same hook for every appliqué. Leave a 10 in (25.4 cm) tail on each piece for sewing.
Tall candle (cream):
- Ch 23.
- Row 1: Sc in the 2nd ch from hook and in each ch across. Turn. (22 sc)
- Rows 2–10: Ch 1, sc BLO in each st. Turn. (22 sc)
- Fasten off.
The candle is 2.75 in (7.0 cm) tall and 1.25 in (3.2 cm) wide. The rows run vertically on the candle, so the BLO ridges make the vertical ribs.
Short candle (cream):
- Ch 17.
- Row 1: Sc in the 2nd ch from hook and in each ch across. (16 sc)
- Rows 2–8: Ch 1, sc BLO in each st. Turn. (16 sc)
The candle is 2 in (5.1 cm) tall and 1 in (2.5 cm) wide.
Flame (gold, make 2):
- Ch 7.
- Sl st in the 2nd ch from hook, then sc, hdc, dc and hdc in the next 4 ch, then 3 sc in the last ch.
- Working along the other side of the chain: hdc, dc, hdc, sc, sl st.
- Ch 2 and sl st into the first sl st to make a pointed tip. (13 sts plus tip)
The flame is about 0.75 in (1.9 cm) long, with a teardrop shape: rounded at the base and pointed at the tip.
Pine sprig (green, make 4):
- Ch 17.
- Sl st in the 2nd ch from hook for the tip.
- Ch 4, sl st in the 2nd, 3rd and 4th ch from hook (one needle), then sl st in the next 2 stem ch. Repeat from * 6 more times (7 needles, with 1 stem ch left).
- Sl st in the last stem ch.
- Rotate and work up the other side of the stem the same way (7 needles).
- Fasten off.
Each sprig has 14 needles and is 2 in (5.1 cm) long.
Berry (cream, make 3):
- Rnd 1: 6 sc in a magic ring. (6)
- Rnd 2: 2 sc in each st. (12)
- Rnd 3: Sc in each st. (12)
- Rnd 4: Sc2tog 6 times. (6)
- Stuff the berry with its own tail, gather the opening closed and fasten off.
Each berry is 0.5 in (1.3 cm) across.
Assembly:
- Pin both candles onto the center mesh with their bases along Row 13. The tall candle goes on the left and the short candle on the right, with a 0.125 in (0.3 cm) gap between them. Together they span about 2.4 in (6.1 cm), centered on the 5 in (12.7 cm) panel.
- Whipstitch around each candle edge, catching the mesh loops.
- Sew a flame to the top center of each candle, with the base overlapping the candle by one row.
- Fan two sprigs out to the left and two to the right, crossing the candle bases at an upward angle. Tack them down at the stem and at every other needle.
- Sew the three berries in a tight cluster at the center, where the sprigs meet.
Final Blocking
- Weave in all the ends along the side columns and bars.
- Spray the panel until it’s evenly damp but not dripping.
- Lay it face up on the mat and pin the top bar straight at 5 in (12.7 cm).
- Pin the side columns parallel so the bordered panel is 8.5 in (21.6 cm) tall from the top bar to the bottom scallops.
- Pin the bottom straight at 6 in (15.2 cm) across the border.
- Pin each scallop into a round curve.
- Ease the swag loops and arches into even curves with your fingers. Don’t pin the appliqués flat.
- Let it dry completely before you unpin it.
Final Quality-Control Checklist
- The top bar and bottom bar each have 41 dc.
- Every A row has 9 loops, and every B row has 8 loops plus 2 half loops.
- The side columns are straight and 3 sts wide in every row.
- Border Row 1 has 139 sc and Row 2 has 143 sts.
- The corners have corner shells, and both top ends finish with half shells.
- The three rings are evenly spaced at sts 1, 21 and 41.
- The candles are centered and the flames point straight up.
- The measurements are 6 in x 9 in (15.2 cm x 22.9 cm), including rings.
Troubleshooting
- The panel narrows toward the bottom: Your tr side columns are tighter than the loops. Loosen the tr stitches or chain a little more firmly.
- The swags look flat: Check the chain counts in Rows 3–4 and 14–15. Ch 8 and ch 10 are what create the drape.
- The sides ruffle in the border: Work 2 sc per row-end instead of 3, but only if you keep each side count at a multiple of 6 plus 1 (for example, 2 + 30 + 1 + 1 = 34 doesn’t fit, so rebalance to 37).
- The sides cup inward: Your sc are too tight. Go up a hook size for Border Row 1 only.
- The candles pucker: Sew with looser stitches and catch only the top layer of mesh.
- The flames curl: Steam-block them separately before sewing them on.
Care
Hand wash in cool water with mild soap, roll the panel in a towel to remove the water, and reblock it flat to dry. Keep it away from real candle flames.
Final Notes
The measurement chain is:
- Row 1 sets the width at 5 in (12.7 cm).
- Seventeen rows bring the panel to 8 in (20.3 cm) tall.
- The 0.5 in (1.3 cm) border makes it 6 in (15.2 cm) wide and 8.5 in (21.6 cm) tall.
- The rings bring the total to 9 in (22.9 cm).
If your gauge matches at Row 1 and Row 5, everything after that will fall into place: the 41-stitch bars, the 139-stitch border base and the shell corners. Take your time with the appliqués, since they give the panel its glow.
Happy crocheting!