
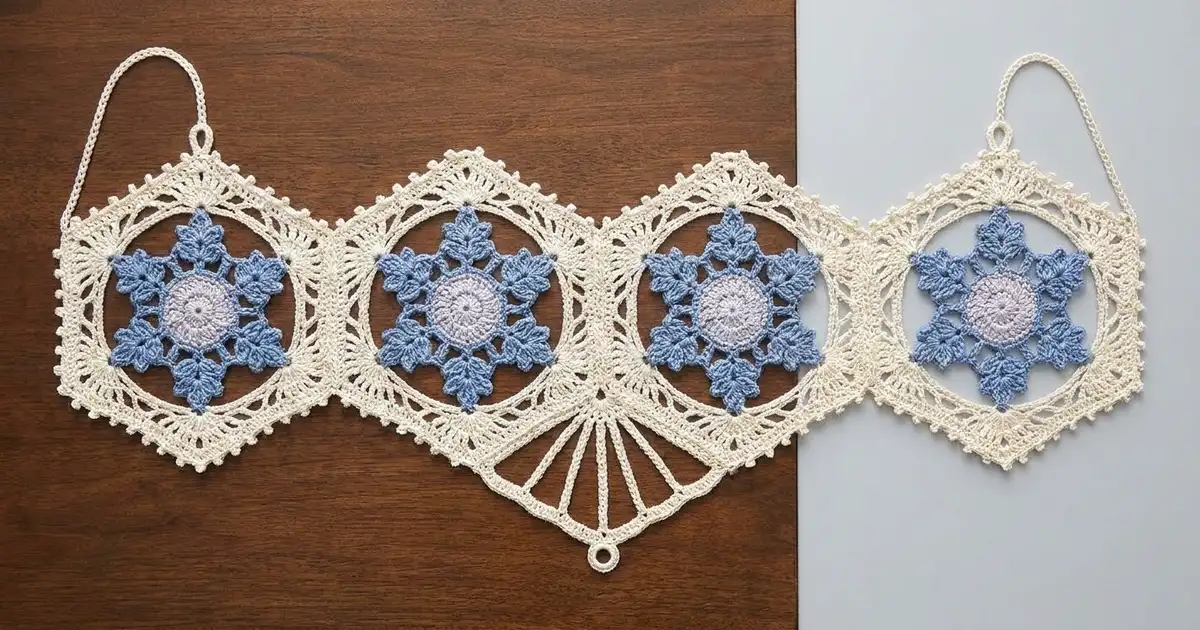
The Frost Lattice strip is a light, lacy hanging made of four hexagon snowflake motifs joined in a single column. Each motif has a pale lilac rosette center, six soft blue snowflake arms with pointed cluster leaves, and an open cream frame of chain spaces and dc fans.
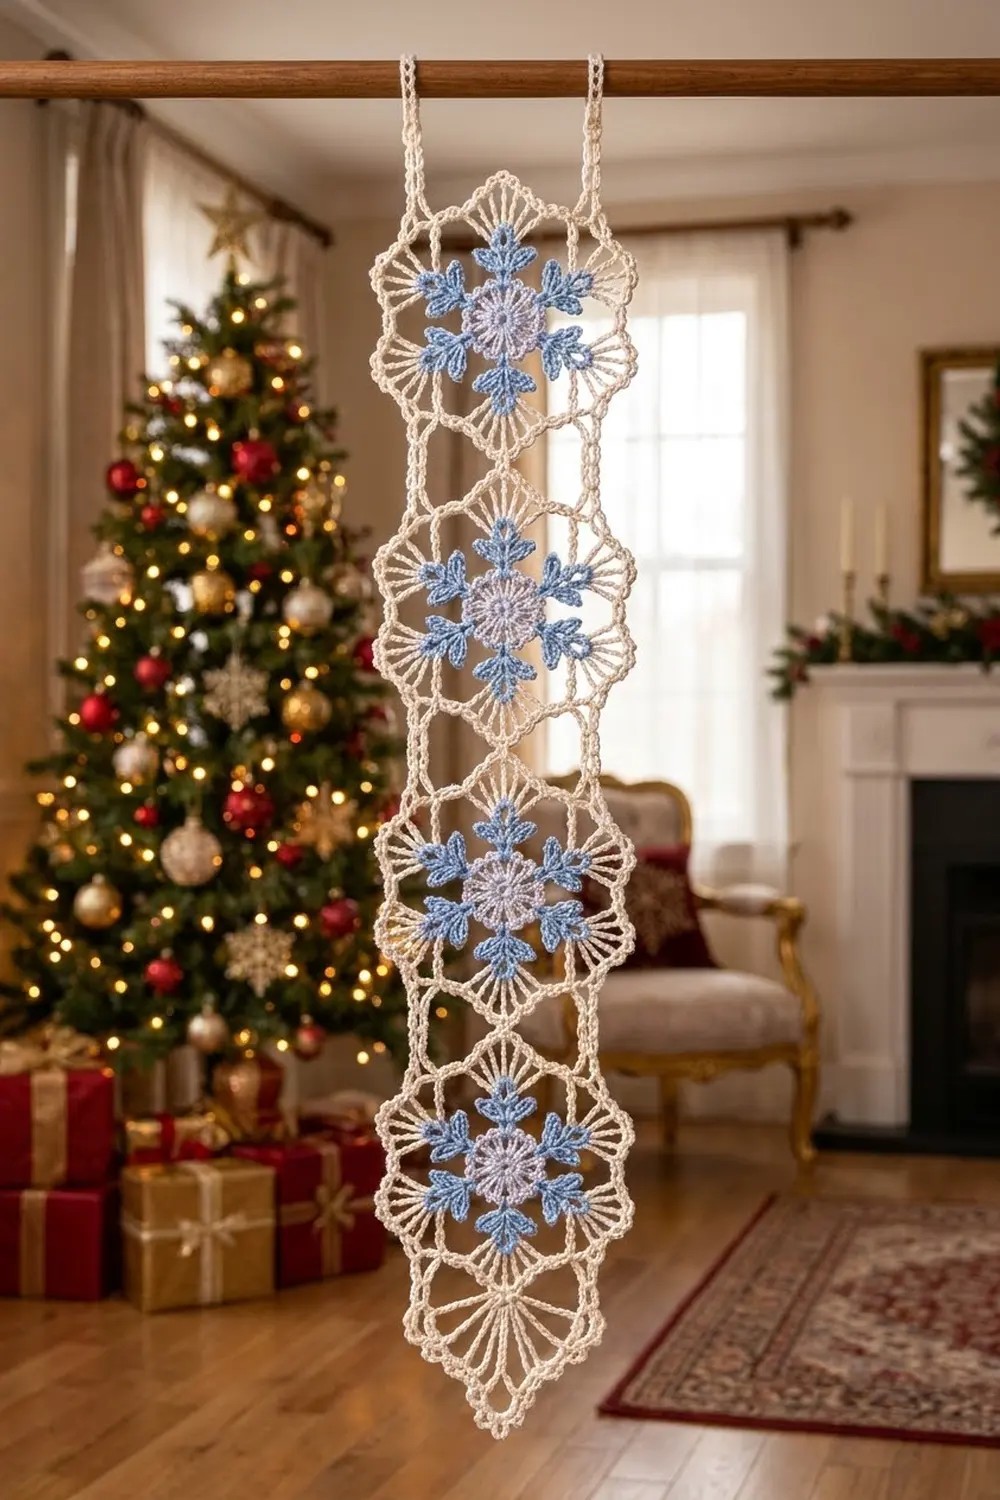
Two slim straps with hanging loops rise from the top corners. The bottom tapers to a point of radiating chain spokes. Hung alone, it makes a window or door ornament. Hung in a row, several strips make a festive curtain.
This pattern uses US crochet terms. The finished strip measures 4.5 in (11.4 cm) wide and 16 in (40.6 cm) from the top edge to the fan tip, or 19.25 in (48.9 cm) including the straps.
Construction overview: you crochet Motif 1 in the round, then join Motifs 2–4 as you go on their last round. Next you work a two-round border around the whole strip, then add the straps and the fan point.
Finished Size and Construction
- Finished size: 4.5 in (11.4 cm) wide × 19.25 in (48.9 cm) long, straps included
- Skill level: Intermediate
- Terminology: US
- Yarn weight: Size 3 mercerized cotton crochet thread (fingering weight, CYC 1)
- Hook: 2.5 mm
- Number of pieces: 4 motifs, joined into 1 strip
- Layout: 1 column × 4 motifs, flat edges joined top to bottom
- Single motif size: 3.5 in (8.9 cm) from flat edge to flat edge, 4.0 in (10.2 cm) from point to point
- Size before border: 4.0 in (10.2 cm) wide × 14 in (35.6 cm) long
- Border depth: 0.25 in (0.6 cm) per edge
Materials
Use mercerized cotton thread. It holds crisp points, takes starch well and doesn’t stretch out when it hangs. Pick a firm, smooth thread rather than a soft, matte one.
- Color A – Medium Blue (arms): 12 g, about 40 m
- Color B – Pale Lilac (centers): 5 g, about 17 m
- Color C – Cream (frame, border, straps, fan): 25 g, about 85 m
Tools:
– 2.5 mm crochet hook
– Tapestry needle
– Rustproof pins and a blocking board
– Spray starch or diluted fabric stiffener (optional)
– Ruler or tape measure
All quantities include about a 15% margin for swatching and weaving in ends.
Abbreviations (US Terms)
- ch – chain
- sl st – slip stitch
- sc – single crochet
- sc2tog – single crochet 2 together
- dc – double crochet
- sp(s) – space(s)
- rep – repeat
- RS – right side
Special stitches:
- 2-dc cluster: (Yo, insert hook in the stitch, pull up a loop, yo and draw through 2 loops) twice in the same stitch, then yo and draw through all 3 loops.
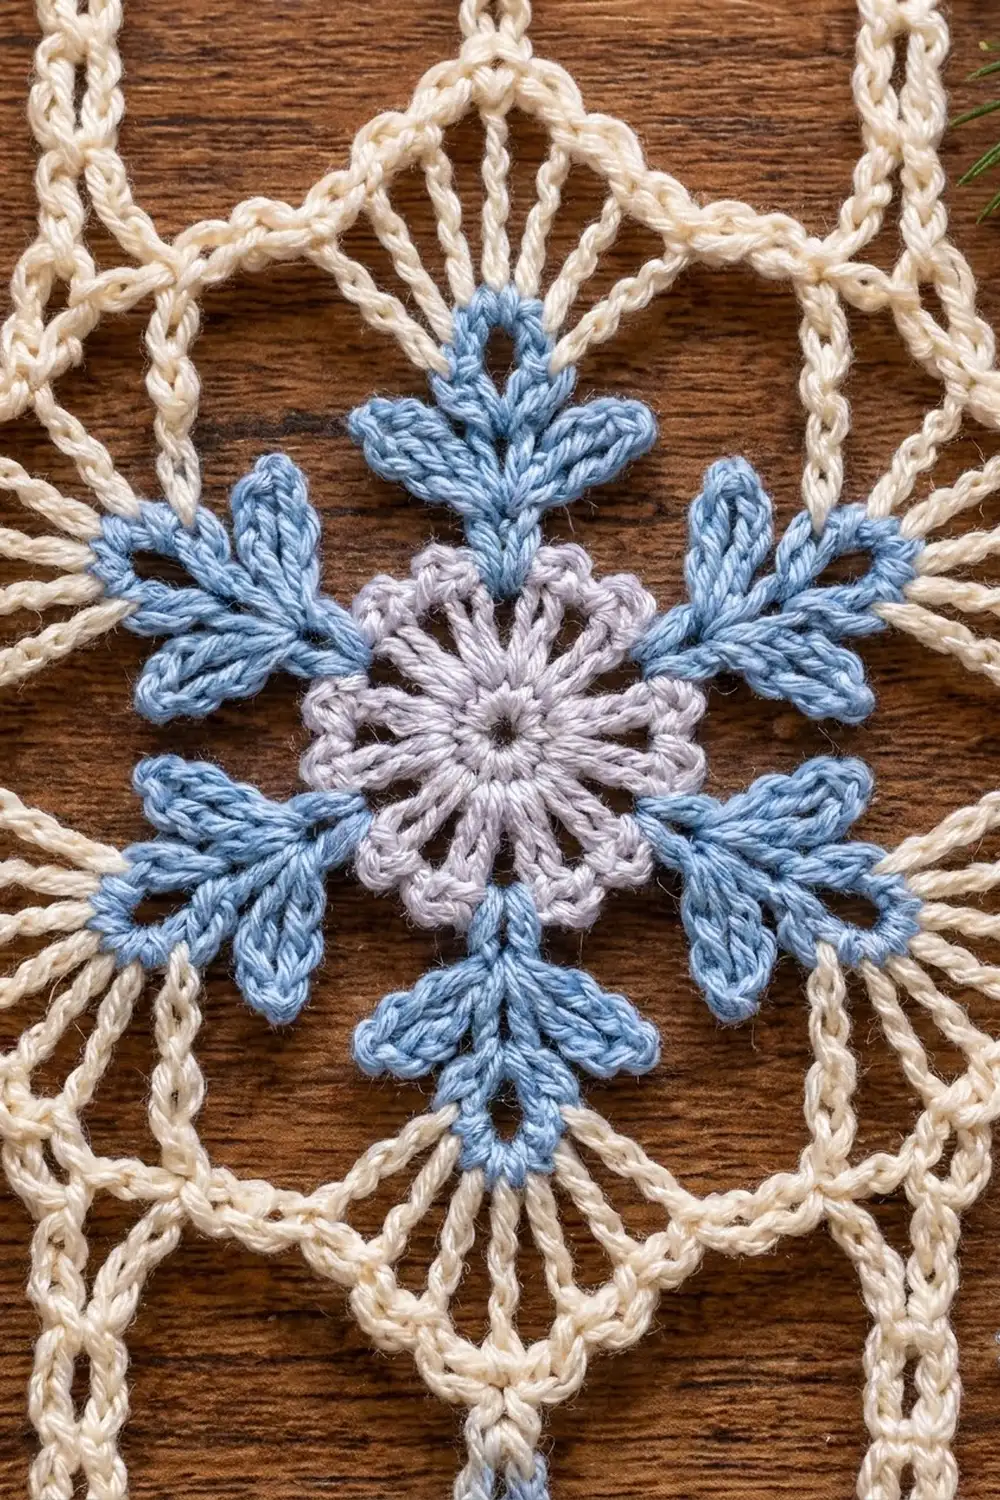
- Leaf: Ch 4, work a 2-dc cluster in the 4th ch from the hook, ch 3, sl st in the same ch as the cluster. This makes one pointed petal. Its tip is the top of the cluster.
- Arm: Ch 6 for the stem. Make 3 Leaves (left, center, right) at the end of the stem. Sl st in the next 2 stem ch, working back toward the center. Make 2 Leaves (one to each side). Sl st in the next 3 stem ch, then sl st in the sc at the base of the Arm.
Gauge and Checkpoints
Gauge: 26 sc = 4 in (10.2 cm), or 6.5 sc per inch (2.5 cm), with Color C on a 2.5 mm hook.
Make one complete motif before starting the strip. Pin it out flat and check it against these measurements:
- After Rnd 2: center rosette 1 in (2.5 cm) across
- After Rnd 3: 3 in (7.6 cm) from the tip of one arm to the tip of the opposite arm
- After Rnd 6: 3.5 in (8.9 cm) from flat edge to flat edge, 4.0 in (10.2 cm) from point to point
Too big? Go down to a 2.25 mm hook, or tighten your chains. Loose chains are the most common reason for an oversized frame.
Too small? Go up to a 2.75 mm hook. Keep the arm stems relaxed so the leaves fan out flat.
If your motif is off by more than 0.25 in (0.6 cm), fix it now. That error is multiplied four times along the strip.
Motif (Make 4)
Rnd 1 (Color B)
Make a magic ring. Ch 3 (counts as dc), then work 11 dc in the ring. Join with a sl st to the top of the ch-3. Pull the ring closed. (12 dc)
Rnd 2 (Color B)
Ch 1. Sc in the next dc, ch 2. Rep from * around. Join with a sl st to the first sc. (12 sc, 12 ch-2 sps)
Fasten off Color B.
Rnd 3 (Color A) – Snowflake Arms
Join Color A in any ch-2 sp.
(Sc, Arm, sc) in the same ch-2 sp, then sc in the next ch-2 sp. Rep from * 5 more times. Join with a sl st to the first sc. (6 Arms, 18 sc, 30 Leaves)
Each Arm has 3 tip Leaves and 2 side Leaves. Lay the motif flat and fan the tip Leaves out evenly. Fasten off Color A.
Rnd 4 (Color C) – Linking the Arm Tips
Join Color C with a sc in the tip of the left tip Leaf of any Arm.
Ch 3, sc in the tip of the center Leaf, ch 3, sc in the tip of the right Leaf, ch 7, sc in the tip of the left Leaf of the next Arm. Rep from * around, leaving out the final sc. Join with a sl st to the first sc. (18 sc, 12 ch-3 sps, 6 ch-7 loops)
The side Leaves stay free. They float inside the frame as in the photo.
Rnd 5 (Color C) – Fans
Sl st in the first ch-3 sp. Ch 1.
Sc in the ch-3 sp, ch 3, sc in the next ch-3 sp, ch 3, 9 dc in the next ch-7 loop, ch 3. Rep from * around. Join with a sl st to the first sc. (12 sc, 54 dc, 18 ch-3 sps)
Each 9-dc fan will become a hexagon corner. The groups over the arm tips will become the flat edges.
Rnd 6 (Color C) – Outline
Sl st in each stitch and chain across to the 5th dc of the first fan.
(Sc, ch 5, sc) in the 5th dc for the corner. (Ch 4, sc in the next ch-3 sp) 3 times, then ch 4. Rep from * around. Join with a sl st to the first sc. (30 sc, 6 ch-5 corner loops, 24 ch-4 side loops)
Edge definition: Each edge has 4 ch-4 side loops between two ch-5 corner loops. The corner loops are not part of the edge count. They are counted separately everywhere in this pattern.
For identification, number the corners C1–C6 in working order. Edge E1 runs from C1 to C2, E5 from C5 to C6, and E6 from C6 back to C1.
Make All Pieces
- Color B: Rnds 1–2 for all 4 motifs
- Color A: Rnd 3 for all 4 motifs
- Color C: Rnds 4–6 for Motif 1. Rnds 4–5 only for Motifs 2–4. Their Rnd 6 is the joining round.
Layout (RS facing, flat edges horizontal):
   strap      strap
 [  Motif 1  ]
 [  Motif 2  ]
 [  Motif 3  ]
 [  Motif 4  ]
      \  /
   fan point
Joining (Join-As-You-Go on Rnd 6)
Hold the new motif and the finished strip with both RS facing up. The new motif’s E5 attaches to the bottom flat edge of the motif above it. Match the loops in reverse order, corner to corner.
Rnd 6 for Motifs 2–4:
- Work Rnd 6 as written through E1–E4.
- At C5, work sc in the 5th dc, ch 2, sl st in the matching corner loop of the motif above, ch 2, sc in the same dc.
- Along E5, work (ch 2, sl st in the matching ch-4 loop above, ch 2, sc in the next ch-3 sp) 3 times. Then ch 2, sl st in the last matching ch-4 loop, ch 2.
- At C6, work sc in the 5th dc, ch 2, sl st in the matching corner loop, ch 2, sc in the same dc.
- Finish E6 as written and join.
Stitch logic: Each joined loop is ch 2 + sl st + ch 2. It takes the place of a ch-4 (or ch-5) loop of the same length, so the motif’s counts stay the same: 30 sc, 6 corner loops and 24 side loops. Each seam uses 6 sl sts: 2 at the corners and 4 along the edge.
Tension: Keep the ch-2s snug but not tight. If a seam puckers, your ch-2s are too short. If it gapes, they are too long.
Checkpoint: Before the border, the joined strip measures 4.0 in (10.2 cm) wide × 14 in (35.6 cm) long, which is 4 × 3.5 in (8.9 cm).
Border
Border gauge: 6.5 sc per inch (2.5 cm). Each edge gets 3 sc in each of its 4 side loops, so 12 sc per edge. That works out to about 1.85 in (4.7 cm), matching the hexagon’s straight edge between corner loops.
What’s on each long side: Each motif contributes 9 outer loops to each long side: 4 side loops, 1 free corner loop and 4 more side loops. With 4 motifs, that’s 4 × 9 = 36 loops per long side. The 3 seams each add exactly one sc2tog, shown separately below and not included in the 36.
The strip’s 4 outer corners are the top-left and top-right corners of Motif 1 and the bottom-left and bottom-right corners of Motif 4.
Border Rnd 1 (Color C)
Join Color C with a sc in the first side loop of the top edge of Motif 1.
- Side loops: 3 sc in each ch-4 side loop.
- Free corner loops (side and strip corners): (2 sc, ch 3, 2 sc) in each.
- Seams: sc2tog. Insert the hook in the upper motif’s corner loop and pull up a loop, then insert it in the lower motif’s corner loop and pull up a loop. Yo and draw through all 3 loops.
Join with a sl st to the first sc.
Counts:
– Top edge: 4 loops × 3 = 12 sc
– Bottom edge: 12 sc
– Each long side: 4 motifs × (8 side loops × 3 sc + 4 corner sc) + 3 sc2tog = 4 × 28 + 3 = 115 sts, plus 4 ch-3 sps
– Each strip corner: 4 sc + 1 ch-3 sp
– Total: 12 + 12 + 115 + 115 + (4 × 4) = 270 sts, plus 12 ch-3 sps
Border Rnd 2 (Color C)
Ch 1. Sc in each sc and in each sc2tog. Work (sc, ch 5, sc) in each ch-3 sp. Join with a sl st to the first sc.
Counts (stitches worked 1 per existing stitch + extra stitches added):
– Top edge and bottom edge: 12 + 0 = 12 sc each
– Each long side: 115 + (4 × 2) = 123 sc, plus 4 ch-5 picots
– Each strip corner: 4 + 2 = 6 sc, plus 1 ch-5 picot
– Total: 270 + (12 × 2) = 294 sc, plus 12 ch-5 picots
Fasten off.
Why the math works: Every outer loop is worked at the same 3-sc rate, matching the gauge. The sc2tog at each seam pulls in the waist instead of adding fullness. The ch-5 picots sit right on the hexagon points, so the outline keeps its shape. The border adds 0.25 in (0.6 cm) per edge, which brings the strip to 4.5 in (11.4 cm) × 14.5 in (36.8 cm).
Straps (Make 2, Color C)
Join Color C in the top-left strip corner ch-5 picot.
Ch 27. Sl st in the 8th ch from the hook to form the hanging loop. Work 12 sc in the loop, then sc in each of the remaining 19 ch. Sl st in the same corner picot and fasten off.
Repeat at the top-right corner. Each strap is about 3.25 in (8.3 cm) tall.
Fan Point (Color C)
This is worked into the 12 sc of the bottom edge from Border Rnd 2.
- Join Color C with a sl st in the 1st sc. Ch 15, then sl st in the 5th ch from the hook to form the tip ring. The 10 ch left over make the first spoke.
- Ch 9, then sl st in the 3rd sc. Sl st in the 4th and 5th sc.
- Ch 8, then sl st in the tip ring.
- Ch 8, then sl st in the 8th sc. Sl st in the 9th and 10th sc.
- Ch 9, then sl st in the tip ring. Work 6 sc in the tip ring.
- Ch 10, then sl st in the 12th sc. Fasten off.
Count: 6 spokes (10, 9, 8, 8, 9 and 10 ch), anchored at sc 1, 3, 5, 8, 10 and 12. The spokes are mirrored in length and position, so the point hangs straight. The point adds 1.5 in (3.8 cm), for a body length of 16 in (40.6 cm).
Final Blocking
- Weave in all ends along stitches of the same color.
- Soak the strip in cool water for 10 minutes. Press out the water in a towel without wringing.
- Pin the strip to 4.5 in (11.4 cm) wide × 14.5 in (36.8 cm) long at the border.
- Pin each hexagon point at its ch-5 picot, and pin each seam waist inward.
- Open the tip Leaves of each arm into a trefoil, and pin out the side Leaves.
- Pull the fan tip down 1.5 in (3.8 cm) and pin it so the spokes lie straight.
- Pin the straps upright with their loops open.
- Spray with starch if you like, and let dry completely before unpinning.
Final Quality-Control Checklist
- Each motif has 6 arms with 5 Leaves each, and the side Leaves are free.
- Rnd 6 of each motif has 30 sc, 6 corner loops and 24 side loops.
- All 3 seams use 6 sl sts each, with no twisting.
- Border Rnd 1 has 270 sts and Rnd 2 has 294 sc.
- The 12 picots sit on the points.
- The fan has 6 symmetric spokes, and the tip hangs centered.
- Both straps are the same height.
- Blocked size is 4.5 in (11.4 cm) × 19.25 in (48.9 cm).
Troubleshooting
- Motif cups: The Rnd 4 ch-7 loops are too tight. Loosen them or go up a hook size for that round.
- Motif ruffles: The fans are too full. Check that you have 9 dc, not 10, and tighten the ch-3s.
- Arms twist: Fan the Leaves out flat before Rnd 4. Block firmly.
- Strip curves sideways: You probably joined an edge one loop off. Count 4 side loops between corners.
- Seam gaps: Shorten the ch-2s in the joining round to ch 1 + sl st + ch 2.
- Fan tip off-center: Recount the spoke chains. Each pair must match.
- Straps uneven: Make both straps with the same 19 sc.
Care
Hand wash in cool water with mild soap, then reshape and dry flat, pinned if needed. Re-starch after washing to restore crisp points.
Final Notes
The measurement chain is simple: one motif at 3.5 in (8.9 cm) gives a 14 in (35.6 cm) column of four. The border brings it to 14.5 in (36.8 cm), the fan point to 16 in (40.6 cm), and the straps to 19.25 in (48.9 cm) overall at 4.5 in (11.4 cm) wide. Check your first motif and the rest will fall into place. For a curtain, make as many identical strips as your rod needs.
Happy crocheting!