
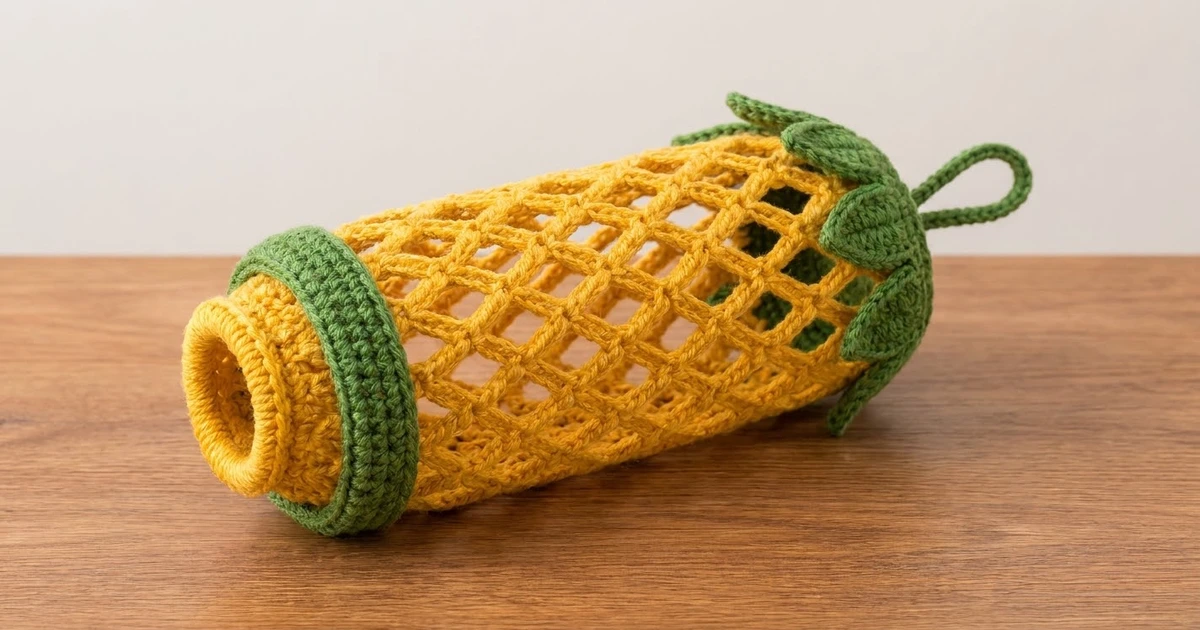
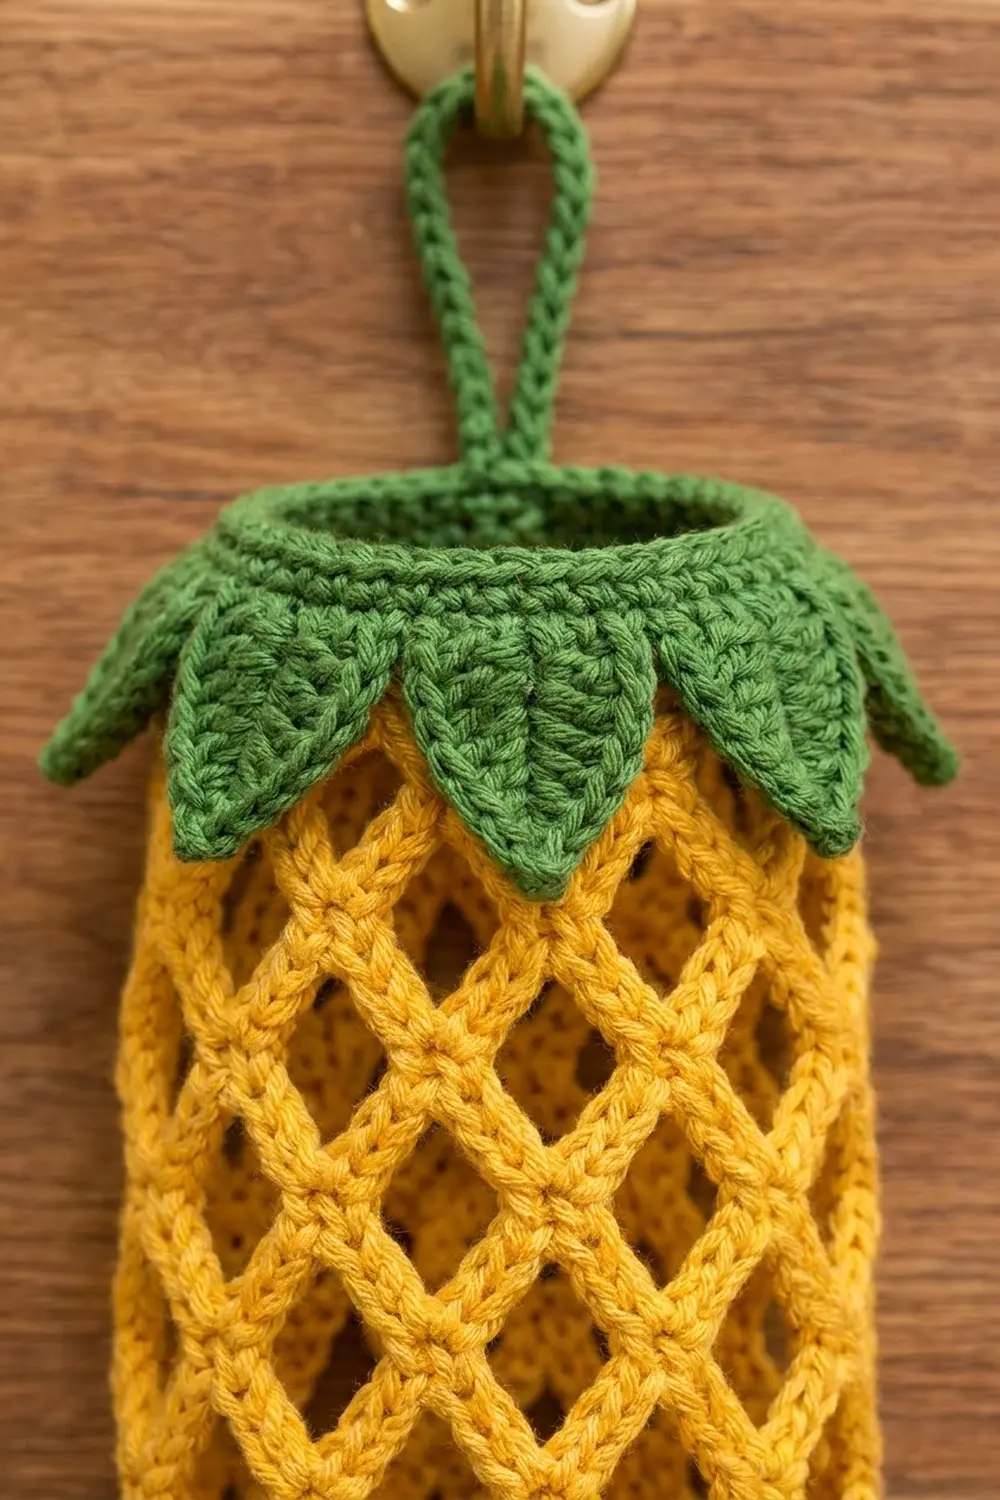
This cheerful pineapple bag holder turns a pile of grocery bags into a kitchen accent. The golden-yellow body is an open diamond net. You can see the bags inside, and it uses very little yarn. A green collar with eight pointed leaves forms the pineapple crown, and a green cord loop hangs it from a hook.
The design uses two colors: warm golden yellow for the fruit and leafy green for the crown. The style is bright, simple, and practical. All instructions use US crochet terms.
The finished holder is 6 in (15.2 cm) wide laid flat and 15.25 in (38.7 cm) long from the bottom ring to the top border. The hanging loop adds about 5 in (12.7 cm) above the rim.
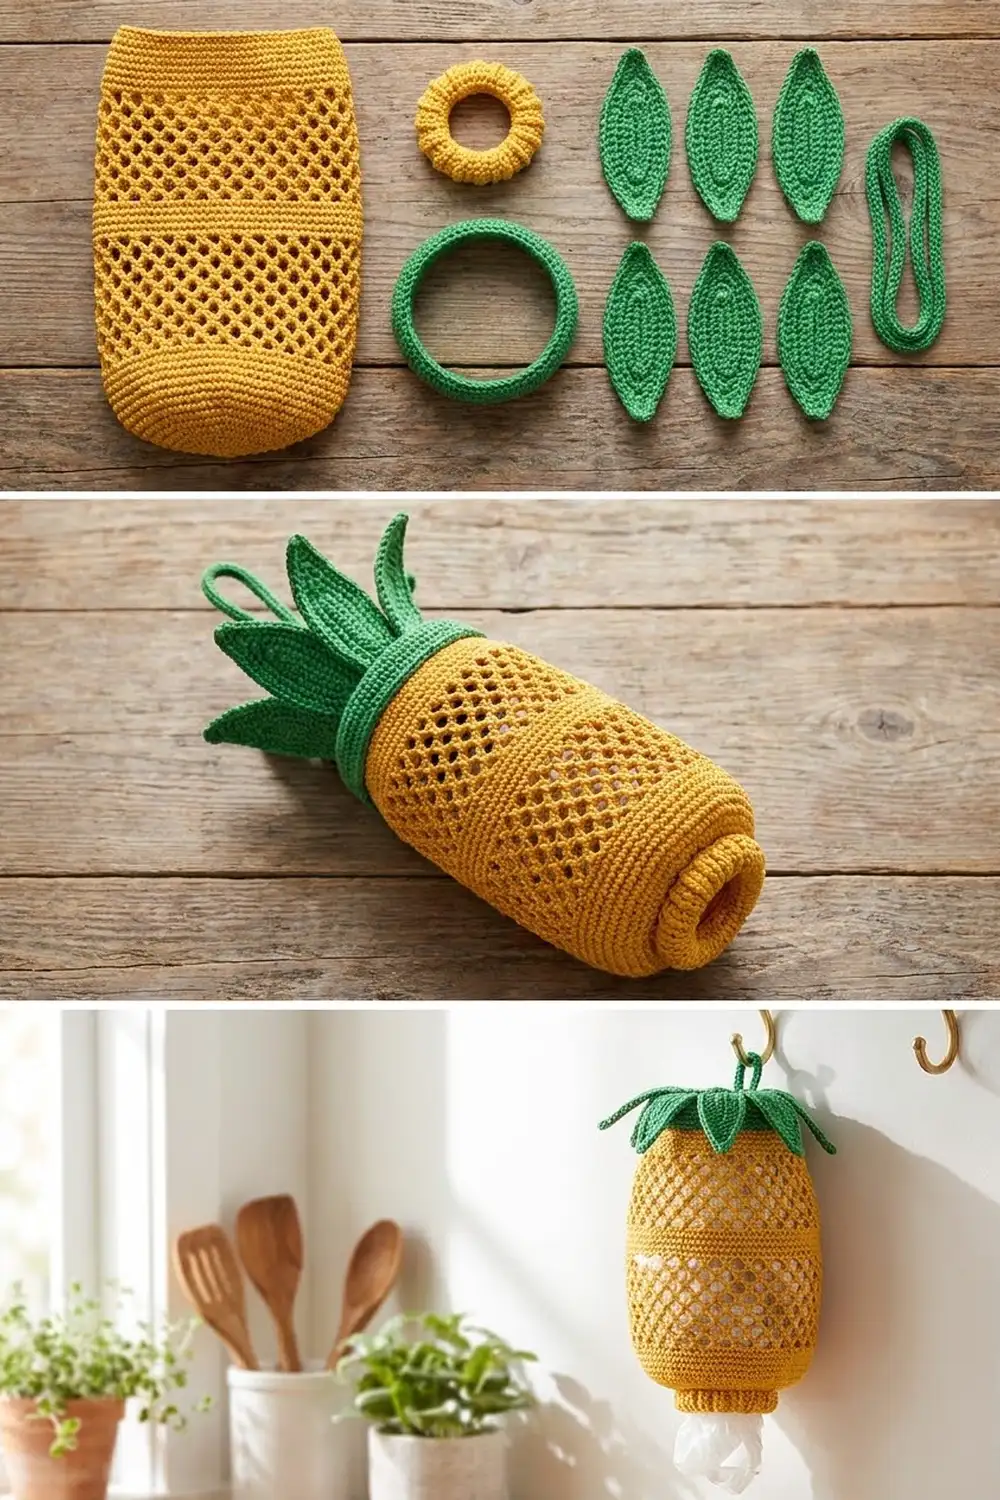
You work the body in the round from the bottom up: a solid band, 15 rounds of chain-loop mesh, then a solid top band. Next you make a bottom ring, a collar, eight leaves, and a hanging loop as separate pieces. Assembly and a two-round green border lock everything together. Stuff bags in at the top and pull them out through the bottom ring.
Finished Size and Construction
- Finished size: 6 in (15.2 cm) wide flat × 15.25 in (38.7 cm) long, plus a 5 in (12.7 cm) loop
- Skill level: Easy
- Terminology: US crochet terms
- Yarn weight: Worsted (#4), cotton or acrylic
- Hook: 5.0 mm (H-8)
- Number of pieces: 12 (1 body, 1 bottom ring, 1 collar, 8 leaves, 1 hanging loop)
- Layout: stacked top to bottom: loop, collar with leaves, body, bottom ring
- Body piece size: 6 in (15.2 cm) wide flat × 14 in (35.6 cm) long
- Size before border: 6 in (15.2 cm) × 14.75 in (37.5 cm) with the ring attached
- Border depth: 0.5 in (1.3 cm), 2 rounds
Materials
Choose a smooth worsted-weight yarn with good stitch definition. Cotton holds the mesh shape well, washes easily, and can stand up to daily use. Acrylic is lighter and a little stretchier, so the mesh may grow more in length once it’s full. Avoid fuzzy or very splitty yarns, because the open mesh looks best with crisp strands.
- Golden yellow: about 85 g / 170 yd (155 m)
- Green: about 30 g / 60 yd (55 m)
These amounts include about 15 percent extra for your gauge swatch and sewing tails.
Tools:
- 5.0 mm (H-8) crochet hook
- Tapestry needle
- 8 stitch markers
- Scissors
- Tape measure
- Rust-proof pins and a blocking mat
Abbreviations (US Terms)
- ch – chain
- sl st – slip stitch
- sc – single crochet
- hdc – half double crochet
- dc – double crochet
- sk – skip
- sp – space
- st(s) – stitch(es)
- rnd – round
- rev sc – reverse single crochet
Special stitch – reverse single crochet (rev sc): Work from left to right (if you crochet right-handed). Insert the hook into the next stitch to the right, yarn over, and pull up a loop. Yarn over again and draw through both loops. This makes the rope-like ridge on the bottom ring and the top border.
Mesh closing trick: At the end of a mesh rnd, “ch 2, dc in first sc” takes the place of the last ch-5 loop. It leaves your hook in the center of that loop, ready to start the next rnd.
Gauge and Checkpoints
Gauge: 16 sc and 16 rnds = 4 in (10.2 cm) in sc worked in the round. In the mesh, 12 loops around = 12 in (30.5 cm) circumference, and 5 mesh rnds = 4 in (10.2 cm). That makes each mesh rnd 0.8 in (2.0 cm) tall.
Test one piece first: work Rnds 1–4 of the body and measure before you start the mesh. Measure mesh height with the tube laid flat and relaxed, not stretched, from the top of Rnd 4 to the top of your latest mesh rnd.
Checkpoints:
- After Rnd 2: flat width 4 in (10.2 cm), height 0.5 in (1.3 cm)
- After Rnd 4: flat width 6 in (15.2 cm), height 1 in (2.5 cm)
- After Rnd 9: total height 5 in (12.7 cm)
- After Rnd 19: total height 13 in (33.0 cm)
- After Rnd 23: total height 14 in (35.6 cm)
Too big? Go down one hook size, to 4.5 mm (US 7). Too small? Go up to 5.5 mm (I-9). The mesh stretches lengthwise when it’s full of bags, so match the width first. Judge the length with the piece hanging.
Body (Golden Yellow)
Join each sc rnd with a sl st to the first sc. The ch 1 at the start of a rnd does not count as a stitch.
Foundation: Ch 32 and join with a sl st to the first ch, taking care not to twist.
Rnd 1: Ch 1, sc in each ch around. (32 sc)
Rnd 2: Ch 1, sc in each st around. (32 sc)
Rnd 3 (growth): Ch 1, sc in next st, 2 sc in next st; repeat from * 16 times. (48 sc)
Rnd 4: Ch 1, sc in each st around. (48 sc)
If you like, place a marker every 4 sts. Each marker shows where a mesh sc will land.
Rnd 5 (first mesh rnd): Ch 1, sc in first st, ch 5, sk 3 sts, sc in next st; repeat from * 10 more times (11 ch-5 loops made), ch 2, sk last 3 sts, dc in first sc. (12 sc, 12 loops)
Rnds 6–18: Ch 1, sc around the post of the dc just made, ch 5, sc in next ch-5 sp; repeat from * 10 more times, ch 2, dc in first sc. (12 sc, 12 loops per rnd)
Each new sc sits in the middle of a loop below, so the loops shift by half a loop every rnd. That shift is what builds the diamond lattice.
Rnd 19 (last mesh rnd): Ch 1, sc around the post of the dc just made, ch 5, sc in next ch-5 sp; repeat from * 10 more times, ch 5, sl st in first sc. (12 sc, 12 full ch-5 loops)
You now have 15 mesh rnds (Rnds 5–19), or about 12 in (30.5 cm) of mesh.
Rnd 20 (conversion): Ch 1, sc in first sc, 3 sc in next ch-5 sp, sc in next sc, 3 sc in next ch-5 sp; repeat from * 10 more times. Count: 12 sc worked one into each existing sc + 36 sc added in the 12 loops = 48 sc.
Rnds 21–23: Ch 1, sc in each st around. (48 sc)
Fasten off and weave in the ends. The body measures 6 in (15.2 cm) wide flat and 14 in (35.6 cm) long. At the top there are 24 sts across each flat side.
Bottom Ring (Golden Yellow)
Foundation: Ch 32 and join with a sl st, without twisting.
Rnd 1: Ch 1, sc in each ch around. (32 sc)
Rnd 2: Ch 1, sc in each st around. (32 sc)
Rnd 3: Ch 1, rev sc in each st around. (32 rev sc)
Fasten off, leaving a 16 in (40.6 cm) tail for sewing. The ring is 4 in (10.2 cm) wide flat and 0.75 in (1.9 cm) tall, matching the body’s foundation edge.
Collar (Green)
Foundation: Ch 48 and join with a sl st, without twisting.
Rnds 1–4: Ch 1, sc in each st around. (48 sc)
Fasten off, leaving a 20 in (50.8 cm) tail. The collar is 6 in (15.2 cm) wide flat and 1 in (2.5 cm) tall, exactly matching the body’s top band.
Leaves (Green, Make 8)
Foundation: Ch 9.
Rnd 1:
1. Starting in the 2nd ch from hook: sc, hdc in next ch, dc in next 3 ch, hdc in next ch, sc in next ch, 3 sc in last ch.
2. Rotate and work along the other side of the foundation: sc in next ch, hdc in next ch, dc in next 3 ch, hdc in next ch, sc in next ch.
3. In the tip (the skipped first ch), work (sl st, ch 2, sl st).
Count: 17 sts plus a ch-2 tip.
Fasten off, leaving an 8 in (20.3 cm) tail. Each leaf is 2.25 in (5.7 cm) long and 1.25 in (3.2 cm) wide. It’s a pointed oval with a rounded base at the 3-sc end.
Center vein: With a strand of green, work surface sl sts along the foundation chain from base to tip. This raised line forms the vein.
Hanging Loop (Green)
Foundation: Ch 49.
Row 1: Sc in 2nd ch from hook and in each ch across. (48 sc)
Row 2: Ch 1, turn, sl st in each st across. (48 sl sts)
Fasten off, leaving a 10 in (25.4 cm) tail. The strip is 12 in (30.5 cm) long. The sl st row firms it up so it won’t stretch under the weight of the bags.
Make All Pieces
- Golden yellow: 1 body, 1 bottom ring
- Green: 1 collar, 8 leaves, 1 hanging loop
Assembly layout (top to bottom):
        [ hanging loop ]
   [ collar + 8 leaves ]   48 sts
   [ body top band     ]   48 sts
   [ diamond mesh      ]   12 loops
   [ body bottom band  ]   32 sts
   [ bottom ring       ]   32 sts
Joining
Bottom ring: Hold the ring’s foundation edge against the body’s foundation edge, right sides out. Whipstitch through both loops, one ring stitch to one body stitch, for all 32 sts. Keep your tension even. Make it snug enough to close the seam but loose enough that the opening stays a round 8 in (20.3 cm) circumference. Two fingers should slip through easily.
Collar: Slide the collar over the outside of the top band so the collar’s Rnd 4 lines up with body Rnd 23. Match stitches one to one for all 48 and pin at 4 evenly spaced points. Whipstitch the collar’s lower (foundation) edge to body Rnd 20 with loose stitches. Pulling tight here would pucker the mesh just below.
Leaves: Place a marker on every 6th collar stitch (sts 1, 7, 13, 19, 25, 31, 37, 43), so the 8 leaves sit evenly around the 48 sts. Center a leaf base at each marker, about 0.25 in (0.6 cm) below the top edge, tip pointing down. Sew the upper third of each leaf to the collar and leave the tip free over the mesh.
Hanging loop: Fold the strip in half. Tuck both ends 1 in (2.5 cm) down between the collar and the body at back center (st 1), side by side. Tack them with a few stitches through all layers.
Checkpoint: The holder now measures 6 in (15.2 cm) wide flat and 14.75 in (37.5 cm) long.
Border (Green)
Border gauge: 4 sc per inch (1.6 sc per cm), the same as the body bands. Both rnds are worked through the top edge, where the collar and the body each have 48 sts, or 24 per flat side.
Rnd 1: Join green at back center. Ch 1, sc through both layers (the collar st and the matching body st) in each st around, catching the loop ends at back center as you go. Join with sl st. (48 sc: 24 front, 24 back)
Rnd 2: Ch 1, rev sc in each st around. Join with sl st and fasten off. (48 rev sc: 24 front, 24 back)
Why the math works: The body’s top band has 48 sts because Rnd 20 places 4 sts above each of the 12 mesh loops (12 × 4 = 48). The collar was also made with 48 sts. So every border stitch takes one body stitch and one collar stitch, with no increases or decreases. At 4 sc per inch, 24 sts per side = 6 in (15.2 cm), which is exactly the body width.
The border adds 0.5 in (1.3 cm), for a total length of 15.25 in (38.7 cm).
Final Blocking
- Weave in all remaining ends. Hide them in the solid bands, not in the mesh.
- Lightly spray the whole holder with water until it’s damp but not soaked.
- Lay it flat and pat it to 6 in (15.2 cm) wide and 15.25 in (38.7 cm) long.
- Gently open each diamond with your fingers so the lattice lines run straight.
- Pin each leaf flat with its tip pointing down, and shape the vein with a fingertip.
- Pin the loop into a smooth teardrop.
- Let it dry completely, then turn it over and check the back.
Final Quality-Control Checklist
- The body’s top band has 48 sts; the bottom band and the ring have 32 sts each.
- The mesh has 12 loops in every rnd and 15 mesh rnds in total.
- The diamonds line up straight, with no twisted columns.
- The ring seam is even and the opening stays round.
- The collar sits flush with the top edge all the way around.
- The 8 leaves are spaced every 6 sts, tips pointing down.
- The border has 24 sts per flat side and a neat rope edge.
- The loop is centered at the back and holds firm when tugged.
- Finished size: 6 in (15.2 cm) × 15.25 in (38.7 cm).
Troubleshooting
Mesh spirals or leans. Make sure each rnd starts with an sc around the post of the closing dc, not in the next loop.
Wrong number of loops. Count sc, not chains. Each mesh rnd must have 12 sc. Mark the first sc of every rnd.
Mesh too long. Stop after 14 mesh rnds instead of 15. Every rnd you remove takes off 0.8 in (2.0 cm).
Top band ripples. Your 3 sc per loop may be too loose. Work them tighter, or use a hook one size smaller for Rnds 20–23 only.
Collar too tight or too loose. Check that both pieces have 48 sts. If the counts match but the sizes differ, rework the collar with a different hook.
Leaves curl. Steam lightly and pin flat. A tightly worked vein can pull the leaf, so rework it more loosely.
Bags fall out of the bottom. Remake the ring with a smaller hook so the opening is narrower.
Holder tilts on the hook. Make sure the loop ends are at exact back center and tacked level.
Care
Hand wash in cool water and lay flat to dry. You can machine wash cotton versions in a mesh laundry bag on a gentle cycle, then reshape and air dry.
Final Notes
The measurement chain is simple. The 32 sts at the base grow to 48 sts in Rnd 3, giving 6 in (15.2 cm) per flat side. The mesh keeps that width with 12 loops, and the top band returns to 48 sts at 4 sts per loop. The collar’s 48 sts match the band, and the border’s 24 sts per side lock the crown in place. The ring matches the base at 32 sts, so every seam is worked one stitch to one stitch.
Check your gauge early, count your loops every rnd, and measure at each checkpoint. You’ll end up with a tidy golden pineapple that keeps your bags in order.
Happy crocheting!