
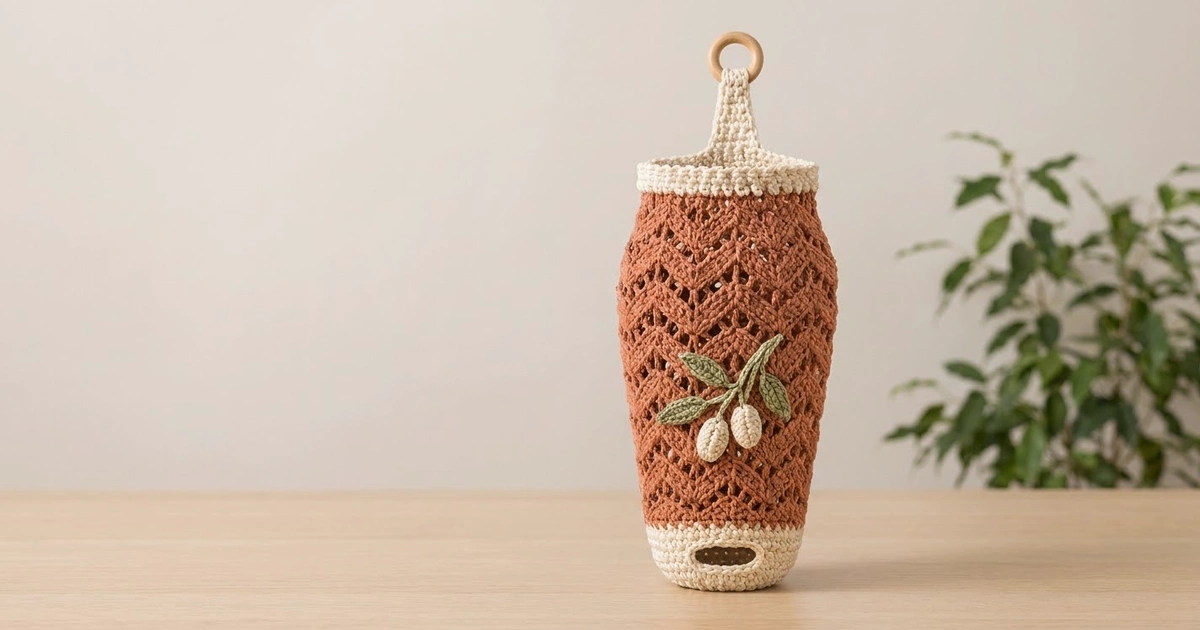
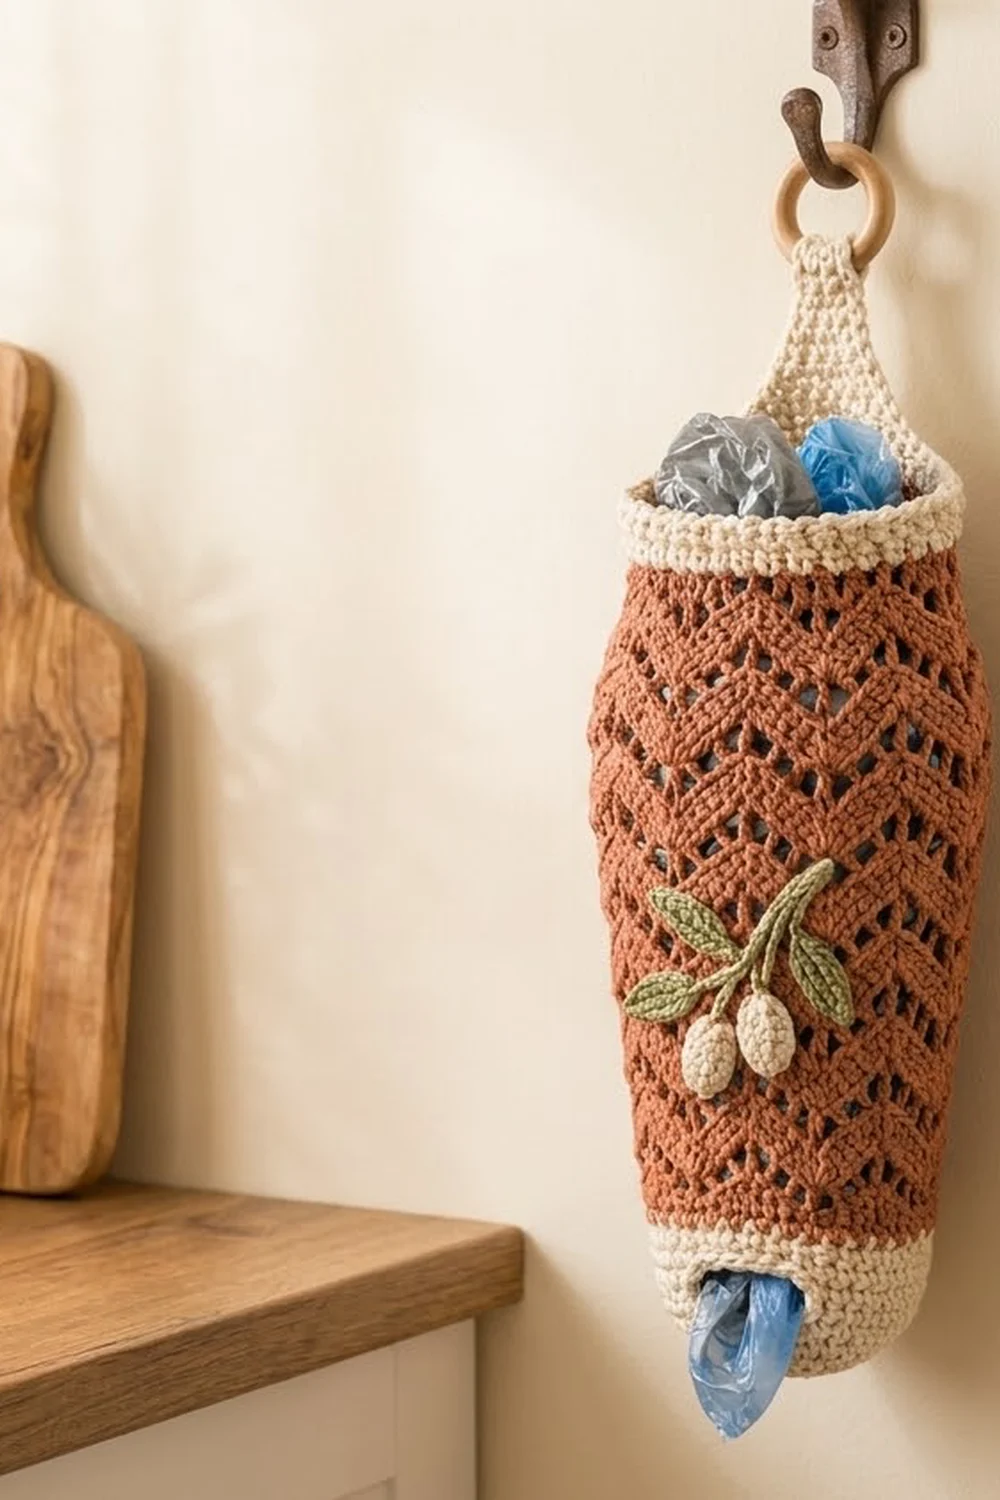
The Terracotta Olive Grove Bag Holder is a tall, vase-shaped bag dispenser. You stuff plastic bags in at the top and pull them out one at a time through a slot near the base. The body is an airy lace chevron in warm terracotta. A solid cream base and a cream rim frame the lace, and a small olive branch in sage green and cream sits on the front.
The style is rustic Mediterranean kitchen: earthy colors, natural cotton and a wooden hanging ring. The same pattern also works in olive green with a terracotta-free cream trim if you want a matching second holder.
The pattern uses US crochet terms. The finished body measures 15.5 in (39.4 cm) tall and 8.6 in (21.8 cm) wide laid flat at its widest point. The strap adds 4.0 in (10.2 cm) up to the ring.
You work everything from the bottom up in one piece. First comes a flat circle base, then a cream wall with the dispensing slot, then 22 rounds of lace chevron. Changing hook size shapes the vase curve, so the stitch count never changes. A leveling round and two decrease rounds form the rim, and the strap is worked in rows straight off the rim. Last, you crochet the stem, leaves and olives separately and sew them on.
Finished Size and Construction
- Finished size: 15.5 in (39.4 cm) tall body; 19.5 in (49.5 cm) including the strap
- Width (flat): 8.0 in (20.3 cm) at base and upper body; 8.6 in (21.8 cm) at widest; 5.3 in (13.5 cm) at the rim
- Skill level: Intermediate
- Terminology: US
- Yarn weight: Worsted (#4 medium)
- Hooks: 5.0 mm (H-8), 5.5 mm (I-9), 4.0 mm (G-6)
- Number of pieces: 1 body (base, lace, rim and strap all in one), plus 7 small appliqué parts (1 stem, 4 leaves, 2 olives)
- Layout: Single vertical tube with the appliqué centered on the front above the slot
- Base diameter: 5.0 in (12.7 cm)
- Size before rim and strap: 14.25 in (36.2 cm) tall
- Rim band depth: 1.25 in (3.2 cm)
Materials
Use a worsted-weight cotton or cotton blend. Cotton holds the vase shape, resists stretching under the weight of the bags, and survives the washing machine. Acrylic will work, but the lace will drape more.
- Terracotta (Color A): 90 g / 165 m (180 yd)
- Cream (Color B): 50 g / 90 m (98 yd)
- Sage green (Color C): 8 g / 15 m (16 yd)
These quantities already include a margin of about 15% for gauge swatching and sewing tails.
Tools:
– 5.0 mm (H-8), 5.5 mm (I-9) and 4.0 mm (G-6) hooks
– Wooden ring, 2 in (5.1 cm) outside diameter
– Stitch markers
– Tapestry needle
– Scissors, sewing pins, tape measure
Abbreviations (US Terms)
- ch – chain
- sl st – slip stitch
- sc – single crochet
- hdc – half double crochet
- dc – double crochet
- sc2tog – single crochet 2 together
- MR – magic ring
- BLO – back loop only
- sp – space
- st(s) – stitch(es)
- rnd(s) – round(s)
Special stitches:
– dc3tog (double crochet 3 together): [Yarn over, insert hook in next st, pull up a loop, yarn over, pull through 2 loops] 3 times. Yarn over and pull through all 4 loops on the hook. This counts as 1 st.
– Peak: (dc, ch 1, dc) in the same st or sp. This counts as 3 sts.
Counting rule for the lace: every dc, every ch-1 sp and every dc3tog counts as 1 stitch.
Gauge and Checkpoints
- Sc gauge (5.0 mm): 15 sc and 16 rnds = 4 in (10.2 cm)
- Lace gauge (5.0 mm): 15 sts and 8 rnds = 4 in (10.2 cm)
- Lace gauge (5.5 mm): 14 sts and 7 rnds = 4 in (10.2 cm)
Use the base as your test piece. Work Rnds 1–23 and then stop and measure.
- After Rnd 10: the base is 5.0 in (12.7 cm) across.
- After Rnd 18: the cream wall is 2.0 in (5.1 cm) tall, the circumference is 16.0 in (40.6 cm), and the piece is 8.0 in (20.3 cm) wide when flattened.
- After Rnd 23: the lace is 2.0 in (5.1 cm) tall above the setup round.
If your base comes out wider than 5.25 in (13.3 cm), go down one hook size. If it is under 4.75 in (12.1 cm), go up one size. Keep the same size jump for every hook in the pattern, so 5.0/5.5/4.0 might become 4.5/5.0/3.5, for example. A 0.25 in (0.6 cm) difference at the base becomes about 0.8 in (2.0 cm) of circumference, so check it now.
Base and Wall
Start with Color B and the 5.0 mm hook. Join each rnd with a sl st to the first sc and ch 1 at the start of each rnd (the ch 1 does not count as a stitch). Keep all round joins in a straight line. That line marks the center back of the holder.
Rnd 1: 6 sc in MR. (6)
Rnd 2: 2 sc in each st. (12)
Rnd 3: [sc 1, 2 sc in next] 6 times. (18)
Rnd 4: [sc 2, 2 sc in next] 6 times. (24)
Rnd 5: [sc 3, 2 sc in next] 6 times. (30)
Rnd 6: [sc 4, 2 sc in next] 6 times. (36)
Rnd 7: [sc 5, 2 sc in next] 6 times. (42)
Rnd 8: [sc 6, 2 sc in next] 6 times. (48)
Rnd 9: [sc 7, 2 sc in next] 6 times. (54)
Rnd 10: [sc 8, 2 sc in next] 6 times. (60)
To keep the circle round rather than hexagonal, shift where the increases fall from one round to the next. For example, in Rnd 7 work sc 2, 2 sc in next, then [sc 5, 2 sc in next] 5 times, sc 3.
Rnd 11: sc in BLO of each st. (60) This round turns the base up into a crisp edge.
Rnd 12: sc in each st. (60)
Rnd 13 (slot): sc 25, ch 10, skip 10 sts, sc 25. (25 + 10 ch + 25 = 60)
Rnd 14: sc 25, 1 sc in each ch, sc 25. (60)
Rnds 15–18: sc in each st. (60)
On the final sl st of Rnd 18, change to Color A. Fasten off Color B, leaving a 6 in (15.2 cm) tail.
The slot is centered on the front, directly opposite the round joins. It is 2.7 in (6.9 cm) wide and opens to about 0.5 in (1.3 cm) tall when the bags push through.
Lace Chevron Body
Rnd 19 (setup, 5.0 mm, Color A): ch 1, sc in each st, join. (60)
Lace section A: 5.0 mm hook
Rnd 20: Ch 4 (counts as dc + ch 1), dc in the same st as the join. That is your first peak.
*[Ch 1, skip 1 st, dc in next st] twice. Dc3tog over the next 3 sts. [Ch 1, skip 1 st, dc in next st] twice.**
Work a peak in the next st. Repeat from * 4 more times, ending the last repeat at **. Join with a sl st to the 3rd ch of the beginning ch-4.
(60 sts: 5 repeats of 12. Each repeat is peak 3 + side 4 + dc3tog 1 + side 4.)
Check the stitches used per repeat: 1 + 4 + 3 + 4 = 12 sts used, and 12 sts made. The circumference stays the same.
Rnd 21: Sl st into the first ch-1 sp (the ch of the beginning ch-4). Ch 4, dc in the same sp.
*[Ch 1, skip 1 st, dc in next st] twice. Dc3tog over the next 3 sts. [Ch 1, skip 1 st, dc in next st] twice.**
Work a peak in the next ch-1 sp, which is the center of the peak below. Repeat from * 4 more times, ending at **. Join. (60)
Each new peak sits in the center sp of the peak below. Each dc3tog is centered over the dc3tog below, using the st before it, the dc3tog itself and the st after it. This stacking makes the V-shaped chevron bands.
Rnds 22–23: Repeat Rnd 21. (60 each)
Checkpoint: lace height is 2.0 in (5.1 cm), circumference is 16.0 in (40.6 cm).
Lace section B: 5.5 mm hook
Rnds 24–37: Repeat Rnd 21. (60 each, 14 rnds)
Checkpoint: lace height is 10.0 in (25.4 cm). The circumference has eased out to 17.1 in (43.4 cm), and the piece measures 8.6 in (21.8 cm) wide when flattened.
Lace section C: 5.0 mm hook
Rnds 38–41: Repeat Rnd 21. (60 each)
Checkpoint: lace height is 12.0 in (30.5 cm), and the body is 14.25 in (36.2 cm) tall from the base fold. Join with Color B on the final sl st and fasten off Color A.
Border: Top Rim, Strap and Slot Edging
Border gauge: 15 sc and 16 rnds = 4 in (10.2 cm) on the 5.0 mm hook. The rim uses the same gauge as the cream base.
Rnd 42 (leveling round, Color B): This round fills the dips in the zigzag so the rim is level. Sl st into the first peak sp, ch 1. Then, for each repeat:
sc in the peak sp, sc in next st, hdc in next 2 sts, dc in next 2 sts, dc in the dc3tog, dc in next 2 sts, hdc in next 2 sts, sc in next st. Repeat 5 times and join.
(60 worked one per existing st, + 0 added = 60.)
The short stitches sit over the peaks and the tall ones drop into the valleys. That makes the top edge flat.
Rnd 43: [sc 4, sc2tog] 10 times. (50) The circumference is now 13.3 in (33.8 cm).
Rnd 44: sc in each st. (50)
Rnd 45: [sc 3, sc2tog] 10 times. (40)
Rnd 46: sc in each st. (40) Do not fasten off.
Why the math works: 60 divides evenly into 10 groups of 6, and 50 divides evenly into 10 groups of 5. Each decrease round removes exactly 10 sts, spread evenly around, so the rim pulls in smoothly with no corners. The final 40 sts measure 10.7 in (27.2 cm) around, or 5.3 in (13.5 cm) wide when flattened. Your hand fits through easily, and the bags can’t fall out.
Strap (worked in rows): Sl st across to the 6th st before the join. Ch 1 at the start of each row; it does not count as a stitch.
Row 1: sc in the next 12 sts, centered over the join. (12) Turn.
Row 2: sc2tog, sc 8, sc2tog. (10) Turn.
Row 3: sc 10. Turn.
Row 4: sc2tog, sc 6, sc2tog. (8) Turn.
Row 5: sc 8. Turn.
Row 6: sc2tog, sc 4, sc2tog. (6) Turn.
Rows 7–20: sc 6. (14 rows)
The strap is 5.0 in (12.7 cm) long, 3.2 in (8.1 cm) wide at the rim and 1.6 in (4.1 cm) wide at the top. Pass the end through the wooden ring from front to back. Fold over 1.0 in (2.5 cm), and whipstitch Row 20 to Row 16 on the inside. The visible strap is 4.0 in (10.2 cm).
Slot edging: With Color B, join at the right end of the slot. Work 10 sl st along the lower edge, 1 sl st at the left end, 10 sl st around the ch-10 along the upper edge and 1 sl st at the right end. (22 sl sts) This edging stops the slot from stretching out.
Olive Branch Appliqué
Use the 4.0 mm hook for all appliqué parts.
Stem (Color C): Ch 16. Sl st in the 2nd ch from the hook and in each ch across. (15 sl sts) The stem is about 3.5 in (8.9 cm) long.
Leaf (make 4, Color C): Ch 7.
– Side one: sc in the 2nd ch from the hook, hdc in next, dc in next 2, hdc in next, 3 sc in the last ch.
– Side two (along the opposite side of the chain): hdc in next, dc in next 2, hdc in next, sc in the last ch.
– Tip: ch 2, sl st in the first sc.
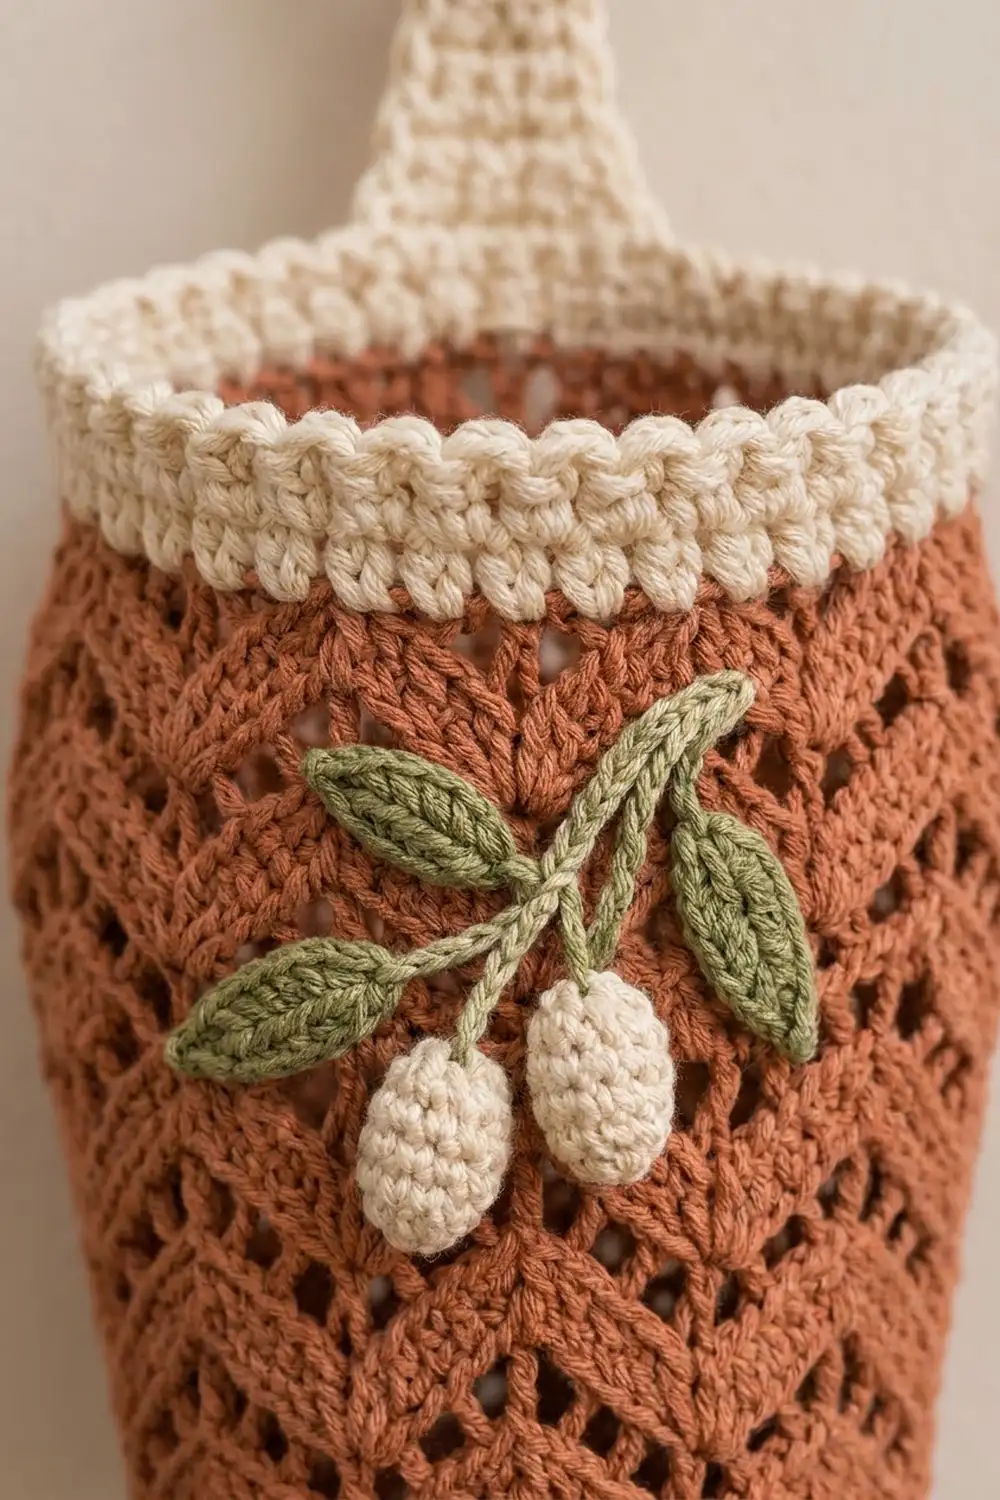
That gives 13 sts plus the pointed tip. Each leaf is 1.5 in (3.8 cm) long and 0.6 in (1.5 cm) wide. Working into both sides of the chain leaves a raised center line that reads as a vein.
Olive (make 2, Color B): Ch 4. Sc in the 2nd ch from the hook, sc in next, 3 sc in the last ch. Working along the opposite side of the chain: sc in next, 2 sc in the last ch. Sl st to the first sc. (8 sts) Each olive is 0.9 in (2.3 cm) long and 0.6 in (1.5 cm) wide.
Layering: Pin the stem diagonally on the front, centered over the slot. Its lower end should sit at about Rnd 28 and its upper end at about Rnd 34. Sew the stem down first. Next, tuck the base of each leaf against the stem, two on each side and alternating, with the points angled upward. Sew the leaves. Last, sew the two olives side by side over the lower end of the stem so they sit on top of it. Stitch through the solid stitches of the lace, not across the holes.
Final Blocking
- Weave in all ends along solid stitches, then trim them.
- Fill the holder with a rolled towel so it holds its vase shape: narrow at the base, fuller in the middle, narrow at the rim.
- Mist it evenly with water until it is damp, not soaked.
- Pat the lace so the chevron points line up vertically. Check that the round-join line runs straight up the center back.
- Flatten the appliqué with your fingertips and smooth the leaf tips into points.
- Let it dry fully on its base, at least 12 hours, before you hang it.
Final Quality-Control Checklist
- The base lies flat and measures 5.0 in (12.7 cm) across.
- The slot is centered on the front, directly opposite the joins.
- Every lace round counts 60 sts, and the 5 peaks stack vertically.
- The body is 15.5 in (39.4 cm) tall, and the rim is level.
- The rim has 40 sts and measures 10.7 in (27.2 cm) around.
- The strap is centered at the back, firmly sewn, and the ring is secure.
- The appliqué is centered above the slot, with the stem under the leaves and olives on top.
Troubleshooting
- Base ruffles or cups: Your tension is off. Ruffling means your stitches are too loose, and cupping means they are too tight. Redo the circle with a hook one size different.
- Chevrons lean or spiral: A peak has been placed into the wrong st. Peaks always go into the center sp of the peak below. Count back to the last correct round.
- Rim is wavy: Rnd 42 was worked as plain sc. Rework it with the tall stitches over the valleys.
- Slot is too tight: Rework Rnds 13–14 with ch 12 and skip 12 (sc 24 on each side, still 60 sts).
- Strap stretches: Work it with the 4.0 mm hook instead.
- Appliqué puckers: You pulled the sewing stitches too tight. Sew with the towel inside the holder so the fabric stays stretched as it will be in use.
Care
Hand wash or machine wash cold on a gentle cycle, reshape while damp and dry flat. Do not tumble dry, because the lace will shrink unevenly.
Final Notes
Each size in this pattern depends on the one before it. A 5.0 in (12.7 cm) base gives a 16.0 in (40.6 cm) cream wall. The 60-stitch lace keeps that circumference until the 5.5 mm hook eases it to 17.1 in (43.4 cm), and the 5.0 mm hook brings it back for the shoulders. The leveling round evens the top, and the decreases take the rim to 40 sts and 10.7 in (27.2 cm). The 4.0 in (10.2 cm) strap finishes the holder at 19.5 in (49.5 cm). Check your measurements at each checkpoint and the holder will come out to size.
Happy crocheting!