

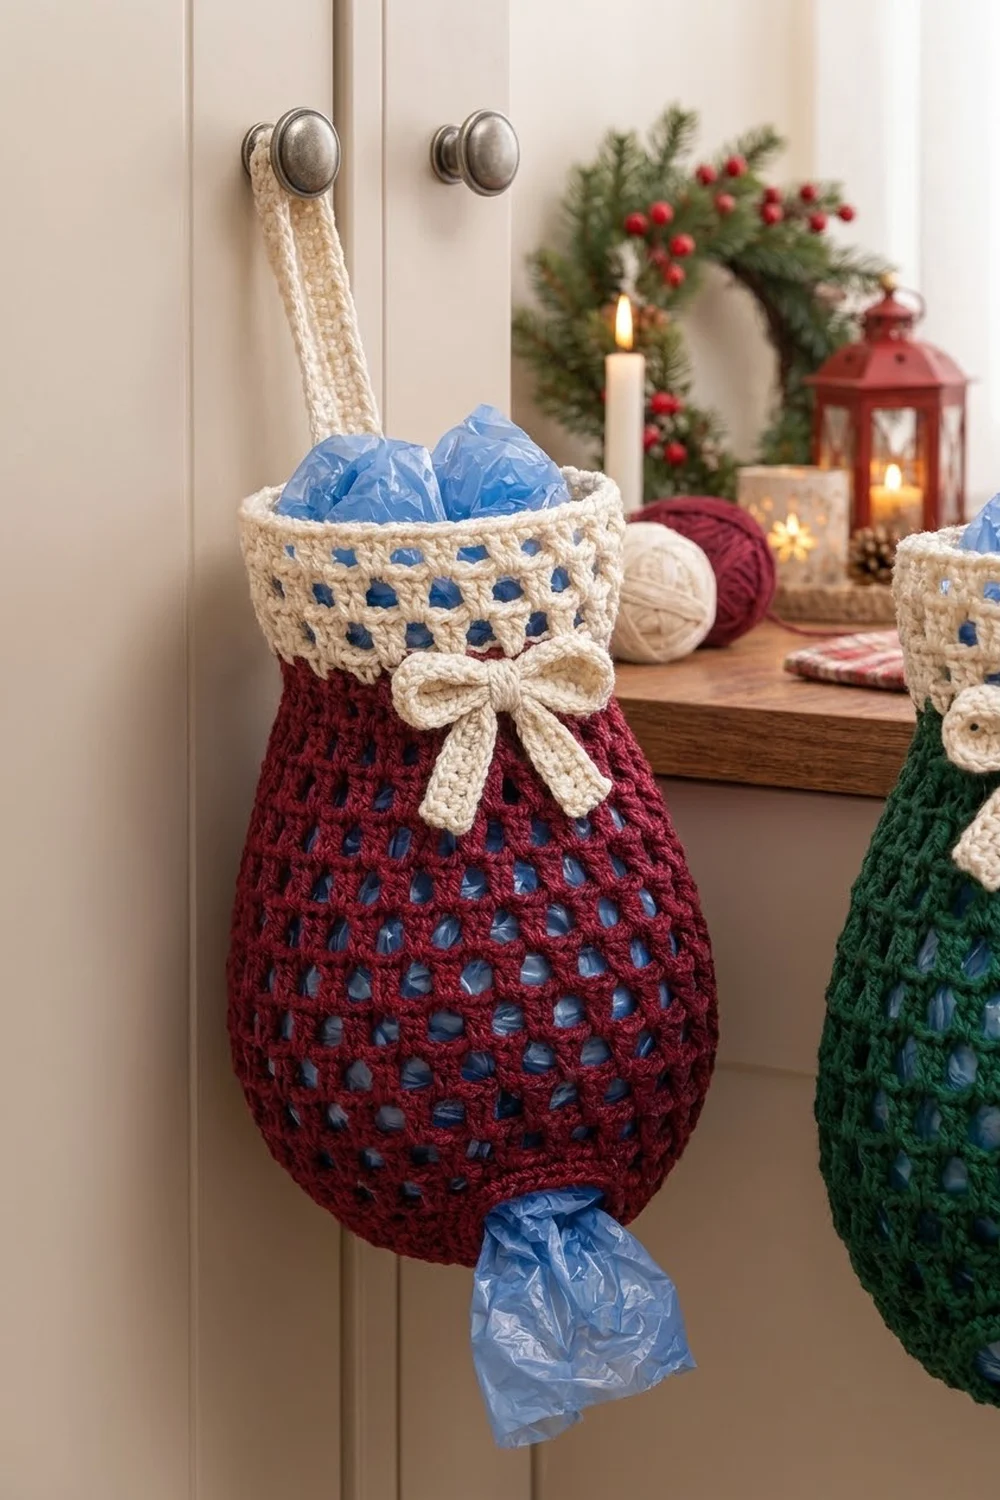
The Holly Lane Grocery Bag Holder is a festive kitchen helper with a soft, rounded vase shape. You stuff plastic bags in at the top and pull them out one at a time through the small opening at the bottom. The open mesh lets you see how many bags are left, and the solid cream collar keeps the top neat and sturdy.
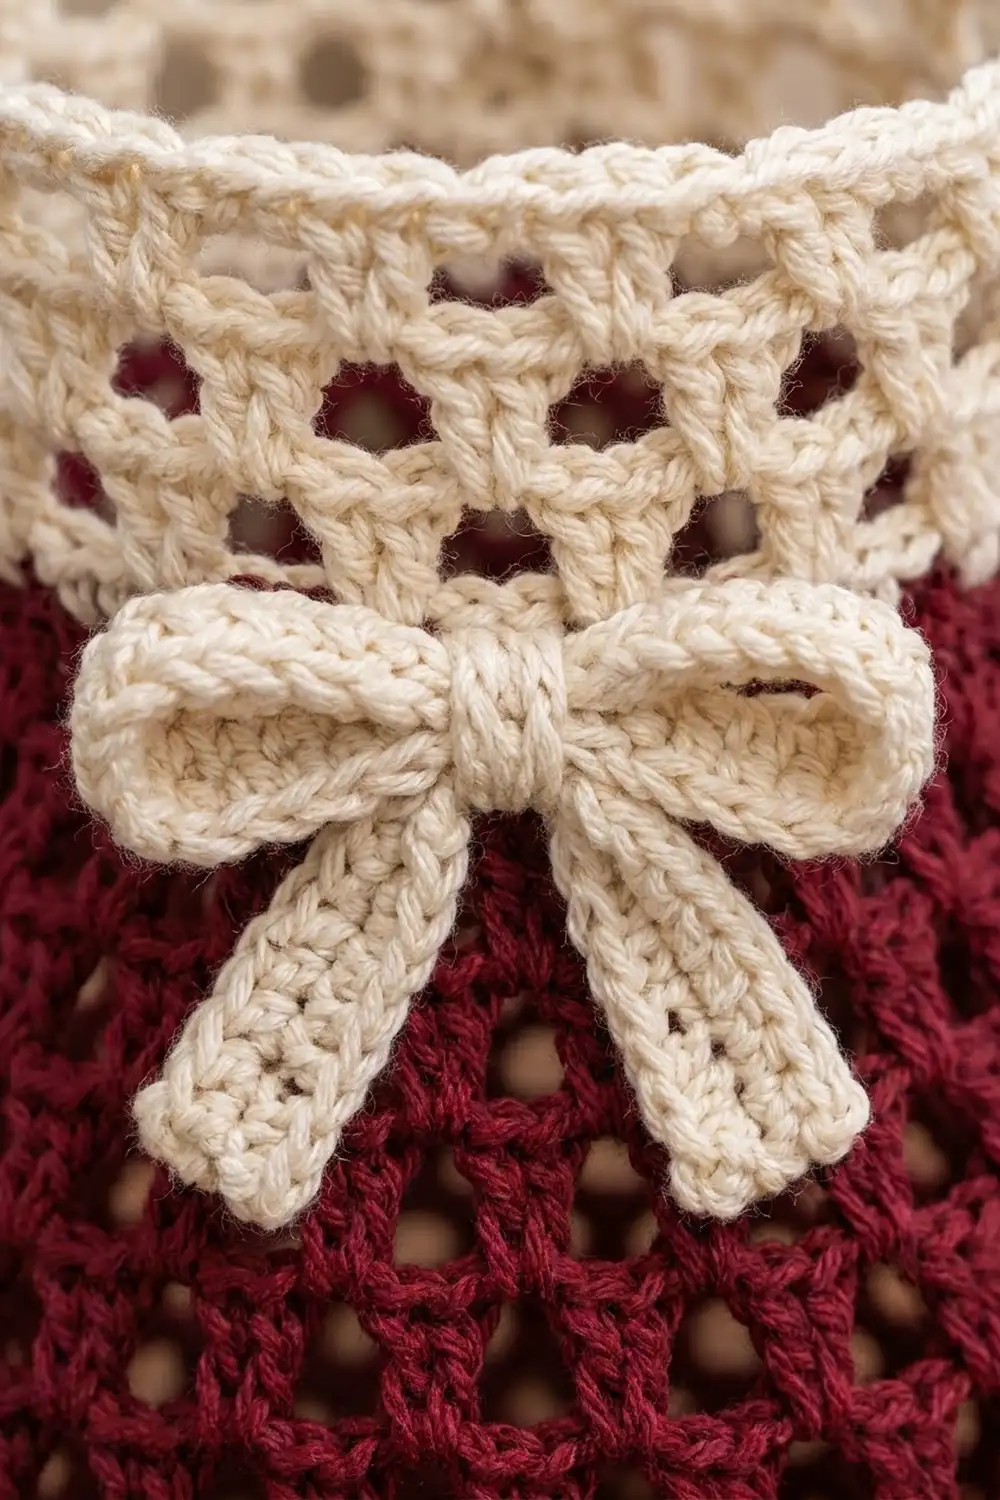
The main body is deep burgundy. The collar, strap and bow are creamy off-white, which gives it the look of a wrapped holiday gift. It also works in forest green with the same cream trim, so you can make a matching pair.
This pattern uses US crochet terms. When hanging flat, the finished holder is about 8.6 in (21.8 cm) wide at the belly and 12.75 in (32.4 cm) tall, and the strap loop rises another 5 in (12.7 cm) above the rim.
You work the body from the bottom up in joined rounds. It starts with a chain ring that becomes the dispensing hole, then a few solid single crochet rounds for the base, then staggered double crochet mesh that you shape with simple increases and decreases. You switch to cream for the collar, then make the strap and bow flat and sew them on.
Finished Size and Construction
- Finished size (flat): 8.6 in (21.8 cm) wide at the belly × 12.75 in (32.4 cm) tall, plus a 5 in (12.7 cm) loop
- Skill level: Easy / advanced beginner
- Terminology: US crochet terms
- Yarn weight: Worsted (#4), cotton or cotton blend
- Hook: 5.0 mm (H-8)
- Number of pieces: 1 body + 1 strap + 3 small bow parts
- Layout: Single seamless tube, worked bottom-up in joined rounds
- Body size before collar: 9.6 in (24.4 cm) tall after Round 23
- Collar (border) depth: 2.5 in (6.4 cm), 7 rounds
- Bottom opening: about 2.2 in (5.6 cm) across
Materials
Use a smooth, firm worsted cotton. Cotton holds its shape when it’s full of bags and doesn’t stretch out the way acrylic can. Stick to a single dye lot for each color.
- Burgundy (Color A): 80 g / about 124 m (136 yd)
- Cream (Color B): 45 g / about 70 m (77 yd)
- Green version: replace the burgundy with 80 g / about 124 m of forest green.
Tools:
– 5.0 mm (H-8) crochet hook
– 4 stitch markers (one for the round start, three spare)
– Tapestry needle
– Scissors
– Measuring tape
– Rust-proof pins and a spray bottle for blocking
These quantities include a margin of about 15% for your gauge swatch and weaving in ends.
Abbreviations (US Terms)
- ch – chain
- sl st – slip stitch
- sc – single crochet
- 2sc – 2 single crochet in the same stitch (increase)
- dc – double crochet
- sk – skip
- sp(s) – space(s)
- rep – repeat
- rnd(s) – round(s)
Special stitch: dc2tog over 2 spaces. Yarn over, insert the hook into the next ch-1 sp, pull up a loop, yarn over and pull through 2 loops. Yarn over, insert the hook into the following ch-1 sp, pull up a loop, yarn over and pull through 2 loops. Yarn over and pull through all 3 loops on the hook. This turns two mesh repeats into one.
Mesh repeat: one dc plus one ch-1 sp counts as 2 stitches of circumference. A beginning ch-4 counts as the first dc plus ch-1.
Gauge and Checkpoints
- Single crochet gauge: 14 sc and 16 rnds = 4 in (10.2 cm)
- Mesh gauge: 7 mesh repeats (14 sts) and 8 rnds = 4 in (10.2 cm). Each mesh round is about 0.5 in (1.3 cm) tall.
Check your gauge by working Rounds 1–5 first and measuring. That base is a small test piece in its own right.
Checkpoints:
1. After Round 1: the ring of 24 sc measures 6.9 in (17.5 cm) around.
2. After Round 5: 48 sc; the edge measures 13.7 in (34.8 cm) around, and the base is 1.25 in (3.2 cm) tall.
3. After Round 7: 30 mesh repeats; the circumference is 17.1 in (43.4 cm), or 8.6 in (21.8 cm) flat.
4. After Round 23: the body is 9.6 in (24.4 cm) tall from the bottom edge.
5. After Round 30: the total height is 12.75 in (32.4 cm).
Too big? Go down 0.5 mm in hook size. Too small? Go up 0.5 mm. A tiny difference adds up fast over 30 rounds, so don’t skip the checkpoints.
Body Pattern
Use Color A (burgundy) for Rounds 1–23.
Base (Solid Single Crochet)
Rnd 1: Ch 24 and join with a sl st to the first ch to make a ring, taking care not to twist it. Ch 1, then sc in each ch around. Join with a sl st to the first sc. (24 sc)
This ring becomes the bottom dispensing hole, about 2.2 in (5.6 cm) across.
Rnd 2: Ch 1, sc in next 3 sts, 2sc in next st; rep from * 6 times. Join. (30 sc)*
Rnd 3: Ch 1, sc in next 4 sts, 2sc in next st; rep from * 6 times. Join. (36 sc)*
Rnd 4: Ch 1, sc in next 5 sts, 2sc in next st; rep from * 6 times. Join. (42 sc)*
Rnd 5: Ch 1, sc in next 6 sts, 2sc in next st; rep from * 6 times. Join. (48 sc)*
Mesh Transition
Rnd 6: Ch 4 (counts as dc + ch 1), sk next st, dc in next st, ch 1, sk next st; rep from * around. Join with a sl st to the 3rd ch of the beginning ch-4. (24 dc, 24 ch-1 sps = 24 repeats, 48 sts)*
This is a conversion round: 48 sc become 24 dc + 24 ch-1 sps. That’s still 48 stitches of circumference, so the edge doesn’t change width.
Belly Increase
Rnd 7: Sl st into the first ch-1 sp, ch 4 (counts as dc + ch 1 in this sp), (dc, ch 1) in each of next 2 sps, (dc, ch 1, dc, ch 1) in next sp, (dc, ch 1) in each of next 3 sps, (dc, ch 1, dc, ch 1) in next sp; rep from * 4 more times. Join. (30 repeats = 60 sts)*
Check: this round works into 4 + (5 × 4) = 24 spaces and makes 5 + (5 × 5) = 30 repeats.
From here on, every dc sits in a ch-1 sp of the round below. That staggers the holes into the honeycomb-like mesh you see in the photos.
Belly
Rnds 8–19: Sl st into the first ch-1 sp, ch 4, (dc, ch 1) in each sp around. Join. (30 repeats = 60 sts each round)
You’ve now worked 12 straight rounds, which adds 6 in (15.2 cm) of height.
Neck Decrease
Rnd 20: Sl st into the first ch-1 sp, ch 4, (dc, ch 1) in each of next 7 sps, dc2tog over next 2 sps, ch 1, (dc, ch 1) in each of next 8 sps, dc2tog over next 2 sps, ch 1; rep from * once more. Join. (27 repeats = 54 sts)*
Rnd 21: Sl st into the first ch-1 sp, ch 4, (dc, ch 1) in each of next 6 sps, dc2tog over next 2 sps, ch 1, (dc, ch 1) in each of next 7 sps, dc2tog over next 2 sps, ch 1; rep from * once more. Join. (24 repeats = 48 sts)*
Rnds 22–23: Sl st into the first ch-1 sp, ch 4, (dc, ch 1) in each sp around. Join. (24 repeats = 48 sts each round)
On the final sl st of Round 23, drop Color A and pull through with Color B (cream). Fasten off Color A.
Border: Cream Collar
The collar is this piece’s border. It doesn’t have corners. When you flatten the holder, each side (front and back) carries exactly half of the stitches.
Border gauge: the same 14 sc = 4 in (10.2 cm). At 48 sts, the collar measures 13.7 in (34.8 cm) around, or 6.9 in (17.5 cm) flat.
Use Color B (cream).
Rnd 24: Ch 1, sc in each dc and in each ch-1 sp around. Join. (24 + 24 = 48 sc; 24 per flat side)
Rnd 25: Ch 4 (counts as dc + ch 1), sk next st, dc in next st, ch 1, sk next st; rep from * around. Join. (24 repeats = 48 sts; 12 repeats per flat side)*
Rnds 26–27: Sl st into the first ch-1 sp, ch 4, (dc, ch 1) in each sp around. Join. (24 repeats = 48 sts; 12 per side)
Rnd 28: Ch 1, sc in each dc and each ch-1 sp around. Join. (48 sc; 24 per side)
Rnds 29–30: Ch 1, sc in each st around. Join. (48 sc; 24 per side)
Fasten off and weave in the ends.
Why the math works: Round 23 has 24 dc + 24 ch-1 sps = 48 stitches. One sc in each of them gives exactly 48 sc. One mesh repeat over every 2 sc gives 24 repeats, which is still 48 stitches of circumference. Every collar round therefore keeps the same 13.7 in (34.8 cm), so the rim stays straight instead of flaring or pulling in.
The collar is 7 rounds deep: 4 sc rounds × 0.25 in (0.6 cm) plus 3 mesh rounds × 0.5 in (1.3 cm), for a total of 2.5 in (6.4 cm).
Hanging Strap
Use Color B (cream).
Row 1: Ch 5, sc in 2nd ch from hook and in each ch across. Turn. (4 sc)
Rows 2–48: Ch 1, sc in each st across. Turn. (4 sc)
The strap is 1.1 in (2.8 cm) wide and 12 in (30.5 cm) long. Fasten off and leave a 12 in (30.5 cm) tail.
Attach: Find the center back of the rim, which is opposite the round joins. Pin one end of the strap 1 in (2.5 cm) down inside the collar. Bring the other end around to lie directly on top of the first end, so the strap makes a loop. Whipstitch both layers through Rounds 28–30. The loop rises about 5 in (12.7 cm) above the rim.
Bow
Use Color B (cream) for all three bow parts.
Bow loops: Ch 31, sc in 2nd ch from hook and in each ch across. (30 sc) Work 2 more rows of 30 sc. The strip is 8.6 in (21.8 cm) × 0.75 in (1.9 cm). Bring both short ends to the middle so they overlap slightly and you have two equal loops. The bow is about 4.3 in (10.9 cm) wide.
Tails: Ch 21, sc in 2nd ch from hook and in each ch across. (20 sc) Work 1 more row of 20 sc. The strip is 5.7 in (14.5 cm) long. Fold it at the center into an upside-down V, with each tail about 2.9 in (7.4 cm) long.
Center wrap: Ch 5, sc in 2nd ch from hook and across. (4 sc) Work 4 more rows of 4 sc. The piece is 1.1 in (2.8 cm) × 1.25 in (3.2 cm).
Assemble: Stack the loops on top of the tails. Pinch the middle, wrap the center piece around it and sew its ends together at the back. Sew the bow to the front center on burgundy Rounds 21–23, just below the collar.
Final Blocking
- Weave in all remaining ends, going through the solid sc rounds wherever you can.
- Fill the holder loosely with a folded towel or a few plastic bags to round out the belly.
- Mist it evenly until it feels damp. Don’t soak it.
- Shape the base into a smooth curve and open the bottom hole to about 2.2 in (5.6 cm).
- Shape the collar so it’s 6.9 in (17.5 cm) across when flat.
- Pin the bow loops into shape and fan the tails out.
- Let it dry completely, then take out the stuffing.
Final Quality-Control Checklist
- [ ] 24 sc in the bottom ring, and the hole is about 2.2 in (5.6 cm) across
- [ ] 48 sc after Round 5
- [ ] 30 mesh repeats through the belly
- [ ] 24 mesh repeats at the neck
- [ ] Collar has 48 sc, or 24 per flat side
- [ ] Body is 12.75 in (32.4 cm) tall and the belly is 8.6 in (21.8 cm) flat
- [ ] Strap is stitched securely through both layers
- [ ] Bow is centered on the front
- [ ] All ends are woven in and secure
Troubleshooting
The base ruffles. Your sc tension is loose. Go down one hook size for Rounds 1–5 only.
The mesh slants or spirals. Always start each round with a sl st into the first ch-1 sp, and always join to the 3rd ch of the ch-4.
The holes don’t stagger. Put each dc into a ch-1 sp, not into the top of a dc.
The collar flares. Your Round 24 count is over 48. Recount, and work 1 sc per dc and 1 sc per space.
Bags fall out on their own. Tighten Round 1, or work the ring with 22 ch for a smaller hole.
The strap stretches. Whipstitch it through all three sc rim rounds, not just the top round.
Care
Hand wash in cool water, press out the extra water in a towel, and dry flat while reshaping it. Don’t tumble dry, because cotton can shrink unevenly.
Final Notes
The measurement chain is simple. A 24-sc ring is 6.9 in (17.5 cm) around. It grows to 48 sc, or 13.7 in (34.8 cm), at the base, then to 30 mesh repeats, or 17.1 in (43.4 cm), at the belly. It comes back to 24 repeats at the neck and keeps 48 sts through a 2.5 in (6.4 cm) collar. If each checkpoint matches, the finished holder will match too: 8.6 in (21.8 cm) wide and 12.75 in (32.4 cm) tall. Make a burgundy one and a green one and hang them side by side for the holidays.
Happy crocheting!