
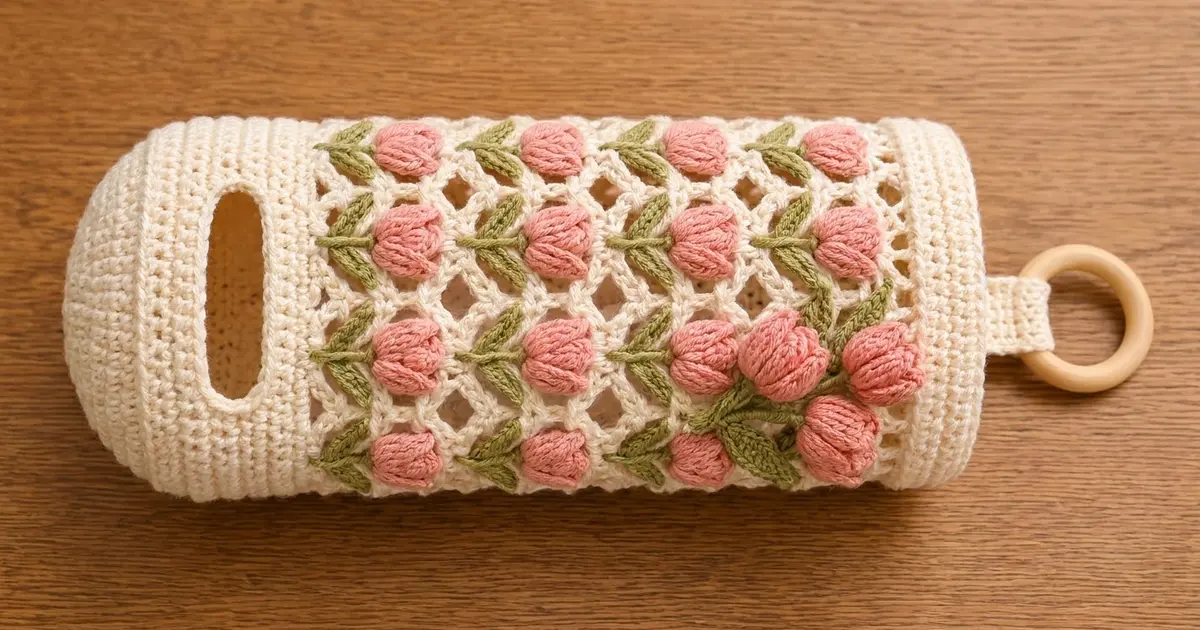
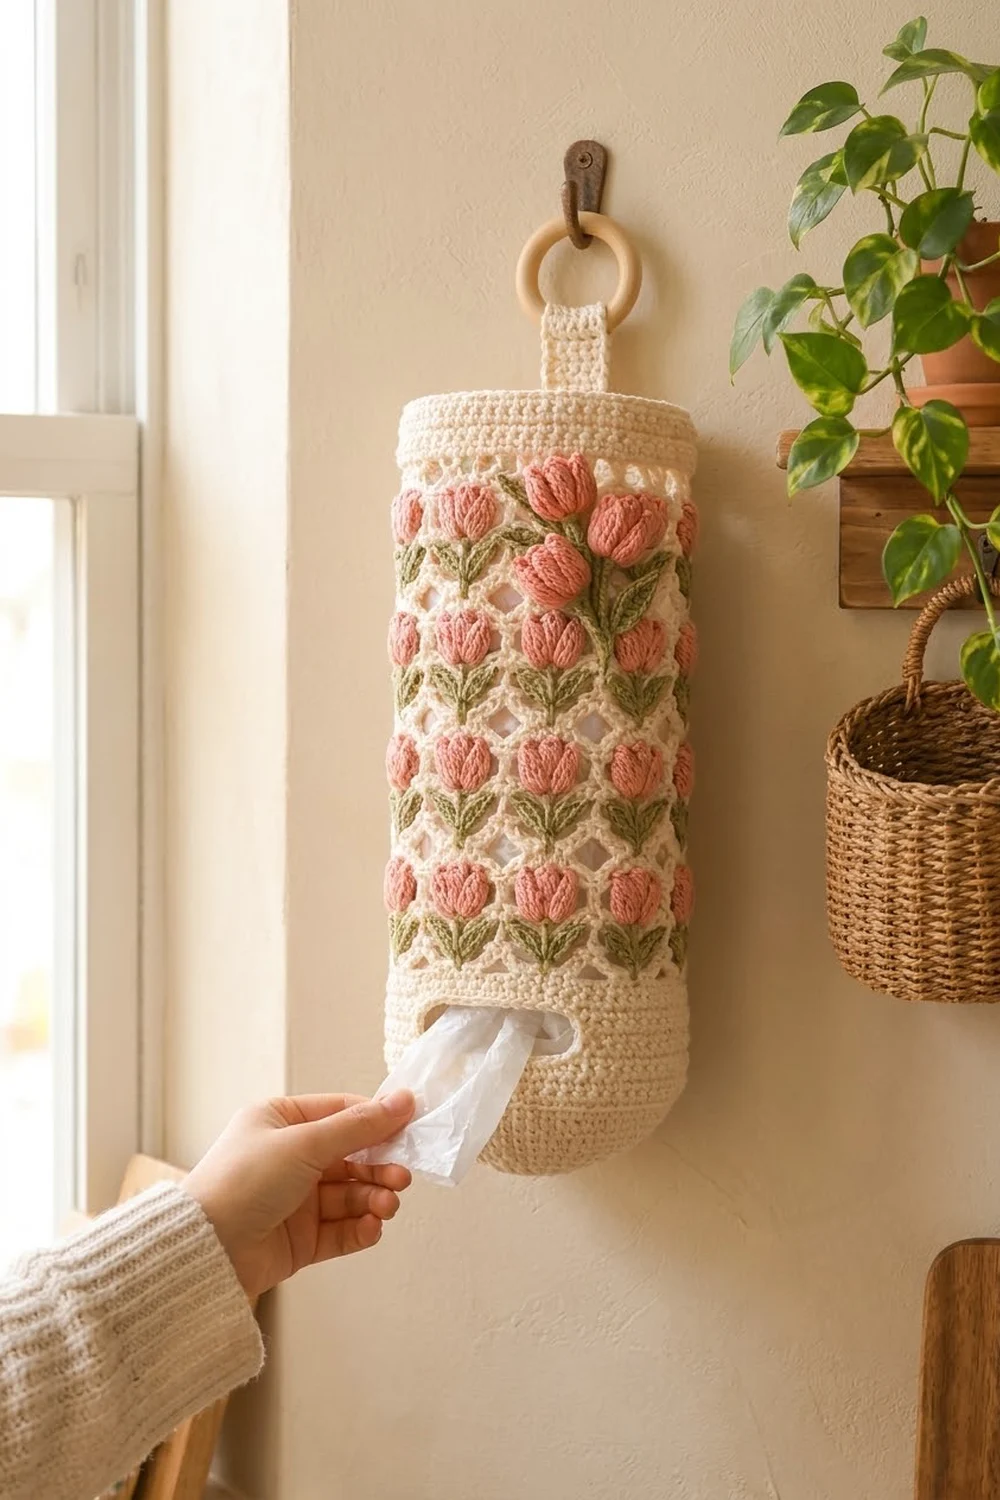
The Tulip Trellis Bag Holder is a hanging tube for plastic grocery bags. You push bags in at the top and pull them out through an oval slot near the rounded bottom. The cream body is an open diamond lattice, with rows of pink puff-stitch tulips that have green embroidered stems and leaves.
A raised spray of three appliqué tulips sits at the upper right. The holder hangs from a cream tab looped around a natural wooden ring. The colors are creamy off-white, salmon pink and sage green. Use lavender instead of pink to make a matching second holder.
All instructions use US crochet terms. The finished holder is 6 in (15.2 cm) wide laid flat and 15.1 in (38.4 cm) from base to top edge, or about 18.4 in (46.7 cm) to the top of the ring.
You make it from separate components. A flat lattice panel is seamed into a tube. A bottom band with the slot and a round base disc close the lower end, and a solid top band finishes the opening. Every joined edge has 54 stitches, so the parts meet stitch for stitch.
Finished Size and Construction
- Finished size: 6 in (15.2 cm) wide flat x 15.1 in (38.4 cm) tall; 18.4 in (46.7 cm) with tab and ring
- Skill level: Intermediate
- Terminology: US
- Yarn weight: DK (#3)
- Hook: 4 mm (G-6)
- Number of pieces: 1 holder assembled from 15 components (panel, bottom band, base disc, top band, tab, 3 tulip heads, 3 stems, 4 leaves)
- Layout: base, bottom band, panel and top band stacked; tab at center back
- Panel size: 12.2 in (31.0 cm) wide x 11.5 in (29.2 cm) tall before seaming
- Size before border: 6 in (15.2 cm) wide flat x 13.9 in (35.3 cm) tall
- Border depth: 1.2 in (3.0 cm) top band
Materials
Choose a smooth cotton or cotton-blend DK. It holds its shape under the weight of bags and shows the stitch texture clearly.
- Cream: 110 g, about 253 m
- Salmon pink: 20 g, about 46 m
- Sage green: 10 g, about 23 m
These quantities include a margin of about 10–15% for swatching and seaming.
Tools: 4 mm (G-6) hook, 2 in (5.1 cm) wooden ring, tapestry needle, stitch markers, scissors, scrap yarn for stuffing, pins.
Abbreviations (US Terms)
ch = chain; sl st = slip stitch; sc = single crochet; hdc = half double crochet; dc = double crochet; inc = 2 sc in same st; st(s) = stitch(es); sk = skip; sp = space; rnd = round; RS/WS = right/wrong side; yo = yarn over.
Puff stitch (puff): (Yo, insert hook in st, yo, pull up a loop to 0.5 in [1.3 cm]) 4 times, yo and draw through all 9 loops, ch 1 to close. A puff counts as 1 st. The closing ch doesn’t count.
Color change: Finish the last 2 loops of the stitch before the change with the new color. Carry the unused color along the row and work over it.
Gauge and Checkpoints
Gauge: 18 sc and 20 rows = 4 in (10.2 cm), which is 4.5 sts and 5 rows per inch.
Test one piece first. Make the base disc first. It checks both stitch gauge and round height.
- Base disc: 54 sts, about 3.75 in (9.5 cm) across
- Bottom band: 6 in (15.2 cm) flat, 2.4 in (6.1 cm) tall
- Panel width: 55 sts = 12.2 in (31.0 cm)
- One tulip tier: 1.75 in (4.4 cm) tall
- Panel: 11.5 in (29.2 cm) tall
- Body before top band: 13.9 in (35.3 cm)
If your work is too big, go down a hook size. If it’s too small, go up a hook size. Change the hook, never the stitch counts, because every join depends on 54 stitches.
Base Disc
With cream, work in continuous rounds, marking the first st of each round.
- Rnd 1: 6 sc in a magic ring. (6)
- Rnd 2: Inc in each st. (12)
- Rnd 3: (Sc 1, inc) 6 times. (18)
- Rnd 4: (Sc 2, inc) 6 times. (24)
- Rnd 5: (Sc 3, inc) 6 times. (30)
- Rnd 6: (Sc 4, inc) 6 times. (36)
- Rnd 7: (Sc 5, inc) 6 times. (42)
- Rnd 8: (Sc 6, inc) 6 times. (48)
- Rnd 9: (Sc 7, inc) 6 times. (54)
Sl st in the next st and fasten off with a 24 in (61.0 cm) tail. The disc lies flat and is about 3.75 in (9.5 cm) across.
Bottom Band with Slot
With cream, ch 54 and join in a ring without twisting.
- Rnd 1: Ch 1, sc in each ch, join. (54)
- Rnds 2–4: Ch 1, sc in each st, join. (54)
- Row 5: Ch 1, sc in next 36 sts, turn. Leave 18 sts unworked. (36)
- Rows 6–8: Ch 1, sc in each st, turn. (36)
- Rnd 9: Ch 1, sc in each of the 36 sts, ch 18, sl st to the first sc. (36 sc + 18 ch)
- Rnd 10: Ch 1, sc in each sc and each ch, join. (36 + 18 = 54)
- Rnds 11–12: Ch 1, sc in each st, join. (54)
Fasten off with a 30 in (76.2 cm) tail.
Slot trim: With RS facing, join cream at a lower corner of the opening. Sc 18 across the unworked sts of Rnd 4, sc 4 up the row ends of Rows 5–8, sc 18 into the underside of the ch-18, and sc 4 down the other row ends, then join. (18 + 4 + 18 + 4 = 44) The slot is 4 in (10.2 cm) wide and about 1 in (2.5 cm) tall.
Checkpoint: 6 in (15.2 cm) wide flat, 2.4 in (6.1 cm) tall.
Lattice Tulip Panel
Work the panel flat in rows in cream. Pink is used only for the puffs.
Foundation Row (WS): Ch 56, sc in 2nd ch from hook and each ch across, turn. (55)
Tulip tier (Rows 1–6):
- Row 1 (RS, lattice): Ch 1, sc in first st, ch 3, sk 2, sc in next st 18 times, turn. (19 sc + 18 ch-3 loops; 1 + 18 x 3 = 55 positions)
- Row 2 (WS, offset lattice): Ch 3 (counts as dc), ch 1, sc in first ch-3 loop, ch 3, sc in next ch-3 loop 17 times, ch 1, dc in last sc, turn. (2 dc, 18 sc, 17 ch-3 loops, 2 ch-1 sps)
- Row 3 (RS, solid): Ch 1, sc in first dc, sc in ch-1 sp, sc in next sc, 2 sc in next ch-3 loop 17 times, sc in last sc, sk last ch-1 sp, sc in 3rd ch of turning ch, turn. (1 + 1 + 51 + 1 + 1 = 55)
- Row 4 (WS): Ch 2 (doesn’t count), hdc in each st, turn. (55)
- Row 5 (RS, tulips): Ch 1, sc in first st, sc 4, pink puff in next st, sc 4 in cream 6 times, turn. (1 + 6 x 9 = 55, including 6 puffs)
- Row 6 (WS): Ch 1, sc in each st, working into the top of each puff, not its closing ch, turn. (55)
Checkpoint: One tier is 1.75 in (4.4 cm) tall.
Work Rows 1–6 a total of 6 times. Then work Rows 1–3 once more to close the lattice. (55) Fasten off with a 30 in (76.2 cm) tail.
Checkpoint: The panel is 12.2 in (31.0 cm) wide x 11.5 in (29.2 cm) tall: 0.2 in (0.5 cm) for the foundation + 10.5 in (26.7 cm) for the tiers + 0.8 in (2.0 cm) for the closing rows.
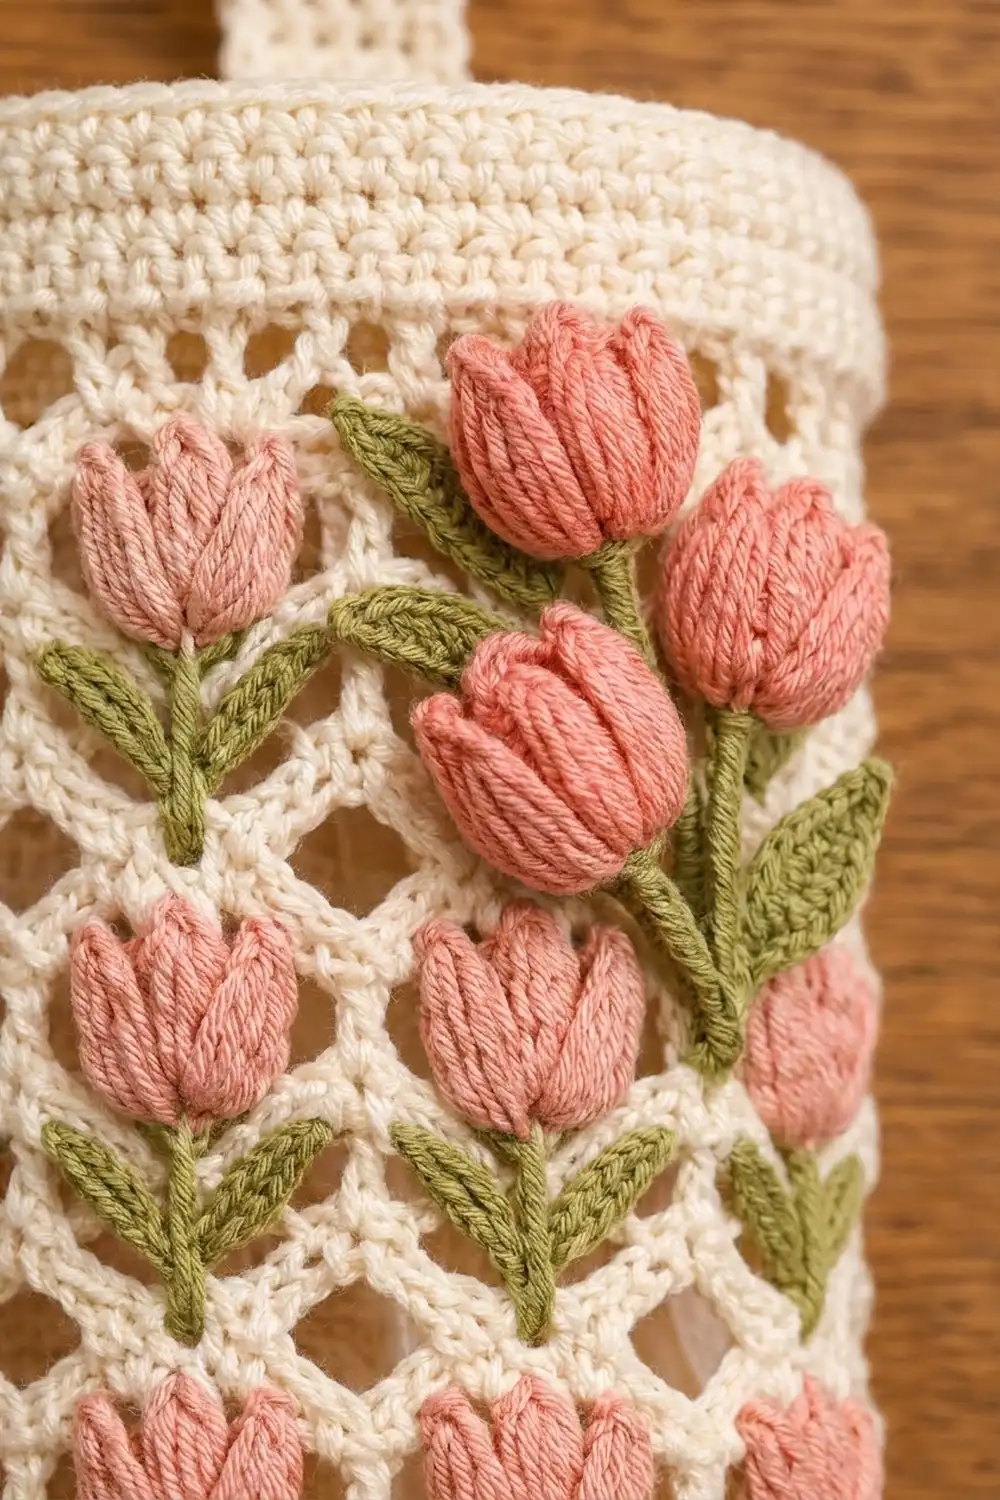
Stems and leaves: With green, work a straight stitch from each puff down through Rows 4 and 3, about 0.5 in (1.3 cm) long. At the base of the stem, add 2 lazy-daisy leaves angled outward in a V. Repeat on all 36 tulips, keeping the stitches loose.
Hanging Tab
With cream, ch 7, sc in 2nd ch from hook and each ch across, turn. (6)
Rows 2–14: Ch 1, sc in each st, turn. (6)
The tab is 1.3 in (3.3 cm) wide x 2.8 in (7.1 cm) long.
Appliqué Tulip Spray
Tulip head (make 3, pink):
– Rnd 1: 6 sc in a magic ring. (6)
– Rnd 2: Inc in each st. (12)
– Rnds 3–4: Sc in each st. (12)
– Rnd 5 (petals): Sl st in next st, (hdc, dc, ch 1, dc, hdc) in next st, sl st in next 2 sts 3 times. (3 petals; 3 x 4 = 12 sts used)
Stuff lightly with scrap yarn and flatten so 2 petals face front. Each head is about 1.3 in (3.3 cm) wide.
Stem (make 3, green): Ch 8, sl st in 2nd ch from hook and each ch across. (7) Each stem is about 1.5 in (3.8 cm) long.
Leaf (make 4, green): Ch 9. Starting in the 2nd ch from hook: sl st, sc, hdc, dc in each of next 2 ch, hdc, sc, sl st. (8) Ch 1, rotate, and work the same 8 sts along the other side of the chain, then join. (16) Each leaf is about 1.75 in (4.4 cm) long.
Make All Pieces
| Component | Qty | Color |
|---|---|---|
| Lattice panel | 1 | Cream, pink puffs, green embroidery |
| Bottom band | 1 | Cream |
| Base disc | 1 | Cream |
| Top band | 1 | Cream |
| Hanging tab | 1 | Cream |
| Tulip head | 3 | Pink |
| Stem | 3 | Green |
| Leaf | 4 | Green |
Layout (top to bottom):
[ wooden ring ]
[ tab, center back ]
[ top band       54 sts | 6 rnds ]
[ lattice panel  54 sts | 6 tiers ]  <- spray at upper right front
[ bottom band    54 sts | slot at front ]
[ base disc      54 sts ]
Joining
Seam the panel. Fold the panel RS out so the side edges meet at center back. Lay the first st of each row over the last st and whipstitch through both layers. The overlap turns 55 sts into 54 positions around the tube. Keep the rows level so the lattice doesn’t spiral.
Panel to bottom band. Center the slot opposite the seam. Whipstitch the Foundation Row edge to Rnd 12 of the band, 1 to 1, for 54 sts. Treat the overlapped seam st as one st.
Base to band. With RS together, whipstitch the disc to Rnd 1 of the band through back loops, 54 to 54. Turn RS out. The seam rolls slightly inward, which rounds the bottom.
Tension: Match your crochet tension when you sew. Tight seams pucker the lattice, and loose seams gap under the weight of the bags.
Checkpoint: The body is 13.9 in (35.3 cm) tall (2.4 in [6.1 cm] + 11.5 in [29.2 cm]) and 6 in (15.2 cm) wide flat.
Border: Top Band
The border uses sc gauge: 4.5 sts and 5 rnds per inch. With cream, ch 54 and join in a ring.
- Rnd 1: Ch 1, sc in each ch, join. (54: 27 front, 27 back when flat)
- Rnds 2–6: Ch 1, sc in each st, join. (54: 27 front, 27 back)
Fasten off with a 30 in (76.2 cm) tail. The band is 1.2 in (3.0 cm) deep. Whipstitch Rnd 1 to the panel’s last row, 1 to 1, with the band join at center back.
Why the math works: The 55-st panel becomes 54 positions after the overlap seam. The band’s 54 sts give one stitch per position, and nothing is added at the seam. Laid flat, that’s 27 sts per side, and 27 ÷ 4.5 = 6 in (15.2 cm), which matches the body width.
Tab: Fold the top 1 in (2.5 cm) of the tab around the ring and sew it down. Sew the bottom 0.5 in (1.3 cm) inside the top band at center back, leaving 1.3 in (3.3 cm) showing.
Spray: On the upper right front, sew the 3 stems in a fan that meets at the bottom. Sew a head to the top of each stem, with the top head touching the band’s lower edge. Place 2 leaves on each side. Tack only at the centers so the petals and leaf tips stay raised.
Final Blocking
- Wet the holder, squeeze it gently and roll it in a towel.
- Slide a bottle about 3.75 in (9.5 cm) across, or a rolled towel, inside the tube.
- Shape it to 15.1 in (38.4 cm) tall and 6 in (15.2 cm) wide flat.
- Open up the lattice diamonds and straighten the tulip tiers.
- Lift the appliqué petals and leaves.
- Let it dry completely before hanging.
Final Quality-Control Checklist
- Every joined edge is 54 sts
- 36 puff tulips, each with a stem and 2 leaves
- Slot centered on the front, 4 in (10.2 cm) x 1 in (2.5 cm)
- Seam and tab at center back
- Body is 15.1 in (38.4 cm) x 6 in (15.2 cm) flat
- Spray has 3 heads, 3 stems and 4 leaves, securely tacked
- Ends woven in at least 1.25 in (3.2 cm)
Troubleshooting
- Lattice slants: Recount Row 3 to 55 sts.
- Puffs on the wrong side: Work puffs only on Row 5, which is a RS row.
- Pink shows through: Carry it loosely, or cut it and rejoin it for each puff.
- Panel too wide for band: The edge sts must overlap at the seam, not sit side by side.
- Slot sags: Work the slot trim with a hook one size smaller.
- Base cups or ruffles: Remake it with a different hook size.
Care
Hand-wash in cool water and dry flat over a bottle to keep the shape. Don’t tumble-dry.
Final Notes
The measurement chain: 54 sts = 12 in (30.5 cm) around = 6 in (15.2 cm) flat. The bottom band is 2.4 in (6.1 cm), the panel is 11.5 in (29.2 cm) and the top band is 1.2 in (3.0 cm), for 15.1 in (38.4 cm) total. Check your gauge on the disc and measure each tier at 1.75 in (4.4 cm), and everything will join cleanly.
Happy crocheting!