

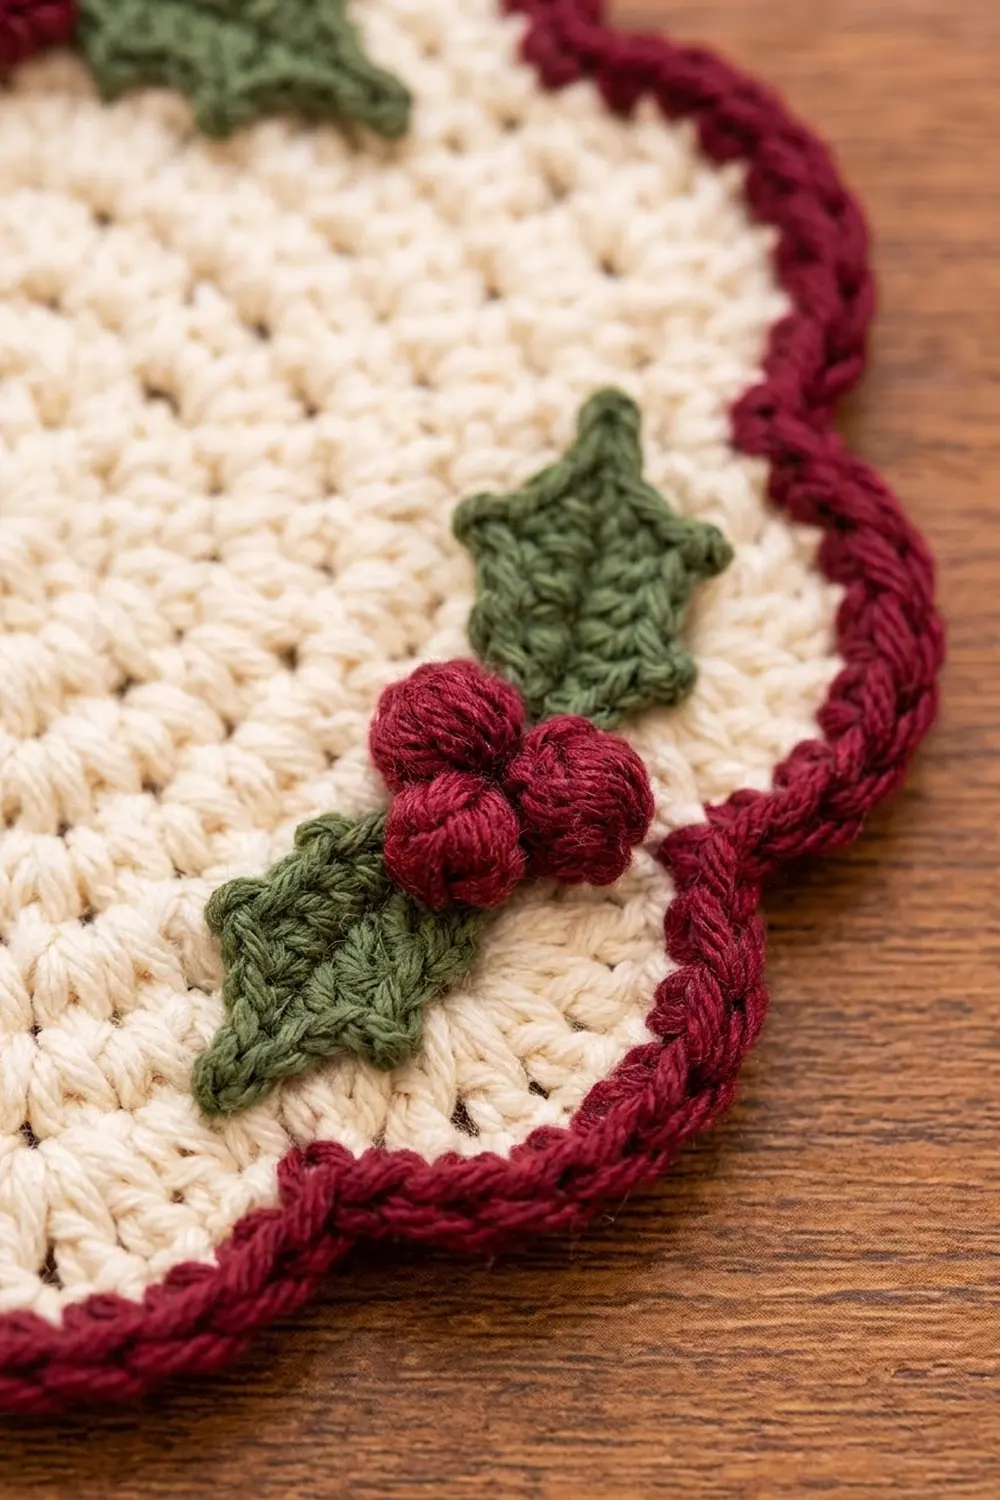
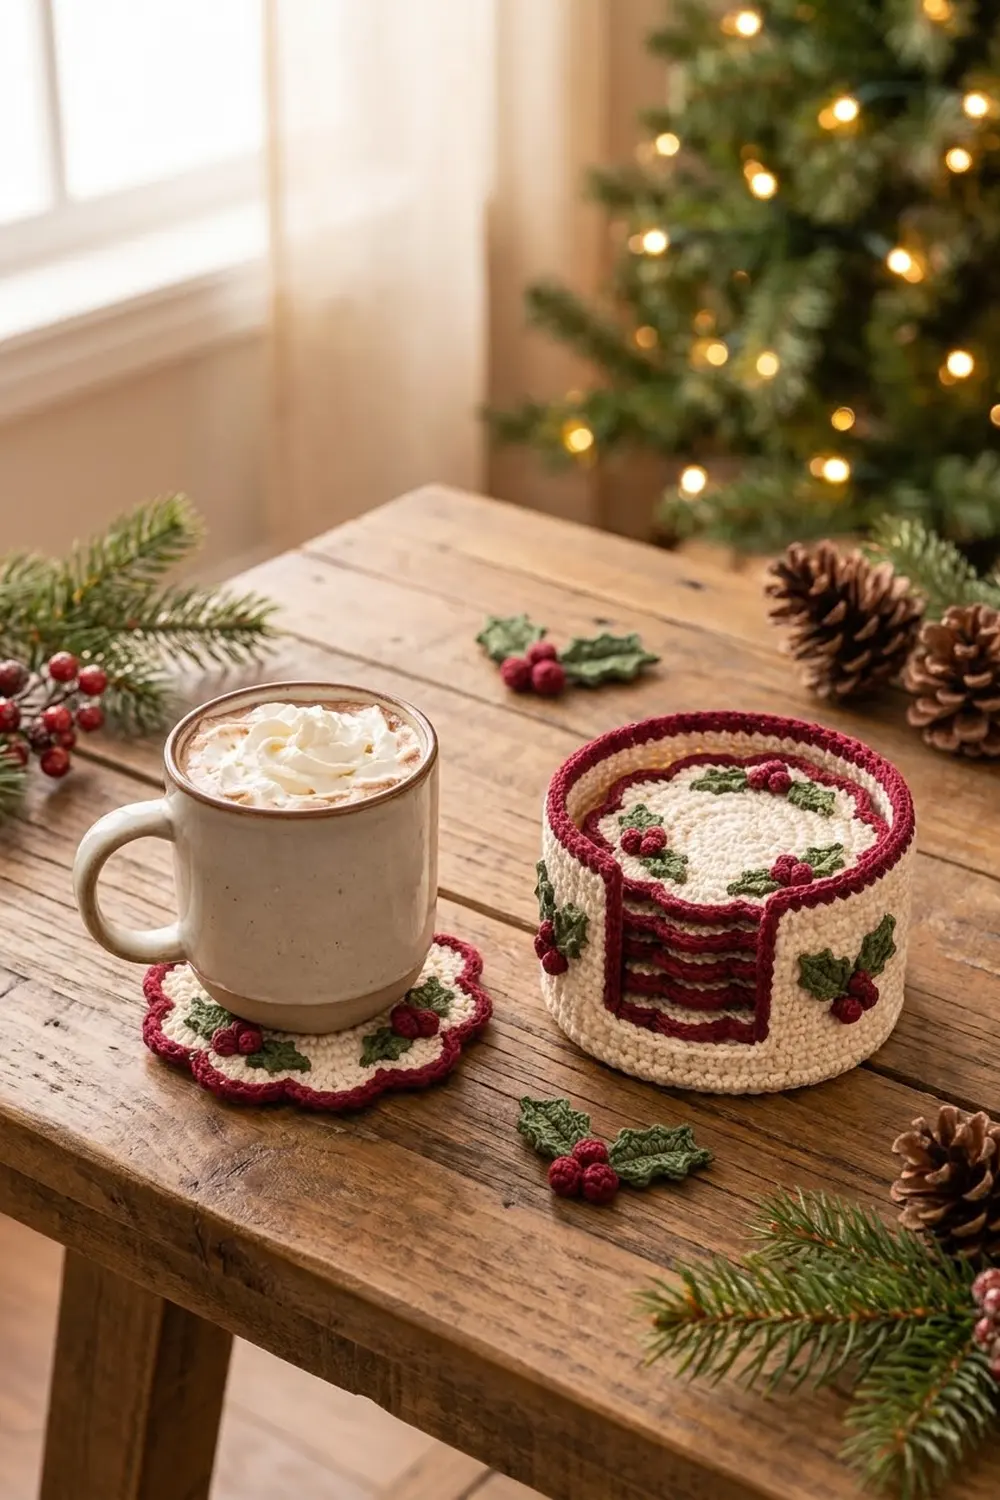
The Hollyberry Hearth set is a cozy holiday table project with six scalloped round coasters and a matching round holder that has a U-shaped front opening. Each coaster has a soft cream center, a rope-textured burgundy edge, and three small holly sprigs with green leaves and red berries.
The colors are classic and warm: cream, deep burgundy, and forest green. The style is traditional and tidy. Dense single crochet rounds lie flat under a mug and hold up to daily use.
This pattern uses US crochet terms. Each finished coaster measures 5.25″ (13.3 cm) from scallop tip to scallop tip. The holder base is 6″ (15.2 cm) across, and the back wall is 2.85″ (7.2 cm) tall.
The construction is simple. You work each coaster in joined rounds from a magic ring, add a scallop round, then edge it in burgundy with single crochet and reverse single crochet. The holder starts the same way and grows into a larger base. It then turns up into walls and finishes with back-and-forth rows that form the opening. You make the holly leaves and berries separately and sew them on.
Finished Size and Construction
- Finished coaster size: 5.25″ (13.3 cm) across, tip to tip
- Finished holder size: 6″ (15.2 cm) base diameter; 2.85″ (7.2 cm) tall at the back; 0.85″ (2.2 cm) tall at the front opening
- Skill level: Easy to intermediate
- Terminology: US crochet terms
- Yarn weight: Worsted weight (#4) cotton
- Hook: 4.0 mm (G-6)
- Number of pieces: 7 main pieces (6 coasters + 1 holder), plus 40 holly leaves and 60 berries sewn on as appliqués
- Layout: Separate pieces, not joined; the coasters stack inside the holder
- Coaster size before border: 4.75″ (12.1 cm) across the scallop tips
- Border depth: 0.25″ (0.6 cm) all around
Materials
Choose a smooth worsted weight cotton. Cotton absorbs condensation, keeps its shape under heat, and shows the stitch texture clearly. Avoid acrylic, because it can soften under hot mugs.
- Cream (main color): 100 g / 154 m
- Burgundy (border and berries): 60 g / 92 m
- Green (leaves): 35 g / 54 m
These amounts include a margin of about 20 percent for swatching and tails.
Tools:
- 4.0 mm (G-6) crochet hook
- Tapestry needle
- 4 stitch markers
- Scissors
- Measuring tape or ruler
- Rust-proof pins and a blocking board or towel
Abbreviations (US Terms)
- ch – chain
- sl st – slip stitch
- sc – single crochet
- hdc – half double crochet
- dc – double crochet
- inc – 2 sc in the same stitch
- BLO – back loop only
- rev sc – reverse single crochet (crab stitch)
- MR – magic ring
- st(s) – stitch(es)
Special stitches:
- Reverse sc (rev sc): Working from left to right (if you crochet right-handed), insert the hook into the next stitch to the right, yarn over, pull up a loop, yarn over, and pull through both loops. This makes the twisted, rope-like edge.
- Picot: Ch 3, sl st in 3rd ch from hook.
- 5-dc bobble: *Yarn over, insert hook in ring, pull up a loop, yarn over, pull through 2 loops; repeat from * 4 more times (6 loops on hook), yarn over, pull through all 6 loops.
Gauge and Checkpoints
Gauge: 19 sc and 20 rounds = 4″ (10.2 cm) in single crochet. Each sc round adds about 0.2″ (0.5 cm) to the radius.
Make one full coaster before you start the rest of the set. It works as your gauge swatch.
Checkpoints:
- After Round 5 (30 sts): 2″ (5.1 cm) across
- After Round 10 (60 sts): 4″ (10.2 cm) across
- After Round 11 (scallops): 4.75″ (12.1 cm) across the tips
- After the border: 5.25″ (13.3 cm) across the tips
If your coaster is too big, go down to a 3.75 mm (F-5) hook. If it is too small, go up to a 4.5 mm (7) hook. If the center cups, your tension is too tight. If the edge ruffles, your tension is too loose or you have added extra stitches.
Coaster (Make 6)
Join each round with a sl st to the first sc. The ch 1 at the start of a round does not count as a stitch. To keep the circle round rather than six-sided, shift the increases slightly on even rounds.
With Cream:
Round 1: MR, ch 1, 6 sc in ring, sl st to first sc. (6)
Round 2: Ch 1, inc in each st around. (12)
Round 3: Ch 1, *sc in next st, inc in next st; repeat from * 6 times. (18)
Round 4: Ch 1, *sc in next 2 sts, inc in next st; repeat from * 6 times. (24)
Round 5: Ch 1, *sc in next 3 sts, inc in next st; repeat from * 6 times. (30)
Checkpoint: 2″ (5.1 cm) across.
Round 6: Ch 1, *sc in next 4 sts, inc in next st; repeat from * 6 times. (36)
Round 7: Ch 1, *sc in next 5 sts, inc in next st; repeat from * 6 times. (42)
Round 8: Ch 1, *sc in next 6 sts, inc in next st; repeat from * 6 times. (48)
Round 9: Ch 1, *sc in next 7 sts, inc in next st; repeat from * 6 times. (54)
Round 10: Ch 1, *sc in next 8 sts, inc in next st; repeat from * 6 times. (60)
Checkpoint: 4″ (10.2 cm) across, lying flat.
Round 11 (scallops): Ch 1, *sc in next st, hdc in next st, 3 dc in next st, hdc in next st, sc in next st; repeat from * 12 times, sl st to first sc. Fasten off.
Count: 60 sts worked 1 per stitch + 24 extra (2 extra in each of 12 scallops) = 84 sts. Each scallop has 7 sts.
Checkpoint: 4.75″ (12.1 cm) across the scallop tips.
Coaster Border
Border gauge: Together, the two border rounds add 0.25″ (0.6 cm) on every side. That takes the coaster from 4.75″ (12.1 cm) to 5.25″ (13.3 cm).
With Burgundy:
Border Round 1: Join in the first sc of any scallop. Ch 1, *sc in sc, sc in hdc, sc in dc, 3 sc in center dc, sc in dc, sc in hdc, sc in sc; repeat from * 12 times, sl st to first sc.
Count: 84 sts worked 1 per stitch + 24 extra (2 extra at each of 12 scallop tips) = 108 sts. Each scallop now has 9 sts.
Border Round 2: Ch 1, rev sc in each st around, sl st to first st. (108) Fasten off and weave in ends.
Why the math works: Each scallop tip is an outward curve, much like a small corner. The 2 extra stitches at each tip let the border wrap around the point without flattening it. The valleys get no increases, so they stay sharp and the scallops keep their shape. The rev sc round adds no stitches. It only twists the edge into a rope texture and doesn’t change the outline.
Holder (Make 1)
Base
With Cream, work Rounds 1–10 exactly as for the coaster. (60)
Round 11: Ch 1, *sc in next 9 sts, inc in next st; repeat from * 6 times. (66)
Round 12: Ch 1, *sc in next 10 sts, inc in next st; repeat from * 6 times. (72)
Round 13: Ch 1, *sc in next 11 sts, inc in next st; repeat from * 6 times. (78)
Round 14: Ch 1, *sc in next 12 sts, inc in next st; repeat from * 6 times. (84)
Round 15: Ch 1, *sc in next 13 sts, inc in next st; repeat from * 6 times. (90)
Checkpoint: 6″ (15.2 cm) across. A finished coaster should sit on the base with a little room on each side.
Walls
Round 16: Ch 1, sc in BLO of each st around. (90) This makes the ridge where the walls turn up.
Rounds 17–18: Ch 1, sc in each st around. (90)
Checkpoint: the front wall is now 0.6″ (1.5 cm) tall.
Back Wall and Opening
From here you work in rows over 60 sts only. The other 30 sts become the low front.
Row 19: Ch 1, sc in first 60 sts. Leave remaining 30 sts unworked. Turn. (60)
Rows 20–28: Ch 1, sc in each st across, turn. (60)
That is 10 rows in total. Fasten off.
Checkpoint: Rounds 16–18 and Rows 19–28 add up to 13 sc rows at 0.2″ (0.5 cm) each, so the back wall is 2.6″ (6.6 cm) tall. The opening is 30 sts wide, about 6.3″ (16.0 cm) along the curve.
Holder Edging
With Burgundy:
Edging Round 1: With the outside of the holder facing you, join in the first st of Row 28. Ch 1, then work: sc in each of 60 sts across the top; 1 sc in each of 10 row ends down the side of the opening; sc in each of 30 unworked sts of Round 18; 1 sc in each of 10 row ends up the other side. Sl st to first sc.
Count: 60 + 10 + 30 + 10 = 110 sts.
Edging Round 2: Ch 1, rev sc in each st around, sl st to first st. (110) Fasten off.
The edging adds 0.25″ (0.6 cm). The back is now 2.85″ (7.2 cm) tall and the front is 0.85″ (2.2 cm) tall.
Why the math works: A sc row is 0.2″ (0.5 cm) tall, which is about the width of one sc. So one sc per row end keeps the side edges flat without puckering.
Holly Leaves (Make 40)
With Green:
Ch 8.
Side 1: Working in back bumps, sl st in 2nd ch from hook, sc in next ch, (hdc, picot) in next ch, dc in next ch, (dc, picot) in next ch, hdc in next ch, sc in last ch. (7 sts, 2 picots)
Ch 2 to round the stem end.
Side 2: Rotate and work in the free loops on the other side of the chain: sc in first ch, hdc in next ch, (dc, picot) in next ch, dc in next ch, (hdc, picot) in next ch, sc in next ch, sl st in last ch. (7 sts, 2 picots)
Tip: Picot, sl st in first sl st. Fasten off, leaving a 10″ (25.4 cm) tail for sewing.
Each leaf has 5 picot points and is about 1.25″ (3.2 cm) long and 0.6″ (1.5 cm) wide.
Berries (Make 60)
With Burgundy:
MR, ch 2, 5-dc bobble in ring, ch 1. Pull ring tight. Fasten off, leaving an 8″ (20.3 cm) tail. Tuck the starting tail inside the bobble to plump it up.
Each berry is about 0.4″ (1.0 cm) across.
Make All Pieces
| Piece | Quantity | Color |
|---|---|---|
| Coaster | 6 | Cream + Burgundy |
| Holder | 1 | Cream + Burgundy |
| Holly leaf | 40 (36 coasters + 4 holder) | Green |
| Berry | 60 (54 coasters + 6 holder) | Burgundy |
Set layout (text grid):
[Coaster 1] [Coaster 2] [Coaster 3]
[Coaster 4] [Coaster 5] [Coaster 6]
          [   Holder   ]
Attach the Holly Appliqués
Each sprig has 2 leaves and 3 berries. Each coaster gets 3 sprigs, and the holder gets 2.
- Coasters: Place the top sprig at 12:00 with the leaves pointing left and right. Place the other two sprigs at 4:00 and 8:00, with the leaves angled along the curve. Center each sprig over Rounds 8–10, about 0.25″ (0.6 cm) inside the scallop valleys.
- Using the leaf tail, sew each leaf down along its center line, then tack down each picot point.
- Sew the 3 berries in a tight triangle where the two leaf stems meet.
- Holder: Place one sprig on the outside wall on each side of the opening, about 0.5″ (1.3 cm) from the burgundy edge and centered on Rows 21–26.
- Weave all tails into the cream fabric on the back. Keep your stitches small so the coaster stays flat.
Final Blocking
- Soak the coasters in cool water, then roll them in a towel to press the water out.
- Lay each coaster right side up on a blocking board.
- Pin each of the 12 scallop tips so the coaster measures 5.25″ (13.3 cm) across.
- Let the coasters dry completely, then unpin them.
- For the holder, dampen it and slip a 6″ (15.2 cm) round container inside. Straighten the walls so the opening is even, and let it dry in place.
Final Quality-Control Checklist
- Each coaster has 12 even scallops and measures 5.25″ (13.3 cm) across.
- Border Round 1 has 108 sts, and the rev sc edge has no gaps.
- Each coaster lies flat with no cupping or ruffling.
- Each coaster has 3 sprigs, each with 2 leaves and 3 berries.
- The holder base is 6″ (15.2 cm) across.
- The back wall is 2.85″ (7.2 cm) tall and the front is 0.85″ (2.2 cm) tall.
- All six coasters slide in and out of the holder easily.
- All ends are woven in securely.
Troubleshooting
- Center cups: Your tension is too tight or you missed an increase. Recount each round and go up a hook size.
- Edge ruffles: You have extra stitches or loose tension. Recount Round 10 (60) and go down a hook size.
- Coaster looks six-sided: Stagger the increases on alternate rounds.
- Scallops are uneven: Check that each scallop has 7 sts in Round 11 and 9 sts in Border Round 1.
- Holder walls lean outward: The BLO round was skipped, or the walls are too loose. Rework Round 16 in BLO.
- Coasters don’t fit: The base is too small. Work one more increase round (sc in next 14 sts, inc; 96 sts), then work the walls over 96 sts. Leave a 32-st opening and work the back wall over 64 sts.
- Leaves curl: Steam-block them flat before sewing them on.
Care
Hand wash in cool water and lay flat to dry. Reshape the scallops while damp, and skip the dryer so the appliqués stay neat.
Final Notes
Here is how the measurements build up. Round 10 is 4″ (10.2 cm) across. The scallop round brings the coaster to 4.75″ (12.1 cm), and the 0.25″ (0.6 cm) border finishes it at 5.25″ (13.3 cm). The holder base grows to 6″ (15.2 cm), so the coasters fit with room to spare. Its walls rise to 2.85″ (7.2 cm) at the back. If you check each stage, the pieces will match and fit together neatly.
Happy crocheting!