
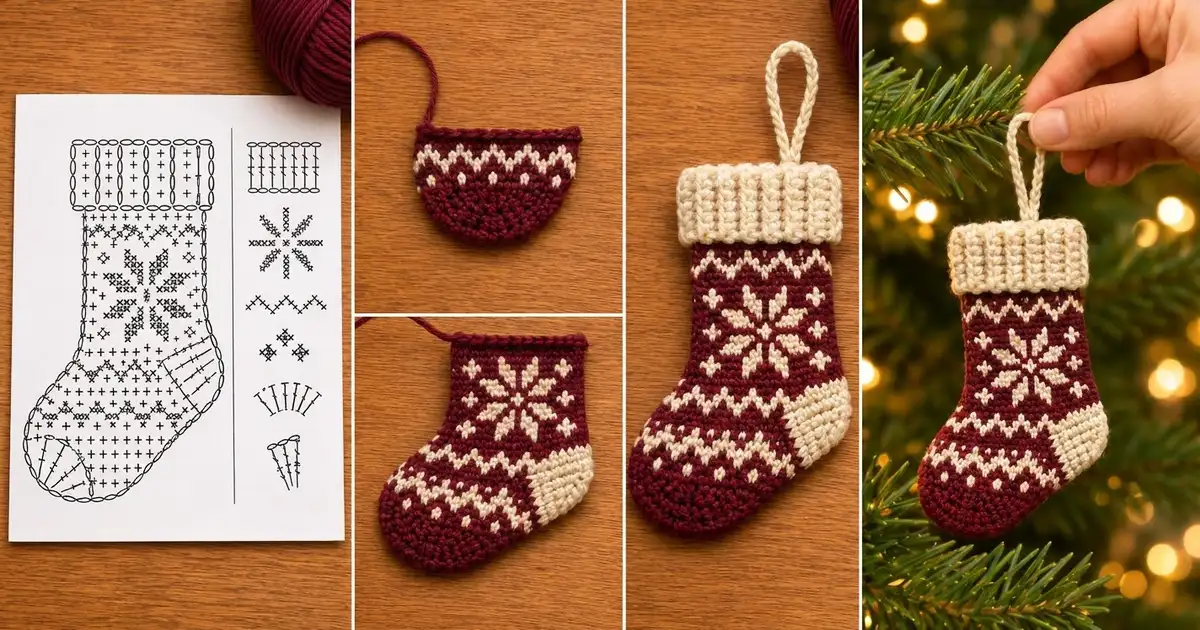
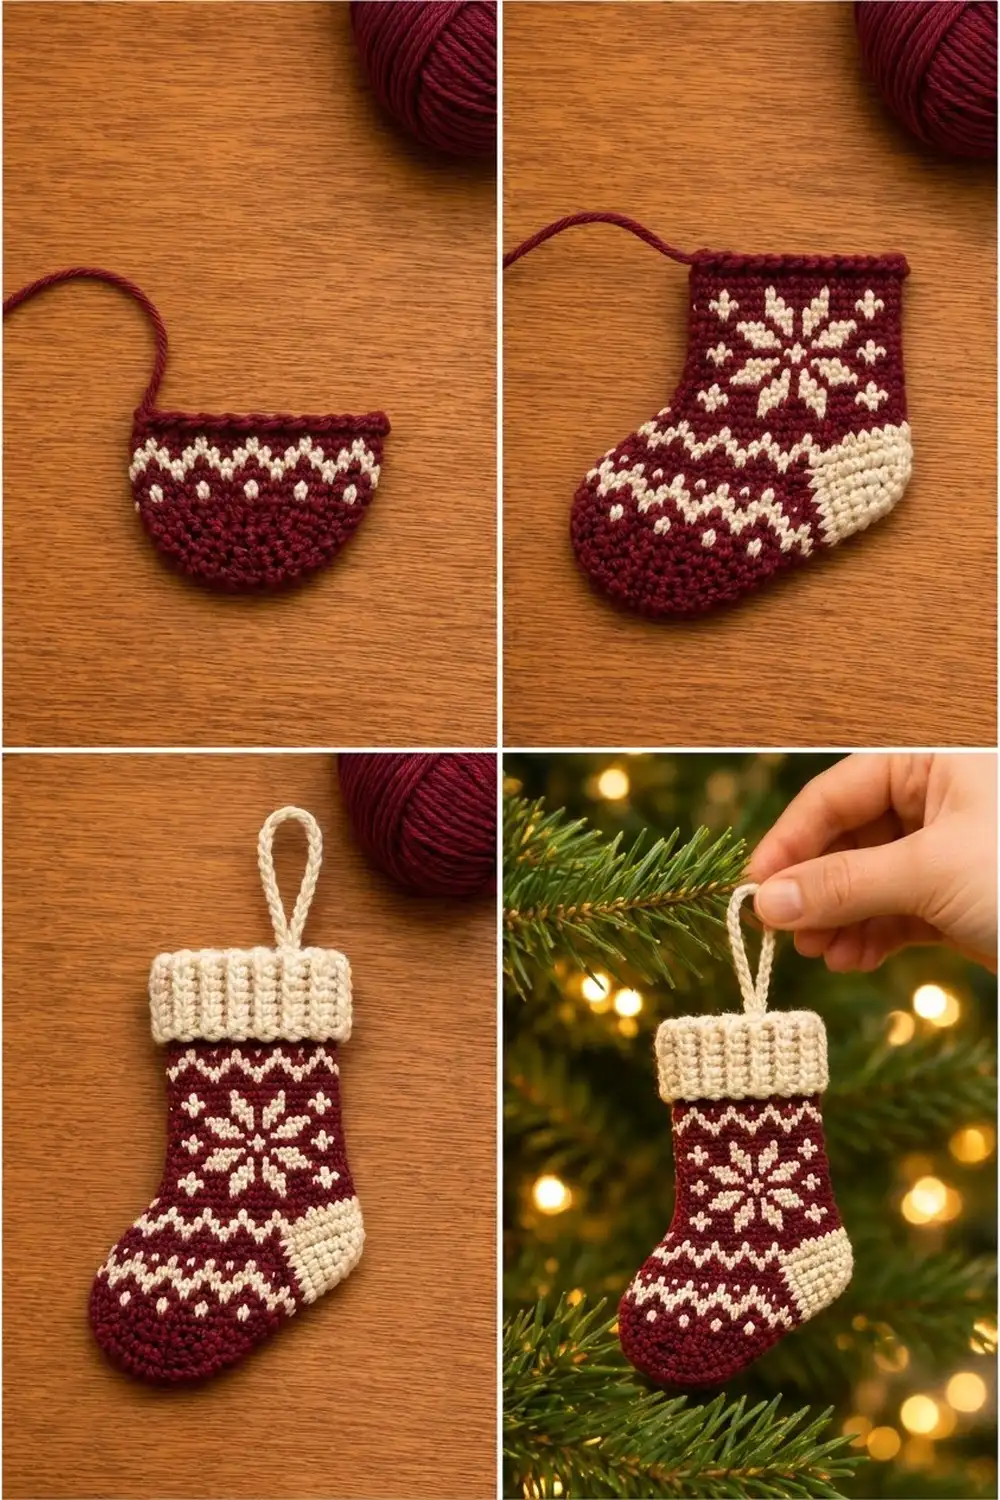
This little stocking looks like a classic Nordic sweater. It has a deep burgundy body with cream dots, zigzags and a bold snowflake, a solid cream heel and a ribbed cream cuff. A cream cord loop on top lets it hang from a tree branch, a door knob or a gift.
The colorwork is tapestry crochet. You carry the color you are not using inside your single crochet stitches, so the fabric is firm and nearly the same on both sides. You only ever work with two colors, burgundy (B) and cream (C).
The ornament is one flat, single-layer piece. It is about 4.4 in (11.2 cm) wide at the foot and 6.6 in (16.8 cm) tall without the loop. This pattern uses US crochet terms.
Construction overview: You work the body flat in rows from the sole up. You shape the rounded foot with increases and the instep with decreases. Then you add one round of burgundy edging. Next you work the ribbed cuff sideways, joining it to the top edge as you go. Last, you add the hanging loop.
Finished Size and Construction
- Finished size: 4.4 in (11.2 cm) wide at the foot × 6.6 in (16.8 cm) tall, not counting the loop
- Skill level: Intermediate
- Terminology: US
- Yarn weight: DK (light worsted / #3)
- Hook: 3.25 mm (US D-3)
- Number of pieces: 1 (body, cuff and loop are all worked on as you go)
- Layout: a single flat stocking, toe pointing left
- Body size before border: 4 in (10.2 cm) wide at the foot × 5.2 in (13.2 cm) tall; the leg is 3 in (7.6 cm) wide
- Border depth: 0.2 in (0.5 cm), one round of single crochet
- Cuff: 3.8 in (9.7 cm) wide × 1.2 in (3.0 cm) tall
- Loop: about 2 in (5.1 cm) tall
Materials
Use a smooth, tightly plied DK yarn in cotton, a cotton blend or a firm acrylic. Fuzzy yarns blur the snowflake. Pick two colors with strong contrast.
- Burgundy (B): 15 g / 34 m
- Cream (C): 10 g / 23 m
The quantities include a margin of about 25% for swatching and for carrying yarn.
Tools:
– 3.25 mm (US D-3) hook
– Tapestry needle
– Scissors
– Stitch markers (2)
– Ruler or tape measure
– Pins and a blocking mat
Abbreviations (US Terms)
- ch – chain
- sc – single crochet
- sl st – slip stitch
- inc – 2 sc in the same stitch
- sc2tog – single crochet 2 together (a decrease)
- blo – back loop only
- st(s) – stitch(es)
- RS / WS – right side / wrong side
- B / C – burgundy / cream
Special technique: tapestry color change. Work the last yarn over of the stitch before a color change with the new color. Lay the unused color along the tops of the stitches you are about to work into, and work over it so it is hidden inside the stitches. From Row 4 on, carry the unused color across the whole row, even in rows that use only one color. This keeps the thickness even.
Reading the rows: Odd rows are RS rows. They are worked right to left, starting at the heel side. Even rows are WS rows, worked left to right from the toe side. Every color sequence below is written in the order you work it.
Gauge and Checkpoints
Gauge: 20 sts × 20 rows = 4 in (10.2 cm) in tapestry sc, carrying the second color.
Make a swatch: ch 21, then work 20 sc across, carrying C. Work 20 rows. Block it, then measure. Because the stitches and rows are nearly square, one edge stitch per row end lies flat later. The border depends on this.
Checkpoints:
– After Row 5: 4 in (10.2 cm) wide
– After Row 10: 2 in (5.1 cm) tall
– After Row 15: the leg is 3 in (7.6 cm) wide
– After Row 26: 5.2 in (13.2 cm) tall
– After the border: 4.4 in (11.2 cm) wide at the foot × 5.4 in (13.7 cm) tall
Too big? Go down 0.25 mm in hook size and tug the carried strand snug every few stitches. Too small? Go up 0.25 mm. Don’t change the stitch counts, because the snowflake depends on them.
Body
Foundation: With B, ch 13.
Row 1 (RS): Sc in the 2nd ch from the hook and in each ch across. Ch 1 and turn. (12 sts)
Row 2 (WS): With B, inc in the first st, sc 10, inc in the last st. Ch 1 and turn. (14 sts)
Row 3 (RS): With B, inc, sc 12, inc. (16 sts)
Join C in the last stitch and start carrying it.
Row 4 (WS), dot row: [B] inc, [C] 1, [B] 3, [C] 1, [B] 3, [C] 1, [B] 3, [C] 1, [B] 1, [B] inc. (18 sts)
Row 5 (RS), heel begins: [C] inc, [C] 2, [B] 14, [B] inc. (20 sts)
Checkpoint: the piece is 4 in (10.2 cm) wide.
Row 6 (WS), zigzag: [B] 1, [C] 1, [B] 3, [C] 1, [B] 3, [C] 1, [B] 3, [C] 1, [B] 1, [C] 5. (20 sts)
Row 7 (RS), zigzag: [C] 6, then [B] 1, [C] 1 7 times. (20 sts)
Row 8 (WS), zigzag: [B] 3, [C] 1, [B] 3, [C] 1, [B] 3, [C] 1, [B] 2, [C] 6. (20 sts)
Row 9 (RS): [C] 6, [B] 14. (20 sts)
Row 10 (WS), dot row: [B] 2, [C] 1, [B] 3, [C] 1, [B] 3, [C] 1, [B] 4, [C] 5. (20 sts)
Checkpoint: the piece is 2 in (5.1 cm) tall. The cream heel wedge is 4 sts wide at Row 5, 6 sts wide at Rows 7–9, and narrows again at Row 10.
Instep shaping. The toe end loses 1 st per row.
Row 11 (RS): [C] 4, [B] 14, [B] sc2tog. (19 sts)
Row 12 (WS): [B] sc2tog, [B] 14, [C] 3. (18 sts)
Row 13 (RS): [C] 2, [B] 14, [B] sc2tog. (17 sts)
Row 14 (WS): [B] sc2tog, [B] 15. (16 sts)
Row 15 (RS): [B] 14, [B] sc2tog. (15 sts)
Checkpoint: the leg is 3 in (7.6 cm) wide. The heel ends in a point at Row 13.
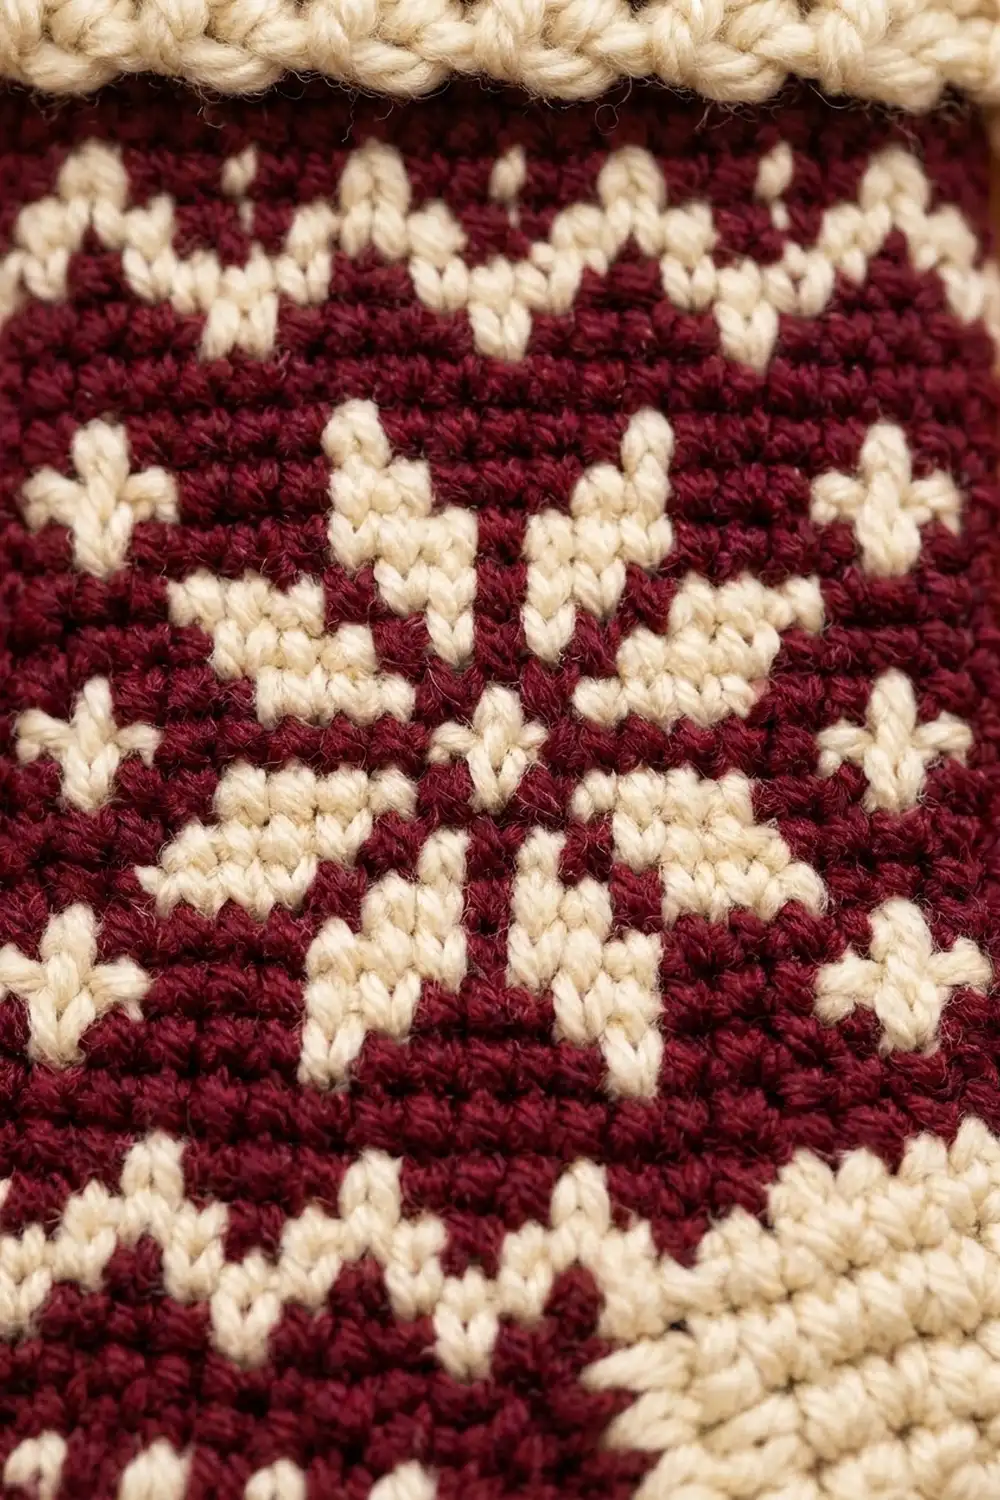
Snowflake section. All of these rows are symmetrical, so you read them the same way in either direction. Each row has 15 sts.
Row 16 (WS): [B] 4, [C] 1, [B] 2, [C] 1, [B] 2, [C] 1, [B] 4.
Row 17 (RS): [B] 5, [C] 1, [B] 1, [C] 1, [B] 1, [C] 1, [B] 5.
Row 18 (WS): [B] 1, [C] 1, [B] 4, [C] 3, [B] 4, [C] 1, [B] 1.
Row 19 (RS), center row: [C] 3, [B] 1, [C] 7, [B] 1, [C] 3.
Row 20 (WS): Repeat Row 18.
Row 21 (RS): Repeat Row 17.
Row 22 (WS): Repeat Row 16.
The 7-stitch center bar and the diagonal and vertical arms form an eight-armed snowflake. The 3-stitch bars at each edge, with single stitches above and below them, form the small side crosses.
Upper band. Each row has 15 sts.
Row 23 (RS): [B] 15.
Row 24 (WS): [B] 1, [C] 1, [B] 3, [C] 1, [B] 3, [C] 1, [B] 3, [C] 1, [B] 1.
Row 25 (RS): [C] 1, [B] 1 7 times, [C] 1.
Row 26 (WS): [B] 3, [C] 1, [B] 3, [C] 1, [B] 3, [C] 1, [B] 3.
Fasten off C. Keep B attached.
Checkpoint: the body is 5.2 in (13.2 cm) tall, 4 in (10.2 cm) wide at the foot and 3 in (7.6 cm) wide at the leg. Weave in the C tail along the carried strand.
Border
Border gauge: the same as the body, 5 sc per inch (per 2.54 cm), and about 1 row end per stitch.
Setup: Do not turn after Row 26. With B, ch 1 and work down the toe-side edge.
Border round (worked along the sides and bottom; the top edge is left open):
– Toe side: sc 1 in each of the 26 row ends, from Row 26 down to Row 1. (26 sts)
– Bottom (sole): working into the unused loops of the foundation ch, work 2 sc in the first loop, sc 10, then 2 sc in the last loop. That is 12 loops worked as 10 + 2 extra. (14 sts)
– Heel side: sc 1 in each of the 26 row ends, from Row 1 up to Row 26. (26 sts)
Total: 26 + 14 + 26 = 66 sts. Fasten off.
Why the math works: the stitch and row gauge are equal, so 1 sc per row end matches the length of each edge. The increases and decreases already round off the curves, so the side edges need no extra stitches. The only extra stitches are the 2 at the sole corners, where the edge turns sharply.
The border adds 1 st on each side and 1 row at the bottom. The foot becomes 22 sts = 4.4 in (11.2 cm) wide, the body becomes 27 rows = 5.4 in (13.7 cm) tall, and the leg becomes 17 sts = 3.4 in (8.6 cm) wide.
Cuff (Ribbed, Joined As You Go)
You work the cuff sideways in sc blo. Each row runs straight up and down, so the rows form vertical ribs. Rows 1–2 and 18–19 hang past the edges of the leg, which makes the cuff wider than the leg.
Foundation: With C, ch 7.
Row 1 (worked downward): Sc in the 2nd ch from the hook and in each ch across. (6 sts) Ch 1 and turn.
Row 2 (worked upward): Sc blo in each st. (6 sts) Ch 1 and turn.
Hold the cuff above the leg so that the end of Row 2 sits just left of the leg’s top-left corner. Its bottom edge should line up with the top of Row 26. Place a marker in the first top stitch of Row 26 (toe side).
Joined rows 3–17:
– Odd rows (worked down): Sc blo in each st (6 sts). Then sl st into the next 2 top sts of Row 26 and turn. Do not ch.
– Even rows (worked up): Skip the sl sts and sc blo in each st (6 sts). Ch 1 and turn.
Rows 3, 5, 7, 9, 11, 13 and 15 each join 2 sts, which is 14 sts. Row 17 joins only the last 1 st. Total joined: 15 sts, exactly the width of the leg top. That gives 15 joined rows for 15 sts, which matches the 1:1 gauge.
Rows 18–19: Work sc blo across (6 sts) with no joins, so these rows hang past the heel side. Fasten off.
Checkpoint: the cuff is 19 rows × 6 sts = 3.8 in × 1.2 in (9.7 cm × 3.0 cm). It extends 0.2 in (0.5 cm) past each bordered edge of the leg. The total height is now 6.6 in (16.8 cm).
Hanging Loop
The top edge of the cuff is made of 19 row ends. With C, join with a sl st in the end of cuff Row 10, the center row.
Ch 30, then sl st into the same row end to close the loop. Sl st into the back bump of each of the 30 ch to make a firm cord. Fasten off and weave the tail down into the cuff.
The loop stands about 2 in (5.1 cm) tall.
Final Blocking
- Weave in all the tails along the carried strands, keeping each color behind matching stitches.
- Mist the ornament lightly with water until it is damp.
- Pin it flat on the mat: 4.4 in (11.2 cm) across the foot, 5.4 in (13.7 cm) from the sole to the cuff seam, and 3.8 in (9.7 cm) across the cuff.
- Ease the sole and toe into a smooth curve with your fingers.
- Straighten the cuff ribs so they stand vertical.
- Lay the loop straight up from the center of the cuff.
- Let it dry completely, then unpin.
Final Quality-Control Checklist
- Stitch counts: Rows 5–10 have 20 sts and Rows 15–26 have 15 sts.
- The snowflake is centered, with its 7-st bar in the middle of Row 19.
- The heel wedge reaches its widest at Rows 7–9 and ends at Row 13.
- The border has 66 sts, and no edge ripples or cups.
- The cuff has 19 rows: 15 joined and 2 free at each end.
- The loop is centered on cuff Row 10.
- None of the carried strands show through on the RS.
- The finished size is 4.4 × 6.6 in (11.2 × 16.8 cm).
Troubleshooting
- Burgundy peeks through the cream stitches: Hold the carried strand lower, and work the color change on the last yarn over of the previous stitch.
- The fabric leans to one side: This is normal in tapestry sc, and blocking fixes most of it. Turning your work every row, as written, also limits the slant.
- The snowflake is off center: Count the leg stitches again. The leg must have exactly 15 sts after Row 15.
- The border ruffles: Your row gauge is shorter than your stitch gauge. Skip 1 row end every 6 rows on each side.
- The cuff pulls in the leg: Sl st loosely into the top stitches, or go up one hook size just for the joins.
- The loop twists: Sl st into the back bumps only, and block the loop while it is damp.
Care
Hand wash in cool water, press out the water in a towel and dry flat. Don’t wring or tumble dry it, because that distorts the colorwork.
Final Notes
Each stage builds on the one before. The 20 sts × 20 rows gauge gives a body 4 × 5.2 in (10.2 × 13.2 cm). The 66-st border brings it to 4.4 × 5.4 in (11.2 × 13.7 cm). The 15 joined cuff rows match the 15 leg stitches, and the 2 free rows at each end make the cuff 3.8 in (9.7 cm) wide. The cuff adds 1.2 in (3.0 cm) of height, for a finished ornament 6.6 in (16.8 cm) tall. Check your gauge first and every later number will fall into place.
Happy crocheting!