

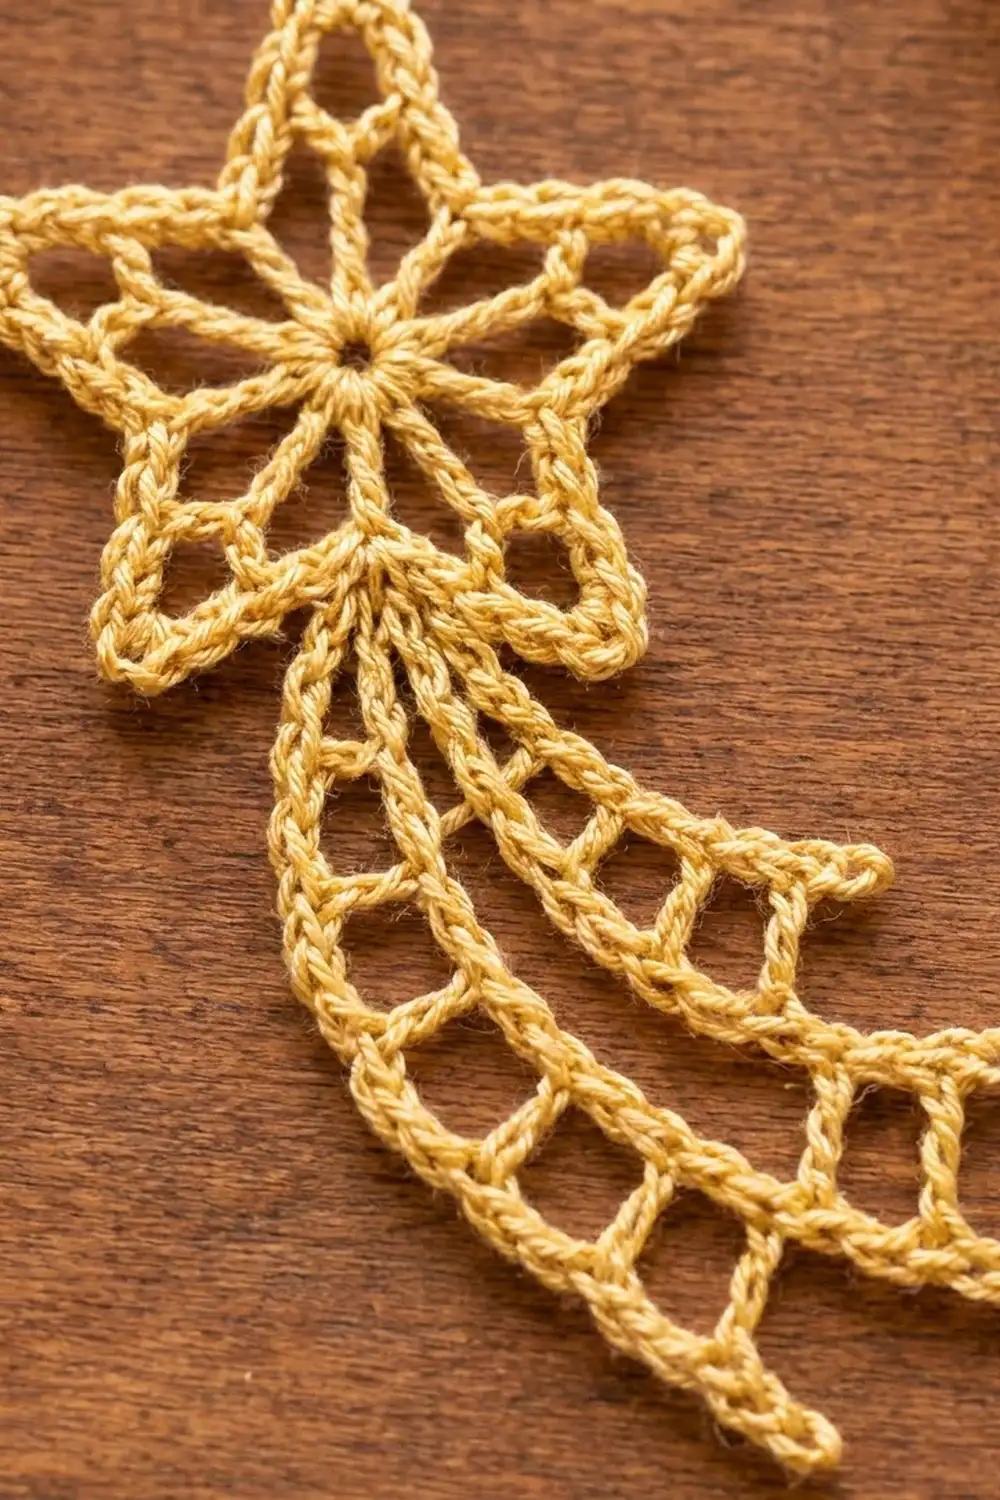
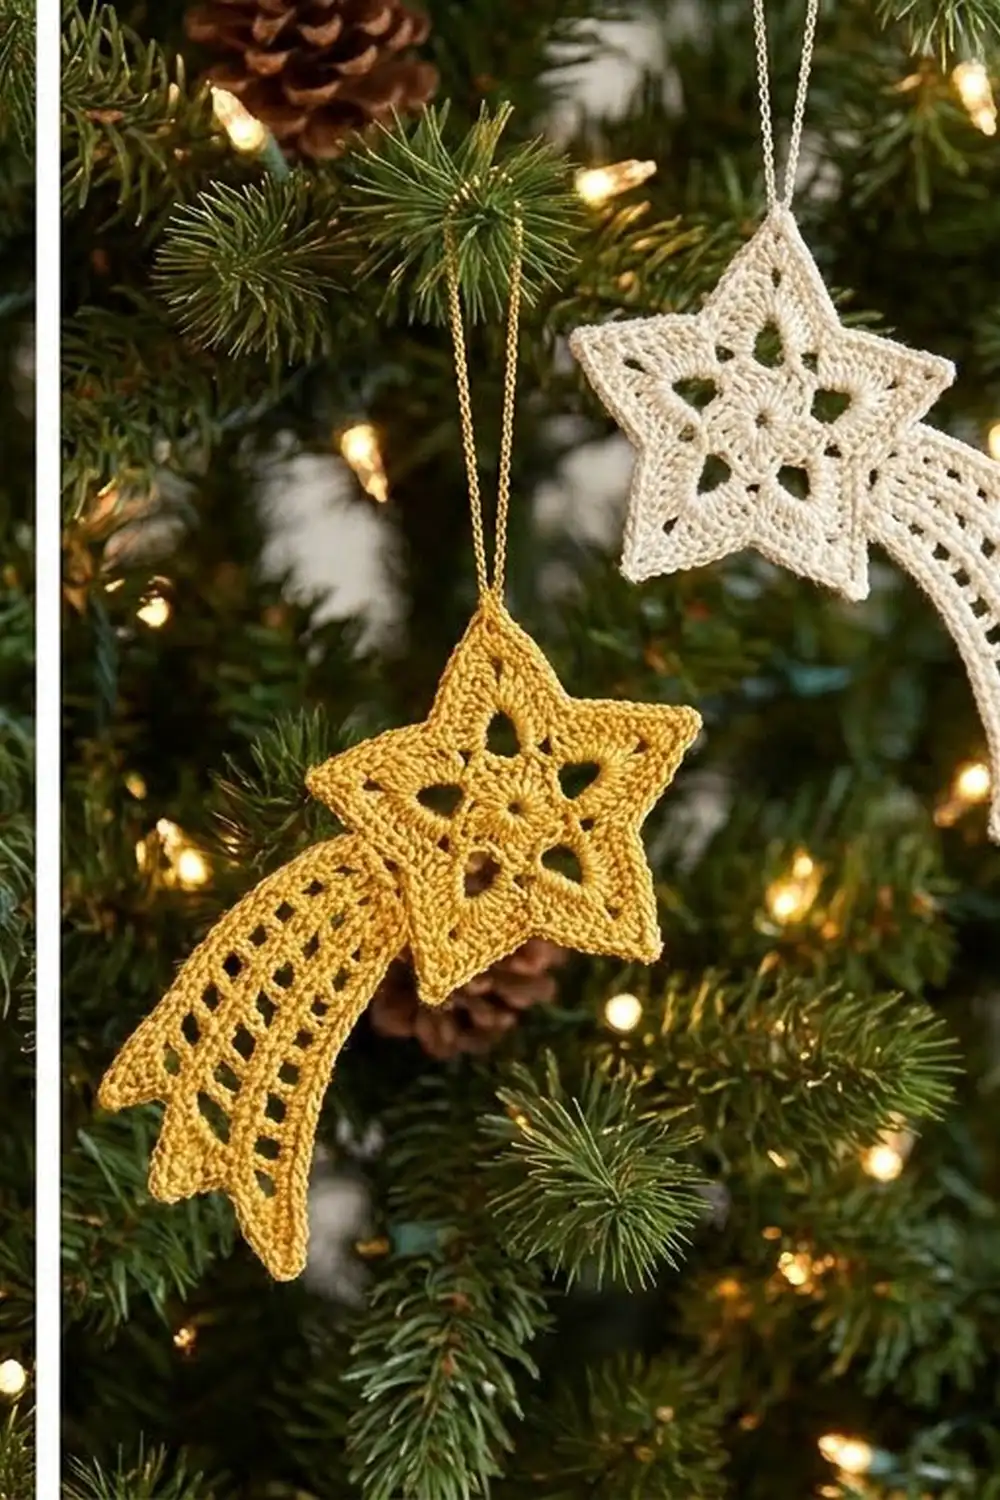
This little shooting star is a light, lacy ornament with a lot of sparkle for very little yarn. An open five-pointed star sits on top of a curved, ladder-style tail. When it hangs, it looks like a comet streaking across the tree.
The sample is made in a warm golden yellow, which reads like tinsel against green branches. It works just as well in cream, lilac or pale blue. If you make one in each color, you get a soft, Scandinavian-style set. The look is clean and airy: open spaces, crisp lines and no fussy surface texture.
The pattern uses US crochet terms. The finished ornament measures 3 in (7.6 cm) across the star from point to point. It is 6 in (15.2 cm) long from the top point to the tail tip, and the hanging loop adds 1.5 in (3.8 cm).
You make the whole ornament in one piece. The star is worked in four rounds from a magic ring. Without cutting the yarn, you then chain out the tail and work two mesh rows back and forth. A trim row finishes the outer edge of the tail. Last, you add a chain hanging loop at the top point.
Finished Size and Construction
- Finished size: 3 in (7.6 cm) wide × 6 in (15.2 cm) long, plus a 1.5 in (3.8 cm) hanging loop
- Skill level: Easy-intermediate
- Terminology: US crochet terms
- Yarn weight: Sport (#2), mercerized cotton
- Hook: 2.75 mm (C)
- Number of pieces: 1
- Layout: Star at the top, curved tail below, loop at the top point
- Star size: 3 in (7.6 cm) point to point
- Size before border: 6 in (15.2 cm) long; tail 0.8 in (2.0 cm) wide
- Border depth: 0.2 in (0.5 cm), on the tail’s outer edge only
Materials
Yarn: Use a smooth, tightly plied mercerized cotton in sport weight. Cotton holds the open shapes well after blocking and keeps the chain rails crisp. Avoid fuzzy or very soft acrylics, because they make the lace look blurry and won’t hold the tail’s curve.
- Golden yellow (sample): 10 g / 35 m per ornament
- Optional colorways: cream, lilac or pale blue, 10 g / 35 m each per ornament
One ornament uses about 6 g. The amounts above include a margin for gauge swatching and practice.
Tools:
– 2.75 mm (C) crochet hook
– Tapestry needle
– Scissors
– Blocking mat and rust-proof pins
– Spray bottle, or fabric stiffener (optional)
Abbreviations (US Terms)
- ch – chain
- sl st – slip stitch
- sc – single crochet
- dc – double crochet
- tr – treble crochet (yo twice)
- sk – skip
- sp – space
- st(s) – stitch(es)
- MR – magic ring
Special stitch: Mesh. Make ch 2 or ch 3 as stated, skip the matching stitches or space, then dc in the next stitch. Each mesh makes one open “ladder” window with one dc rung.
Gauge and Checkpoints
Gauge isn’t critical for an ornament, but it controls the star’s shape and the tail’s curve. Make one complete star and check it before you commit to a set.
Base gauge: Rnds 1–2 should measure 1.5 in (3.8 cm) across.
Checkpoints:
– After Rnd 1: 0.6 in (1.5 cm) across
– After Rnd 2: 1.5 in (3.8 cm) across
– After Rnd 3: 2.6 in (6.6 cm) point to point
– After Rnd 4: 3 in (7.6 cm) point to point
– Tail Row 2: 3 meshes = 1 in (2.5 cm)
– Finished tail inner rail: 3.25 in (8.3 cm)
Too big? Go down to a 2.5 mm hook, or tighten your chains. Loose chains are the usual cause, because the star outline and tail rails are built on them.
Too small? Go up to a 3 mm hook. If the star cups instead of lying flat, your Rnd 3 chains are too tight. Loosen them before you change hooks.
Pattern
Part 1: Star
Rnd 1: MR, ch 3 (counts as dc), 9 dc in ring, sl st to top of beg ch-3. Pull the ring closed tightly. (10 dc)
Rnd 2 (spokes): Ch 6 (counts as tr + ch 2), [tr in next dc, ch 2] 9 times, sl st to 4th ch of beg ch-6. (10 tr, 10 ch-2 sps)
These 10 tr are the spokes. From here on, they alternate between valley spokes and point spokes, starting with a valley spoke.
Rnd 3 (points): Ch 1, sc in same st (valley spoke). Ch 3, (tr, ch 3, tr) in next tr (point spoke), ch 3, sc in next tr (valley spoke). Repeat from * to * 5 times. On the last repeat, replace the final sc with a sl st to the first sc. (5 sc, 10 tr, 15 ch-3 sps: 5 tip sps + 10 side sps)
Each pair of tr stands on top of a point spoke and forms an open V. That V pushes the point out beyond the inner circle. The ch-3 sides angle back in toward the valleys.
Rnd 4 (outline): Ch 1, sc in same sc (valley). 3 sc in next ch-3 sp, sc in next tr, (2 sc, ch 2, 2 sc) in tip ch-3 sp, sc in next tr, 3 sc in next ch-3 sp, sc in next valley sc. Repeat from * to * 5 times. On the last repeat, skip the final valley sc, because it was already worked at the start. Sl st to the first sc. (65 sc + 5 ch-2 tips; 13 sc per point)
Per-point count check: 3 + 1 + 4 + 1 + 3 + 1 valley = 13 sc. 13 × 5 = 65 sc.
The star should now measure 3 in (7.6 cm) point to point. Turn it so the valley where you closed Rnd 4 is at the bottom. The point opposite it is the top point. Do not fasten off.
Part 2: Tail
The tail grows from the bottom valley sc, which is the first sc of Rnd 4.
Row 1 (inner rail): Ch 31.
Row 2 (first ladder band): Dc in 8th ch from hook. The 7 skipped chains count as the tip post, a ch-2 sp and 2 skipped chains. [Ch 2, sk 2 ch, dc in next ch] 7 times. Then ch 2, sk last 2 ch, and dc in the bottom valley sc of the star. (10 posts, 9 ch-2 meshes)
Chain check: 9 meshes × 3 + 4 = 31 chains. The last post goes into the star rather than a chain, which is why the formula is +4 instead of the usual +5.
Row 3 (second ladder band, curve row): Ch 5 (counts as dc + ch 2), turn. Sk ch-2 sp, dc in next dc. [Ch 3, dc in next dc] 8 times. The last dc goes into the tip post of Row 2 (3rd skipped ch from the first mesh). (10 posts, 9 meshes: 1 ch-2 + 8 ch-3)
The ch-3 spaces make the outer rail 8 chains longer than the inner rail. That extra length is what makes the tail curve. Lay the piece down now. The tail should already arc away from the star, and the outer rail should be about 4 in (10.2 cm) long.
Tip spike: Still at the tail tip, ch 6, sl st in 2nd ch from hook and in each of next 4 ch. (5 sl st) This extends the outer rail past the last rung, which gives the staggered rail ends you see in the sample.
Border (Tail Edge Trim and Hanging Loop)
The border is worked along the tail’s outer rail only. The star already has its finished outline from Rnd 4.
Border gauge: 9 sc = 1 in (2.5 cm) along the outer rail.
Trim row: Ch 1. Working back along Row 3 toward the star: sc in the tip post, then [3 sc in next ch-3 sp, sc in next dc] 8 times. That brings you to the last ch-2 sp. Work 2 sc in the ch-2 sp, then sc in the 3rd ch of the turning ch-5. (36 sc)
Count breakdown: 10 posts × 1 sc = 10. 8 ch-3 sps × 3 sc = 24. 1 ch-2 sp × 2 sc = 2. Total 10 + 24 + 2 = 36 sc.
Why the math works: Each ch-3 sp plus its post is 4 chain-lengths, and you work 4 sc over it. The ch-2 sp plus its post is 3 chain-lengths, and you work 3 sc over it. One sc per chain-length keeps the trim flat. It doesn’t pull the curve tighter or ruffle the edge. 36 sc at 9 sc per inch is 4 in (10.2 cm), which matches the outer rail.
Sl st into the next sc of the star outline to anchor the tail. Fasten off, leaving a 6 in (15.2 cm) tail.
Hanging loop: Join yarn with a sl st in the ch-2 tip of the top point. Ch 24, then sl st in the same ch-2 tip. Fasten off and weave in the ends. The loop hangs 1.5 in (3.8 cm) above the star.
Weave all ends into the solid outline, not into the open chain rails, where they would show.
Final Blocking
- Soak the ornament in cool water for 5 minutes. Press out the water in a towel. Don’t wring it.
- Lay the star flat on the mat with the top point up. Pin each of the 5 ch-2 tips so the star is 3 in (7.6 cm) point to point.
- Pin each valley lightly inward so all 5 points match in length.
- Shape the tail into a smooth arc. Pin the inner rail first, about 3.25 in (8.3 cm) long, then ease the outer rail into place.
- Pin each ladder window open so all the rungs stand straight and evenly spaced.
- Pin the tip spike straight out from the tail.
- Pin the hanging loop into a neat teardrop.
- For a stiff ornament, brush on diluted fabric stiffener now.
- Let it dry completely, at least 12 hours, before you unpin it.
Final Quality-Control Checklist
- Star is 3 in (7.6 cm) point to point, and all 5 points are the same size
- Center ring is closed tightly, with no hole bigger than the ring stitches
- Rnd 4 has 13 sc per point and a ch-2 at every tip
- Tail has 9 windows in each ladder band
- Trim row has 36 sc and lies flat
- Overall length is 6 in (15.2 cm), not counting the loop
- Loop is centered on the top point
- No yarn ends are visible from the front
Troubleshooting
Star cups or domes: Rnd 3 chains are too tight. Work them looser, or use ch 4 for the side spaces and keep 3 sc per space in Rnd 4.
Star ruffles: Rnd 3 chains are too loose. Tighten your tension, or go down a hook size.
Points look uneven: Count the spokes before Rnd 3. A missed tr in Rnd 2 shifts the valleys out of place.
Tail is straight instead of curved: Check that Row 3 uses ch-3 spaces, not ch-2. Blocking will also set the arc.
Tail curls too tightly: Your trim is too tight. Work it with a relaxed hand, or use a 3 mm hook for that row only.
Ornament twists when hanging: The loop is off-center. Re-join it exactly in the top ch-2 tip.
Care
Hand wash in cool water and lay flat to dry, re-pinning to shape if needed. Store the ornament flat in tissue so the points and tail keep their shape.
Final Notes
Everything in this pattern builds on the measurement before it. A 0.6 in (1.5 cm) ring leads to 1.5 in (3.8 cm) of spokes. The spokes lead to 2.6 in (6.6 cm) points and then a 3 in (7.6 cm) star. The 31-chain tail gives 9 even meshes, and the ch-3 outer band pulls it into a smooth arc. The 36-sc trim finishes the edge without changing the curve.
If you check each number as you go, every ornament in your set will come out the same size. Make one golden comet for the top branch, then add cream, lilac and pale blue ones for a soft, glowing set.
Happy crocheting!