

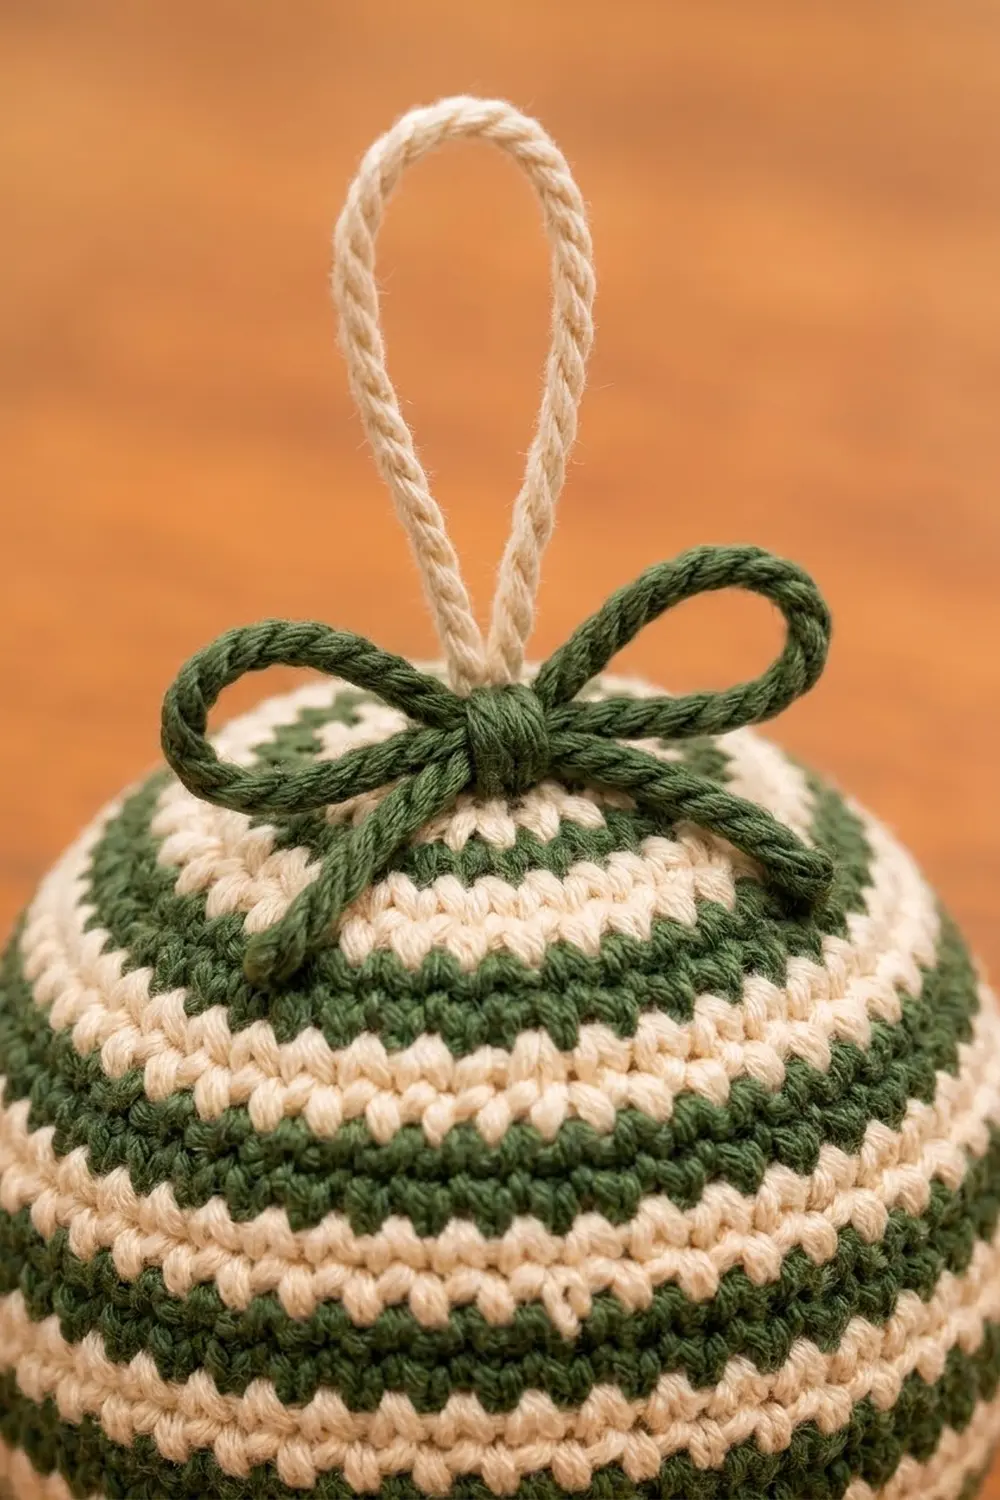
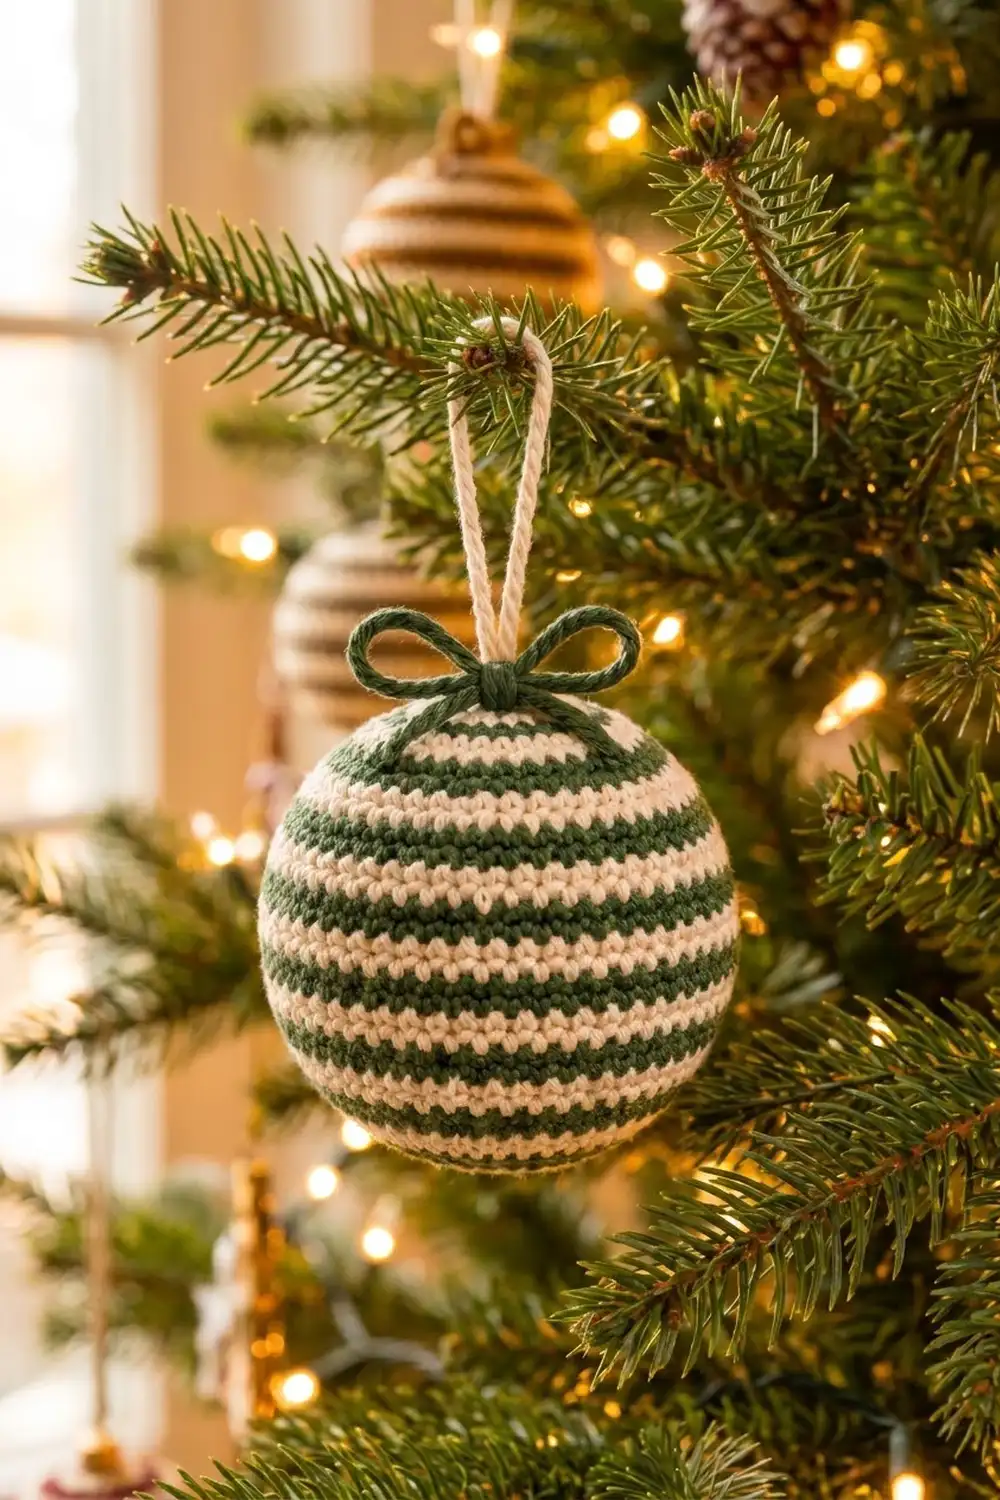
This striped ball ornament starts as a flat rectangle. You work it in rows, seam it into a tube, stuff it, and gather both ends closed. Forest-green and cream stripes wrap around the ball, and a cream twisted-cord loop with a small green bow sits on top.
The look is calm and classic, like an old wool ornament from a holiday cabin. The fabric is dense single crochet, so the stripes stay crisp and the stuffing stays hidden. Swap the green for burgundy, navy, or mustard and you have a matching set for the tree.
This pattern uses US crochet terms. The finished ball is about 3 in (7.6 cm) in diameter, about 9.4 in (23.9 cm) around the middle, and the hanging loop adds about 2.5 in (6.4 cm) on top.
Here is how it comes together. First you crochet a 36-stitch, 26-row striped rectangle. Next you seam the short side edges together to make a tube. Then you work a cream rim around each opening and gather it shut, stuffing the ball before you close the top. Last, you add the hanging loop and the bow.
Finished Size and Construction
- Finished size: about 3 in (7.6 cm) in diameter; loop adds 2.5 in (6.4 cm)
- Skill level: Easy
- Terminology: US crochet terms
- Yarn weight: Worsted (#4), cotton or cotton blend
- Hook: 4.0 mm (US G-6)
- Number of pieces: 1 ball body, plus 1 twisted-cord loop and 1 twisted-cord bow
- Layout: one flat rectangle, seamed into a tube with gathered ends
- Piece size (flat): 8 in (20.3 cm) wide x 5.2 in (13.2 cm) tall
- Size before border: tube 8 in (20.3 cm) around x 5.2 in (13.2 cm) tall
- Border depth: 2 rounds per opening, about 0.4 in (1.0 cm) before gathering
Materials
Choose a smooth worsted-weight cotton or cotton blend with good stitch definition. Cotton holds its shape well over stuffing and keeps the stripe edges sharp. Avoid fuzzy yarns, which blur the stripes.
- Color A, forest green: 15 g, about 27 m (29.5 yd)
- Color B, cream: 15 g, about 27 m (29.5 yd)
Tools:
- 4.0 mm (US G-6) crochet hook
- Tapestry needle
- Scissors
- Polyester fiberfill, about 10 g
- 2 stitch markers
- Measuring tape or ruler
These amounts include a safety margin of roughly 25% for gauge swatching, tails, and the twisted cords.
Abbreviations (US Terms)
- ch – chain
- sc – single crochet
- sl st – slip stitch
- sc2tog – single crochet 2 together
- st(s) – stitch(es)
- rnd – round
- RS / WS – right side / wrong side
Special stitch – sc2tog: Insert the hook in the next st, yarn over, pull up a loop. Insert the hook in the following st, yarn over, pull up a loop (3 loops on hook). Yarn over and pull through all 3 loops. This turns 2 stitches into 1.
Color change: Work the last sc of the row until 2 loops are left on the hook. Drop the old color, yarn over with the new color, and pull through both loops.
Gauge and Checkpoints
Gauge: 18 sc and 20 rows = 4 in (10.2 cm) in single crochet worked in rows.
The rectangle is the gauge swatch, so check it as you go. Measure on a flat surface without stretching.
- After Row 10: 8 in (20.3 cm) wide x 2 in (5.1 cm) tall
- After Row 20: 8 in (20.3 cm) wide x 4 in (10.2 cm) tall
- After Row 26: 8 in (20.3 cm) wide x 5.2 in (13.2 cm) tall
If your width is more than 8.2 in (20.8 cm), go down half a hook size. Fabric that is too loose lets stuffing show between the stitches.
If your width is less than 7.8 in (19.8 cm), go up half a hook size. A rectangle that is too small will give you a smaller, firmer ball. That still works, but the stripes will look narrower.
Row height matters less than width. If you have 8 in (20.3 cm) across but your rows run a little short or tall, keep the row count at 26 so the stripe sequence still ends in green.
Pattern: Striped Rectangle
The stripe sequence is 2 rows Color A, 2 rows Color B, repeated. The rectangle starts and ends with Color A. That gives 7 green stripes (14 rows) and 6 cream stripes (12 rows), for 26 rows total.
Every stripe is 2 rows, so each color change happens at the same side edge. Carry the unused color loosely up that edge instead of cutting it. This edge goes into the seam later, so the carried strands will be hidden.
Foundation: With Color A, ch 37.
Row 1 (RS): Sc in the 2nd ch from the hook and in each ch across, turn. (36 sc)
Place a marker on the RS of Row 1 so you can find it later.
Row 2: Ch 1 (does not count as a st), sc in each st across. Change to Color B in the last st, turn. (36 sc)
Rows 3–4: With Color B, ch 1, sc in each st across, turn. Change to Color A in the last st of Row 4. (36 sc each row)
Rows 5–6: With Color A, ch 1, sc in each st across, turn. Change to Color B in the last st of Row 6. (36 sc each row)
Rows 7–26: Keep repeating Rows 3–6. That is 2 rows of Color B, then 2 rows of Color A, until you finish Row 26 in Color A. (36 sc each row)
Fasten off Color A with a 12 in (30.5 cm) tail for seaming. Cut Color B with a 6 in (15.2 cm) tail.
Stitch count check: 36 sts x 26 rows = 936 sc total. At 18 sts per 4 in (10.2 cm), 36 sts = 8 in (20.3 cm). At 20 rows per 4 in (10.2 cm), 26 rows = 5.2 in (13.2 cm).
Pattern: Seaming the Tube
Fold the rectangle so the two short side edges (the row ends) meet, with the RS facing in. You now have 26 row ends on each side. Match them one to one, Row 1 to Row 1 and Row 26 to Row 26, so every stripe lines up.
Thread the Color A tail onto the tapestry needle. Whipstitch through 1 row end on each side, 26 stitches in all. Keep the tension even and snug, but don’t pull so hard that the seam puckers. Weave in the tail along the seam and turn the tube RS out.
Checkpoint: The tube should measure 8 in (20.3 cm) around and 5.2 in (13.2 cm) tall. The stripes should meet cleanly at the seam with no stair-step.
The seam joins row ends only. It doesn’t change the 36 stitches around either opening, which matters for the border.
Pattern: Hanging Loop and Bow
Hanging loop (Color B): Cut a 36 in (91.4 cm) strand. Fold it in half and knot the cut ends together. Anchor the knot (for example under a book), slip a pencil through the fold, and twist until the strand kinks back on itself. Fold the twisted strand in half and let it twist back together. Knot the end. You should get a cord about 7 in (17.8 cm) long.
Bow (Color A): Make a second twisted cord the same way from a 48 in (121.9 cm) strand. It should be about 10 in (25.4 cm) long. Set both cords aside.
Border: Edge Rounds and Closing
Border gauge: The border is worked in single crochet rounds at the same gauge as the body. Because 36 sts = 8 in (20.3 cm), Rnd 1 matches the tube circumference exactly and lies flat without ruffling or pulling in.
Bottom Opening (Foundation Edge)
Rnd 1: With RS facing, join Color B with a sl st in the free loop of the foundation chain at the seam. Ch 1, sc in each of the 36 free loops (1 sc per existing st + 0 extra). Sl st to the first sc to join. (36 sc)
Rnd 2 (decrease): Ch 1, sc2tog 18 times around. Sl st to the first st to join. (18 sts)
Fasten off, leaving a 10 in (25.4 cm) tail. Thread the tail through the front loop of each of the 18 sts, pull tight to close the hole, and knot it on the inside. Weave in the end.
Top Opening (Row 26 Edge)
Rnd 1: With RS facing, join Color B with a sl st in the top of the first st of Row 26 at the seam. Ch 1, sc in each of the 36 sts (1 sc per existing st + 0 extra). Sl st to join. (36 sc)
Rnd 2 (decrease): Ch 1, sc2tog 18 times around. Sl st to join. (18 sts)
Fasten off with a 10 in (25.4 cm) tail. Thread the tail through the front loops of all 18 sts, but don’t close the hole yet.
Stuffing: Stuff the ball firmly, a small tuft at a time. Fill the bottom first, then the middle, then up to the rim. The ball should feel firm and round, not lumpy. Firm stuffing stretches the 8 in (20.3 cm) tube to about 9.4 in (23.9 cm) around.
Attach the loop: Fold the 7 in (17.8 cm) cream cord so it makes a loop 2.5 in (6.4 cm) tall. Push both knotted ends about 0.5 in (1.3 cm) down into the opening.
Close the top: Pull the tail tight so the gathered rim grips the base of the loop. Stitch through both cord ends twice to lock them in place, then knot inside and bury the tail in the stuffing.
Why the math works: Each opening has exactly 36 sts, because the seam joins row ends and adds no stitches. Rnd 1 keeps all 36 sts so the cream rim matches the tube without ripples. Rnd 2 halves 36 to 18, which pulls the rim inward. Gathering the 18 front loops then closes the hole to about 0.25 in (0.6 cm). That is small enough to disappear under the bow on top and to form a neat dimple on the bottom.
Add the bow: Tie the 10 in (25.4 cm) green cord in a bow around the base of the loop. Make the loops about 1 in (2.5 cm) wide and leave tails about 0.5 in (1.3 cm) long. Put a dab of fabric glue on the knot or tack it with yarn so it stays centered.
Final Blocking
- Roll the ball between your palms for about 30 seconds to spread the stuffing evenly.
- Hold a steam iron 1 in (2.5 cm) above the surface and steam the ball lightly all over. Never press the iron onto the yarn.
- While it is warm, gently shape the ball with your hands. Push out any flat areas and line the stripes up horizontally.
- Steam the bow lightly and pinch the loops into shape.
- Hang the ornament by its loop and let it dry and cool completely, about 1 hour.
- Measure the ball. It should be about 3 in (7.6 cm) across and about 9.4 in (23.9 cm) around the middle.
Final Quality-Control Checklist
- Rectangle had 36 sc in every row and 26 rows total
- Stripes alternate 2 rows green, 2 rows cream, starting and ending in green
- Seam stripes line up with no stair-step
- Each border Rnd 1 has 36 sc; each Rnd 2 has 18 sts
- Bottom closes to a small, neat dimple
- Stuffing is firm and even, with none showing through the stitches
- Loop is secure, centered, and about 2.5 in (6.4 cm) tall
- Bow is centered and tacked in place
- All ends are woven in or buried in the stuffing
Troubleshooting
Rectangle is wider at the top than the bottom. You may be adding or skipping a stitch at the row ends. Count to 36 every row and work the first sc into the first st, not the turning chain.
Stripes don’t line up at the seam. Unpick the seam and match row ends one to one, starting from Row 1.
Carried yarn shows on the edge. Keep the carried strand loose and on the seam edge only. It will be hidden inside the whipstitch.
Stuffing shows through. Your fabric is too loose. Go down half a hook size, or use a fiberfill that matches your yarn color.
The gathered hole won’t close. Make sure you threaded through the front loops of all 18 sts, then pull firmly in steps.
Ball looks egg-shaped. Add stuffing around the middle, roll it between your palms, and steam-shape again.
Loop pulls out. Re-open the top a little, push the cord ends deeper, and stitch through them twice before you close the top.
Care
Spot clean with cool water and mild soap, then press out the water with a towel and let the ornament air dry while hanging. Don’t machine wash or tumble dry, because that can flatten the stuffing.
Final Notes
Every measurement in this pattern builds on the one before it. Gauge of 18 sc and 20 rows = 4 in (10.2 cm) gives a 36-stitch, 26-row rectangle of 8 in (20.3 cm) x 5.2 in (13.2 cm). Seamed, it becomes a tube 8 in (20.3 cm) around. Each opening has exactly 36 sts for Rnd 1 of the border, and Rnd 2 halves that to 18 for gathering. Firm stuffing stretches the tube to a ball about 3 in (7.6 cm) across and 9.4 in (23.9 cm) around, finished with a 2.5 in (6.4 cm) loop and a green bow.
If your rectangle measures right, the rest will follow. Make one in green, then try burgundy, navy, or mustard for a full set on the tree.
Happy crocheting!