
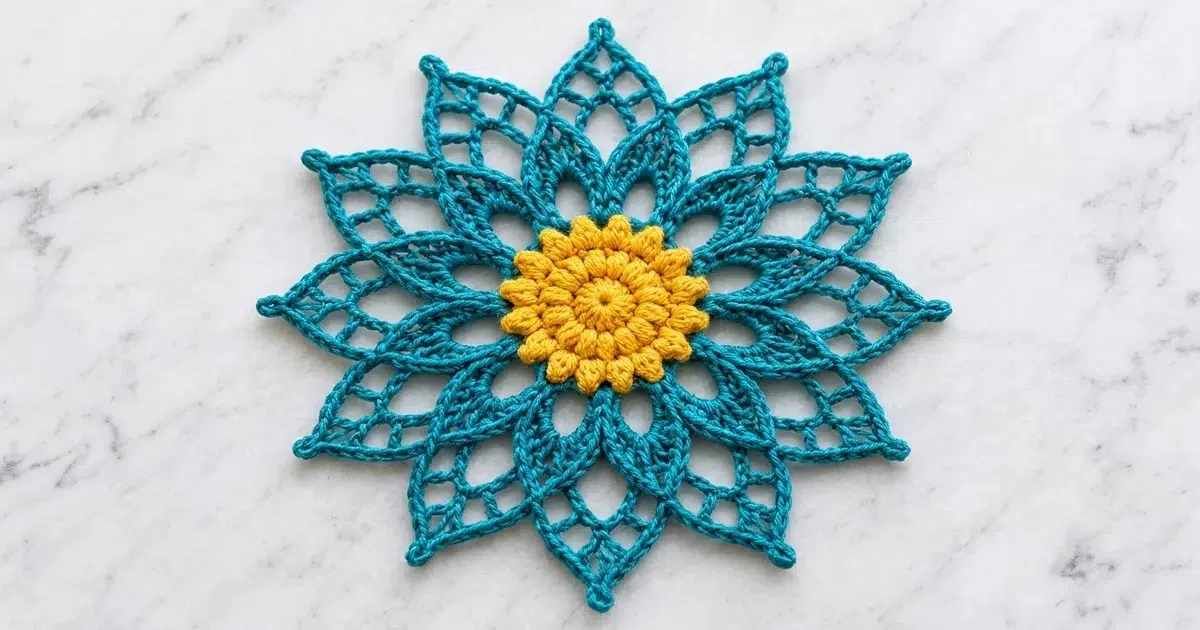
This motif is a bright, lacy star flower. A round, bobbly golden-yellow center sits inside two layers of deep teal petals. Twelve pointed inner petals frame the center, and twelve open lattice points fan out behind them. Together they form a crisp 12-point starburst.
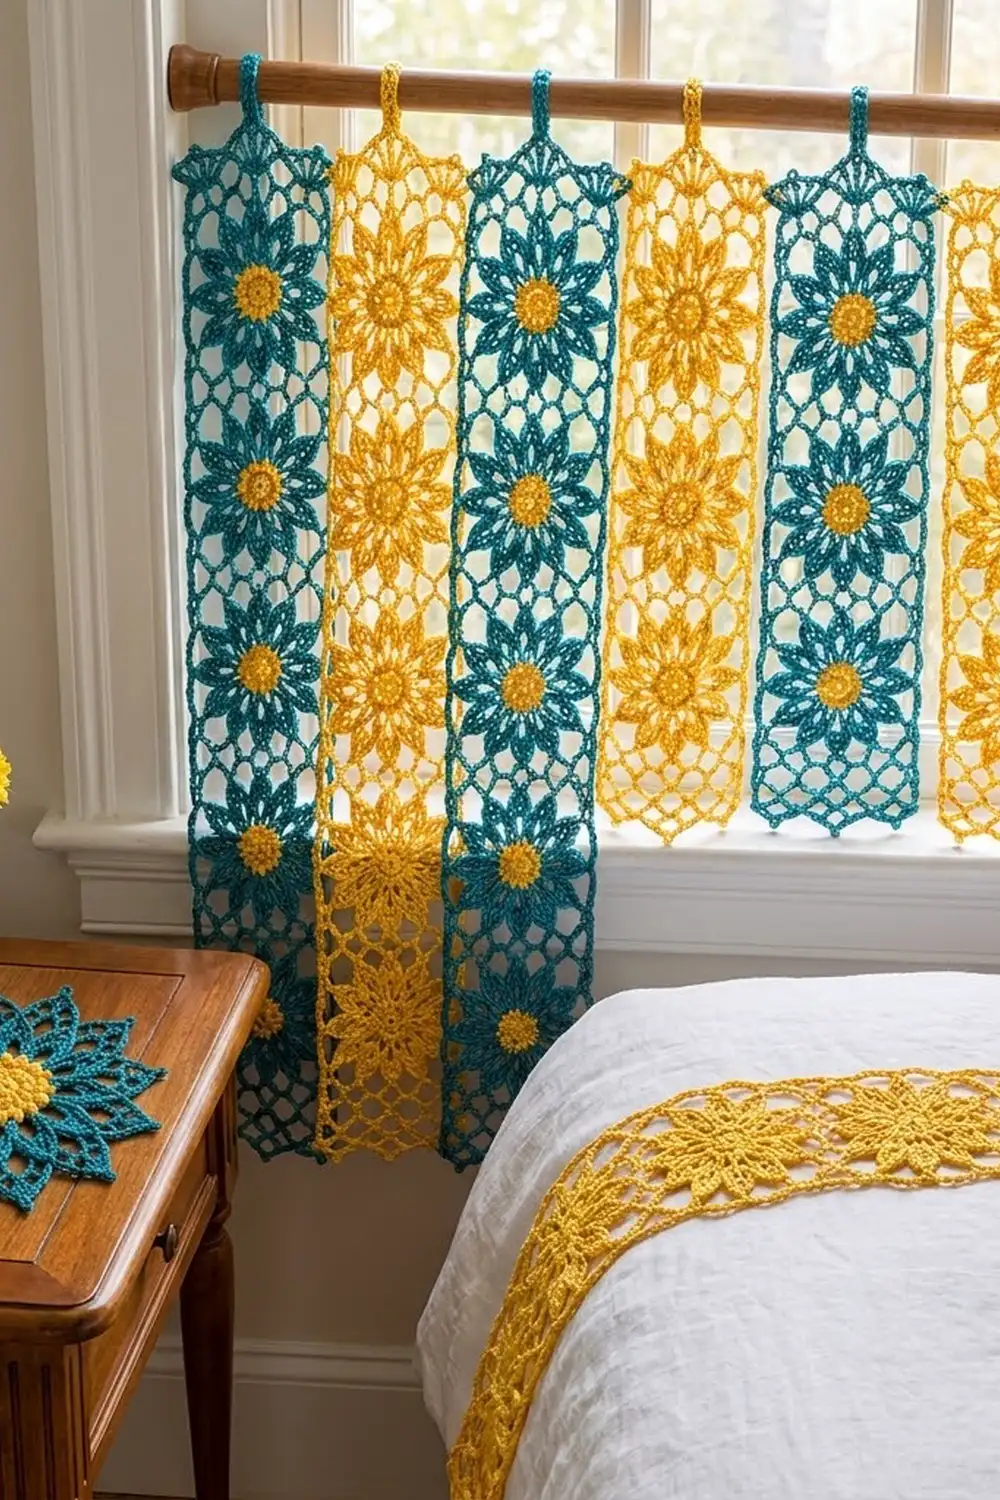
The look is somewhere between a mandala and a sunflower. It is bold enough to use as a coaster or table accent, and light enough to hang in a window. With only two colors, the strong contrast between teal and yellow does most of the visual work.
The pattern uses US crochet terms. The finished motif measures 8 in (20.3 cm) from point to point after blocking. It is one single piece, worked in the round from the center out, so there is nothing to join.
Here is how it is built. You work three yellow rounds for the bobble center and then switch to teal. One teal round gives you a solid base of single crochet, and chain loops then set up the 12 inner petals. Next comes a round of support stitches worked behind the petals, followed by the lattice points. A single-crochet border with picot tips finishes the motif.
Finished Size and Construction
- Finished size: 8 in (20.3 cm) from point to point, after blocking
- Skill level: Intermediate
- Terminology: US crochet terms
- Yarn weight: DK (light worsted / #3), mercerized cotton recommended
- Hook: 3.5 mm (US E-4)
- Number of pieces: 1 motif
- Layout: single round motif with 12 points, worked center-out
- Piece size before border (after Rnd 8): 7.25 in (18.4 cm) from point to point
- Border depth: 0.375 in (1.0 cm) per side, so it adds 0.75 in (1.9 cm) to the total width
- Size after border (Rnd 9): 8 in (20.3 cm)
Materials
Yarn: Use a smooth DK cotton or cotton blend. Mercerized cotton gives the crisp stitch definition and sharp points you see in the photo. Avoid fuzzy or very stretchy yarns, because the lattice windows will blur and the points will curl.
- Color A (golden yellow): 10 g / 24 m (26 yd)
- Color B (deep teal): 25 g / 60 m (66 yd)
These quantities include a margin of about 20% for your gauge swatch and weaving in ends.
Tools:
– 3.5 mm (US E-4) crochet hook
– Tapestry needle
– Scissors
– Stitch marker
– Rust-proof pins and a foam blocking mat
– Spray bottle with clean water
– Ruler or tape measure
Abbreviations (US Terms)
- ch – chain
- sl st – slip stitch
- sc – single crochet
- hdc – half double crochet
- dc – double crochet
- tr – treble crochet
- sp(s) – space(s)
- sk – skip
- MR – magic ring
- st(s) – stitch(es)
Special stitches:
- 3-dc bobble: (Yarn over, insert hook in st, yarn over and pull up a loop, yarn over and pull through 2 loops) 3 times in the same st. You now have 4 loops on the hook. Yarn over and pull through all 4 loops.
- Beginning bobble: Ch 2, then work a 2-dc bobble (the same steps as above, but only 2 times) in the same st.
- Ch-3 picot point: Ch 3 inside the space, between two groups of sc. It forms the sharp tip of each outer point.
Gauge and Checkpoints
Gauge matters more for a motif than for a swatch. Make one complete motif as your test piece, and check it at each stage below.
- Rnds 1–2: 1.5 in (3.8 cm) across
- After Rnd 3 (bobble center): 2.25 in (5.7 cm) across
- After Rnd 4 (teal sc ring): 2.75 in (7.0 cm) across
- After Rnd 6 (inner petals): 5 in (12.7 cm) from tip to tip
- After Rnd 8 (lattice points): 7.25 in (18.4 cm) from point to point
- After Rnd 9 (border, blocked): 8 in (20.3 cm) from point to point
If your motif is too big: go down to a 3.25 mm (US D-3) hook, or work your chains a little tighter.
If your motif is too small: go up to a 3.75 mm (US F-5) hook. Loose chains are the most common reason for points that are too long. Tight chains are the most common reason the motif cups.
Being off by 0.125 in (0.3 cm) at Rnd 3 grows to about 0.5 in (1.3 cm) by the final round, so correct early.
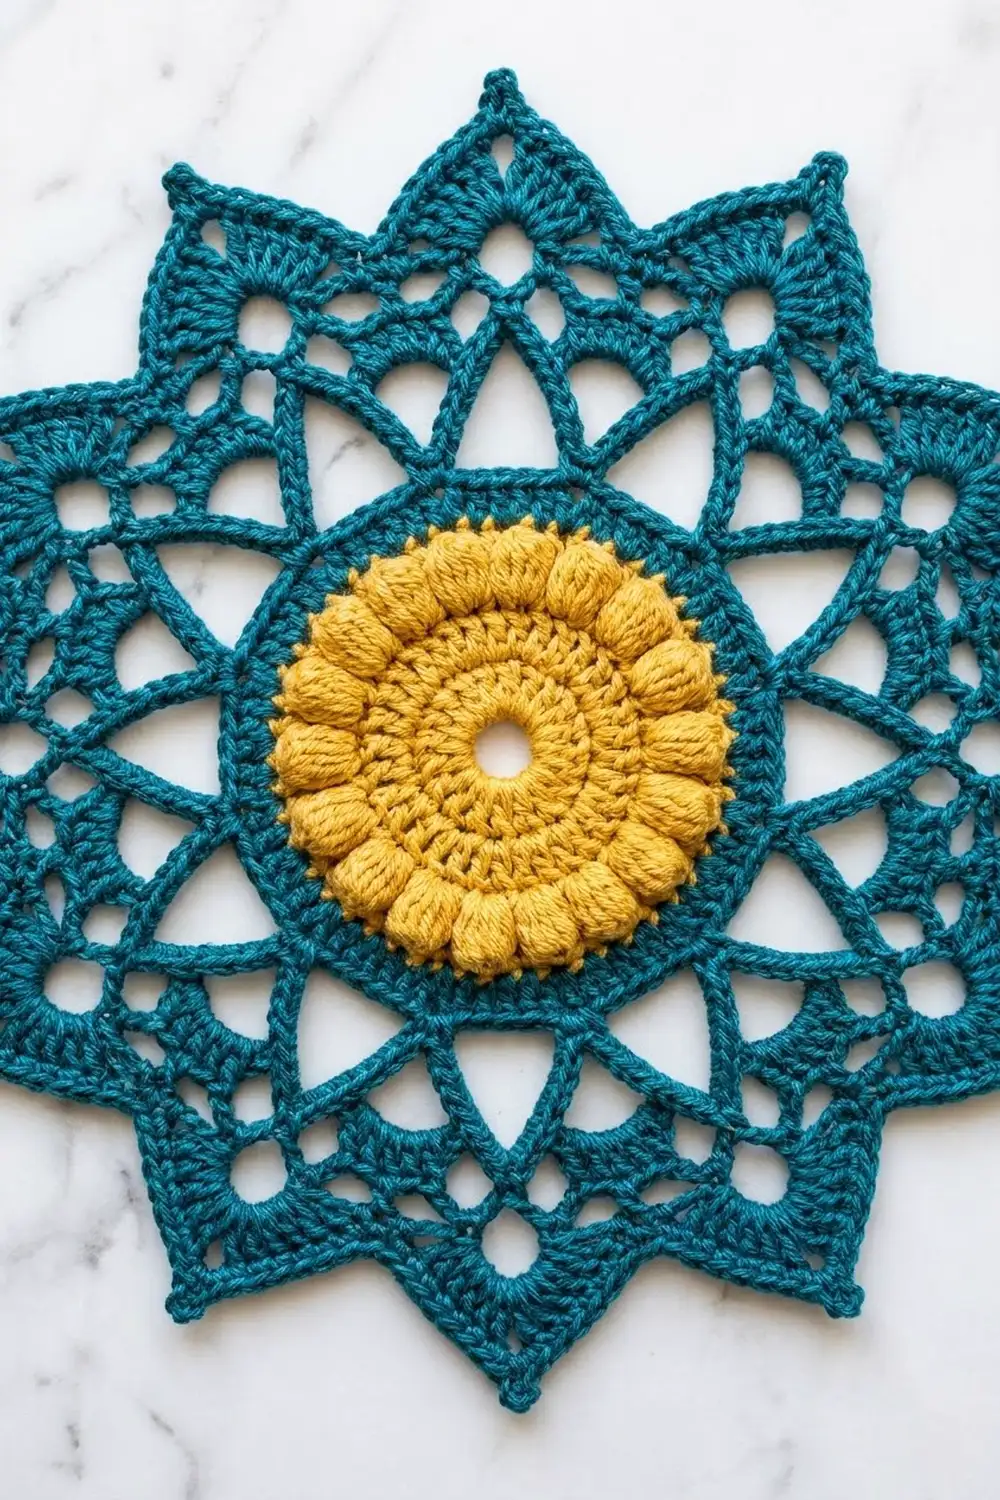
Bobble Center (Color A, Yellow)
Rnd 1: Make a MR. Ch 3 (counts as dc), 11 dc in the ring. Sl st to the top of the beginning ch-3. Pull the ring closed, but leave a tiny center hole. (12 dc)
Rnd 2: Ch 3 (counts as dc), dc in the same st. Work 2 dc in each st around. Sl st to the top of the beginning ch-3. (24 dc)
Rnd 3: Sl st into the space between the first 2 dc. Work a beginning bobble in that space, then ch 1. Work a 3-dc bobble in the next space between dc, then ch 1. Repeat from * to * around. Sl st to the top of the beginning bobble. (24 bobbles, 24 ch-1 sps)
Fasten off Color A. The center should measure 2.25 in (5.7 cm) and lie flat. The bobbles should sit side by side in a neat ring.
Teal Base Ring (Color B)
Rnd 4 (conversion round): Join Color B with a sc in the top of any bobble. Sc in the next ch-1 sp. Sc in the top of the next bobble, then sc in the next ch-1 sp. Repeat from * to * around. Sl st to the first sc.
Stitch count: 24 sc (1 per bobble) + 24 sc (1 per ch-1 sp) = 48 sc.
Check: 2.75 in (7.0 cm) across.
Inner Petals
Rnd 5 (petal loops): Ch 1. Sc in the next sc, ch 8, sk the next 3 sc. Repeat from * to * 12 times in total. Sl st to the first sc.
Each repeat uses 4 sc from Rnd 4, and 12 × 4 = 48, so the repeats fit exactly. (12 sc, 12 ch-8 loops)
Rnd 6 (inner petals): In each ch-8 loop, work this sequence: (sc, hdc, dc, ch 2, tr, ch 3, tr, ch 2, dc, hdc, sc). Do not work into the Rnd 5 sc between loops; you will use them in Rnd 7. Sl st to the first sc.
Per petal: 8 sts (sc, hdc, dc, tr, tr, dc, hdc, sc) + 2 ch-2 sps + 1 ch-3 tip.
Total: 96 sts, 24 ch-2 sps, 12 ch-3 tips.
The ch-2 spaces on either side of the tr pair open a small window in each petal, which gives it the chain-outlined look. The ch-3 makes the pointed tip.
Check: 5 in (12.7 cm) from tip to tip.
Lattice Points
Rnd 7 (support round): Sl st across the sc, hdc, dc, the ch-2 sp, and the tr, then into the ch-3 tip of the first petal.
Sc in the ch-3 tip, ch 6. Bring the hook behind the petals and work 1 tr in the Rnd 5 sc that sits between this petal and the next, then ch 6. Repeat from * to * 12 times in total. Sl st to the first sc.
(12 sc, 12 tr, 24 ch-6 sps)
These tr stitches anchor behind the petals, so the outer points will sit between the inner petals.
Rnd 8 (lattice points): Ch 1.
Sc in the tip sc. Ch 4, sc in the next ch-6 sp, ch 4. Work (tr, ch 3, tr) in the next tr. Ch 4, sc in the next ch-6 sp, ch 4. Repeat from * to * 12 times in total. Sl st to the first sc.
Per repeat: 5 sts (sc, sc, tr, tr, sc) + 4 ch-4 sps + 1 ch-3 point sp.
Total: 60 sts, 48 ch-4 sps, 12 ch-3 point sps.
The ch-4 spaces make the open lattice windows. The (tr, ch 3, tr) group lifts each outer point.
Check: 7.25 in (18.4 cm) from point to point. Pin a few points out flat to measure accurately.
Border
Border gauge: 4 sc covers a ch-4 sp in 1 in (2.5 cm) of edge length. The finished border sits 0.375 in (1.0 cm) out from the Rnd 8 chain line.
Think of each “side” as one point section: from a petal-tip sc to the next petal-tip sc.
Rnd 9 (border): Ch 1.
Sc in the tip sc. 4 sc in the next ch-4 sp, sc in the next sc, 4 sc in the next ch-4 sp. Sc in the tr. Work (2 sc, ch 3, 2 sc) in the ch-3 point sp. Sc in the next tr. 4 sc in the next ch-4 sp, sc in the next sc, 4 sc in the next ch-4 sp. Repeat from * to * 12 times in total. Sl st to the first sc. Fasten off.
Per side: 1 + 4 + 1 + 4 + 1 + (2 + 2) + 1 + 4 + 1 + 4 = 25 sc + 1 ch-3 picot point.
Total: 12 × 25 = 300 sc, 12 ch-3 picot points.
Why the math works: Every stitch from Rnd 8 gets exactly 1 sc. That is 5 per side, or 60 in total. Every ch-4 space gets 4 sc, one per chain, so the edge neither ruffles nor pulls in. That is 16 per side, or 192 in total. Each ch-3 point space gets 4 sc split around the picot. That is 4 per side, or 48 in total. Check the sum: 60 + 192 + 48 = 300. ✓
Because the picot ch-3 sits between the sc pairs, each point stays sharp after blocking.
Final Blocking
- Weave in all ends on the wrong side. Run them through stitches of their own color: yellow ends into the center, teal ends into the sc rounds.
- Lightly mist the motif with water until it is damp but not dripping.
- Lay it right side up on the blocking mat.
- Pin the center flat first, and check that it is 2.75 in (7.0 cm) across the teal ring.
- Pin the 12 picot points evenly on an 8 in (20.3 cm) circle. Start with 4 points at 12, 3, 6, and 9 o’clock, then fill in the rest.
- Pin the 12 inner petal tips so they point straight out, centered between the outer points.
- Gently open each lattice window with your fingertips.
- Let it dry completely, about 6–12 hours, before you remove the pins.
Final Quality-Control Checklist
- Center has 24 bobbles, a small round hole, and lies flat
- Teal ring has 48 sc with no gaps where it joins the yellow
- 12 inner petals, all the same size, with open windows on both sides of the tr pair
- 12 outer lattice points, each sitting exactly between two inner petals
- Border has 25 sc per side, 300 sc in total
- Every point ends in a crisp ch-3 picot
- Motif measures 8 in (20.3 cm) from point to point
- All ends are secured and invisible from the front
Troubleshooting
Center cups like a bowl: Your bobbles are too tight. Pull up each loop to the full height of a dc.
Center ruffles: The MR was not pulled closed enough, or Rnd 2 was worked too loosely. Redo Rnd 2 with a smaller hook.
Petals curl forward: Your ch-8 loops are too short. Loosen the chains, or block the petals firmly.
Outer points lean sideways: The Rnd 7 tr was placed in the wrong sc. It must go in the Rnd 5 sc between petals, not in a petal stitch.
Border waves: You worked more than 4 sc into some ch-4 spaces. Count again: 25 per side.
Border pulls tight: Your sc are too firm. Go up 0.25 mm in hook size for Rnd 9 only.
Motif is 0.5 in (1.3 cm) too small: Re-block it, stretching the points to the 8 in (20.3 cm) circle.
Care
Hand wash in cool water with mild soap, press out the water in a towel, and dry flat. Re-pin the points while the motif is damp if they lose their shape.
Final Notes
The measurement chain for this motif is simple:
- Bobble center at 2.25 in (5.7 cm)
- Teal ring at 2.75 in (7.0 cm)
- Inner petals at 5 in (12.7 cm)
- Lattice points at 7.25 in (18.4 cm)
- Finished border at 8 in (20.3 cm)
Hit each checkpoint, and the 12-point star will lie flat with sharp points and open lattice windows. The stitch counts follow the same steady logic throughout: 12, 24, 48, 12 loops, 96, 24, 60, and finally 300 sc with 12 picot points.
Happy crocheting!