
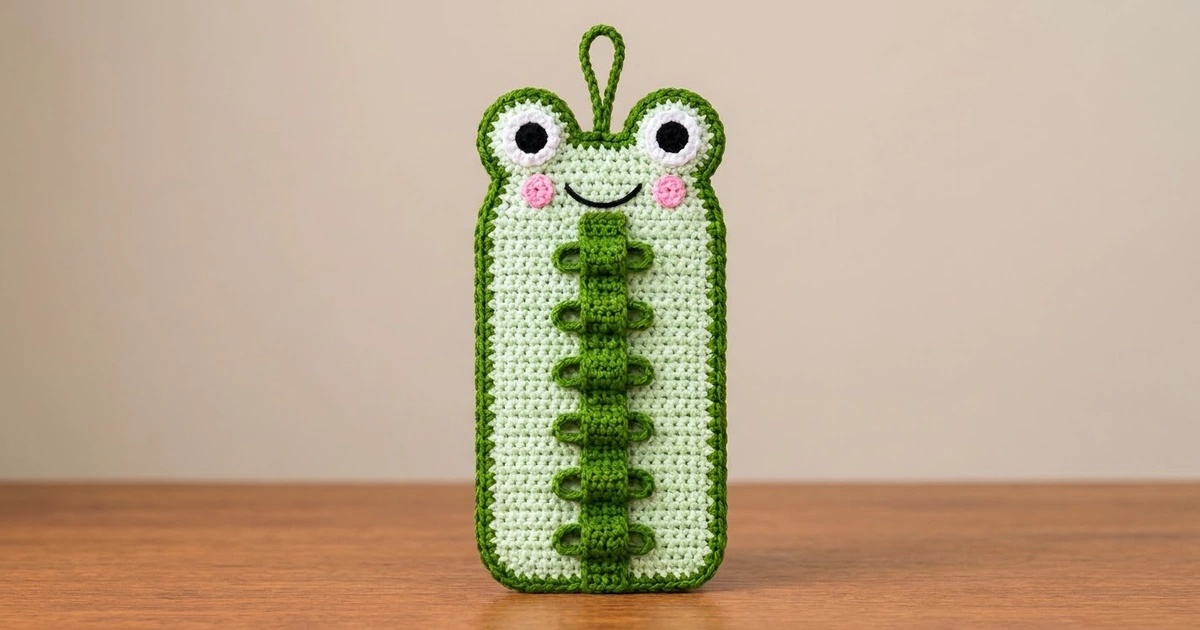
Meet the Froggy Cord Keeper, a flat wall-hanging organizer that keeps charging cables neat and in sight. It has a soft mint-green panel with two round frog ears, a dark green rope-textured border, big black-and-white eyes, pink cheeks and a simple stitched smile.
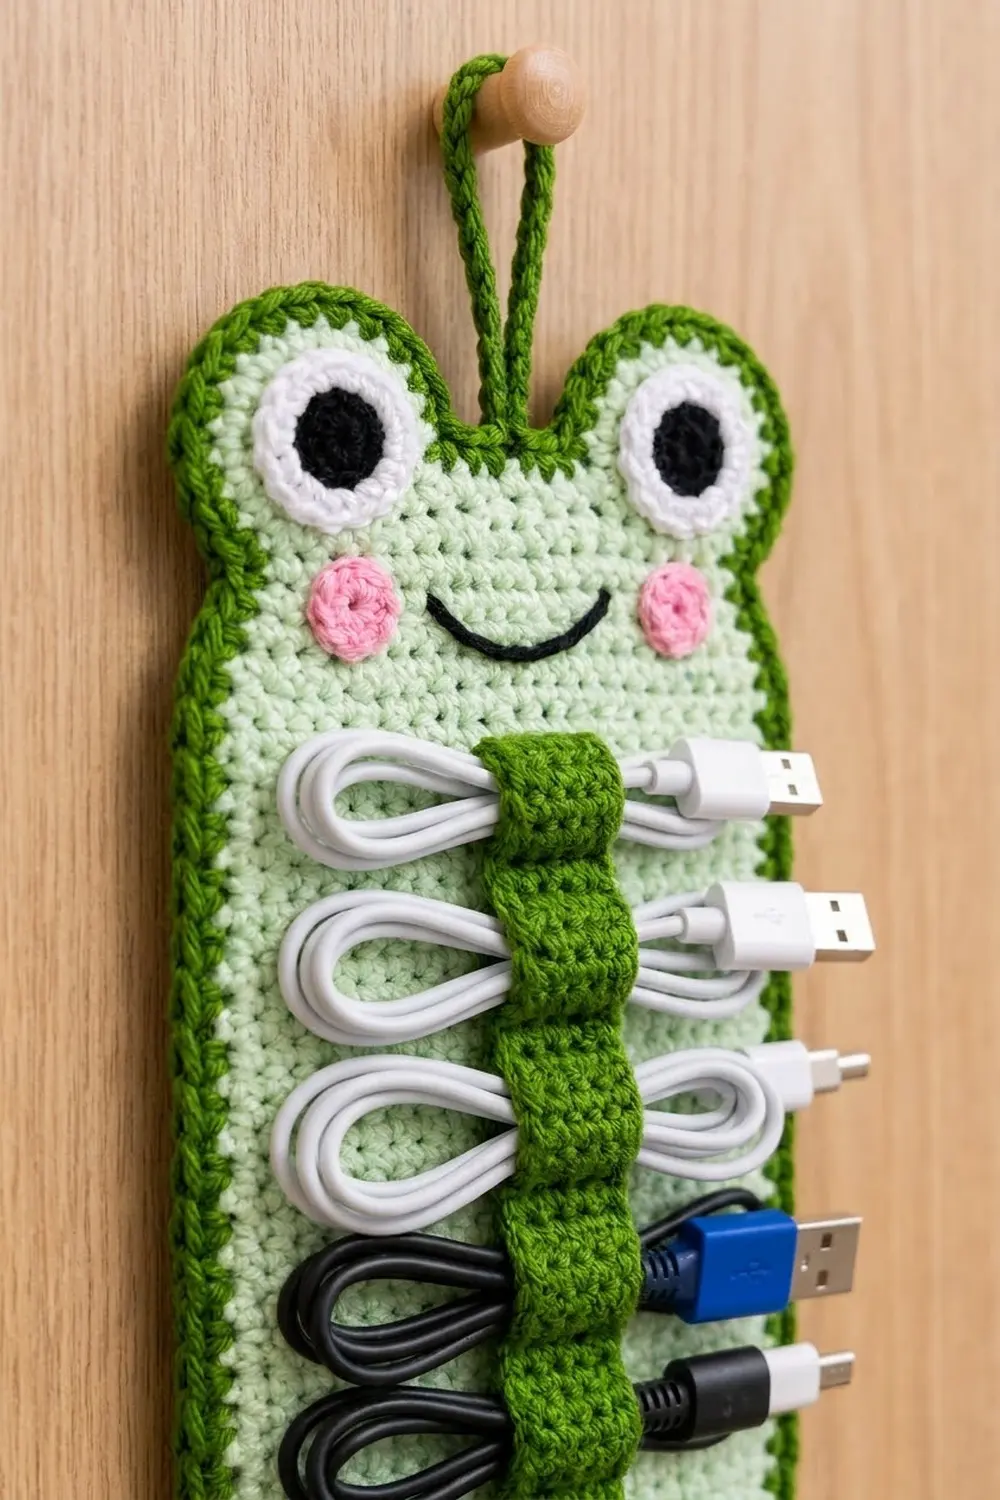
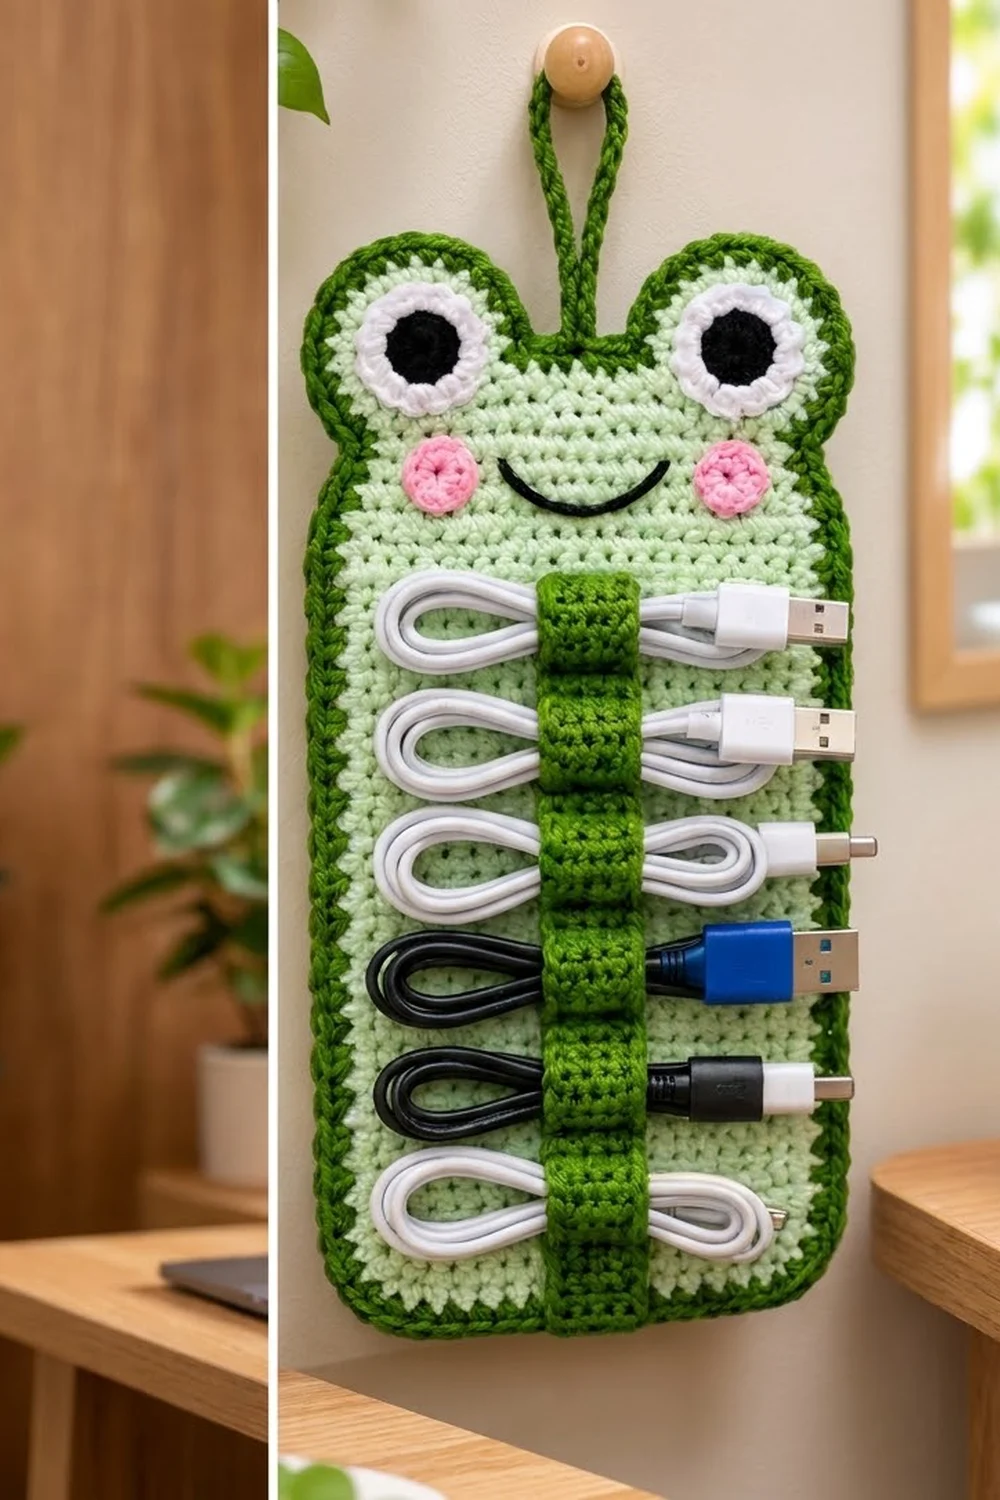
A narrow dark green strap runs down the frog’s tummy. It is tacked down to make six little bridges, and each bridge holds one coiled cable. Small chain loops along both edges of the strap give it a playful look and help keep the coils in place.
This pattern uses US crochet terms. The finished organizer measures about 6 in (15.2 cm) wide by 11.4 in (29.0 cm) tall, not counting the hanging loop.
You’ll crochet the panel flat in rows, shaping the corners and ears as you go. Then you add a two-round border and a hanging loop, make the eyes and cheeks in the round, embroider the smile, and sew on the looped strap.
Finished Size and Construction
- Finished size: about 6 in (15.2 cm) x 11.4 in (29.0 cm), plus the hanging loop
- Skill level: Easy / Advanced Beginner
- Terminology: US crochet terms
- Yarn weight: Medium worsted (#4), cotton or cotton blend
- Hook: 4.0 mm (US G-6)
- Number of pieces: 1 finished organizer: 1 panel with 1 hanging loop, 2 eyes, 2 cheeks and 1 strap sewn on
- Layout: single panel, hung vertically
- Panel size before border: 5.5 in (14.0 cm) wide x 10.9 in (27.7 cm) tall, ears included
- Border depth: about 0.25 in (0.6 cm) on every side
- Strap size: about 1.75 in (4.4 cm) x 8.5 in (21.6 cm) after edging
Materials
Use a smooth cotton or cotton-blend worsted yarn. Cotton holds its shape on a wall and doesn’t stretch under the weight of cables. Fuzzy or very stretchy yarns hide the stitch texture and let the strap sag.
- Light mint green (panel): 30 g / 57 m
- Dark green (border, hanging loop, strap): 25 g / 48 m
- White (eye rings): 4 g / 8 m
- Black (eye centers, smile): 4 g / 8 m
- Pink (cheeks): 3 g / 6 m
All quantities include a small safety margin.
Tools: 4.0 mm (US G-6) hook, tapestry needle, 4 to 6 stitch markers, scissors, rustproof pins, blocking mat, spray bottle, tape measure.
Abbreviations (US Terms)
- ch – chain
- sl st – slip stitch
- sc – single crochet
- inc – 2 sc in the same stitch
- sc2tog – single crochet 2 together
- st(s) – stitch(es)
- rnd – round
- MR – magic ring
- rev sc – reverse single crochet
Reverse single crochet (crab stitch): Work from left to right (right to left if you crochet left-handed). Insert the hook into the next stitch to the right, yarn over and pull up a loop, then yarn over and pull through both loops. This makes the twisted, rope-like border edge.
Gauge and Checkpoints
Gauge: 16 sc and 18 rows = 4 in (10.2 cm) in sc rows.
Before starting the panel, make a test swatch of 20 sc by 22 rows, about 5 in (12.7 cm) square, and measure the center 4 in (10.2 cm). The border and strap counts depend on getting 4 sc per inch.
Checkpoints:
– Row 1: 4.5 in (11.4 cm) wide
– Row 3: 5.5 in (14.0 cm) wide
– Row 45: 10 in (25.4 cm) tall
– After the ears: 10.9 in (27.7 cm) tall
– After the border: 6 in (15.2 cm) x 11.4 in (29.0 cm)
If it’s too big: switch to a 3.75 mm (US F-5) hook. If it’s too small: switch to a 4.5 mm (US 7) hook. Change your hook, never the stitch counts.
Frog Panel
With light mint green.
Row 1: Ch 19. Sc in 2nd ch from hook and in each ch across. Turn. (18 sc)
Row 2: Ch 1, inc in first st, sc in next 16 sts, inc in last st. Turn. (20 sc)
Row 3: Ch 1, inc in first st, sc in next 18 sts, inc in last st. Turn. (22 sc)
These two increase rows round off the bottom corners. The panel should now measure 5.5 in (14.0 cm) wide.
Rows 4–45: Ch 1, sc in each st across. Turn. (22 sc)
Check that the panel measures 10 in (25.4 cm) tall. Don’t fasten off.
First Ear
Row 46: Ch 1, sc in first 7 sts. Turn, leaving the other 15 sts unworked. (7 sc)
Row 47: Ch 1, sc in each st across. Turn. (7 sc)
Row 48: Ch 1, sc2tog, sc in next 3 sts, sc2tog. Turn. (5 sc)
Row 49: Ch 1, sc2tog, sc in next st, sc2tog. (3 sc) Fasten off.
Second Ear
Skip the next 8 unworked sts of Row 45. They form the dip between the ears, which is 2 in (5.1 cm) wide. Join light mint green in the 16th st of Row 45.
Rows 46–49: Work as for the First Ear. (7, 7, 5, 3 sc) Fasten off.
Each ear starts 1.75 in (4.4 cm) wide and adds about 0.9 in (2.3 cm) of height, for a total of 10.9 in (27.7 cm). Count check on Row 45: 7 + 8 + 7 = 22 sts. Weave in the ends.
Eyes (Make 2)
Rnd 1: With black, make a MR and work 6 sc in the ring. Join with sl st to first sc. (6 sc)
Rnd 2: Ch 1, inc in each st around. Join. (12 sc) Fasten off black.
Rnd 3: Join white in any st. Ch 1, (sc in next st, inc) 6 times. Join. (18 sc)
Fasten off, leaving a 12 in (30.5 cm) tail for sewing. Each eye is about 1.25 in (3.2 cm) across. The black center and white ring are worked as one piece, so there are no separate layers to stack.
Cheeks (Make 2)
Rnd 1: With pink, make a MR and work 6 sc in the ring. Join. (6 sc)
Rnd 2: Ch 1, inc in each st around. Join. (12 sc)
Fasten off, leaving a 10 in (25.4 cm) tail. Each cheek is about 0.75 in (1.9 cm) across.
Border
With dark green and the right side facing you. The border gauge is 4 sc per inch, matching the panel.
Rnd 1: Join dark green in the first foundation ch at the bottom right corner. Ch 1 and work around the panel as follows:
- Bottom edge: inc in first ch, sc in next 16 chs, inc in last ch. (20 sc)
- Left side: sc in the row ends of Rows 1–45, skipping the row ends of Rows 9, 18, 27, 36 and 45. (40 sc)
- Left ear: 4 sc up the outer row ends, 2 sc in each of the 3 top sts (6 sc), 4 sc down the inner row ends. (14 sc)
- Between ears: sc in each of the 8 unworked sts of Row 45. (8 sc)
- Right ear: work as for the left ear. (14 sc)
- Right side: work as for the left side, going down. (40 sc)
Join with sl st to first sc. Total: 20 + 40 + 14 + 8 + 14 + 40 = 136 sc
Rnd 2: Ch 1, work 1 rev sc in each st around. Join. (136 rev sc) Fasten off and weave in the ends.
Why the math works: At gauge, 45 rows measure 10 in (25.4 cm). If you put 1 sc in every row end, the side would get 45 sc, which is too many and makes the edge ruffle. Skipping 1 row end in every 9 leaves 40 sc, exactly 10 in (25.4 cm) at 4 sc per inch. The bottom edge gets 1 sc for each of the 18 foundation chains, plus 1 extra at each corner to help it turn. Rnd 2 adds no stitches. The two rounds add 0.25 in (0.6 cm) on every side, so the panel grows from 5.5 in to 6 in (15.2 cm) wide and from 10.9 in to 11.4 in (29.0 cm) tall.
Hanging Loop
With dark green, ch 26. Sl st in 2nd ch from hook and in each ch across. (25 sl st) The cord should be about 6 in (15.2 cm) long.
Fold the cord in half. Sew both ends to the back of the panel, centered in the 8-stitch dip between the ears and just behind the border. The loop should stand about 3 in (7.6 cm) above the panel. Sew through several stitches so it can carry the weight of the cables.
Face Assembly
- Eyes: Center each eye on an ear. Place the top of the white ring 1/8 in (0.3 cm) inside the border, so the lower edge overlaps the head. Whipstitch around the white edge.
- Cheeks: Place each cheek just below and slightly outside its eye, at about Rows 40–42. Whipstitch around the edge.
- Smile: With black, backstitch a shallow curve 1.5 in (3.8 cm) wide, centered between the cheeks. The middle of the curve should sit 1 row lower than the ends. Make each backstitch the width of 1 sc.
Cable Strap
With dark green.
Row 1: Ch 6. Sc in 2nd ch from hook and in each ch across. Turn. (5 sc)
Rows 2–36: Ch 1, sc in each st across. Turn. (5 sc)
The strap should measure 1.25 in (3.2 cm) x 8 in (20.3 cm). Think of it as 6 sections of 6 rows each. Don’t fasten off.
Loop Edging Rnd: Ch 1 and work around the strap.
- Short end: 3 sc in first st, sc in next 3 sts, 3 sc in last st. (9 sc)
- Long side: repeat this sequence 6 times, once per section: sc in next 2 row ends, ch 6, skip 2 row ends, sc in next 2 row ends. (24 sc + 6 ch-6 loops)
- Second short end: work across the foundation chain as for the first short end. (9 sc)
- Second long side: work as for the first long side. (24 sc + 6 ch-6 loops)
Join. Total: 66 sc + 12 ch-6 loops. Fasten off, leaving a 36 in (91.4 cm) tail.
The loops stick out about 0.5 in (1.3 cm), so the strap measures 1.75 in (4.4 cm) across the loops. The loops sit in pairs, one on each side of the middle of each section.
Attaching the Strap
- Center the strap on the panel. Place the top end 2 rows below the smile and the bottom end about 3 rows above the border.
- Whipstitch both short ends firmly to the panel.
- Backstitch straight across the strap after strap Rows 6, 12, 18, 24 and 30, going through both layers. That makes 5 inner tack lines.
- This gives you 6 bridges, each about 1 1/3 in (3.4 cm) tall. Ease a little slack into each section before tacking so a coiled cable can slide underneath.
Final Blocking
- Weave in all ends behind matching colors.
- Mist the piece until it’s evenly damp.
- Lay it face up on the blocking mat.
- Pin the bottom edge straight at 6 in (15.2 cm).
- Pin the sides straight to 11.4 in (29.0 cm), including the ears.
- Ease each ear into a smooth half-circle.
- Slide a pencil under each bridge so it holds its shape while drying.
- Let it dry completely before you unpin it.
Final Quality-Control Checklist
- Size is 6 in (15.2 cm) x 11.4 in (29.0 cm)
- Border has 136 sts in each round
- Sides lie straight, with no ruffling or cupping
- Ears match in size and shape
- Eyes are level and centered on the ears
- Cheeks and smile are symmetrical
- Strap is centered, with 12 loops in 6 matching pairs
- All 6 bridges are open and the same height
- Hanging loop is secure and centered
- No ends show on the front
Troubleshooting
Border ruffles: You probably worked into every row end. Rework the round, skipping 1 row end in every 9.
Sides cup or pull in: Use a hook 0.5 mm larger for border Rnd 1.
Ears look pointed: Check that you worked 2 sc in each of the 3 top stitches.
Ears are different sizes: Recount the 8 skipped stitches before you join the second ear.
Bridges are too tight: Remove the tack lines and resew them with more slack.
Rev sc looks loopy: Keep each pulled-up loop short.
Care
Remove all cables, then hand wash in cool water with mild soap. Roll in a towel to press out the water and dry flat.
Final Notes
Each stage builds on the one before it. A gauge of 16 sc and 18 rows to 4 in (10.2 cm) gives a panel 5.5 in (14.0 cm) by 10 in (25.4 cm), and the ears bring the height to 10.9 in (27.7 cm). The 136-stitch border, with 40 sc on each side, adds 0.25 in (0.6 cm) all around for a finished 6 in (15.2 cm) x 11.4 in (29.0 cm). The 36-row strap divides into six even bridges that each hold one cable. Check your size at every checkpoint and the frog will hang flat and tidy.
Happy crocheting!