
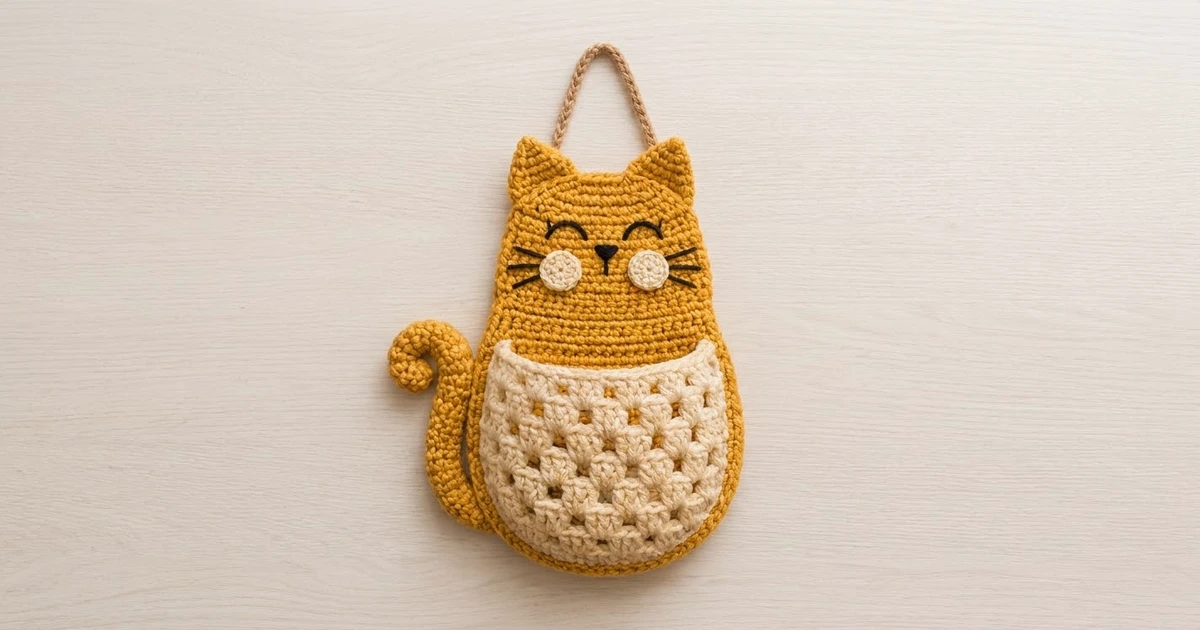
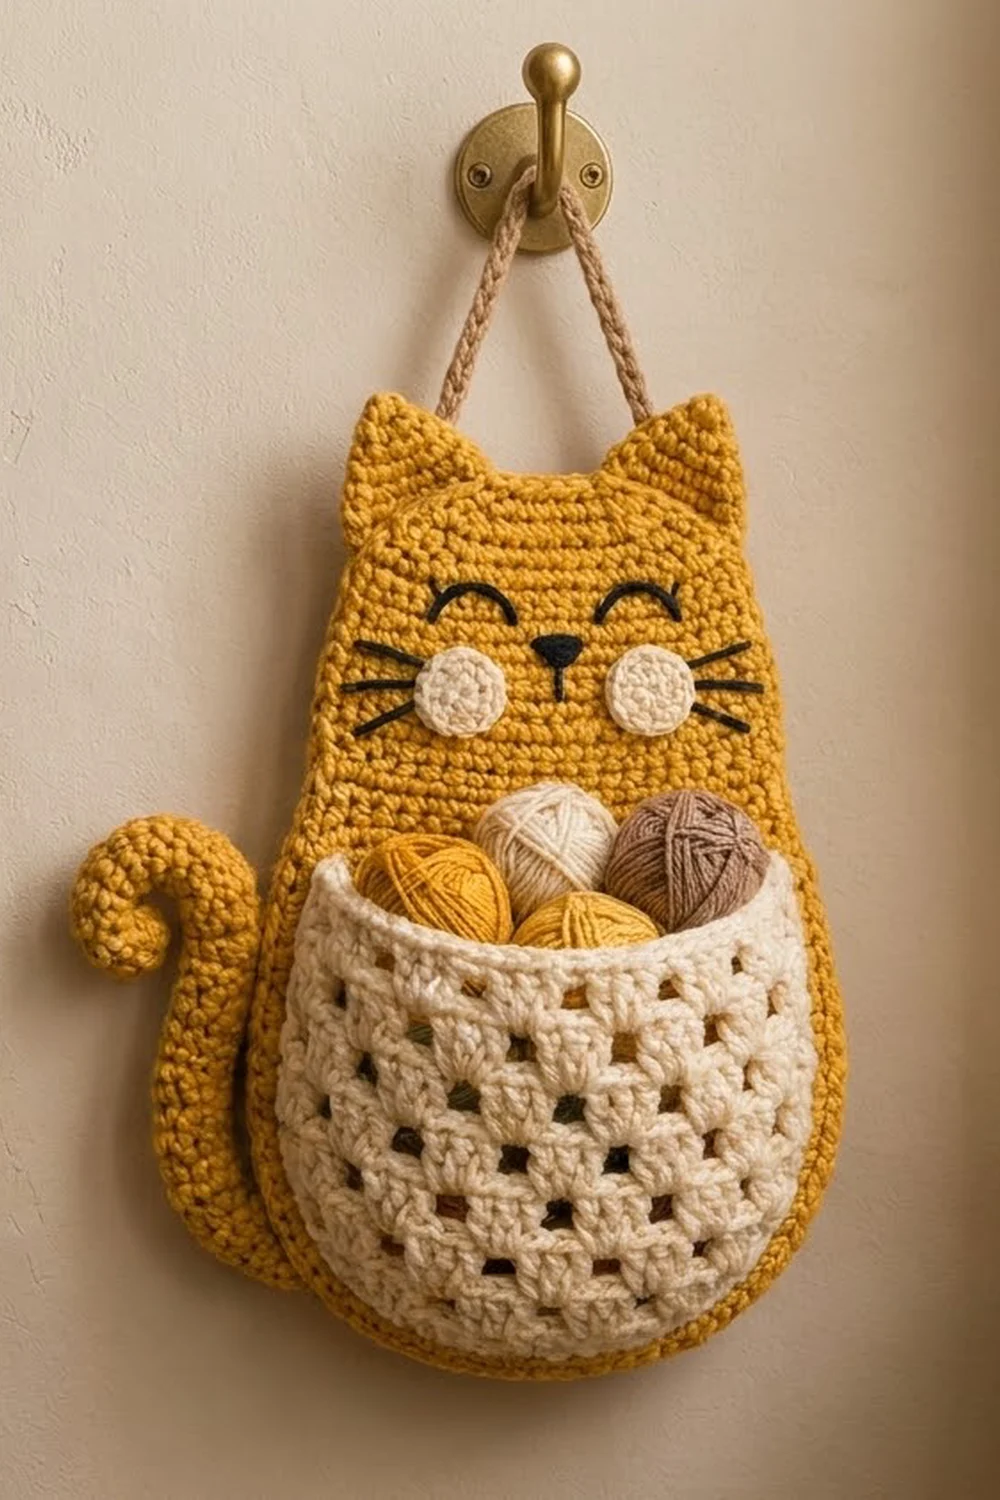
This cat wall pocket hangs from a hook and holds whatever needs a home: yarn balls, mail, keys or small toys. A mustard-gold cat body forms the back panel. A cream granny-stitch pocket covers its lower half, and a curled tail sticks out on one side.
The colors are warm and simple: mustard gold for the cat, cream for the pocket and round cheeks, tan for the hanging cord and black yarn for the embroidered face. The face has closed smiling eyes, a tiny triangle nose and three whiskers on each side. The style is cozy and cartoon-like, with solid single crochet behind an open, lacy pocket.
This pattern uses US crochet terms. The finished body measures 8 in (20.3 cm) wide by 10.5 in (26.7 cm) tall. With the ears it is 11.75 in (29.8 cm) tall. The pocket is 7.25 in (18.4 cm) wide by 5.75 in (14.6 cm) tall.
You will make eight separate parts: the body, two ears, a tail, two cheeks, the pocket and a cord. The body is worked flat in shaped rows. The pocket is worked from the top edge down in granny cluster rows. You then sew everything together, embroider the face and finish the body outline with one round of border.
Finished Size and Construction
- Finished size: body 8 in (20.3 cm) wide x 10.5 in (26.7 cm) tall; 11.75 in (29.8 cm) tall with ears
- Skill level: Easy to Intermediate
- Terminology: US crochet terms
- Yarn weight: Worsted (#4)
- Hook: 5.0 mm (US H-8)
- Number of pieces: 8 (1 body, 2 ears, 1 tail, 2 cheeks, 1 pocket, 1 cord)
- Layout: one flat cat panel, with the appliqué parts and the pocket sewn to it
- Body size before border: 7.5 in (19.1 cm) x 10 in (25.4 cm)
- Border depth: 1 round of sc, about 0.25 in (0.6 cm) on every edge
- Pocket size: 7.25 in (18.4 cm) x 5.75 in (14.6 cm)
Materials
Choose a smooth worsted-weight cotton or cotton blend. Cotton holds the flat shape well and keeps the pocket from sagging. The amounts below assume a yarn with about 197 m (215 yd) per 100 g.
- Mustard gold: 75 g, about 148 m (162 yd), for the body, ears and tail
- Cream: 45 g, about 89 m (97 yd), for the pocket and cheeks
- Tan: 10 g, about 20 m (22 yd), for the hanging cord
- Black: about 3 m (3.3 yd), for the embroidery
These amounts include a margin of about 15 percent for swatching and sewing tails.
Tools:
- 5.0 mm (US H-8) crochet hook
- Tapestry needle
- Stitch markers
- Scissors
- Measuring tape
- Pins and a blocking surface
- Spray bottle
Abbreviations (US Terms)
- ch: chain
- sl st: slip stitch
- sc: single crochet
- hdc: half double crochet
- dc: double crochet
- sc2tog: single crochet 2 together
- sc3tog: single crochet 3 together
- sp: space
- st(s): stitch(es)
- tch: turning chain
- RS / WS: right side / wrong side
Special stitch (cluster): work 3 dc into the same stitch or space. Clusters sit in the gaps between the clusters of the row below.
Gauge and Checkpoints
Body gauge: 16 sc x 18 rows = 4 in (10.2 cm), in sc worked in rows.
Pocket gauge: one row of 8 clusters is 6.75 in (17.1 cm) wide, and 4 dc rows are 2 in (5.1 cm) tall.
Make the body first. It is the largest piece, and every other part is sized to fit it. Check these points as you go:
- After Row 7: the piece is 7.5 in (19.1 cm) wide.
- After Row 27: the piece is 6 in (15.2 cm) tall.
- After Row 45: the piece is 7.5 in (19.1 cm) x 10 in (25.4 cm).
If your piece is too big, try a 4.5 mm hook. If it is too small, try a 5.5 mm hook. Row gauge matters here because the top of the pocket lines up with a specific row.
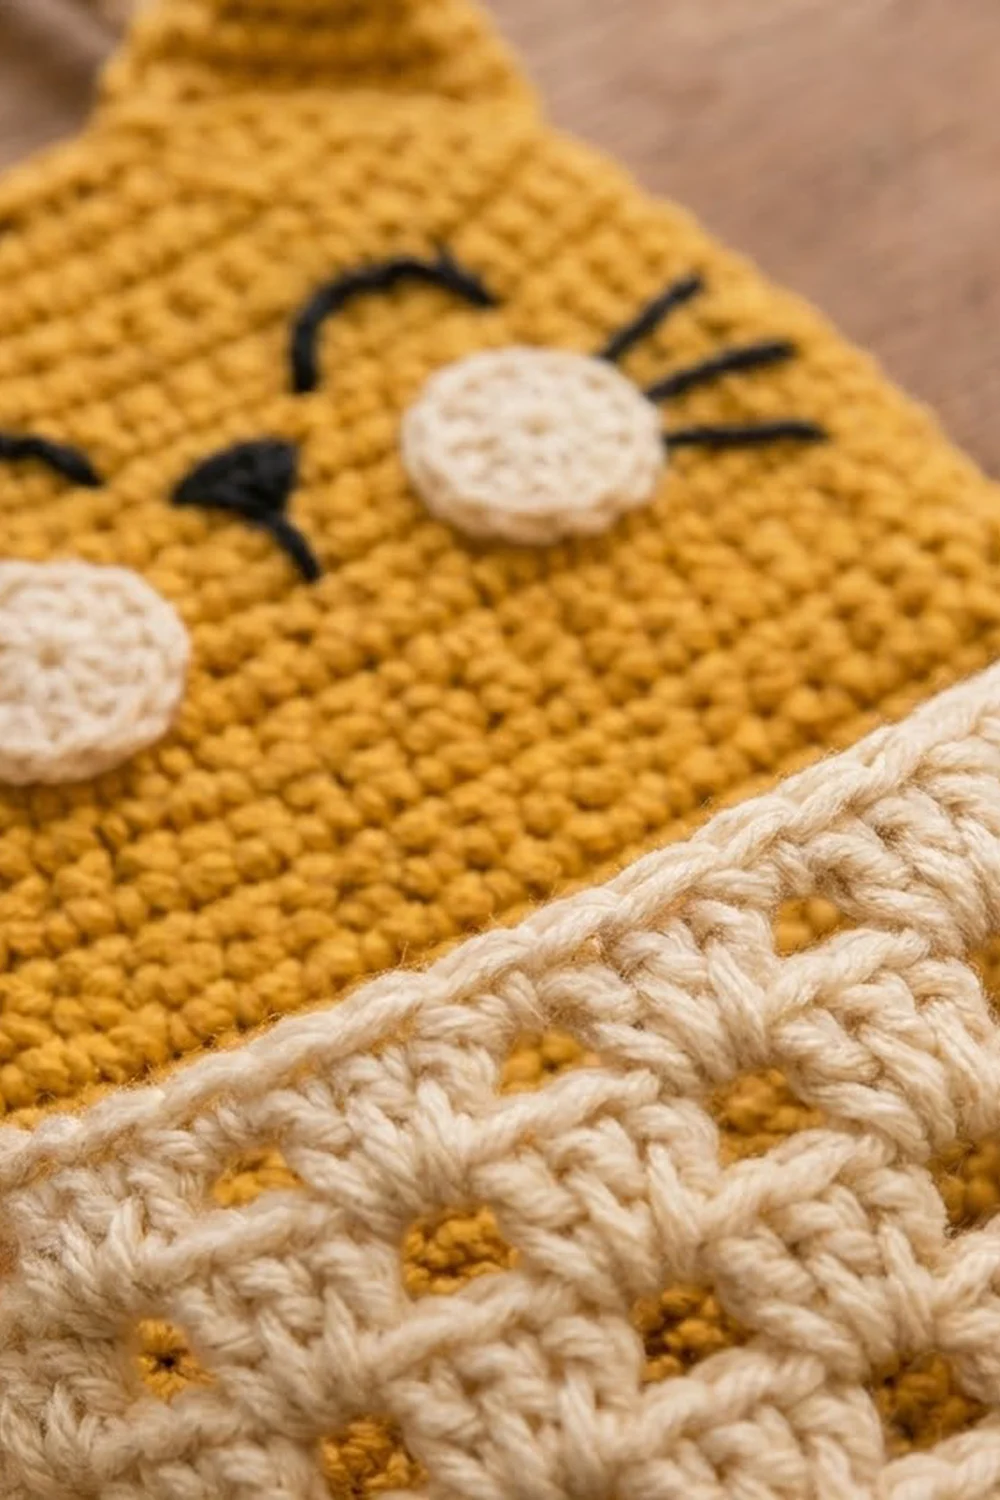
Body
With mustard, ch 19.
Row 1 (RS): Sc in 2nd ch from hook and in each ch across, turn. (18 sts)
The turning ch-1 never counts as a stitch.
Row 2: Ch 1, 2 sc in first st, sc in each st to last st, 2 sc in last st, turn. (20 sts)
Rows 3–7: Repeat Row 2. Row 3: 22 sts. Row 4: 24 sts. Row 5: 26 sts. Row 6: 28 sts. Row 7: 30 sts.
These quick increases make the round, wide bottom of the cat.
Rows 8–27: Ch 1, sc in each st across, turn. (30 sts in each row)
Checkpoint: 7.5 in (19.1 cm) wide x 6 in (15.2 cm) tall.
Row 28: Ch 1, sc2tog, sc in each st to last 2 sts, sc2tog, turn. (28 sts)
Rows 29–30: Repeat Row 28. Row 29: 26 sts. Row 30: 24 sts.
These rows make the gentle shoulders where the body narrows into the head.
Rows 31–42: Ch 1, sc in each st across, turn. (24 sts in each row)
The head is now 6 in (15.2 cm) wide.
Rows 43–45: Repeat Row 28. Row 43: 22 sts. Row 44: 20 sts. Row 45: 18 sts.
Fasten off. The top of the head is 4.5 in (11.4 cm) wide. The full body is 45 rows, or 10 in (25.4 cm) tall.
Ears (Make 2)
With mustard, ch 8.
Row 1: Sc in 2nd ch from hook and in each ch across, turn. (7 sts)
Row 2: Ch 1, sc in each st, turn. (7 sts)
Row 3: Ch 1, sc2tog, sc in next 3 sts, sc2tog, turn. (5 sts)
Row 4: Ch 1, sc in each st, turn. (5 sts)
Row 5: Ch 1, sc2tog, sc in next st, sc2tog, turn. (3 sts)
Row 6: Ch 1, sc in each st, turn. (3 sts)
Row 7: Ch 1, sc3tog. (1 st) Do not turn.
Edging: Ch 1, 3 sc in the Row 7 st (this is the tip). Rotate and sc in the ends of Rows 6 through 1 (6 sc). Fasten off. Rejoin at the end of Row 1 on the other side. Sc in the ends of Rows 1 through 6 (6 sc), then sl st to the first tip sc. That gives 3 + 6 + 6 = 15 sc. Fasten off, leaving a 12 in (30.5 cm) tail.
Leave the base unedged so it is easy to sew. Each ear is about 2 in (5.1 cm) wide x 1.75 in (4.4 cm) tall.
Tail
With mustard, ch 32.
Row 1: Hdc in 3rd ch from hook and in next 14 ch (15 hdc), then 2 hdc in each of the last 15 ch (30 hdc), turn. (45 sts)
The skipped ch-2 does not count as a stitch. The doubled stitches on the second half make that end twist into a spiral.
Row 2: Ch 1, sc in each st across. (45 sts)
Fasten off, leaving a 12 in (30.5 cm) tail. Wind the curled end into a loose spiral with your fingers. The straight end, with 15 single stitches, is the base that you sew behind the body. The tail is about 0.75 in (1.9 cm) wide.
Cheeks (Make 2)
With cream, make a magic ring.
Round 1: 6 sc in ring. (6 sts)
Round 2: 2 sc in each st around. (12 sts)
Sl st to the first sc. Fasten off, leaving a 10 in (25.4 cm) tail. Each cheek is about 1 in (2.5 cm) across.
You work the pocket from the top band down. The last rows narrow to make the rounded U-shaped bottom.
With cream, ch 28.
Row 1: Sc in 2nd ch from hook and in each ch across, turn. (27 sts)
Row 2: Ch 1, sc in each st across, turn. (27 sts)
These two rows form the firm top band.
Row 3 (Row A setup): Ch 3 (counts as dc), skip next st, cluster in next st, skip next 2 sts. Repeat from * 7 more times, dc in last st, turn. (8 clusters + 2 edge dc = 26 dc)
Row 4 (Row B): Ch 3 (counts as dc), 1 dc in the sp between the edge dc and the first cluster, cluster in each of the next 7 sps between clusters, 1 dc in the sp between the last cluster and the tch, dc in top of tch, turn. (7 clusters + 4 edge dc = 25 dc)
Row 5 (Row A): Ch 3 (counts as dc), skip next dc, cluster in the sp before the first cluster, cluster in each of the next 6 sps between clusters, cluster in the sp after the last cluster, dc in top of tch, turn. (8 clusters + 2 edge dc = 26 dc)
Rows 6–9: Work Row B, Row A, Row B, Row A. Row 6: 25 dc. Row 7: 26 dc. Row 8: 25 dc. Row 9: 26 dc.
Checkpoint: 6.75 in (17.1 cm) wide.
Row 10 (shaping): Ch 3 (counts as dc), cluster in each of the 7 sps between clusters, dc in top of tch, turn. (7 clusters + 2 edge dc = 23 dc)
Row 11: Ch 3, cluster in each of the 6 sps between clusters, dc in top of tch, turn. (6 clusters + 2 edge dc = 20 dc)
Row 12: Ch 3, cluster in each of the 5 sps between clusters, dc in top of tch. (5 clusters + 2 edge dc = 17 dc) Do not fasten off.
Pocket edging:
- Bottom: Ch 1, turn. 2 sc in the first st, sc in the next 15 sts, 2 sc in the last st. (17 + 2 = 19 sc)
- First side: Rotate. 2 sc in the end of each of Rows 12–3 (20 sc), then sc in the ends of Rows 2 and 1 (2 sc). (22 sc) Fasten off.
- Second side: Rejoin at the end of Row 1 on the other side. Sc in the ends of Rows 1 and 2 (2 sc), then 2 sc in the end of each of Rows 3–12 (20 sc). (22 sc) Sl st to the first bottom sc.
Total: 19 + 22 + 22 = 63 sc. Fasten off, leaving a 36 in (91.4 cm) tail for sewing. The top band stays unedged. The pocket now measures 7.25 in (18.4 cm) x 5.75 in (14.6 cm).
Hanging Cord
Hold 2 strands of tan together and ch 61.
Row 1: Sl st in the back bump of the 2nd ch from hook and in each ch across. (60 sl st)
Fasten off, leaving 8 in (20.3 cm) tails at both ends. The cord is about 12 in (30.5 cm) long, with a twisted, rope-like look.
Make All Pieces
Check that you have every part before you start assembly:
- Mustard: 1 body, 2 ears, 1 tail
- Cream: 1 pocket, 2 cheeks
- Tan: 1 cord
- Black: embroidery only
Layout guide (RS facing):
        [Ear]             [Ear]
      +-------------------------+
      |   eyes  Head   eyes     |  <- cord sewn on back
      |  (Ck)   nose    (Ck)    |
      |       whiskers          |
[Tail]+-------------------------+  <- pocket top at Row 27
 curl |      Cream Pocket       |
  |   |    granny clusters      |
  +---|                         |
      +-------------------------+
Joining (Assembly)
Use whipstitch throughout. Catch one loop from each layer and pull each stitch just snug, never tight enough to pucker the body.
Ears: Place one ear behind each top corner of the head, overlapping 0.5 in (1.3 cm). The ear bases sit on Rows 43–45. Whipstitch from the back so no stitches show on the front.
Tail: Lay the straight base of the tail behind the lower left edge of the body, along Rows 6–20. Let the curl rise beside the body. Stitch down the base, then tack the lowest curl in two places so it keeps its spiral.
Pocket: Lay the body flat, RS up. Position the pocket so its top band sits on Row 27. Its sides should sit 0.125 in (0.3 cm) inside the raw body edge, and its bottom 0.25 in (0.6 cm) above the raw bottom edge. Pin every 1 in (2.5 cm). Whipstitch through each pocket edging sc and the body stitch behind it, working down one side, across the bottom and up the other side. Leave the top band open.
Cord: On the back of the head, sew each cord end to Row 40, 1.5 in (3.8 cm) in from its side edge, overlapping 1 in (2.5 cm). Stitch through the back layer only so nothing shows on the front.
Face: Sew the cheeks onto Rows 33–37, about 1.5 in (3.8 cm) in from each side. With black yarn, backstitch a curved arc above each cheek for the closed eyes. Satin stitch a small triangle nose on Row 36, centered between the cheeks. Make three straight whiskers on each side, about 1.25 in (3.2 cm) long, crossing the outer edge of each cheek.
Size checkpoint: The assembled body still lies flat at 7.5 in (19.1 cm) x 10 in (25.4 cm).
Border
Work this round in mustard, on the body only. Keep the ears, tail and cord behind your work. Border gauge is 4 sc per inch, the same as the body.
Round 1 (RS): Join with sc in the first st of Row 45. (This joining sc is the first of the 2 sc below.)
- Top: 2 sc in the first st, sc in the next 16 sts, 2 sc in the last st. (18 + 2 = 20 sc)
- Side: Sc in the end of each row down to Row 1, skipping every 9th row end. (45 − 5 = 40 sc)
- Bottom: Working in the free loops of the foundation chain, 2 sc in the first loop, sc in the next 16 loops, 2 sc in the last loop. (18 + 2 = 20 sc)
- Side: Sc in the end of each row up to Row 45, skipping every 9th row end. (40 sc)
Sl st to the first sc and fasten off. Total: 20 + 40 + 20 + 40 = 120 sc.
Why the math works: Each side has 45 rows. At 4.5 rows per inch, that is 10 in (25.4 cm). Skipping 5 row ends leaves 40 sc, which is exactly 4 sc per inch over 10 in (25.4 cm), so the edge lies flat without ruffling. The extra sc at the four corners help the border turn the rounded curves without pulling. The border adds 0.25 in (0.6 cm) on every edge, which brings the body to 8 in (20.3 cm) x 10.5 in (26.7 cm).
Final Blocking
- Weave in all remaining ends on the back.
- Lay the cat face down on a blocking mat.
- Pin the outline to 8 in (20.3 cm) x 10.5 in (26.7 cm).
- Mist lightly with water until the stitches are damp.
- Turn the cat RS up and pin the pocket edges so they lie flat.
- Reshape the tail curl with your fingers.
- Let it dry completely, for at least 12 hours.
- Remove the pins and hang.
Final Quality-Control Checklist
- The body measures 8 in (20.3 cm) x 10.5 in (26.7 cm).
- The border has 120 sc and lies flat.
- The ears match in height and placement.
- The top band of the pocket sits on Row 27.
- The pocket sides are the same distance from the body edge.
- The cheeks and eyes are level.
- The whiskers are the same length on both sides.
- The cord is centered and secure.
- No sewing stitches show on the front.
Troubleshooting
Body edges wave: The border stitches are too loose, or there are too many. Recount 40 sc per side.
Pocket bottom looks pointed: Check that each of Rows 10–12 drops exactly one cluster.
Pocket sags open: Use cotton yarn, or work the top band with a hook one size smaller.
Tail will not curl: Make sure each of the last 15 ch has 2 hdc.
Cat leans when hung: Re-sew the cord ends so they are the same distance from the side edges.
Granny rows slant: Check the edge stitches. Rows should alternate between 26 dc (Row A) and 25 dc (Row B).
Care
Hand wash in cool water and lay flat to dry. Reshape the tail and pocket while they are damp.
Final Notes
Each measurement depends on the one before it. A gauge of 16 sc x 18 rows gives the 7.5 in (19.1 cm) x 10 in (25.4 cm) body. The 27-row checkpoint sets where the pocket sits. The 8-cluster pocket rows give a 7.25 in (18.4 cm) pocket that fits inside the body outline. The 120-stitch border then brings the cat to 8 in (20.3 cm) x 10.5 in (26.7 cm). Check your gauge first and the rest will follow.
Happy crocheting!