
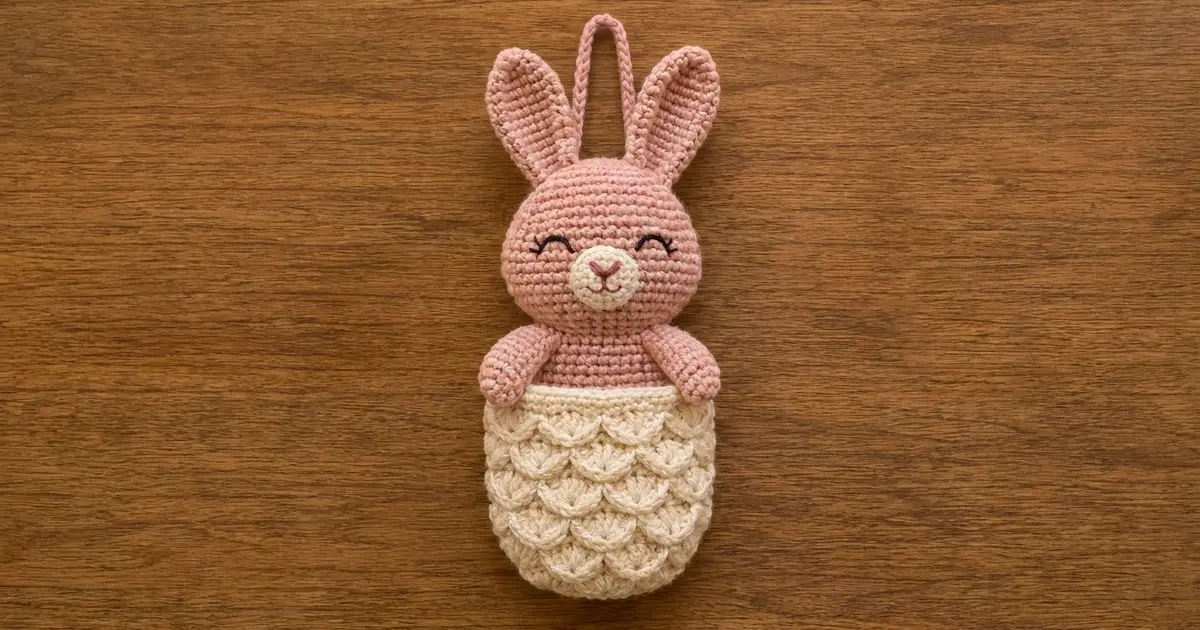
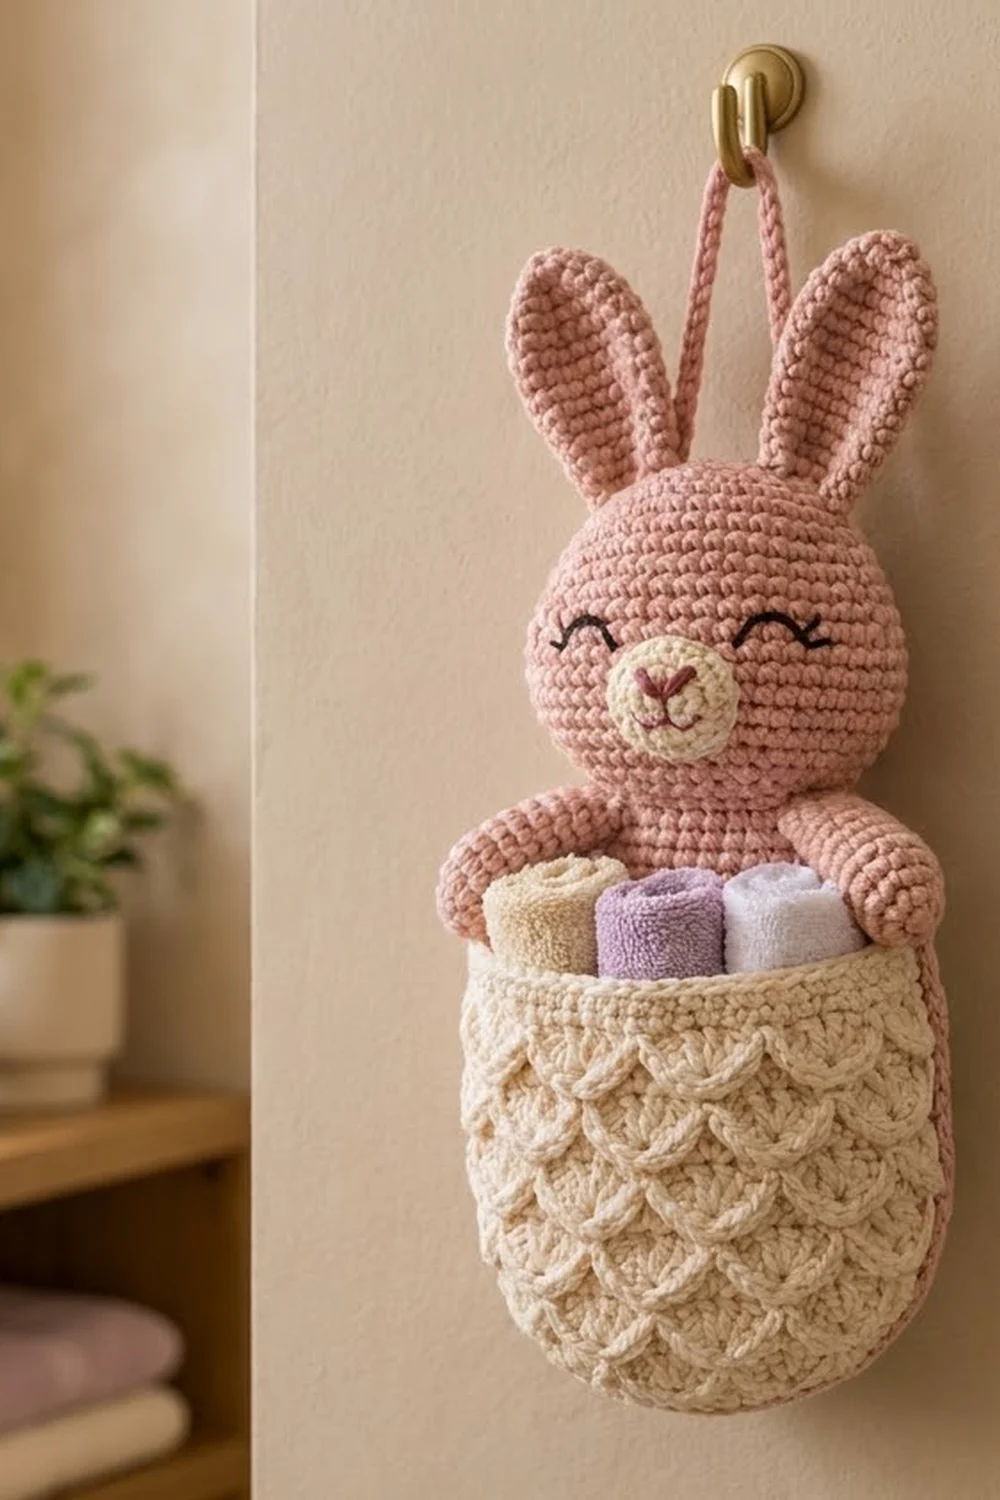
This sweet bunny peeks over the rim of a textured basket pocket. Hang it on a hook to hold rolled washcloths, hair ties or baby socks.
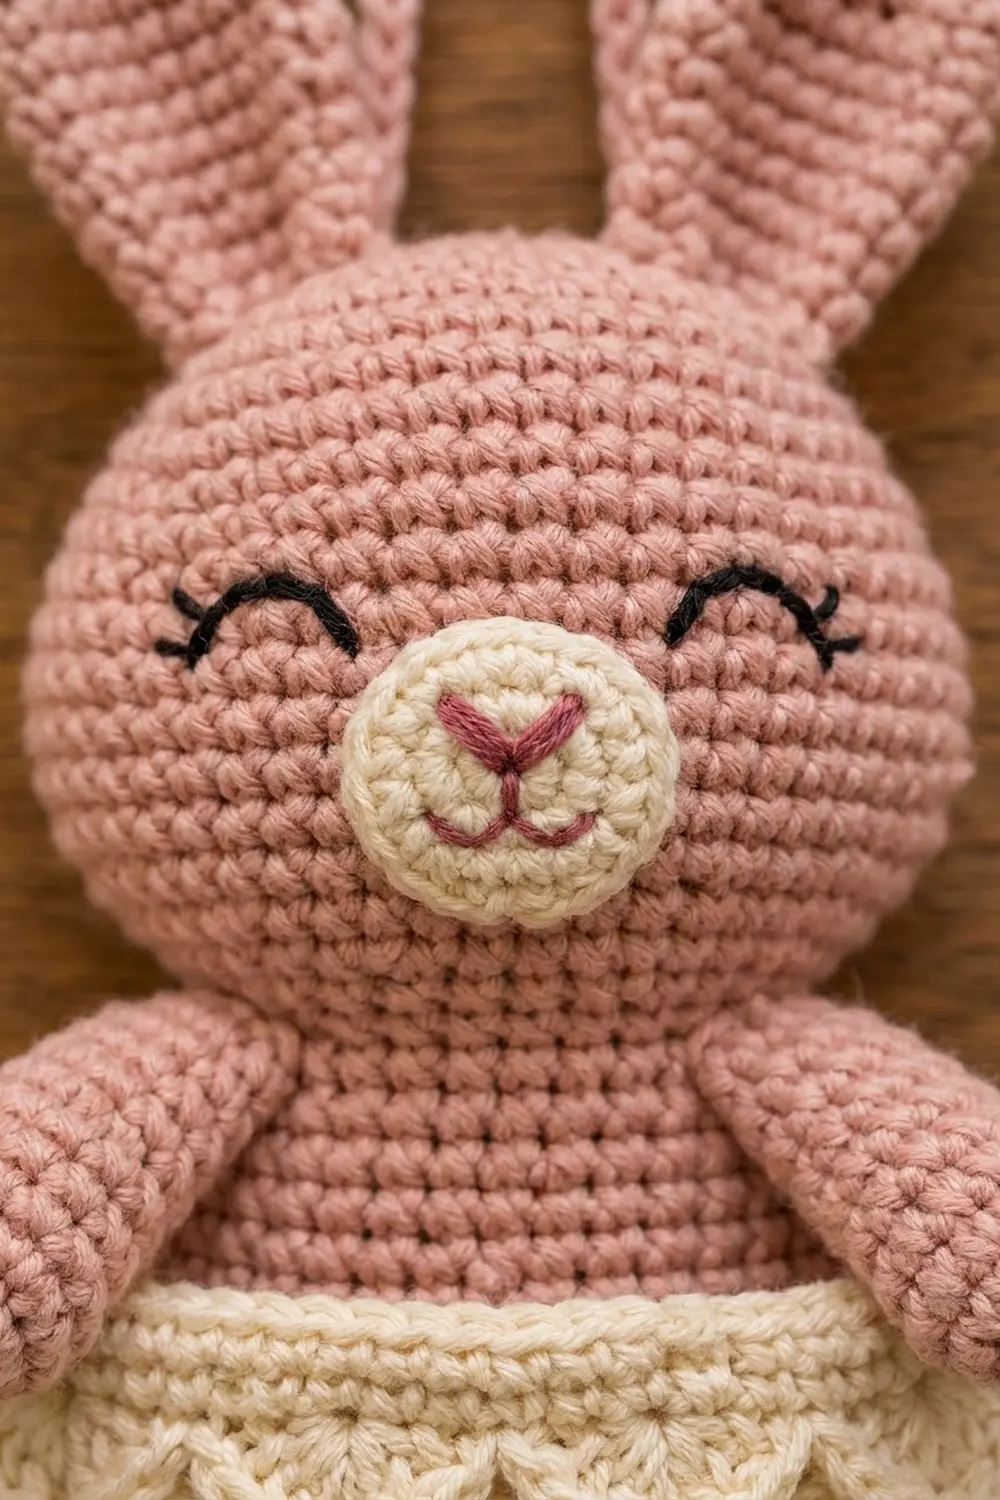
The bunny is dusty rose pink, with long leaf-shaped ears, a cream muzzle, sleepy embroidered eyes and two little arms resting on the rim. The cream pocket is covered in staggered shells that look like scales, and it has a firm single crochet rim.
This pattern uses US crochet terms. The finished hanger is about 15 in (38.1 cm) tall from the ear tips to the pocket bottom, and 6.75 in (17.1 cm) wide.
You make nine parts: a flat body panel worked in rows, a flat head circle with a neck tab, two ears, a muzzle, two arms, a strap, and a 3D pocket worked in rounds from an oval base. Then you sew them together.
Finished Size and Construction
- Finished size: 15 in (38.1 cm) tall x 6.75 in (17.1 cm) wide
- Skill level: Intermediate
- Terminology: US terms
- Yarn weight: worsted (#4) cotton
- Hook: 4.0 mm (G-6)
- Number of pieces: 9
- Layout: head above the body, pocket over the lower body, arms draped over the rim
- Body before border: 6 in (15.2 cm) wide x 6.4 in (16.3 cm) tall
- Body after border: 6.4 in (16.3 cm) x 6.8 in (17.3 cm)
- Border depth: 0.2 in (0.5 cm) on the body; 0.6 in (1.5 cm) rim band on the pocket
Materials
Use a smooth, firm worsted cotton yarn. Cotton holds the pocket’s shape and shows the shells clearly. The amounts below assume about 190 m per 100 g.
- Color A, dusty rose: 75 g / 143 m
- Color B, cream: 60 g / 114 m
- Black yarn or floss: 2 m, for the eyes
- Deep rose yarn or floss: 2 m, for the nose and mouth
All quantities include a margin of about 25% for swatching and sewing tails.
Tools: 4.0 mm (G-6) hook, tapestry needle, 4 stitch markers, pins, a small handful of fiberfill, measuring tape, spray bottle and blocking mat.
Abbreviations (US Terms)
- ch: chain
- sl st: slip stitch
- sc: single crochet
- hdc: half double crochet
- dc: double crochet
- inc: 2 sc in the same stitch
- sc2tog: single crochet 2 together
- BLO: back loop only
- MR: magic ring
- st(s): stitch(es)
- RS: right side
Shell: 5 dc in the same stitch.
Shell Round (worked over a multiple of 6 sts):
1. Ch 1, sc in the first st.
2. Sk 2 sts, shell in the next st, sk 2 sts, sc in the next st. Repeat from * around.
3. On the last repeat, after the second sk 2, sl st to the first sc instead of working the final sc.
Each repeat uses 6 sts and makes 6 sts (1 sc + 5 dc).
Gauge and Checkpoints
Gauge: 18 sc x 20 rows = 4 in (10.2 cm).
Make the body first. It is the largest flat piece and the easiest to measure.
- Body after Row 4: 6 in (15.2 cm) wide
- Body after Row 32: 6.4 in (16.3 cm) tall
- Head after Rnd 6: 2.5 in (6.4 cm) across
- Head after Rnd 12: 5 in (12.7 cm) across
- Pocket base after Rnd 5: 5.8 in (14.7 cm) x 2 in (5.1 cm)
If your piece is too big, go down 0.5 mm in hook size. If it is too small, go up 0.5 mm. Keep all stitch counts the same, because the parts are planned to fit together at these counts.
Body Panel
Use Color A and work in rows from the bottom up.
Row 1: Ch 22, sc in the 2nd ch from the hook and in each ch across. (21 sts)
Row 2: Ch 1, turn, inc, sc in the next 19 sts, inc. (23 sts)
Row 3: Ch 1, turn, inc, sc in the next 21 sts, inc. (25 sts)
Row 4: Ch 1, turn, inc, sc in the next 23 sts, inc. (27 sts)
These increase rows shape the rounded bottom corners.
Rows 5–24: Ch 1, turn, sc across. (27 sts)
Row 25: Ch 1, turn, sc2tog, sc in the next 23 sts, sc2tog. (25 sts)
Rows 26–27: Ch 1, turn, sc across. (25 sts)
Row 28: Ch 1, turn, sc2tog, sc in the next 21 sts, sc2tog. (23 sts)
Rows 29–30: Ch 1, turn, sc across. (23 sts)
Row 31: Ch 1, turn, sc2tog, sc in the next 19 sts, sc2tog. (21 sts)
Row 32: Ch 1, turn, sc across. (21 sts)
Do not fasten off. Go straight to the Body Edging in the Border section.
Head
Use Color A and work in a spiral, using a marker to track the start of each round.
Rnd 1: 6 sc in MR. (6)
Rnd 2: Inc in each st around. (12)
Rnd 3: (Sc 1, inc) 6 times. (18)
Rnd 4: (Sc 2, inc) 6 times. (24)
Rnds 5–12: Add 1 more sc before each inc in every round. The round totals are 30, 36, 42, 48, 54, 60, 66 and 72. Rnd 12 ends with 72 sts. Shift the increases on alternate rounds so the circle stays round. Fasten off with an invisible join.
Neck Tab: With RS facing, join Color A 7 sts to the right of the bottom-center st.
- Row 1: Ch 1, sc in the same st and in the next 14 sts. (15)
- Rows 2–4: Ch 1, turn, sc across. (15)
The tab measures 3.3 in (8.4 cm) x 0.8 in (2.0 cm). Leave a 12 in (30.5 cm) tail.
Ears (make 2)
Use Color A.
Rnd 1:
1. Ch 16.
2. Sc in the 2nd ch from the hook, sc in the next ch, hdc in the next 3, dc in the next 6, hdc in the next 2, sc in the next 1, 3 sc in the last ch.
3. Working along the other side of the chain: sc 1, hdc 2, dc 6, hdc 3, sc 1.
4. Work (sc, ch 2) in the first ch, then sl st to the first sc.
Count: 31 sts + a ch-2 tip.
Rnd 2: Ch 1, sc in each st around. Work 2 sc in each of the 3 base sts and (sc, ch 2, sc) in the ch-2 tip. Sl st to the first sc. (36 sts + ch-2 tip)
The tall stitches in the middle and the short ones at both ends make the pointed leaf shape. Each ear is 3.5 in (8.9 cm) long x 1.5 in (3.8 cm) wide.
Muzzle
Use Color B.
Rnd 1: 6 sc in MR. (6)
Rnd 2: Inc in each st around. (12)
Rnd 3: (Sc 1, inc) 6 times. (18)
Rnd 4: (Sc 2, inc) 6 times. (24)
The muzzle is 1.6 in (4.1 cm) across. With deep rose, embroider a small inverted-triangle nose, a short line down from it and a shallow V-shaped mouth.
Arms (make 2)
Use Color A and work in a spiral.
Rnd 1: 6 sc in MR. (6)
Rnd 2: Inc in each st around. (12)
Rnds 3–6: Sc around. (12)
Rnd 7: (Sc 4, sc2tog) 2 times. (10)
Rnd 8: Sc around. (10)
Stuff the paw end lightly. Flatten the opening and close it with 5 sc worked through both layers. Each arm is 1.75 in (4.4 cm) x 1.25 in (3.2 cm).
Strap
Use Color A. Ch 46, then sc in the 2nd ch from the hook and in each ch across. (45 sts)
The strap is 10 in (25.4 cm) long.
Use Color B and work in joined rounds. Begin each round at one short end of the oval. That end will become the back of the pocket.
Rnd 1: Ch 18. Sc in the 2nd ch from the hook, sc in the next 15, 3 sc in the last ch. Working along the other side of the chain: sc in the next 15, 2 sc in the first ch. Join. (36)
Rnd 2: Ch 1, inc, sc 15, inc in each of the next 3, sc 15, inc in each of the last 2. Join. (42)
Rnd 3: Ch 1, (sc 1, inc), sc 15, (sc 1, inc) 3 times, sc 15, (sc 1, inc) 2 times. Join. (48)
Rnd 4: Ch 1, (sc 2, inc), sc 15, (sc 2, inc) 3 times, sc 15, (sc 2, inc) 2 times. Join. (54)
Rnd 5: Ch 1, (sc 3, inc), sc 15, (sc 3, inc) 3 times, sc 15, (sc 3, inc) 2 times. Join. (60)
Each round adds 3 sts at each curved end. The straight sides stay at 15 sts.
Rnd 6: Ch 1, sc in the BLO of each st around. Join. (60) This round turns the base up into the walls.
Rnd 7: Work a Shell Round. (10 shells, 60 sts)
Rnd 8: Ch 1, work 1 sc in each sc and each dc around. Join. (60)
Rnd 9: Sl st in the next 3 sts, then work a Shell Round starting in that st. (60)
The 3 slip stitches move the start of the round onto the center dc of a shell. That places each new sc above an old shell and each new shell above an old sc, which creates the staggered scales.
Rnds 10, 12, 14, 16: Repeat Rnd 8. (60)
Rnds 11, 13, 15: Repeat Rnd 9. (60)
You now have 5 shell rounds. The round start moves 12 sts in total, but it stays on the back of the pocket. Flattened, the pocket walls are about 6 in (15.2 cm) tall.
Make All Pieces
Check that you have all nine parts:
- Color A: 1 body, 1 head with tab, 2 ears, 2 arms, 1 strap (7 pieces)
- Color B: 1 pocket, 1 muzzle (2 pieces)
Layout (front view):
      [Ear] [Strap] [Ear]
          [  Head  ]
          [ Muzzle ]
   [Arm]  [  Body  ]  [Arm]
          [ Pocket ]
Joining
Whipstitch every seam with the yarn tails. Make each stitch snug but not tight so the seams lie flat.
- Face: Sew the muzzle to the lower center of the head, 0.75 in (1.9 cm) above the bottom edge. With black, embroider two curved closed eyes 1.25 in (3.2 cm) apart, just above the muzzle. Add 2 lashes at the outer end of each eye.
- Head to body: Place the tab behind the top edge of the body. Match the 15 tab sts, one to one, to the center 15 of the 21 top border sts, leaving 3 sts free on each side. Sew along the tab, then tack down its sides.
- Ears: Overlap the bottom 0.75 in (1.9 cm) of each ear behind the top of the head. Place them 1.5 in (3.8 cm) apart, angled slightly outward.
- Strap: Sew both ends to the back of the head on Rnds 9–10, 2 in (5.1 cm) apart.
- Pocket: Place the round-start side of the pocket against the body.
- Line it up so the rim sits 1.3 in (3.3 cm) below the body top and the base hangs 0.5 in (1.3 cm) below the body bottom.
- Sew the 30 back rim sts across the body.
- Tack the back of the base to the body.
- Arms: Sew the closed ends to the shoulders, 0.25 in (0.6 cm) below the top edge. Drape the paws over the rim and tack each one with 2 stitches.
Size checkpoint: The finished hanger should measure 15 in (38.1 cm) x 6.75 in (17.1 cm).
Border
Border gauge: 18 sc = 4 in (10.2 cm). Each border round adds 0.2 in (0.5 cm).
Body Edging (Color A)
Rnd 1: Ch 1 and turn.
- Top: Working into the tops of Row 32, work 3 sc in the first st, sc in the next 19, 3 sc in the last st.
- First side: Work 1 sc in each row-end of Rows 31 down to 2. (30)
- Bottom: Work 3 sc in the first foundation ch, sc in the next 19, 3 sc in the last ch.
- Second side: Work 1 sc in each row-end of Rows 2 up to 31. (30)
- Join to the first sc.
Count: 110 sts.
Counts per side: The center sc of each 3-sc group is the corner st. Counting each side with both of its corners included:
- Top: 23 sts
- Each side: 34 sts
- Bottom: 23 sts
Why the math works: 23 + 34 + 23 + 34 = 114. Each corner is counted on two sides, so subtract the 4 shared corners: 114 − 4 = 110, which matches the round total. Working 1 sc per row-end keeps the sides flat because 20 rows and 18 sts both measure 4 in (10.2 cm).
Pocket Rim (Color B)
Rnds 17–19: Ch 1, sc in each st around. Join. (60)
That gives 30 sts on the front and 30 on the back. The rim count matches the walls, so the opening does not flare or pull in. The rim band is 0.6 in (1.5 cm) deep. Leave a 24 in (61.0 cm) tail for sewing.
Final Blocking
- Block the body, head and ears before you assemble.
- Pin them to size: body 6.4 x 6.8 in (16.3 x 17.3 cm), head 5 in (12.7 cm), ears 3.5 in (8.9 cm).
- Mist until damp and let them dry completely.
- Fill the pocket with a rolled hand towel, mist it and let it dry so the walls stand up.
- After assembly, steam the seams lightly from a distance. Never press the shells.
Final Quality-Control Checklist
- Body border has 110 sts and lies flat.
- Head has 72 sts and does not ruffle or cup.
- Both ears match.
- Pocket has 60 sts per round, with 10 staggered shells in each shell round.
- Rim sits 1.3 in (3.3 cm) below the body top.
- Arms are tacked over the rim.
- All ends are woven in.
Troubleshooting
- Head ruffles: Check that each round adds exactly 6 sts, or go down a hook size.
- Head cups: Go up a hook size.
- Shells stack instead of staggering: You missed the 3 slip stitches on Rnds 9, 11, 13 or 15.
- Pocket walls splay out: Rnd 6 was not worked in BLO.
- Body edges wave: Use only 1 sc per row-end.
- Pocket gapes away from the body: Tack the base down more firmly.
Care
Hand wash in cool water. Reshape the pocket over a towel and dry flat.
Final Notes
Each measurement builds on the gauge of 18 sc and 20 rows = 4 in (10.2 cm):
- The 27-st body is 6 in (15.2 cm) wide, and 32 rows are 6.4 in (16.3 cm) tall.
- The edging brings the body to 6.4 x 6.8 in (16.3 x 17.3 cm).
- The 72-st head is 5 in (12.7 cm) across.
- The 60-st pocket flattens to 6.75 in (17.1 cm) wide.
Together they make a hanger 15 in (38.1 cm) tall. Check each measurement as you go and the parts will fit.
Happy crocheting!