

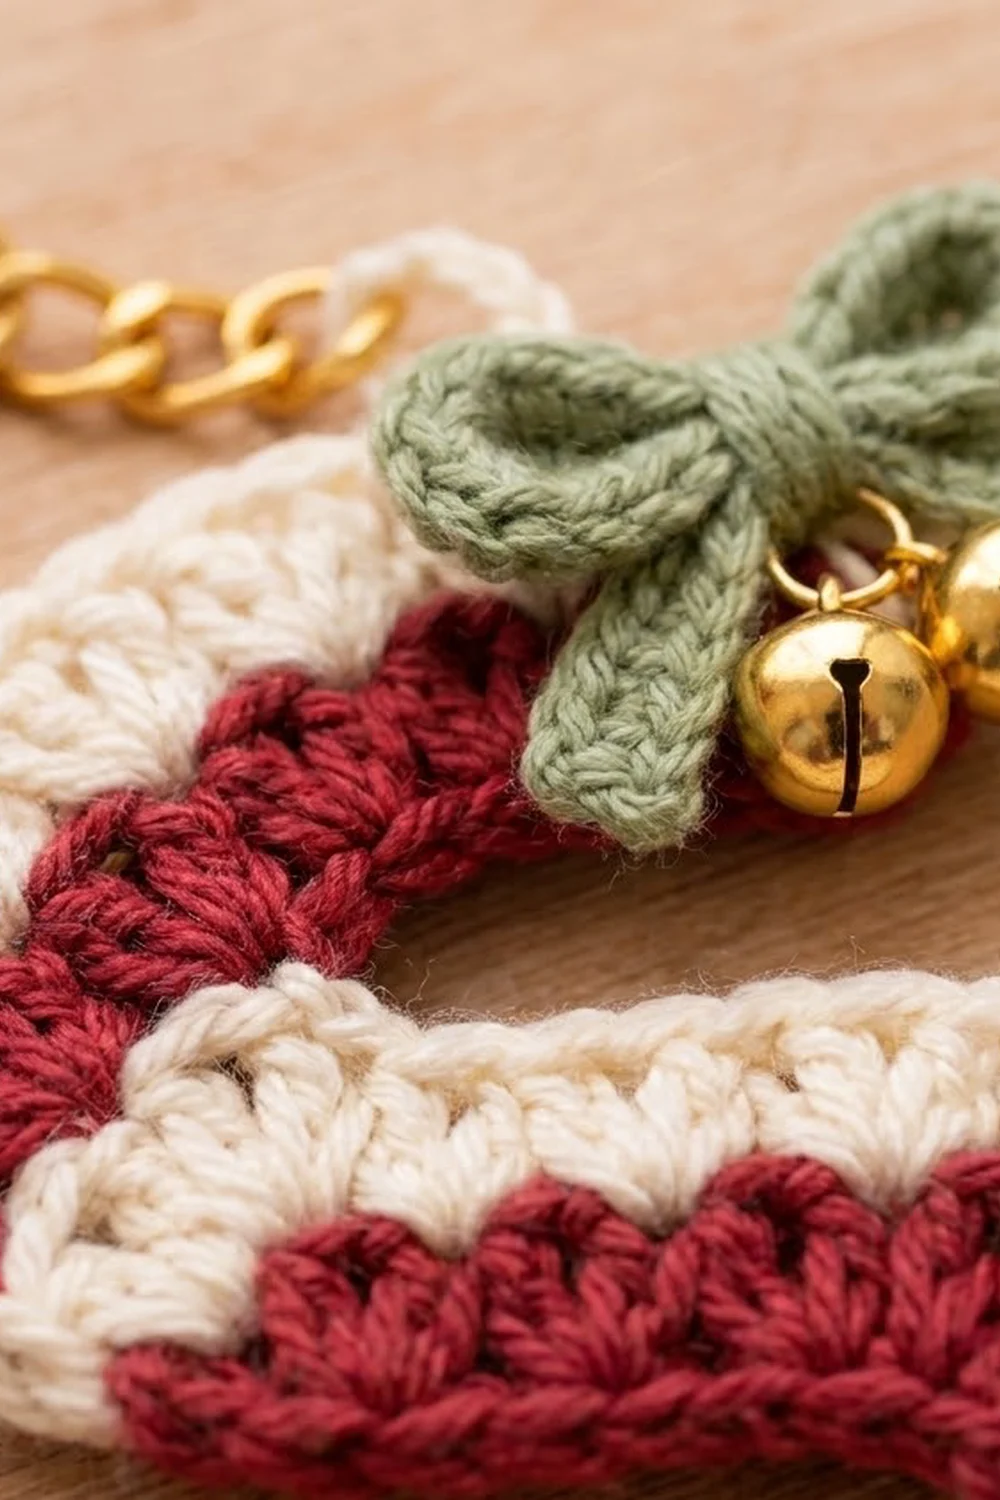
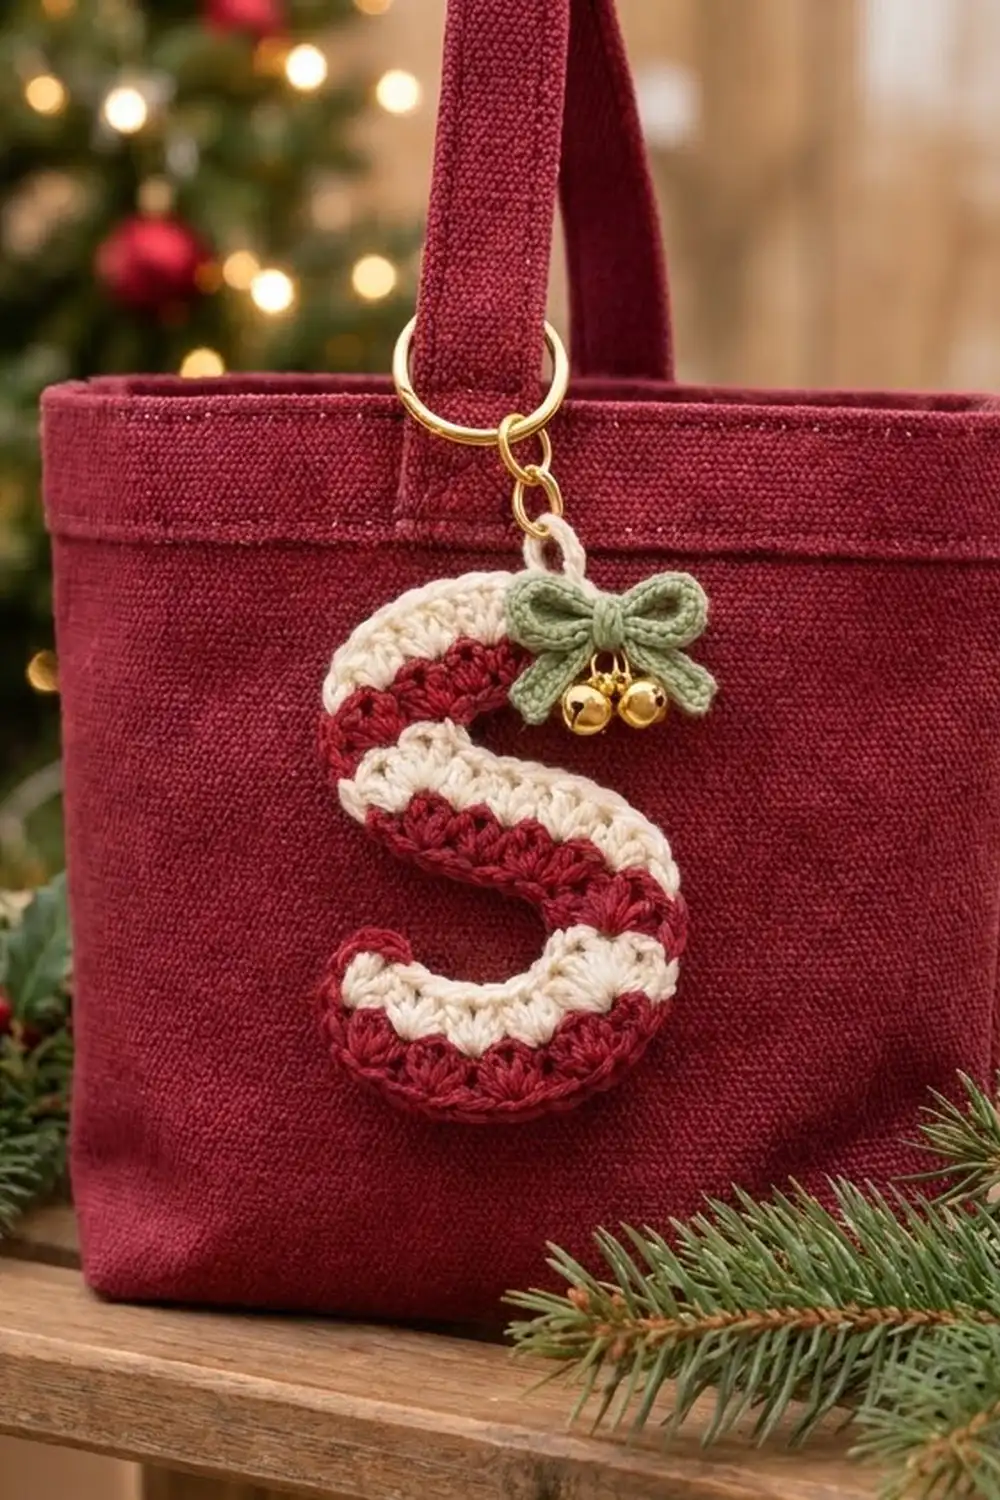
This little letter S looks like a candy cane. It has cranberry red stripes of solid double crochet, and each one is topped with a row of soft cream fans. A tiny sage green bow and two gold jingle bells make it festive. It’s a quick handmade gift, stocking stuffer or bag charm.
The letter is worked in one piece from three linked bands: a curled bottom bowl, a slanted middle band and a curled top bowl. Each band is one red row plus one cream fan row. That gives the letter six rows of stripes, always cream over red.
This pattern uses US crochet terms. The finished letter measures about 3.25 in (8.3 cm) tall by 3.25 in (8.3 cm) wide, not counting the keyring.
Construction overview: You work Rows 1–6 in turn. The middle and top bands start on a free-hanging chain, and that chain is anchored to the band below at one end only. This leaves the two open counters of the S. Next, a red single crochet edging neatens the outside. Last, you add the bow, the bells and the hanging loop.
Finished Size and Construction
- Finished size: 3.25 in (8.3 cm) tall x 3.25 in (8.3 cm) wide
- Skill level: Easy
- Terminology: US crochet terms
- Yarn weight: Worsted (#4), cotton or cotton blend
- Hook: 4.0 mm (G-6)
- Number of pieces: 1 letter body worked in one piece, plus 1 small bow embellishment
- Layout: Three bands stacked into an S. The bottom and middle bands connect on the right, and the middle and top bands connect on the left.
- Size before border: 3 in (7.6 cm) tall x 2.75 in (7.0 cm) wide
- Border depth: 0.25 in (0.6 cm) on the bottom and sides. The cream fan tops have no border.
Materials
Yarn: Use a smooth, mercerized or matte worsted-weight cotton. Cotton gives crisp fan stitches and holds its curve after blocking. Acrylic also works, but it may need steam blocking to keep the curls in shape.
- Red (cranberry): 8 g, about 14 m
- Cream: 6 g, about 10 m
- Sage green: 2 g, about 3 m
These quantities include a margin for your gauge swatch and yarn tails.
Tools and notions:
- 4.0 mm (G-6) crochet hook
- Tapestry needle
- Scissors
- 2 gold jingle bells, 3/8 in (1.0 cm)
- 1 gold split keyring, 1 in (2.5 cm), with a short chain and jump ring
- Rust-proof pins and a foam blocking mat
- Spray bottle
Abbreviations (US Terms)
- ch – chain
- sl st – slip stitch
- sc – single crochet
- dc – double crochet
- dc2tog – double crochet 2 together
- sk – skip
- st(s) – stitch(es)
- RS / WS – right side / wrong side
- rep – repeat
Special stitches
- Fan: 3 dc in the same stitch.
- Standing sc: With a slip knot on your hook, insert the hook into the stitch and work an sc as usual. No joining sl st is needed.
- dc2tog: Yarn over, insert the hook in the next st, pull up a loop, then yarn over and pull through 2 loops. Repeat in the following st. Yarn over and pull through all 3 loops on the hook.
Note: Ch-3 at the start of a dc row counts as 1 dc.
Gauge and Checkpoints
Gauge: 16 dc and 8 rows = 4 in (10.2 cm). That works out to 4 dc per 1 in (2.5 cm), and each row is 0.5 in (1.3 cm) tall.
Since the letter is small, test with the piece itself. Work Rows 1 and 2, then check them:
- After Row 1: The foundation edge, laid flat before it curves, measures 3.75 in (9.5 cm). The row is 0.5 in (1.3 cm) tall.
- After Row 2: The bottom band is 1 in (2.5 cm) tall.
- After Row 4: The piece is 2 in (5.1 cm) tall.
- After Row 6: The piece is 3 in (7.6 cm) tall and 2.75 in (7.0 cm) wide.
- After the border: The letter is 3.25 in (8.3 cm) square.
If your piece is too big, go down to a 3.5 mm hook. If it is too small, go up to a 4.5 mm hook. Don’t change the stitch counts. The fan repeats and the anchor points depend on them.
Letter Pattern
Work all cream rows with the RS facing you. Fasten off at the end of every row. Leave 4 in (10.2 cm) tails, and work over them where you can.
Section 1: Bottom Bowl
Row 1 (Red, RS): Ch 17. Dc in the 4th ch from the hook and in each of the next 2 ch. Dc2tog over the next 2 ch. Dc in each of the next 4 ch. Dc2tog over the next 2 ch. Dc in each of the last 3 ch. Fasten off.
(13 sts)
The chain covers 15 stitch positions: the base of the beginning ch-3 plus 14 more chains. Only 13 sts sit on top, so the two decreases make the top edge shorter than the bottom edge. The band curves into a smile, with the red on the outer (lower) edge.
Row 2 (Cream, RS): Standing sc in the first st. Sk 1 st, fan in the next st, sk 1 st, sc in the next st. Repeat from * 2 more times.
(3 fans and 4 sc = 13 sts)
Fasten off. Number this row’s stitches 1 to 13 from right to left. Stitches 1, 5, 9 and 13 are the sc.
Section 2: Middle Band
Row 3 (Red, WS): Turn the piece so the WS faces you. Join Red with a sl st in st 9 of Row 2. This is the sc between the second and third fans. Ch 11, and let the chain lie over the curled end of the bottom band.
Dc in the 4th ch from the hook and in each of the remaining 7 ch. You will finish next to the joining sl st, with 9 sts. Continue into Row 2 and dc in sts 10, 11, 12 and 13. Fasten off.
(13 sts: 9 on the chain + 4 in Row 2)
The middle band is attached to the bottom band only by its last 5 stitch positions: the joining sl st plus 4 dc. The rest of it floats above the bottom curl, which forms the lower counter of the S. Because this row has no increases or decreases, the band stays straight.
Row 4 (Cream, RS): Turn the piece back so the RS faces you. Work as for Row 2.
(3 fans and 4 sc = 13 sts)
Fasten off. Number the stitches 1 to 13 starting from the left end, which is the end with the free chain. Stitches 1, 5, 9 and 13 are the sc.
Section 3: Top Bowl
Row 5 (Red, RS): Keep the RS facing you. Join Red with a sl st in st 5 of Row 4. Ch 9, and let the chain lie toward the right, above the right end of the middle band.
Dc in the 4th ch from the hook and in the next ch. Work 2 dc in the next ch. Dc in each of the last 3 ch, ending next to the joining sl st (8 sts). Continue into Row 4 toward the left edge: dc in st 4, 2 dc in st 3, dc in st 2 and dc in st 1. Fasten off.
(13 sts: 8 on the chain + 5 in Row 4)
The base of this row has only 10 positions: 7 on the chain plus 3 in Row 4 (sts 4, 3 and 2–1 as worked). The 2 increases make the top edge longer than the base. The top band curves into a frown, so the right end curls down over the upper counter. The cream row on top therefore sits on the outer curve, just like in the finished letter.
Row 6 (Cream, RS): Work as for Row 2.
(3 fans and 4 sc = 13 sts)
Fasten off.
Checkpoint: The piece should be 3 in (7.6 cm) tall (6 rows at 0.5 in / 1.3 cm each) and about 2.75 in (7.0 cm) wide. The bottom band curls up at the left and the top band curls down at the right.
Border
Border gauge: 4 sc = 1 in (2.5 cm). Work 2 sc into the end of every row, because each row is 0.5 in (1.3 cm) tall. Work 1 sc into each foundation chain.
Use Red throughout. The border goes along the bottom, the row ends and the free chain edges. It does not go across the cream fan tops, so they stay scalloped. Work it in three segments with the RS facing.
Segment 1: around the bottom bowl and up the right side
Join Red with a standing sc in the left end of Row 2, then work 1 more sc in the same row end (2 sc). Work 2 sc in the end of Row 1.
Along the foundation chain: work 2 sc at the base of the beginning ch-3 (corner), then 1 sc in each of the next 13 ch. Work 2 sc in the last ch (corner).
Up the right side: 2 sc in the end of Row 1, 2 sc in Row 2, 2 sc in Row 3 and 2 sc in Row 4. Fasten off.
(29 sc: 4 on the left end, 17 on the bottom, 8 on the right side)
Segment 2: under the middle band and up the left side
Join Red with a standing sc in the first free ch next to the joining sl st of Row 3. Work 1 sc in each of the next 7 free ch (8 sc). Work 2 sc at the base of the beginning ch-3 (corner).
Up the left side: 2 sc in the end of Row 3, 2 sc in Row 4, 2 sc in Row 5 and 2 sc in Row 6. Fasten off.
(18 sc: 8 under the chain, 2 at the corner, 8 on the left side)
Segment 3: under the top bowl’s curl
Join Red with a standing sc in the first free ch next to the joining sl st of Row 5. Work 1 sc in each of the next 5 free ch (6 sc). Work 2 sc at the base of the beginning ch-3 (corner). Then work 2 sc in the end of Row 5 and 2 sc in the end of Row 6. Fasten off.
(12 sc)
Border total: 29 + 18 + 12 = 59 sc
Why the math works:
- The bottom edge has 15 foundation positions. Thirteen get 1 sc each and the 2 corner positions get 2 sc each, for 17 sc. The corners are counted inside those 17, not added again.
- The free chains of Rows 3 and 5 have 8 and 6 working chains, and each gets 1 sc. Each beginning ch-3 base is a corner with 2 sc.
- The border adds 0.25 in (0.6 cm) to the bottom and to each side, and nothing to the top. That gives 3 in + 0.25 in = 3.25 in (8.3 cm) tall and 2.75 in + 0.25 in + 0.25 in = 3.25 in (8.3 cm) wide.
Bow, Bells and Hanging Loop
Bow (Sage): Ch 36. Sl st in the back bump of the 2nd ch from the hook and in each ch across (35 sl st). Fasten off. The cord should be about 7 in (17.8 cm) long. Tie it into a bow about 1.25 in (3.2 cm) wide and trim the tails to 0.5 in (1.3 cm).
Bells: Thread both bells onto a sage tail and sew them under the bow knot so they hang side by side.
Placement: Sew the bow over the top band, just right of center, near the curl. Stitch through the knot only, so the loops stay soft.
Hanging loop (Cream): Join Cream with a sl st in the top of the center dc of the second fan of Row 6. Ch 10, then sl st in the same st. Fasten off and weave in the ends. Open the jump ring with pliers, slide the loop on and close the ring.
Final Blocking
- Weave in all the ends along stitches of the same color.
- Mist the letter until it is damp, not soaked.
- Pin it RS up on the mat.
- Ease the bottom band into a smooth smile and pin its curl tip upward.
- Pin the top band into a frown with its curl tip pointing down.
- Keep the middle band straight and slanted.
- Pin each fan point so the scallops sit evenly.
- Check the size: 3.25 in (8.3 cm) tall and wide.
- Let it dry completely, then add the bow and keyring if you haven’t yet.
Final Quality-Control Checklist
- Each red row has 13 sts, and each cream row has 3 fans and 4 sc.
- Row 3 is anchored to Row 2 at st 9, and Row 5 is anchored to Row 4 at st 5.
- Both counters are open, with the curl tips free.
- The border has 59 sc and the fan tops are left without a border.
- The letter measures 3.25 in (8.3 cm) square.
- The bow, bells and loop are secure, and the bells ring freely.
- No tails show on the RS.
Troubleshooting
- The bottom band won’t curve: Check that both dc2tog are in Row 1, then block it more firmly.
- The top band is flat: Check that Row 5 has both increases.
- The fans bunch or slant: Count your skips. Each repeat uses exactly 4 sts.
- The counters close up: You joined too far along. The joining sl st belongs in st 9 (Row 3) or st 5 (Row 4).
- The border ruffles: Work 1 sc per row end instead of 2, or use a smaller hook for the border.
- The keyring tugs the letter crooked: Move the loop to the center fan.
Care
Hand wash in cool water and lay flat to dry. Remove the keyring and bells before washing.
Final Notes
Here is the measurement chain:
- 4 dc per 1 in (2.5 cm), with rows 0.5 in (1.3 cm) tall
- Six rows give 3 in (7.6 cm) of height, and the curved bands give 2.75 in (7.0 cm) of width
- The red border adds 0.25 in (0.6 cm) on three sides, for a finished letter of 3.25 in (8.3 cm) square
If you check your size at each step, the letter will turn out just right.
Happy crocheting!