
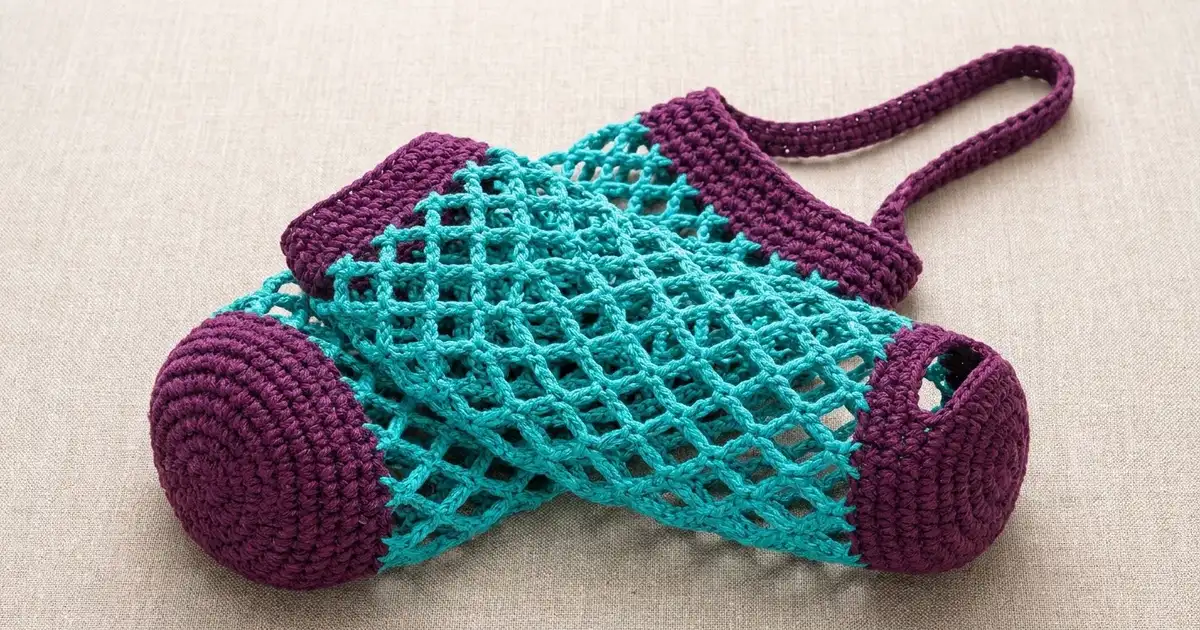
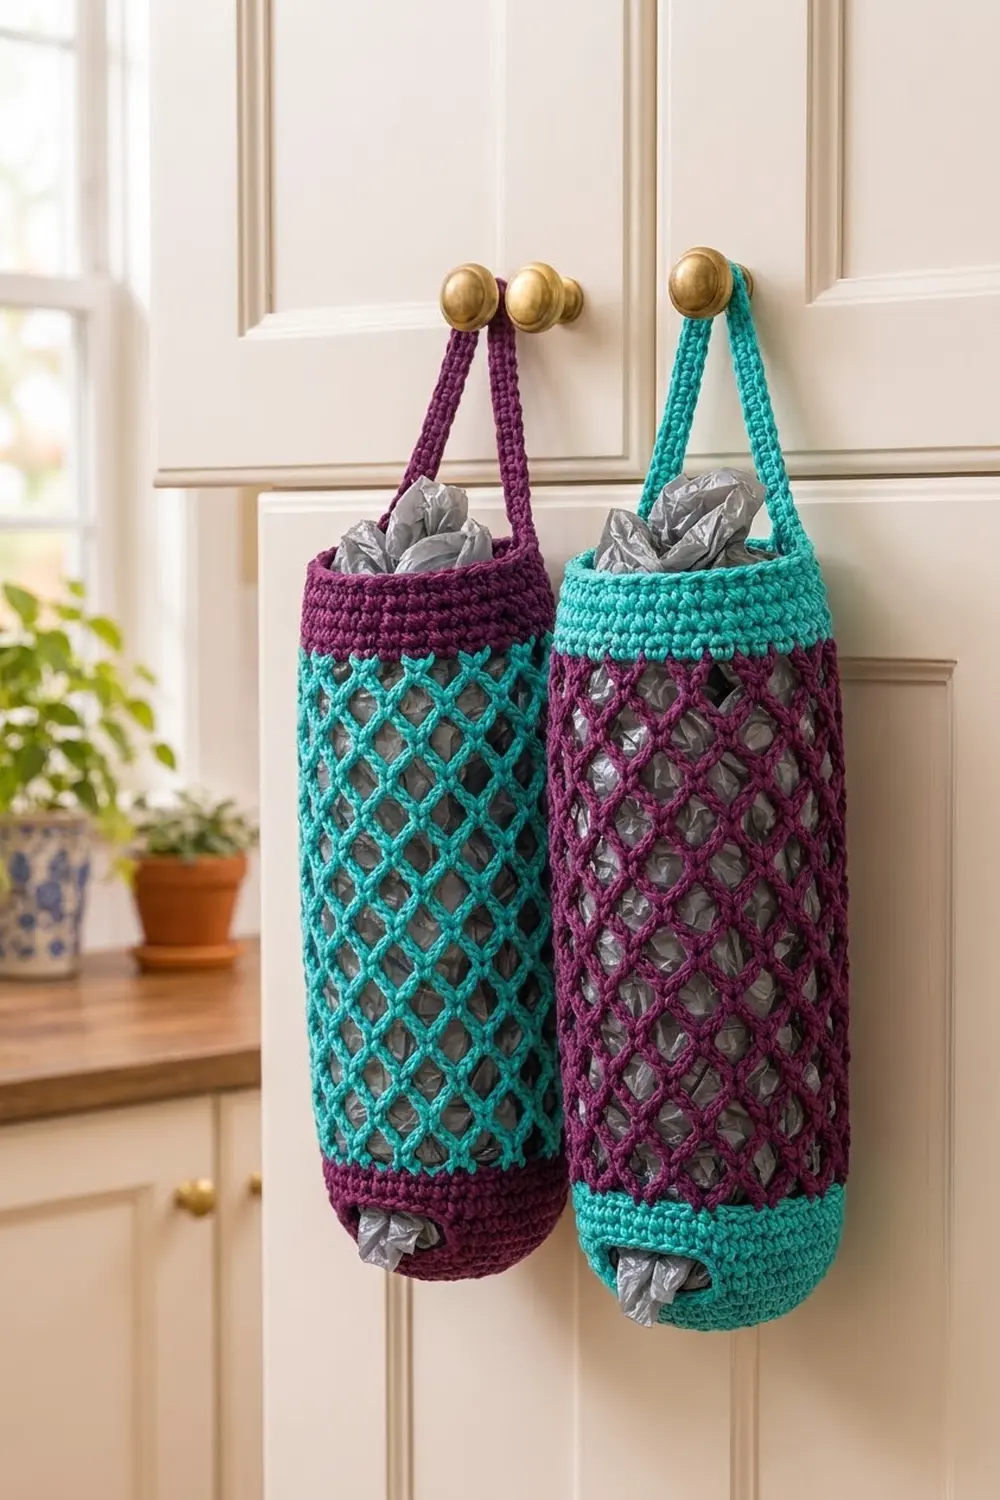
The Lattice Loop Plastic Bag Holder is a tall two-color tube that hangs from a cabinet knob and keeps loose grocery bags tidy. You stuff bags in at the top and pull them out one at a time through the round opening in the base. It’s a quick, practical project that uses only basic stitches and can be finished in a few evenings.
This version uses deep plum for the base, the top band and the hanging strap. The body is an open diamond mesh in bright turquoise. Because the mesh is open, you can see how many bags are left. The solid plum bands keep both ends firm. For the reverse look, just swap the two colors.
The pattern uses US crochet terms. The finished holder is about 6.9 in (17.5 cm) wide laid flat and 15.75 in (40.0 cm) tall from base to rim. The strap rises about 6.5 in (16.5 cm) above the rim, so the total hanging length is about 22.25 in (56.5 cm).
It’s made in one piece, in joined rounds from the bottom up. You start at the dispensing hole and increase out to a flat base ring. Next you work plum single crochet up the sides, switch to turquoise for the ch-5 mesh, and finish with a plum single crochet band. The strap is worked in rows straight off the top band and joined to the opposite side.
Finished Size and Construction
- Finished size: 6.9 in (17.5 cm) wide flat x 15.75 in (40.0 cm) tall, plus a 6.5 in (16.5 cm) strap loop
- Skill level: Easy
- Terminology: US crochet terms
- Yarn weight: Worsted weight (#4) cotton
- Hook: 5 mm (H-8)
- Number of pieces: 1 (the strap is worked onto the body)
- Layout: One vertical tube, worked bottom-up in joined rounds
- Circumference: 48 sts, about 13.7 in (34.8 cm)
- Size before top band: 13.75 in (34.9 cm) tall (base sides plus mesh)
- Top band depth: 2 in (5.1 cm)
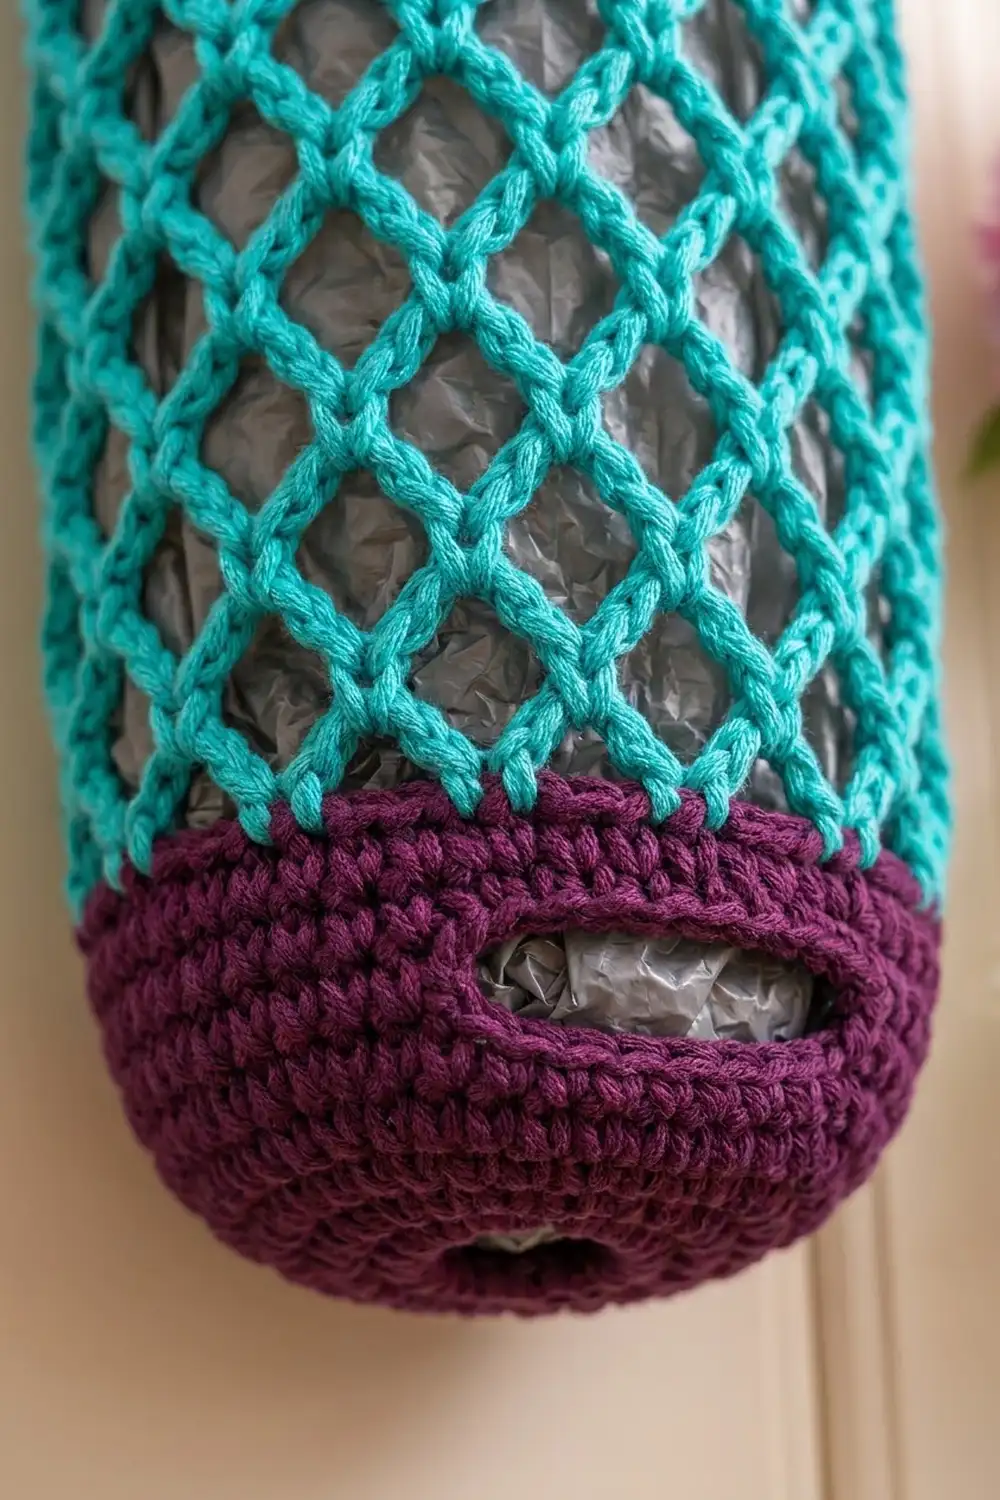
- Base opening: about 2.2 in (5.6 cm) across
Materials
Use a smooth, firm worsted weight cotton or cotton blend. Cotton holds its shape and doesn’t stretch much when the holder is packed full of bags. Avoid splitty or very soft yarns, because the mesh needs crisp chains.
- Color A (plum): 75 g, about 128 m (140 yd)
- Color B (turquoise): 50 g, about 85 m (93 yd)
Both amounts assume a yarn of about 170 m per 100 g. They include a margin of about 15–20 percent for a gauge swatch and small differences in tension.
Reversed colorway: For the turquoise-band version, use turquoise for the base, top band and strap, and plum for the mesh. Swap the amounts as well: 75 g of turquoise and 50 g of plum.
Tools:
- 5 mm (H-8) crochet hook
- 1 locking stitch marker
- 2 extra stitch markers for the strap position
- Tapestry needle
- Scissors
- Tape measure
- Optional: an empty 2-liter bottle or a rolled towel for blocking
Abbreviations (US Terms)
- ch – chain
- sc – single crochet
- sl st – slip stitch
- st(s) – stitch(es)
- sk – skip
- sp – space
- inc – 2 sc in the same st
- rnd – round
Special stitch – ch-5 loop: Chain 5 loosely. In the mesh, each ch-5 loop arches over 3 skipped stitches (in the set-up round) or over one loop below, and is anchored with 1 sc. Where two loops meet at a sc, they form one side of a diamond.
Gauge and Checkpoints
Single crochet gauge: 14 sc and 16 rnds = 4 in (10.2 cm).
Mesh gauge: 4 mesh rnds = 3.5 in (8.9 cm), measured lightly stretched. Twelve loops fill the full 48-st circumference.
To measure the mesh, lay the piece flat and stretch it gently along its length until the diamonds are open but not distorted. Measure from the base of the set-up round to the top of the fourth mesh round.
Make Rnds 1–6 first as your test piece. This small cup shows your gauge and the base shape before you start the turquoise.
Checkpoints:
- After Rnd 4: The base ring lies flat. It’s about 4.4 in (11.2 cm) across, with a hole about 2.2 in (5.6 cm) across.
- After Rnd 10: The plum sides stand 1.5 in (3.8 cm) tall. Flattened, the piece is 6.9 in (17.5 cm) wide.
- After Rnd 24: The mesh section measures 12.25 in (31.1 cm), and the total height is about 13.75 in (34.9 cm).
- After Rnd 32: The top band is 2 in (5.1 cm) deep, and the body is 15.75 in (40.0 cm) tall.
If your piece is too big, switch to a 4.5 mm (7) hook. If it’s too small, switch to a 5.5 mm (I-9) hook. Don’t change the stitch counts, because the mesh needs a multiple of 4 sts.
Pattern
Notes:
- Work in joined rounds. Don’t turn unless the pattern tells you to.
- The ch 1 at the start of a round doesn’t count as a stitch.
- Put the marker in the first st of every sc round.
- Make the base chain loosely so the opening stays round and soft.
Base and Lower Sides (Color A, plum)
Foundation: With A, ch 24. Make sure the chain isn’t twisted, then sl st to the first ch to form a ring. This ring is the dispensing hole.
Rnd 1: Ch 1, sc in each ch around, sl st to first sc. (24 sc)
Rnd 2: Ch 1, sc in next 2 sts, inc in next st; repeat from * 8 times total, sl st to first sc. (32 sc)
Rnd 3: Ch 1, sc in next 3 sts, inc in next st; repeat from * 8 times total, sl st to first sc. (40 sc)
Rnd 4: Ch 1, sc in next 4 sts, inc in next st; repeat from * 8 times total, sl st to first sc. (48 sc)
Check that the ring lies flat with a clean round hole in the center. Adding 8 sts per round keeps single crochet flat.
Rnds 5–10: Ch 1, sc in each st around, sl st to first sc. (48 sc in each rnd)
The sides now turn up into a shallow bowl, and after Rnd 10 they are 1.5 in (3.8 cm) tall. Before you change colors, flatten the piece and check that it’s 6.9 in (17.5 cm) wide. Fasten off A.
Mesh Body (Color B, turquoise)
Rnd 11 (set-up mesh): Join B with a sl st in any st. Ch 1, sc in same st, ch 5, sk next 3 sts, sc in next st; repeat from * 10 more times, ch 5, sk last 3 sts, sl st to first sc. (12 sc, 12 ch-5 loops)
To check the math: 12 anchoring sc + (12 x 3 skipped sts) = 48 sts. Every stitch of Rnd 10 is either used or skipped exactly once.
Rnd 12: Sl st in next 3 ch to reach the center of the first loop. Ch 1, sc in same loop, ch 5, sc in next ch-5 loop; repeat from * 10 more times, ch 5, sl st to first sc. (12 sc, 12 ch-5 loops)
Rnds 13–24: Repeat Rnd 12. (12 sc, 12 ch-5 loops in each rnd)
Each sc sits in the center of a loop from the round below. That shifts the loops by half a loop each round and builds the diamond lattice. Rnds 11–24 give you 14 mesh rounds, about 12.25 in (31.1 cm) in total. Fasten off B.
Keep your chains even. If some loops are tighter than others, the diamonds will lean or pucker.
Top Band (Color A, plum)
Rnd 25 (conversion round): Join A with a sl st in any sc of Rnd 24. Ch 1, sc in same sc, 3 sc in next ch-5 loop, sc in next sc, 3 sc in next ch-5 loop; repeat from * 10 more times, sl st to first sc. (12 sc worked 1-per-existing-sc + 36 sc worked into the 12 loops = 48 sc)
Rnds 26–32: Ch 1, sc in each st around, sl st to first sc. (48 sc in each rnd)
Fasten off, then rejoin at the strap position below.
Border (Top Band and Strap)
On this single-piece holder, the plum top band is the border and the finished edge. The strap is built off it.
Border gauge: 14 sc and 16 rnds = 4 in (10.2 cm), the same as the base.
Per-side count: Flatten the tube so there’s a fold at each side. Each flat side has 24 sts, since 24 + 24 = 48. Rnd 25 adds 4 sc per mesh loop (12 loops x 4 = 48), so the band matches the plum base exactly. That’s why the holder hangs straight and doesn’t flare at the top.
Mark the strap positions: Count from the first st of Rnd 32. Mark st 1 and st 5, which gives 5 sts centered on st 3. Then mark st 25 and st 29, which gives 5 sts centered on st 27. St 3 and st 27 are 24 sts apart, so the two strap ends sit exactly opposite each other at the side folds.
Strap Row 1: With A, join in st 1 of Rnd 32. Ch 1, sc in sts 1–5. (5 sc)
Strap Rows 2–56: Ch 1, turn, sc in each st across. (5 sc in each row)
The strap is now 14 in (35.6 cm) long and 1.4 in (3.6 cm) wide. Don’t fasten off.
Join the strap: Bring the strap across to sts 25–29 without twisting it. Hold Row 56 against the top of Rnd 32, with the strap on the outside. Sl st through each st of Row 56 and the matching st of Rnd 32. (5 sl sts)
Fasten off, leaving a 6 in (15.2 cm) tail. Use the tail to stitch down the strap edges for 0.25 in (0.6 cm) on each side for extra strength.
The finished strap forms a loop about 6.5 in (16.5 cm) above the rim.
Final Blocking
- Weave in all ends on the inside, through the solid sc sections only. Ends woven into the mesh chains tend to show.
- Soak the holder in cool water and gently squeeze out the extra water. Don’t wring it.
- Roll it in a towel to remove more water.
- Slide an empty 2-liter bottle or a tightly rolled towel inside the tube.
- Adjust the mesh until every diamond is even and the loops line up in straight diagonal lines.
- Check the size: the holder should be 6.9 in (17.5 cm) wide flat and 15.75 in (40.0 cm) tall.
- Lay the strap out flat and straight. Let everything dry completely before you hang it.
Final Quality-Control Checklist
- Rnd 4 has 48 sc, and the base ring lies flat.
- The base opening is smooth and about 2.2 in (5.6 cm) across.
- Rnds 5–10 each have 48 sc.
- Every mesh round has exactly 12 ch-5 loops.
- Rnd 25 has 48 sc (12 + 36).
- The top band is 2 in (5.1 cm) deep.
- The strap has 56 rows of 5 sc and no twist.
- The strap ends sit opposite each other, 24 sts apart.
- All ends are woven into solid plum sections.
Troubleshooting
The base cups instead of lying flat. Your increase rounds are too tight. Go up one hook size for Rnds 1–4 only.
The base ruffles. Check that you made exactly 8 increases in each round.
The mesh twists into a spiral. Joined rounds can drift. Each time, make sure you sl st into the center of the first loop (the third ch), not the first or fourth ch.
The loop count drifts. Count 12 sc in every mesh round. A marker in the first sc helps.
The diamonds look like narrow slits. Your chains are too tight. Chain more loosely, or use a hook one size larger for the chains only.
The top band flares or pulls in. Recheck Rnd 25: 1 sc in each sc and 3 sc in each loop, for 48 sts in total.
Color joins show a jog. Join each new color at the same side fold, then hang the holder with that fold toward the wall.
Bags fall out of the bottom. The hole is too loose. Redo the foundation with ch 22 and work Rnd 1 as (sc 1, inc) twice, then sc in each remaining ch to get back to 24 sc.
The strap stretches over time. Make the strap with a hook one size smaller, or add a sl st edging along both long edges.
Care
Hand wash, or machine wash on a gentle cycle in cool water. Reshape it over a bottle and let it air dry. Don’t tumble dry, because the mesh can shrink unevenly.
Final Notes
The measurements are easy to check as you go:
- The 24-st foundation grows into a 48-st base ring that’s 6.9 in (17.5 cm) wide when flattened.
- Those 48 sts become 12 mesh loops of 4 sts each.
- The 12 loops turn back into exactly 48 sts in the top band.
- The body is 1.5 in (3.8 cm) of plum sides, 12.25 in (31.1 cm) of mesh and a 2 in (5.1 cm) top band, for a height of 15.75 in (40.0 cm).
- The 14 in (35.6 cm) strap joins 24 sts from where it starts.
If each checkpoint matches, the finished holder will match too.
Happy crocheting!