
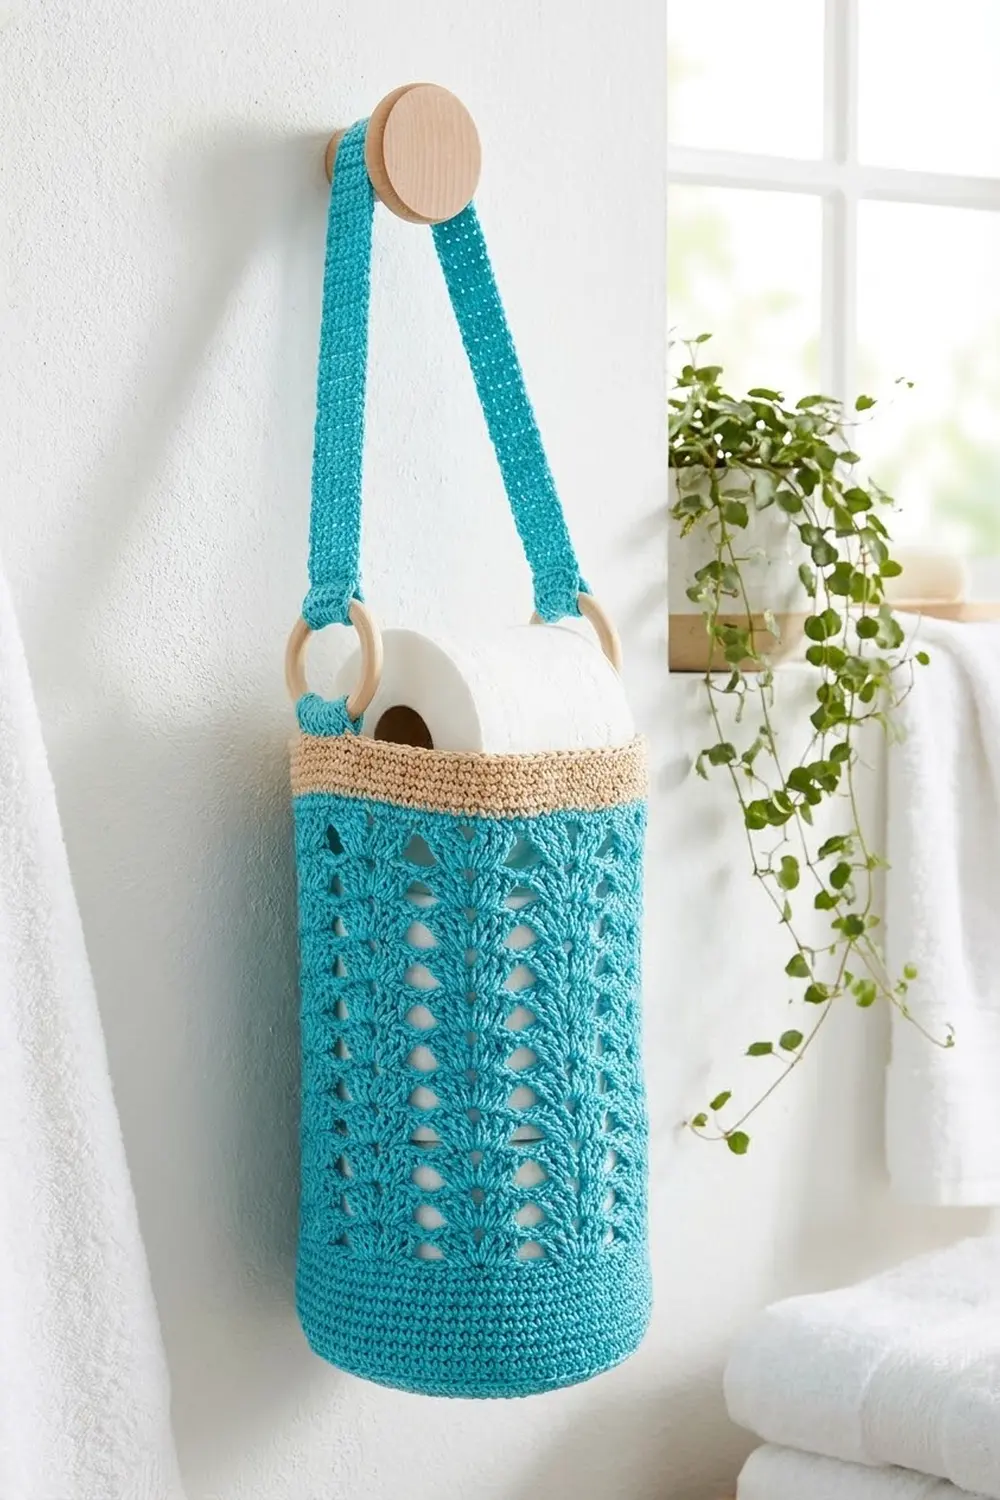
The Lagoon Lace Holder is a tall, open-lace cylinder that hangs on a wall peg and keeps spare toilet rolls within reach. The body is bright turquoise cotton with a lacy pattern of stacked Y shapes and triangular windows, so you can see at a glance when you’re running low.
A light tan rim finishes the top edge. Two natural wooden rings link the body to the straps, which gives the piece a warm, Scandinavian bathroom feel. The pattern uses US crochet terms throughout.
The finished holder is 5.6 in (14.2 cm) across and 11 in (27.9 cm) tall, and each strap is 11 in (27.9 cm) long. It holds two standard rolls, with a third sitting on top and sticking out above the rim.
You start with a flat hdc circle for the base. You then work the wall upward from the base without fastening off: a solid sc band, 15 lace rounds, and one sc round, all in turquoise. After that come four tan rim rounds, two tabs worked straight onto the rim, and two straps worked around a foundation chain. To finish, you thread everything onto the wooden rings and sew it together.
Finished Size and Construction
- Finished size: 5.6 in (14.2 cm) diameter x 11 in (27.9 cm) tall
- Skill level: Easy-Intermediate
- Terminology: US crochet terms
- Yarn weight: Worsted (#4) cotton
- Hook: 5.0 mm (H-8)
- Number of pieces: 1 body (base and wall in one), 2 straps, and 2 tabs worked directly on the rim, plus 2 wooden rings
- Layout: 1 vertical cylinder with 2 straps, one on each side, meeting at a single hanging point
- Piece size: body 5.6 in (14.2 cm) x 11 in (27.9 cm); strap 11 in x 1 in (27.9 cm x 2.5 cm)
- Size before border: 10 in (25.4 cm) tall
- Border depth: 1 in (2.5 cm) tan rim
Materials
Use a smooth worsted-weight cotton or cotton blend. Cotton holds its shape, doesn’t stretch much under the weight of the rolls, and copes well with bathroom humidity. Acrylic works too, but the lace will be softer and the cylinder may sag.
- Turquoise (main color): about 150 g (about 240 m)
- Tan / natural (rim): about 20 g (about 32 m)
Tools and notions:
- 5.0 mm (H-8) crochet hook
- 2 unfinished wooden rings, 2 in (5.1 cm) outer diameter
- Tapestry needle
- Locking stitch marker
- Scissors and rust-proof pins
- Wall peg or hook for hanging
These quantities include a margin of about 15% for swatching and weaving in ends.
Abbreviations (US Terms)
- ch – chain
- sl st – slip stitch
- sc – single crochet
- hdc – half double crochet
- dc – double crochet
- blo – back loop only
- sk – skip
- sp(s) – space(s)
- st(s) – stitch(es)
- rnd(s) – round(s)
- dc2tog – double crochet 2 together
Special stitches
- V-st (V-stitch): (dc, ch 2, dc) in the same stitch or space.
- cl (3-dc cluster): *Yarn over, insert hook in the stated space, yarn over and pull up a loop, yarn over and pull through 2 loops; repeat from * 2 more times in the same space (4 loops on hook), yarn over and pull through all 4 loops.
- Beginning cl: Ch 2, then dc2tog in the same space. This counts as 1 cl.
Gauge and Checkpoints
Single crochet gauge: 16 sc and 16 rnds = 4 in (10.2 cm).
Lace gauge: 4 repeats = 5 in (12.7 cm) wide, and 5 lace rnds = 3 in (7.6 cm) tall.
Use the base as your test piece. If your Rnd 7 base comes out at the right size, the wall will too, because the wall is worked on the same 70 stitches.
Checkpoints:
- Base Rnd 2: 1.6 in (4.1 cm) diameter
- Base Rnd 4: 3.2 in (8.1 cm) diameter
- Base Rnd 7: 5.6 in (14.2 cm) diameter
- Wall after Rnd 3: 0.75 in (1.9 cm) tall
- After Rnd 8 (5 lace rnds): 3.75 in (9.5 cm) tall
- After Rnd 13 (10 lace rnds): 6.75 in (17.1 cm) tall
- After Rnd 18 (15 lace rnds): 9.75 in (24.8 cm) tall
- After Rnd 19: 10 in (25.4 cm) tall
- After the border: 11 in (27.9 cm) tall
Too big? Change to a hook 0.5 mm smaller. Too small? Change to a hook 0.5 mm larger. Don’t change the stitch counts. The lace repeat needs 70 stitches, which is 14 repeats of 5.
Base (Turquoise)
Work in joined rounds. The beginning ch 2 does not count as a stitch. Join each round with a sl st to the first hdc.
Rnd 1: Make a magic ring, ch 2, then work 10 hdc in the ring. Pull the ring closed and join. (10 sts)
Rnd 2: Ch 2, 2 hdc in each st around, join. (20 sts)
Rnd 3: Ch 2, hdc in next st, 2 hdc in next st; repeat from * around, join. (30 sts)
Rnd 4: Ch 2, hdc in next 2 sts, 2 hdc in next st; repeat from * around, join. (40 sts)
Rnd 5: Ch 2, hdc in next st, 2 hdc in next st, hdc in next 3 sts, 2 hdc in next st; repeat from * to the last 2 sts, hdc in last 2 sts, join. (50 sts)
Rnd 6: Ch 2, hdc in next 4 sts, 2 hdc in next st; repeat from * around, join. (60 sts)
Rnd 7: Ch 2, hdc in next 2 sts, 2 hdc in next st, hdc in next 5 sts, 2 hdc in next st; repeat from * to the last 3 sts, hdc in last 3 sts, join. (70 sts)
The base should lie flat and measure 5.6 in (14.2 cm) across. Don’t fasten off.
Body Wall (Turquoise)
Rnd 1 (turning round): Ch 1, sc blo in each st around, join to the first sc. (70 sts: 70 worked 1 per existing st + 0 added)
Working in the back loop only creates a crisp fold, so the wall turns straight up from the base.
Rnds 2–3: Ch 1, sc in each st around, join. (70 sts)
This gives you the solid band at the bottom of the wall.
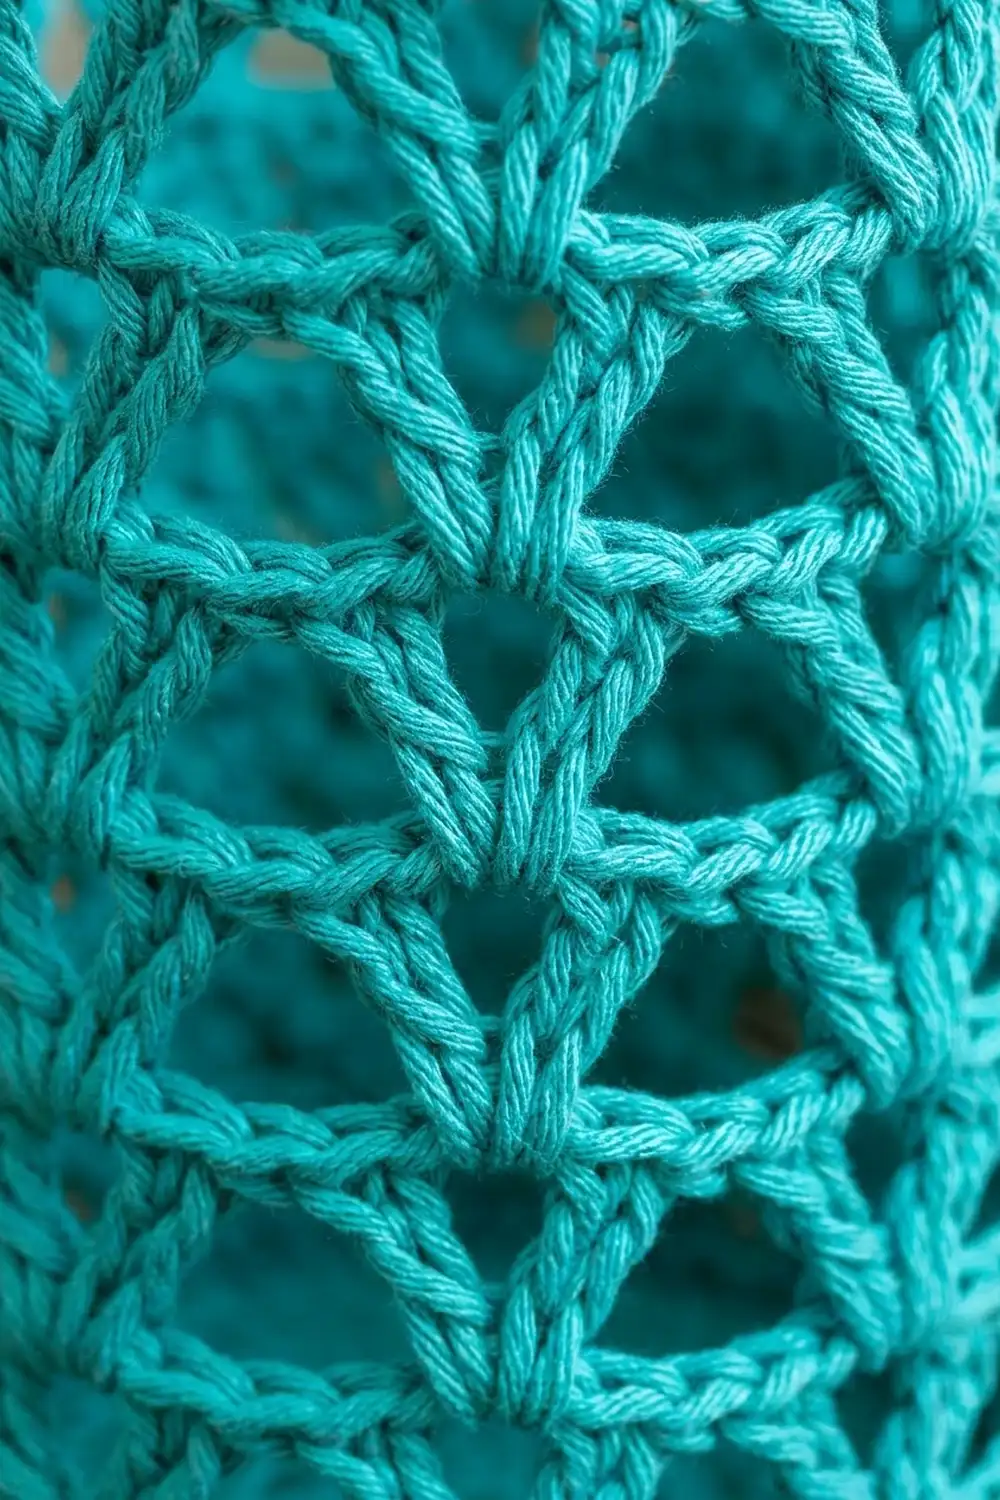
Rnd 4 (first V round): Ch 5 (counts as dc + ch 2), dc in the first st (first V-st made), ch 1, sk 4 sts, V-st in next st, ch 1, sk 4 sts; repeat from * 12 more times. Join with a sl st to the 3rd ch of the beginning ch-5. (14 V-sts and 14 ch-1 sps)
Each repeat takes up 5 base stitches (1 worked + 4 skipped), and 14 x 5 = 70.
Rnd 5 (cluster round): Sl st into the first ch-2 sp. Work a beginning cl in that sp, ch 4, cl in the ch-2 sp of the next V-st, ch 4; repeat from * 12 more times. Join to the top of the beginning cl. (14 cl and 14 ch-4 sps)
Rnd 6 (V round): Ch 5 (counts as dc + ch 2), dc in the top of the same cl, ch 1, V-st in the top of the next cl, ch 1; repeat from * 12 more times. Join to the 3rd ch of the beginning ch-5. (14 V-sts and 14 ch-1 sps)
Each V-st sits on top of a cluster, which makes the Y shape. The ch-1 bridges over the ch-4 space below it, and that leaves the triangular window.
Rnds 7–18: Repeat Rnds 5 and 6 six more times. (Rnd 18 ends with a V round: 14 V-sts and 14 ch-1 sps)
That makes 15 lace rounds in total: 8 V rounds and 7 cluster rounds.
Rnd 19 (conversion round): Ch 1, sc in the first dc of the V-st, 2 sc in the ch-2 sp, sc in the second dc, sc in the ch-1 sp; repeat from * around, join. (70 sts: 28 sc worked 1 per dc + 42 sc worked into spaces, 2 in each of the 14 ch-2 sps and 1 in each of the 14 ch-1 sps)
Fasten off the turquoise. The wall should now be 10 in (25.4 cm) tall.
Make All Pieces
Pieces and colors:
- Body: 1, in turquoise (with a tan rim added in the Border section)
- Tabs: 2, in turquoise (worked onto the rim after the border)
- Straps: 2, in turquoise
- Wooden rings: 2, unfinished
Text layout (front view):
        [ peg ]
        /     \
   strap       strap
     |           |
   (ring)     (ring)
     |           |
    tab         tab
  [=== tan rim ======]
  [  lace cylinder   ]
  [  solid band      ]
  [  base            ]
Straps (make 2)
Foundation: With turquoise, ch 41.
Rnd 1: Sc in the 2nd ch from the hook and in the next 38 ch (39 sc), 3 sc in the last ch. Rotate to work along the other side of the foundation chain: sc in the next 38 ch, 2 sc in the same ch as the first sc. Join to the first sc. (82 sts: 39 + 3 + 38 + 2)
Rnd 2: Ch 1, 2 sc in the first st, sc in the next 38 sts, 2 sc in each of the next 3 sts (the end curve), sc in the next 38 sts, 2 sc in each of the last 2 sts. Join. (88 sts: 82 worked 1 per existing st + 6 added at the ends)
Fasten off and leave a 12 in (30.5 cm) tail. Each strap measures 11 in x 1 in (27.9 cm x 2.5 cm) and has a rounded end at each end.
Joining (Assembly)
The tabs and straps take most of the weight, so sew them with firm, short stitches. The tension should hold the pieces securely but not pucker the fabric.
Tabs: Lay the body flat to find two points directly opposite each other. Count the 70 rim sts as two halves of 35 sts. Mark sts 1–5 for tab 1 and sts 36–40 for tab 2. That leaves 30 sts between the tabs on each side.
Join the turquoise to the first marked st.
- Row 1: Ch 1, sc in each of the 5 marked sts, turn. (5 sts)
- Rows 2–8: Ch 1, sc in each st across, turn. (5 sts)
Each tab is 1.25 in (3.2 cm) wide and 2 in (5.1 cm) long. Pass the tab through a wooden ring from front to back. Fold it down inside the rim and sew Row 8 stitch for stitch to the matching 5 sts on the inside of the border. You should see a loop about 1 in (2.5 cm) above the rim.
Straps: Thread one end of each strap through a ring. Fold it back 1.25 in (3.2 cm) and whipstitch through both layers along both edges. Then overlap the free ends of the two straps by 1.5 in (3.8 cm) and sew all around the overlapped area. This is the hanging point.
Size checkpoint: When you hang the holder, the straps should form an even inverted V, and the rim should hang level.
Border (Tan Rim)
Border gauge: 16 sc and 16 rnds = 4 in (10.2 cm), so each round adds 0.25 in (0.6 cm).
You work the border before the tabs, on the 70 sts of Rnd 19. Seen as two sides of the cylinder, that’s 35 sts per side.
Rnd 20: Join the tan to any st. Ch 1, sc in each st around, join. (70 sts: 35 per side)
Rnds 21–23: Ch 1, sc in each st around, join. (70 sts each round, 35 per side)
Fasten off and weave in the ends. The border adds 1 in (2.5 cm), which brings the holder to 11 in (27.9 cm).
Why the math works: The lace is 14 repeats of 5 stitch-widths, and Rnd 19 turns each repeat back into exactly 5 sc. The rim therefore starts with the same 70 stitches as the base and the turning round. The circumference stays the same from bottom to top, so the rim doesn’t flare out or pull in. Because 70 splits evenly into two sides of 35, the two tabs land exactly opposite each other.
Final Blocking
- Weave in all the ends along the solid rounds, where they’re hidden.
- Spray the body and straps until damp, or soak them in cool water and press out the excess.
- Roll a towel into a tube about 5.6 in (14.2 cm) across, or use a clean bottle wrapped in a towel, and slide the body over it.
- Smooth the lace so the V-sts stand upright and the triangles open evenly. Check the height: 11 in (27.9 cm).
- Pin the straps flat at 11 in x 1 in (27.9 cm x 2.5 cm).
- Leave everything to dry completely before you assemble or hang it.
Final Quality-Control Checklist
- The base lies flat at 5.6 in (14.2 cm) with no ripples.
- The wall turns sharply upward at the blo round.
- Each lace round has 14 V-sts or 14 clusters.
- The V-sts sit directly above the clusters in straight vertical columns.
- Rnd 19 and every border round have 70 sts.
- The tabs sit 30 sts apart on each side.
- The rings are held securely, and the strap folds are sewn through both layers.
- The holder hangs level, with the rim at 11 in (27.9 cm).
Troubleshooting
- The base cups: Your tension is too tight, or you missed an increase. Count each round, and go up a hook size for the base only if you need to.
- The base ruffles: You added extra stitches. Recount Rnds 5–7.
- The wall flares: Your ch-4 spaces are too loose. Work the chains more snugly.
- The wall narrows: Your ch-1 bridges are too tight. Loosen them slightly.
- The columns spiral: You started the round in the wrong space. Always start in the first ch-2 sp or the top of the first cluster.
- The rim waves: Check you have exactly 70 sts in Rnd 19.
- The holder tilts: The tabs aren’t opposite each other. Recount 35 sts between their starting points.
Care
Hand wash in cool water and lay flat over a rolled towel to dry. Unfinished wooden rings shouldn’t soak, so remove the rings before machine washing on a gentle cycle.
Final Notes
The measurement chain is simple: the 70-stitch base is 5.6 in (14.2 cm) across, the 70-stitch wall is 14 lace repeats, Rnd 19 brings the count back to 70 sts, and the border keeps 70 sts for four rounds. The wall is 10 in (25.4 cm) tall before the border and 11 in (27.9 cm) after it. The two 11 in (27.9 cm) straps hang from rings set exactly opposite each other. If you check your gauge on the base, the rest of the holder will come out the right size.
Happy crocheting!