
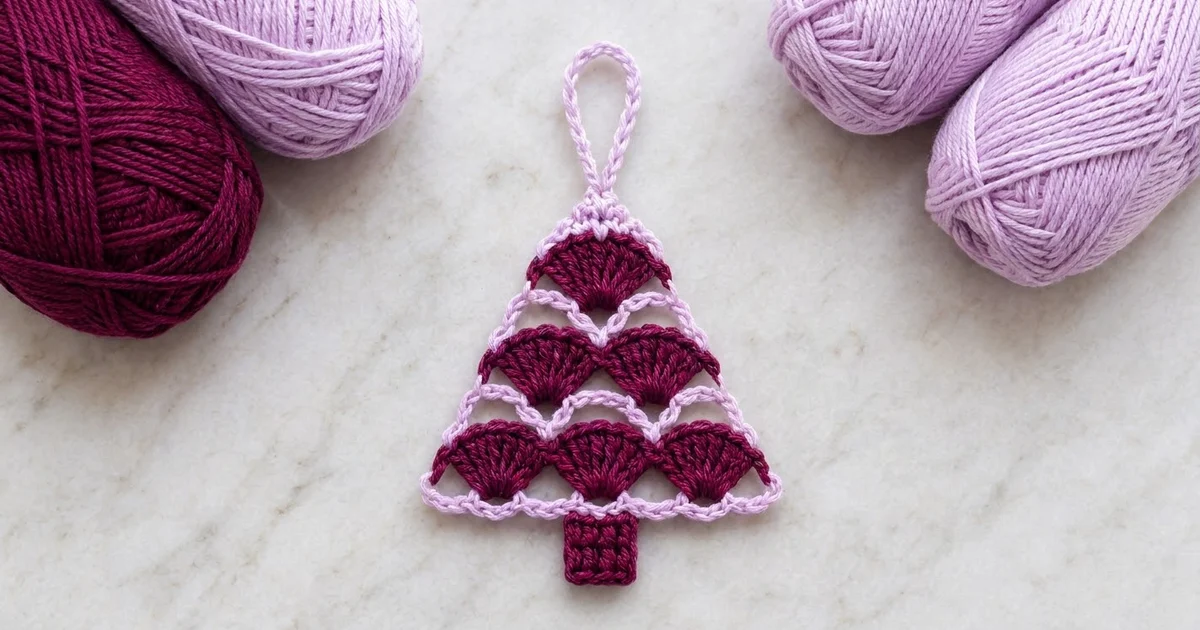
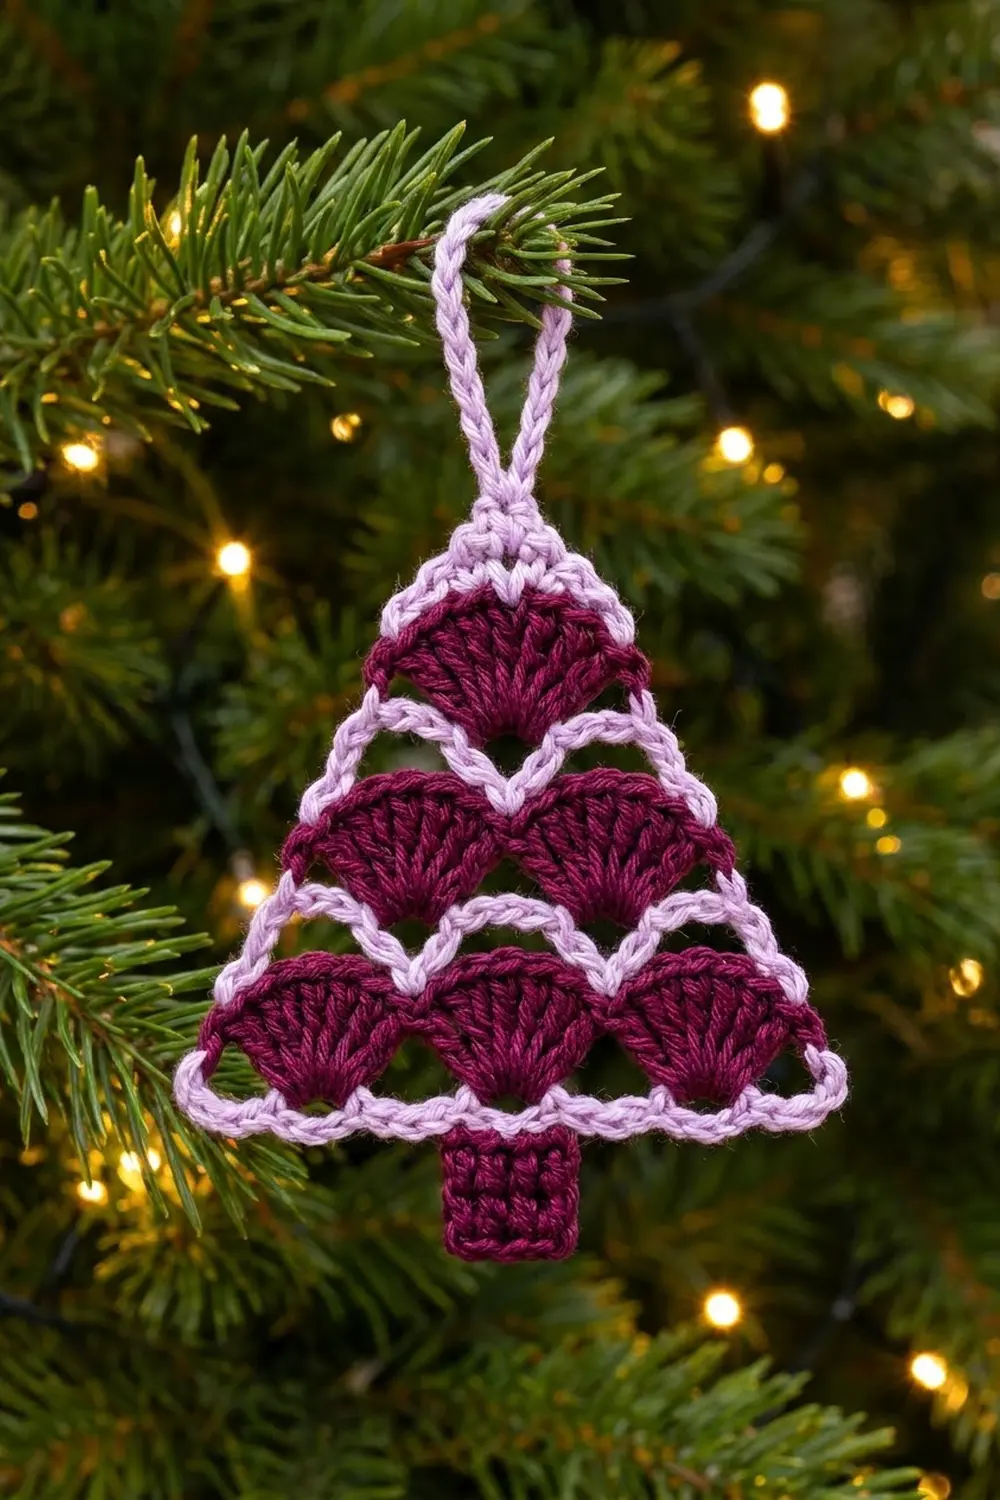
The Mulberry Frost Shell Tree is a small, lacy Christmas tree ornament. Its rich burgundy fans are framed by soft lilac chain arches. Three tiers of shells (three, then two, then one) stack into a neat triangle. A solid lilac tip, a sturdy hanging loop and a small square trunk finish the tree.
The two-color palette gives it a slightly vintage, sugared-plum look that stands out on a green tree. Each burgundy fan sits nestled in the V between the two fans below it, and the lilac arches dip into the center of every fan. That is what gives the tree its scalloped, frosted outline.
This pattern uses US crochet terms. The finished ornament is 4 in (10.2 cm) wide and 4.65 in (11.8 cm) tall including the trunk. The hanging loop adds about 1.75 in (4.4 cm).
Construction overview: You work the tree flat from the bottom up in alternating stripes: a lilac arch row, then a burgundy shell row. Each shell tier is one shell narrower than the one below. After the top shell, you close the tip with solid lilac single crochet. Then you make the hanging loop and work one lilac arch edging round around the whole triangle. Last, you work the burgundy trunk down from the center of the bottom edge.
Finished Size and Construction
- Finished size: 4 in (10.2 cm) wide × 4.65 in (11.8 cm) tall, plus a 1.75 in (4.4 cm) loop
- Skill level: Easy-intermediate
- Terminology: US
- Yarn weight: DK / light worsted (#3), cotton
- Hook: 3.5 mm (E-4)
- Number of pieces: 1 (single piece, no joining)
- Layout: One triangle with 3 shell tiers (3–2–1 shells), a tip, a hanging loop and a trunk
- Triangle size before edging: 3.75 in (9.5 cm) wide × 3.6 in (9.1 cm) tall
- Triangle size after edging: 4 in (10.2 cm) wide × 3.75 in (9.5 cm) tall
- Border depth: about 0.125 in (0.3 cm) on each side
- Trunk: 0.8 in (2.0 cm) wide × 0.9 in (2.3 cm) tall
Materials
Yarn: Use a smooth, mercerized DK cotton or cotton blend. Cotton gives the shells crisp definition and keeps the ornament flat. Avoid fuzzy yarns, because the lilac arches will lose their clean outline.
- Color A, Burgundy (shells and trunk): 8 g, about 18 m (19.7 yd)
- Color B, Lilac (arches, tip, edging and loop): 7 g, about 16 m (17.5 yd)
The quantities include a margin of about 30% for your gauge swatch and weaving in ends. Leftover cotton from bigger projects works well here.
Tools:
– 3.5 mm (E-4) crochet hook
– Tapestry needle
– Scissors
– Ruler or tape measure
– Blocking mat and rust-proof pins
– Spray bottle with water
Abbreviations (US Terms)
- ch – chain
- sc – single crochet
- dc – double crochet
- sl st – slip stitch
- sk – skip
- sp – space
- st(s) – stitch(es)
- sc2tog – single crochet 2 together
- sc3tog – single crochet 3 together
- RS – right side
- WS – wrong side
Special stitch – Shell: 7 dc in the same stitch. The shell fans out with its point at the bottom and its curved edge at the top. The 4th dc is the center dc.
Gauge and Checkpoints
Gauge is not critical for an ornament, but it controls the outline. If your gauge is off, the tree may come out too wide or too tall, and the edging arches may pucker or sag.
- Foundation chain: 5 ch = 1 in (2.5 cm)
- One shell: 1.25 in (3.2 cm) wide across the top × 0.55 in (1.4 cm) tall
- Single crochet: 5 sc and 5.5 rows = 1 in (2.5 cm)
Test first: Make the foundation chain and Rows 1–2, then measure.
Checkpoints:
– After Row 1: 3.75 in (9.5 cm) wide
– After Row 2: 3.75 in (9.5 cm) wide × 0.85 in (2.2 cm) tall
– After Row 7: 2.75 in (7.0 cm) tall
– After Row 12: 3.6 in (9.1 cm) tall
– After the edging: 4 in (10.2 cm) wide × 3.75 in (9.5 cm) tall
– After the trunk: 4.65 in (11.8 cm) tall in total
Too big? Go down to a 3.25 mm (D-3) hook. Too small, or shells cupping? Go up to a 3.75 mm (F-5) hook. Keep the foundation chain loose either way. Use a hook one size larger for the chain alone if it tends to pull.
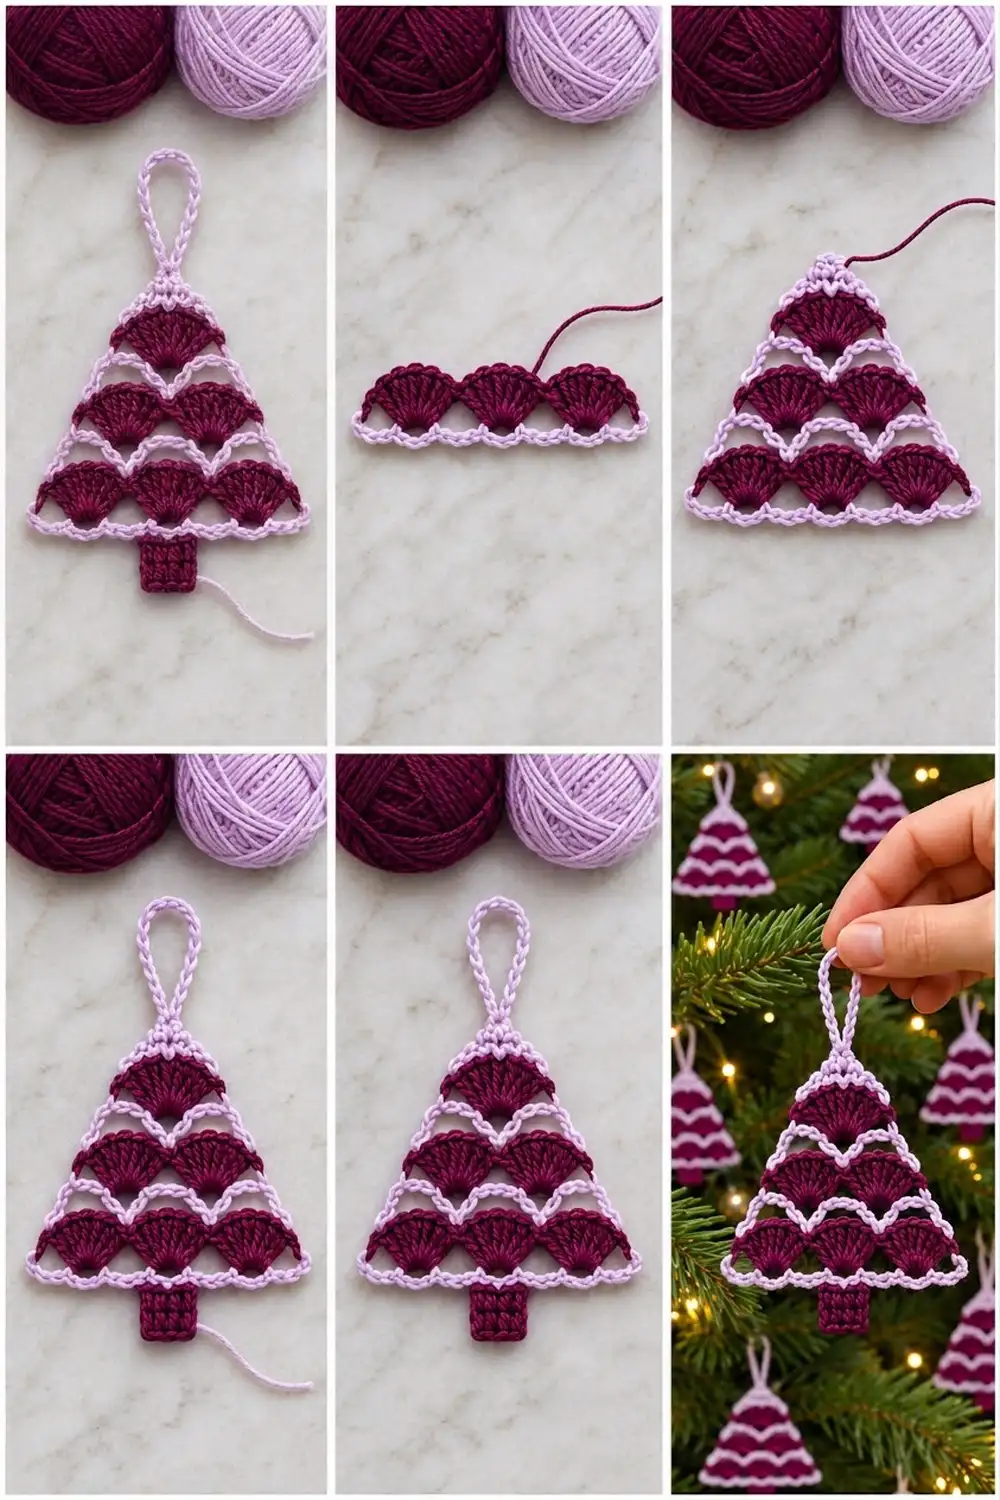
Pattern: The Tree Body
Note: Work Rows 1–7 with the RS facing and start each row at the right-hand edge. Fasten off at the end of every row, except where Row 7 continues straight into Row 8. Leave 4 in (10.2 cm) tails, which you can crochet over or weave in later.
Foundation: With Lilac, ch 20.
Row 1 (Lilac): Sc in 2nd ch from hook, [ch 3, sk 2 ch, sc in next ch] 6 times. Fasten off.
(7 sc, 6 ch-3 sps)
The 19 foundation chains are used as 1 + (6 × 3) = 19.
Row 2 (Burgundy, Tier 1): Join Burgundy with a sc in the first sc. [Sk next ch-3 sp, shell in next sc, sk next ch-3 sp, sc in next sc] 3 times. Fasten off.
(4 sc + 3 shells of 7 dc = 25 sts)
The shells land on the 2nd, 4th and 6th sc of Row 1. The anchoring sc land on the 1st, 3rd, 5th and 7th sc.
Row 3 (Lilac arches): Join Lilac with a sc in the first sc. [Ch 3, sc in center dc of next shell, ch 3, sc in next sc] 3 times. Fasten off.
(7 sc, 6 ch-3 sps)
This makes the lilac arches with a V at the center of each fan. Number the 7 sc of this row 1–7 from right to left. Sc 3 and sc 5 sit above the gaps between the tier-1 shells.
Row 4 (Burgundy, Tier 2): Join Burgundy with a sc in sc 2. [Sk next ch-3 sp, shell in next sc, sk next ch-3 sp, sc in next sc] 2 times. Fasten off.
(3 sc + 2 shells of 7 dc = 17 sts)
The shells sit in sc 3 and sc 5, so each one nests in the V between two tier-1 fans. Sc 1 and sc 7 of Row 3 stay free and will anchor the edging.
Row 5 (Lilac arches): Join Lilac with a sc in the first sc. [Ch 3, sc in center dc of next shell, ch 3, sc in next sc] 2 times. Fasten off.
(5 sc, 4 ch-3 sps)
Row 6 (Burgundy, Tier 3): Join Burgundy with a sc in sc 2. Sk next ch-3 sp, shell in next sc, sk next ch-3 sp, sc in next sc. Fasten off.
(2 sc + 1 shell of 7 dc = 9 sts)
Sc 1 and sc 5 of Row 5 stay free.
Row 7 (Lilac arches): Join Lilac with a sc in the first sc. Ch 3, sc in center dc of the shell, ch 3, sc in last sc. Do not fasten off.
(3 sc, 2 ch-3 sps)
Checkpoint: The piece is 3.75 in (9.5 cm) wide at the base and 2.75 in (7.0 cm) tall.
The Solid Tip
Rows 8–12 continue in Lilac and are turned rows.
Row 8 (WS, conversion row): Ch 1, turn. Sc in first sc, 3 sc in ch-3 sp, sc in next sc, 3 sc in ch-3 sp, sc in last sc.
(3 sc worked 1 per existing sc + 6 sc worked into spaces = 9 sc)
Row 9: Ch 1, turn. Sc2tog, sc in next 5 sts, sc2tog. (7 sc)
Row 10: Ch 1, turn. Sc2tog, sc in next 3 sts, sc2tog. (5 sc)
Row 11: Ch 1, turn. Sc2tog, sc in next st, sc2tog. (3 sc)
Row 12: Ch 1, turn. Sc3tog. (1 st) Do not fasten off.
Checkpoint: The triangle is 3.75 in (9.5 cm) wide × 3.6 in (9.1 cm) tall.
Hanging Loop
Ch 20, then sl st into the Row 12 stitch to form a ring. Work 26 sc into the ring, covering the chain completely. Sl st into the Row 12 stitch again.
The sc covering turns the loop into a firm, rounded cord about 1.75 in (4.4 cm) tall. Do not fasten off. Go straight on to the edging.
Border: Lilac Arch Edging
Border gauge: Each ch-4 side arch spans one shell tier, about 0.9 in (2.3 cm) of slope. Each ch-2 bottom arch spans 3 foundation chains, about 0.6 in (1.5 cm).
Edging round (Lilac): Continue from the base of the loop and work down the first sloped side.
First side:
1. Work 1 sc in the end of each of Rows 11, 10, 9 and 8. (4 sc)
2. Sc in the side of the end sc of Row 7. (5th sc)
3. Ch 4, sc in the free end sc of Row 5.
4. Ch 4, sc in the free end sc of Row 3.
5. Ch 4, then work (sc, ch 2, sc) in the end sc of Row 1 for the corner.
Bottom edge: Turn the piece so that you are working into the underside of the foundation chain. [Ch 2, sk 2 ch, sc in next ch] 5 times. Ch 2, sk 2 ch, then work (sc, ch 2, sc) in the last foundation ch for the corner.
Second side:
1. Ch 4, sc in the free end sc of Row 3.
2. Ch 4, sc in the free end sc of Row 5.
3. Ch 4, sc in the side of the end sc of Row 7.
4. Work 1 sc in the end of each of Rows 8, 9, 10 and 11.
5. Sl st into the base of the hanging loop. Fasten off.
Counts per side:
– Each sloped side: 5 sc at the tip end + 3 ch-4 arches + 2 anchor sc, ending in the corner
– Bottom: 6 ch-2 arches with 5 sc between them, plus the 2 corners
Why the math works:
– Sides: There are three shell tiers, so each side gets exactly three arches, one beside each tier. The anchor points are the free end stitches of Rows 3 and 5 and the end of Row 7, which are the corners of the lilac arch rows.
– Tip: The tip rows (8–11) get one sc per row end, so the tip stays solid and smooth.
– Bottom: On the bottom, 6 spans × 3 chains + 1 corner chain = 19 chains, which is exactly the foundation length. Each bottom sc lands under a Row 1 sc, so the edge doesn’t ruffle or pull in.
Checkpoint: The triangle is 4 in (10.2 cm) wide × 3.75 in (9.5 cm) tall.
Trunk
With the RS facing and the tree upside down, find the center sc of the bottom edging (the 3rd of the 5 bottom sc). Join Burgundy in the ch-2 arch just to the right of it.
Row T1: Ch 1, 2 sc in this ch-2 arch, sk center sc, 2 sc in next ch-2 arch. (4 sc)
Rows T2–T5: Ch 1, turn, sc in each st across. (4 sc)
Fasten off. The trunk is 0.8 in (2.0 cm) wide × 0.9 in (2.3 cm) tall, giving a total height of 3.75 + 0.9 = 4.65 in (11.8 cm).
Final Blocking
- Weave in all ends inside stitches of the same color. Burgundy ends go behind shells and Lilac ends go inside the arches.
- Mist the ornament until it is evenly damp, but not soaked.
- Lay it RS up on the blocking mat.
- Pin the two bottom corners 4 in (10.2 cm) apart.
- Pin the tip so the triangle is 3.75 in (9.5 cm) tall.
- Pin each side arch gently outward so the sloped edges are straight.
- Fan each shell open with your fingertips so all 7 dc spread evenly.
- Pin the trunk square and center it under the tree.
- Shape the hanging loop into a smooth teardrop.
- Let it dry completely, at least 6 hours, before unpinning.
For a stiffer ornament, mist lightly with fabric stiffener before drying.
Final Quality-Control Checklist
- Tier counts are 3, 2 and 1 shells, each with 7 dc.
- Every upper shell sits centered in the V between two lower shells.
- Every lilac arch dips into the center dc of a shell.
- Each side has 3 ch-4 arches, and the bottom has 6 ch-2 arches.
- The corners lie flat and are not pulled or flared.
- The trunk is 4 sts wide × 5 rows tall and centered.
- The loop is firm and fully covered with sc.
- The size is 4 in (10.2 cm) × 4.65 in (11.8 cm) plus the loop.
- No ends are visible on the RS.
Troubleshooting
Shells cup or curl. The ch-3 arches are too short for your tension. Go up a hook size for the arch rows only, or loosen your dc.
Shells look gappy or floppy. Your dc are too loose. Go down a hook size for the shell rows.
Upper shells don’t sit in the V. Check that you started Rows 4 and 6 in sc 2 and worked the shell into the next sc, which is the one above the gap between the shells below.
Sides pull inward. The ch-4 side arches are too tight. Change to ch 5, then block firmly.
Bottom edge ruffles. You may have skipped only 1 chain. Recount so you use 3 foundation chains per span, 19 in total.
Tip is lopsided. Make sure both sc2tog in each tip row are worked at the row ends.
Trunk is off-center. Count the bottom sc again. The trunk must flank the 3rd of the 5 sc.
Care
Hand-wash in cool water with mild soap, press out the water in a towel, and re-block flat to dry. Store the ornament flat between sheets of tissue so the shells keep their shape.
Final Notes
The measurement chain is:
- 19 foundation chains give a 3.75 in (9.5 cm) base, which matches three 1.25 in (3.2 cm) shells.
- Three shell tiers plus the solid tip reach 3.6 in (9.1 cm).
- The lilac edging takes the triangle to 4 in (10.2 cm) × 3.75 in (9.5 cm).
- The 0.9 in (2.3 cm) trunk brings the total height to 4.65 in (11.8 cm).
- The 1.75 in (4.4 cm) loop finishes the ornament.
If each checkpoint matches, the finished tree will too.
Happy crocheting!