
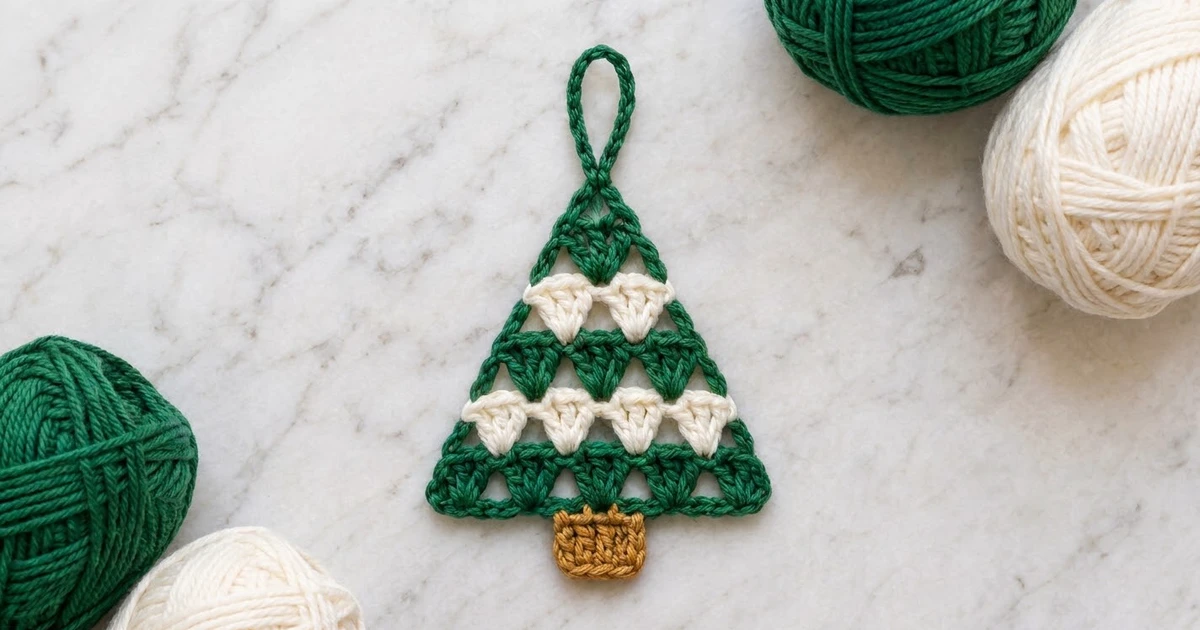
This little tree ornament is made from classic granny clusters stacked into a neat triangle. Forest-green and cream stripes make it look like snow on the branches. A golden-tan trunk and a green hanging loop finish it off. It is quick to make, uses very little yarn and looks lovely in groups on a real tree.
The palette is simple: deep green for the tree and edging, soft cream for two snow stripes, and warm golden tan for the trunk. The style is cozy and traditional, and the small triangular openings between the clusters let a little tree light shine through.
This pattern uses US crochet terms. The finished ornament is 5 in (12.7 cm) wide and 4.2 in (10.7 cm) tall from the peak to the bottom of the trunk. With the hanging loop it is about 6.2 in (15.7 cm) tall.
You work the tree from the bottom up in rows of 3-dc groups, losing one group in every row until a single group is left at the peak. Then you work one round of single crochet around the whole triangle, adding the hanging loop at the point. Last, you work the trunk straight off the center of the bottom edge. It is all one piece, so there is no sewing.
Finished Size and Construction
- Finished size: 5 in (12.7 cm) wide x 3.4 in (8.6 cm) tall for the triangle; 4.2 in (10.7 cm) tall with the trunk
- Skill level: Easy
- Terminology: US
- Yarn weight: DK / light worsted (#3), cotton or cotton blend
- Hook: 3.5 mm (E/4)
- Number of pieces: 1 (tree, border, loop and trunk all worked as one piece)
- Layout: Single triangular motif, 6 cluster rows
- Triangle size before border: 4.6 in (11.7 cm) wide x 3 in (7.6 cm) tall
- Border depth: 1 round of sc, about 0.2 in (0.5 cm)
- Trunk: 1 in (2.5 cm) wide x 0.8 in (2.0 cm) tall
- Hanging loop: about 2 in (5.1 cm) tall
Materials
Yarn: Use a smooth DK cotton or cotton blend so the clusters look crisp and the stripes stay clean. Mercerized cotton keeps a slight sheen and holds its shape on the tree. If you use acrylic, it will work, but the ornament will be a little softer and may need a firmer blocking.
- Color A, forest green: 10 g / 21 m
- Color B, cream: 4 g / 9 m
- Color C, golden tan: 2 g / 4 m
These quantities include a margin for the color-change tails and for swatching. A single 50 g ball of each color is enough for a whole set of ornaments.
Tools:
– 3.5 mm (E/4) crochet hook
– Tapestry needle
– Scissors
– Rust-proof pins and a foam blocking mat
– Spray bottle with water
– Ruler or tape measure
Abbreviations (US Terms)
- ch – chain
- sl st – slip stitch
- sc – single crochet
- dc – double crochet
- sp – space
- st(s) – stitch(es)
- RS – right side
- sk – skip
Special stitches
- 3-dc group: Work 3 dc into the same ch-1 space. Each group forms one downward-pointing cluster.
- Standing dc: Put a slip knot on your hook, yarn over, insert the hook into the stitch or space, and complete a dc as normal. It counts as 1 dc.
- Standing sc: Put a slip knot on your hook, insert the hook into the stitch, and complete a sc as normal. It counts as 1 sc.
Gauge and Checkpoints
Gauge: 5 sts = 1 in (2.5 cm) in dc or sc, and 2 dc rows = 1 in (2.5 cm). Each dc row is about 0.5 in (1.3 cm) tall.
The ornament is small, so make one full test piece instead of a separate swatch. Check it at each stage:
- After Row 1: 23 sts measure 4.6 in (11.7 cm) wide.
- After Row 6: The triangle measures 3 in (7.6 cm) from the foundation chain to the top of the last group.
- After the border: 5 in (12.7 cm) wide x 3.4 in (8.6 cm) tall.
- After the trunk: 4.2 in (10.7 cm) total height, not counting the loop.
If your Row 1 is too wide (for example 5 in / 12.7 cm), go down to a 3.25 mm hook. If it is too narrow (for example 4 in / 10.2 cm), go up to a 3.75 mm hook. Size matters more than exact gauge here, but if you are making a set, keep every ornament to the same Row 1 width so they match.
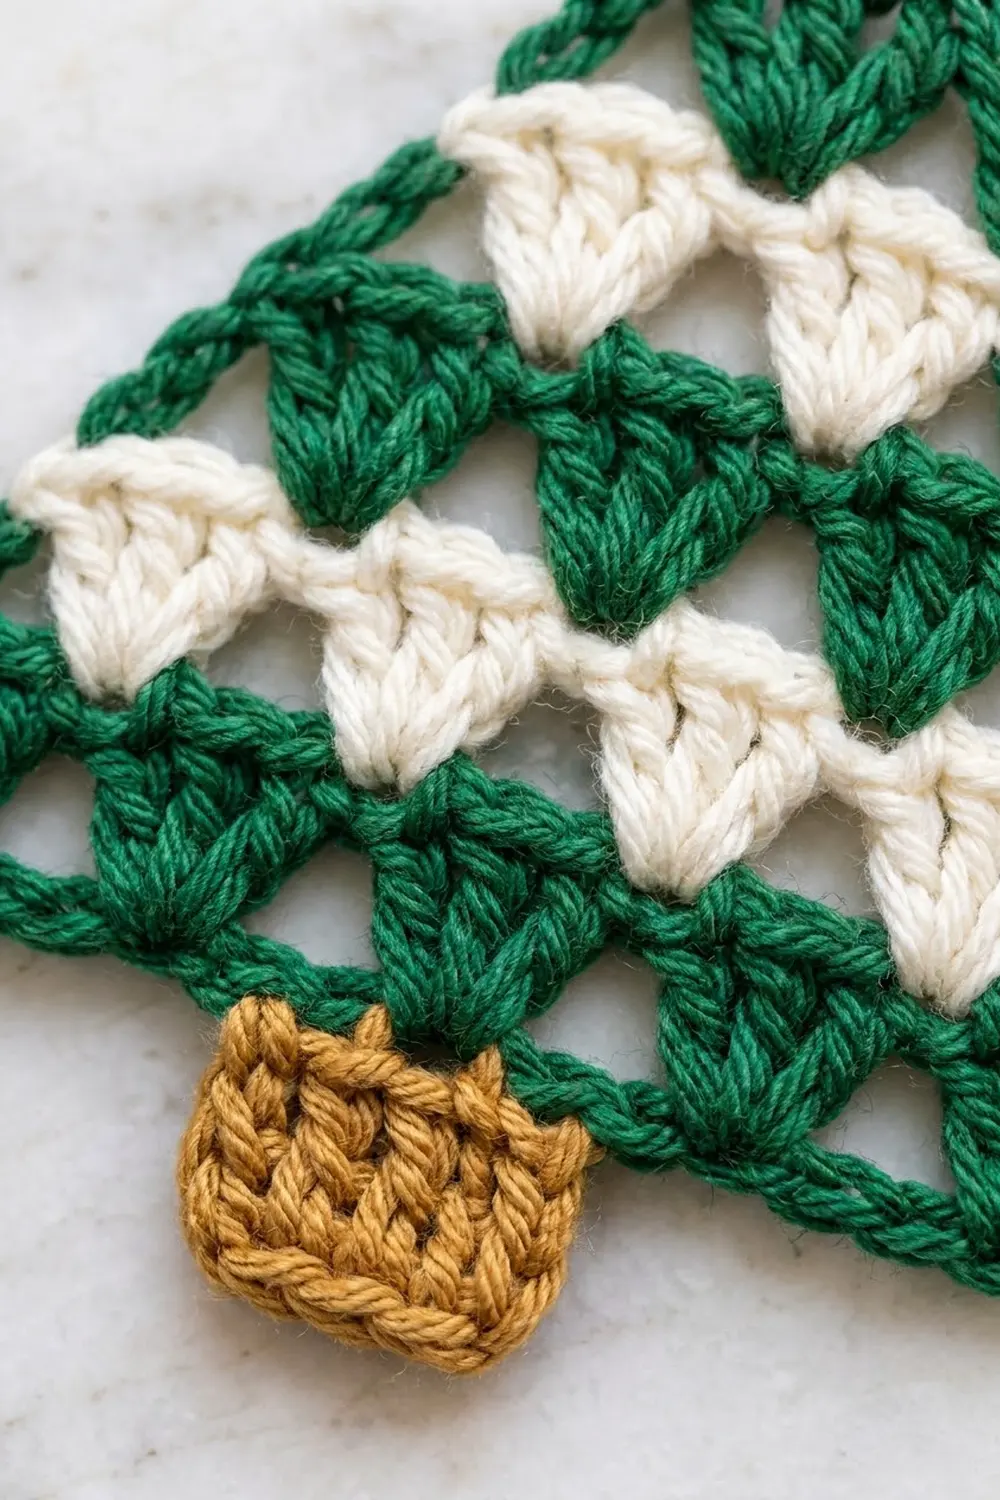
Tree Body
All rows are worked with the RS facing, and you never turn. You fasten off at the end of every row and join again at the right-hand edge. This keeps the color stripes clean and makes every row look the same.
Foundation (Color A): Ch 25.
Row 1 (Color A): Dc in the 4th ch from the hook (the 3 skipped ch count as the first dc) and in the next ch. Ch 1, sk 1 ch, dc in each of the next 3 ch. Repeat from * 4 more times. Fasten off.
Row 1 has 6 groups of 3 dc (18 dc) and 5 ch-1 sps. Across the base there are 23 sts: 18 dc + 5 ch.
The side of Row 1 that faced you while you worked it is now the RS. Keep it facing you for every row that follows.
Row 2 (Color A): Join A with a standing dc in the first ch-1 sp at the right-hand edge, then work 2 dc in the same sp. Ch 1, 3 dc in the next ch-1 sp. Repeat from * 3 more times. Fasten off.
Row 2 has 5 groups (15 dc) and 4 ch-1 sps.
Each new group sits over a space in the row below. The end groups of the row below are left unworked, so each edge steps in by half a group. This forms the slanted sides.
Row 3 (Color B): Join B with a standing dc in the first ch-1 sp, then work 2 dc in the same sp. Ch 1, 3 dc in the next ch-1 sp. Repeat from * 2 more times. Fasten off.
Row 3 has 4 groups (12 dc) and 3 ch-1 sps.
Row 4 (Color A): Join A with a standing dc in the first ch-1 sp, then work 2 dc in the same sp. Ch 1, 3 dc in the next ch-1 sp. Repeat from * once more. Fasten off.
Row 4 has 3 groups (9 dc) and 2 ch-1 sps.
Row 5 (Color B): Join B with a standing dc in the first ch-1 sp, then work 2 dc in the same sp. Ch 1, 3 dc in the next ch-1 sp. Fasten off.
Row 5 has 2 groups (6 dc) and 1 ch-1 sp.
Row 6 (Color A): Join A with a standing dc in the only ch-1 sp, then work 2 dc in the same sp. Fasten off.
Row 6 has 1 group (3 dc). This is the peak.
Checkpoint: The triangle measures 4.6 in (11.7 cm) across the base and 3 in (7.6 cm) tall. Weave in every tail now along the row ends, hiding each color in its own stripe. The border will cover the edges.
Border
The border is one round of green sc. It smooths the stepped edges into straight lines, sharpens the peak and makes the hanging loop at the same time.
Border gauge: 5 sc = 1 in (2.5 cm), the same as the body gauge.
Border Round 1 (Color A): With the RS facing, join A with a standing sc in the first (right-hand) dc of Row 6.
- Peak: In the center dc of Row 6, work (sc, ch 22, sc). The ch-22 is the hanging loop. Sc in the last dc of Row 6. (4 sc at the peak, plus the loop.)
- Left slanted side: Working down the row ends, work 2 sc around the post of the end dc of each row, from Row 6 down to Row 1. (12 sc.)
- Bottom-left corner: Work 3 sc in the foundation ch at the base of the corner dc. (3 sc.)
- Bottom edge: Working into the remaining loops of the foundation chain, work 1 sc in each of the next 21 ch. (21 sc.)
- Bottom-right corner: Work 3 sc in the last foundation ch. (3 sc.)
- Right slanted side: Working up the row ends, work 2 sc around the post of the end dc of each row, from Row 1 up to Row 6. (12 sc.)
Sl st to the first sc. Fasten off and weave in.
Round total: 4 + 12 + 3 + 21 + 3 + 12 = 55 sc, plus the ch-22 loop.
Count per side:
– Bottom edge, from one corner’s center sc to the other corner’s center sc, inclusive: 1 + 1 + 21 + 1 + 1 = 25 sc.
– Each slanted side, between the peak sc and the corner group: 12 sc.
Why the math works:
– Bottom edge: The foundation has 23 chains. The 2 end chains each take a 3-sc corner group, and the 21 chains between them take 1 sc each. That is 1 sc per chain, so the base lies flat.
– Slanted sides: A dc is about as tall as 2 sc, so 2 sc per row end matches the height of 6 rows without ruffling or pulling.
– Corners: 3 sc in one stitch turns each bottom corner cleanly.
– Peak: Working the loop between 2 sc in the center dc gives a sharp point with the loop centered on it.
Loop styling: Before you work the second sc at the peak, give the ch-22 one half-twist. This gives the slight figure-eight cross at the base of the loop, as in the photo. The loop stands about 2 in (5.1 cm) tall.
Checkpoint: The triangle measures 5 in (12.7 cm) wide x 3.4 in (8.6 cm) tall.
Trunk
The trunk is a small block of sc worked straight off the bottom edge, so it needs no sewing.
Hold the ornament with the RS facing and the bottom edge at the top. Count the 25 bottom-edge sc from the left corner’s center sc (#1) to the right corner’s center sc (#25). The center sc is #13, so the trunk uses sc #11 to #15.
Row 1 (Color C): Join C with a standing sc in sc #11. Sc in each of the next 4 sts. (5 sc.)
Rows 2–4: Ch 1, turn. Sc in each st across. (5 sc.)
Fasten off and weave in the tails along the trunk’s side edges.
Checkpoint: The trunk measures 1 in (2.5 cm) wide x 0.8 in (2.0 cm) tall, and it sits exactly at the center of the bottom edge, with 10 border sc on each side of it.
Final Blocking
- Lightly spray the ornament with water until it is damp but not soaked.
- Lay it RS up on the blocking mat.
- Pin the two bottom corners 5 in (12.7 cm) apart.
- Pin the peak 3.4 in (8.6 cm) above the center of the bottom edge, so both slanted sides are the same length.
- Add a pin halfway along each slanted side to keep it straight.
- Gently open each triangular hole between the clusters with your fingertip so the openings look even.
- Pin the trunk square, 1 in (2.5 cm) wide and 0.8 in (2.0 cm) tall.
- Lay the hanging loop flat with its twist centered.
- Leave it pinned until it is completely dry. For extra stiffness, you can mist it with a light fabric stiffener or starch before drying.
Final Quality-Control Checklist
- 6 cluster rows: 6, 5, 4, 3, 2 and 1 groups.
- Colors from the bottom up: green, green, cream, green, cream, green.
- Every group has exactly 3 dc.
- The border has 55 sc: 25 along the bottom edge (corner center to corner center) and 12 on each slanted side.
- The peak is sharp and the loop is centered on it.
- The trunk is 5 sc wide and 4 rows tall, centered with 10 border sc on each side.
- The triangle measures 5 in (12.7 cm) x 3.4 in (8.6 cm), and the total height without the loop is 4.2 in (10.7 cm).
- All tails are woven in and hidden in matching colors.
Troubleshooting
The triangle leans to one side. You probably missed a ch-1 space or started a row in the wrong space. Count the groups in each row against the pattern.
The slanted sides ruffle. Work 1 sc on some row ends and 2 sc on others, but keep the same number on both sides.
The slanted sides pucker or curve inward. Your border is too tight. Use a 3.75 mm hook for the border round only.
The bottom edge flares. Check that you worked exactly 21 sc between the corner groups.
The holes look uneven. Keep each ch-1 snug but not tight, then block with a fingertip as in step 6.
The trunk is off-center. Count the bottom-edge sc again from the corner center, then pull out the trunk and rework it starting in sc #11.
The loop is too long or too short. Change the number of chains by 4 at a time, about 0.4 in (1.0 cm) of loop height per change.
Care
Hand wash in cool water with mild soap, press out the water in a towel, and dry flat, re-pinning to shape if needed. Store flat between seasons so the peak and loop keep their shape.
Final Notes
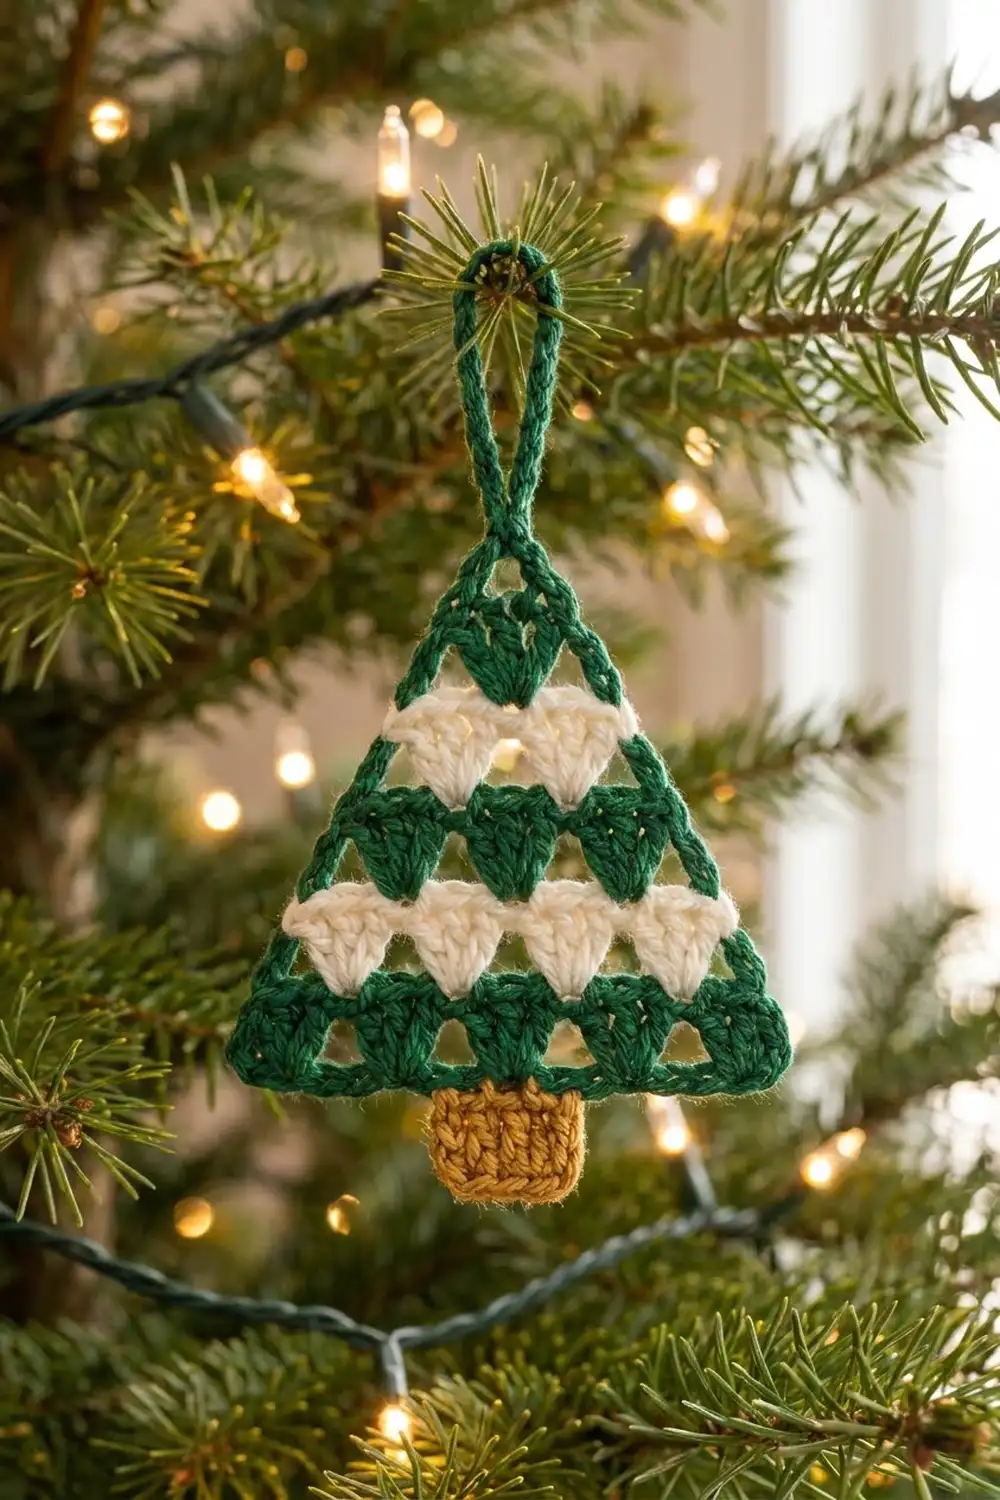
The measurement chain is short and easy to check. Row 1 should be 4.6 in (11.7 cm) wide. The six-row triangle should be 3 in (7.6 cm) tall. The border brings it to 5 in (12.7 cm) x 3.4 in (8.6 cm), and the trunk brings the total height to 4.2 in (10.7 cm). If each checkpoint matches, the finished ornament will match too. Once you have one you like, make a whole forest in the same colors for a calm, matching tree.
Happy crocheting!