
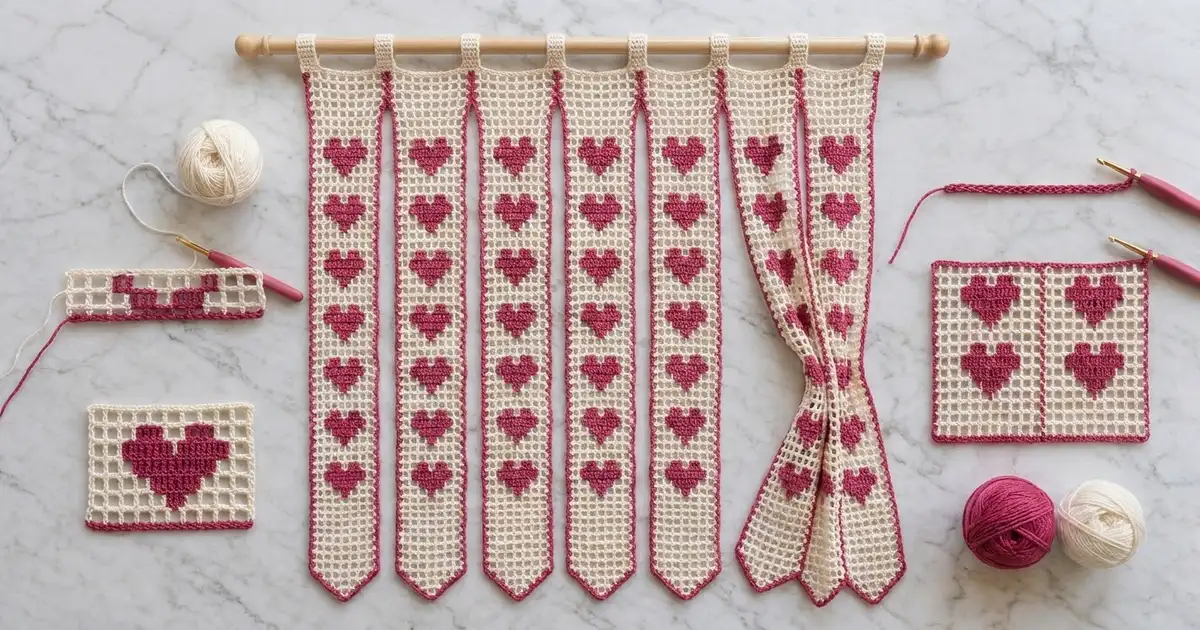
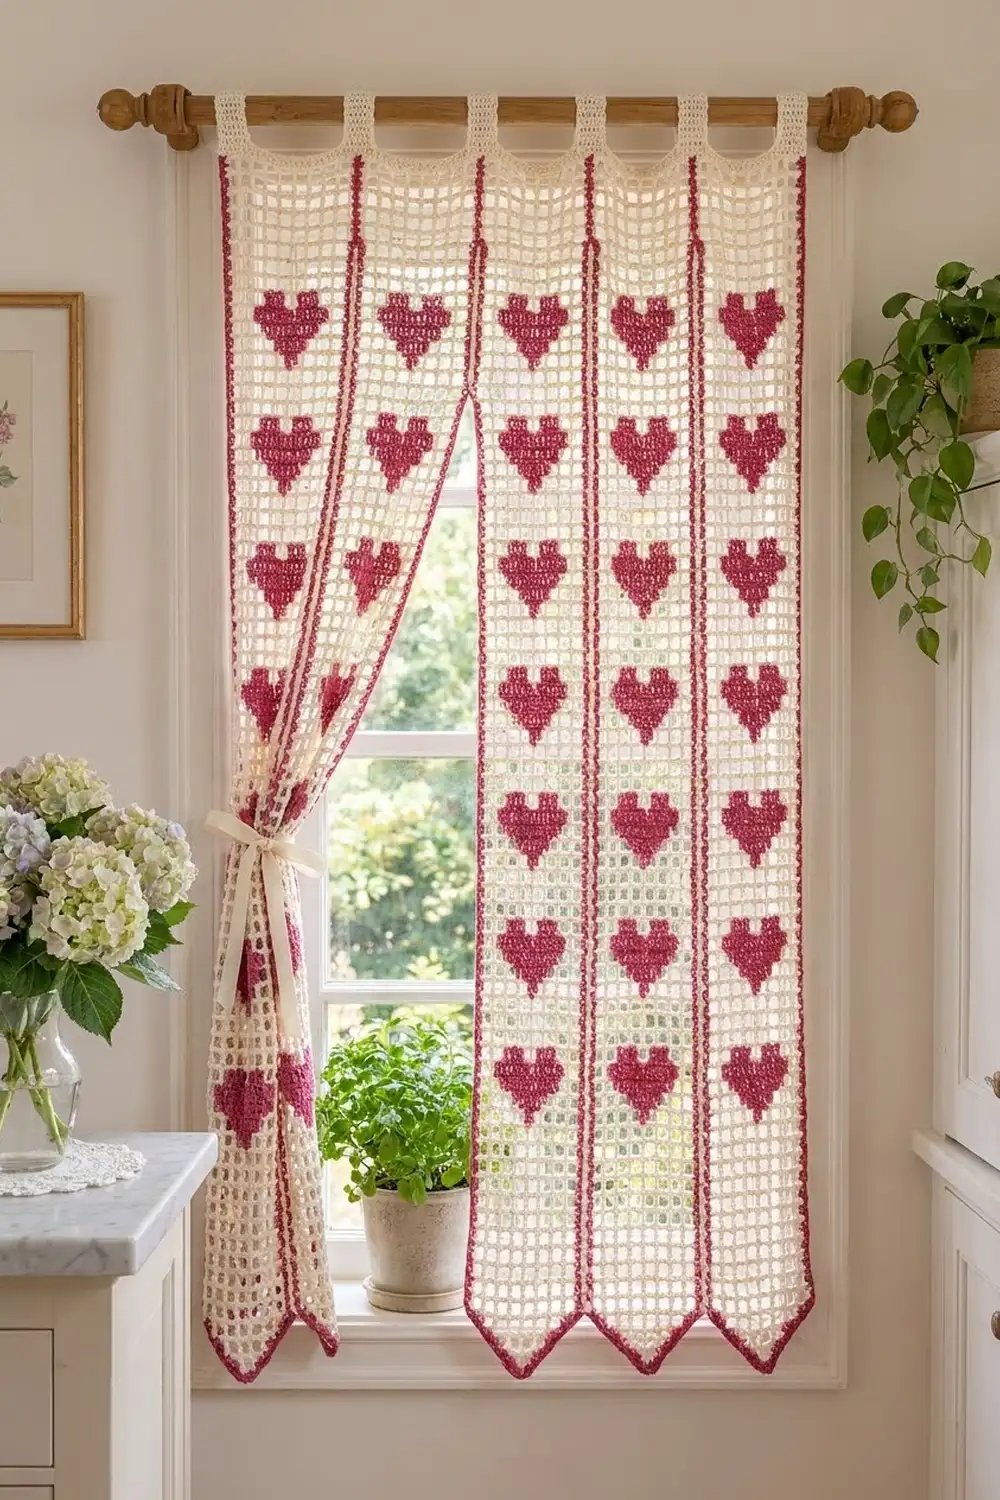
This curtain combines classic filet mesh with a simple pixel heart. Seven narrow cream strips, each with a column of seven raspberry hearts, are joined side by side and finished with a tab top that slides straight onto a curtain rod. Each strip ends in a pointed tip, so the hem has a soft, scalloped look.
The palette is two colors: a warm cream for the open mesh and a deep raspberry pink for the hearts, edging, and seams. In a sunny window the mesh lets light through and the hearts read as solid shapes.
The pattern uses US crochet terms. The finished curtain measures 35 in (88.9 cm) wide and 39.1 in (99.3 cm) from the pointed tips to the top of the band. The tab loops add another 2 in (5.1 cm) above the band.
You’ll work each strip from the bottom up in filet mesh, add a pointed tip to the foundation edge, and edge the strip in raspberry. Then you’ll join the strips with slip stitch and finish with a top band and tabs.
Finished Size and Construction
- Finished size: 35 in × 39.1 in (88.9 cm × 99.3 cm), plus 2 in (5.1 cm) tab loops
- Skill level: Intermediate
- Terminology: US crochet terms
- Yarn weight: Sport weight (#2), cotton or cotton blend
- Hook: 3.5 mm (E-4)
- Number of pieces: 7 identical strips
- Layout: 7 strips side by side (1 row × 7 strips)
- Strip size after edging: 5 in × 38.5 in (12.7 cm × 97.8 cm), tip to top edge
- Size before border: 35 in × 38.5 in (88.9 cm × 97.8 cm)
- Border (top band) depth: 0.6 in (1.5 cm), plus tabs
Materials
Choose a smooth, mercerized or matte sport-weight cotton. Cotton holds the square mesh crisply and blocks well. Avoid fuzzy yarns, because the open spaces will blur.
- Cream (main color): 250 g, about 750 m
- Raspberry pink (contrast): 200 g, about 600 m
- 3.5 mm (E-4) crochet hook
- 8 small yarn bobbins or butterflies for the raspberry
- Tapestry needle
- Stitch markers
- Rust-proof pins and a blocking surface at least 40 in (101.6 cm) long
- Measuring tape
These quantities include a margin of about 15% for gauge swatches and differences in tension.
Abbreviations (US Terms)
- ch – chain
- sl st – slip stitch
- sc – single crochet
- dc – double crochet
- sk – skip
- sp – space
- st(s) – stitch(es)
- RS / WS – right side / wrong side
Special stitches
- Space (sp): ch 2, sk 2 sts (or the ch-2 sp below), dc in the next dc.
- Block (bl): dc in each of the next 2 sts (or 2 dc in the ch-2 sp below), dc in the next dc.
- Color change: work the last dc before the new color until 2 loops remain on the hook, then complete it with the new color.
Every mesh row has 9 squares and 28 sts: the first dc plus 3 sts per square.
Gauge and Checkpoints
Gauge: 10 squares × 10 rows of filet mesh = 5 in × 5 in (12.7 cm × 12.7 cm). One square is 0.5 in (1.3 cm).
Single-crochet gauge: 12 sc × 10 rows = 2 in × 2 in (5.1 cm × 5.1 cm).
Make one full strip before you start the rest. Use these checkpoints:
- After Row 10: the strip measures 4.5 in (11.4 cm) wide × 5 in (12.7 cm) tall.
- After the first heart: the heart is 3.5 in (8.9 cm) wide × 3 in (7.6 cm) tall.
- After Row 72: the body is 36 in (91.4 cm) long.
- After the point: the tip adds 2 in (5.1 cm).
- After the edging: the strip is 5 in (12.7 cm) wide.
If your strip is too big, go down to a 3.25 mm hook. If it is too small, go up to a 3.75 mm hook. Change hooks rather than changing your tension, so all seven strips match.
Strip (Make 7)
Body
The body has 72 rows. These rows are plain mesh: 1–3, 10–13, 20–23, 30–33, 40–43, 50–53, 60–63, and 70–72. The hearts sit on Rows 4–9, 14–19, 24–29, 34–39, 44–49, 54–59, and 64–69.
Foundation: With cream, ch 32.
Row 1 (RS): Dc in the 8th ch from the hook (this makes the first square). Ch 2, sk 2 ch, dc in the next ch; rep from * 7 more times. Turn. (9 squares, 28 sts)*
Row 2: Ch 5 (this counts as dc + ch 2). Sk the ch-2 sp, dc in the next dc. Ch 2, dc in the next dc; rep from * across, working the last dc in the 3rd ch of the turning chain. Turn. (9 squares, 28 sts)*
Row 3: Repeat Row 2.
Heart Rows
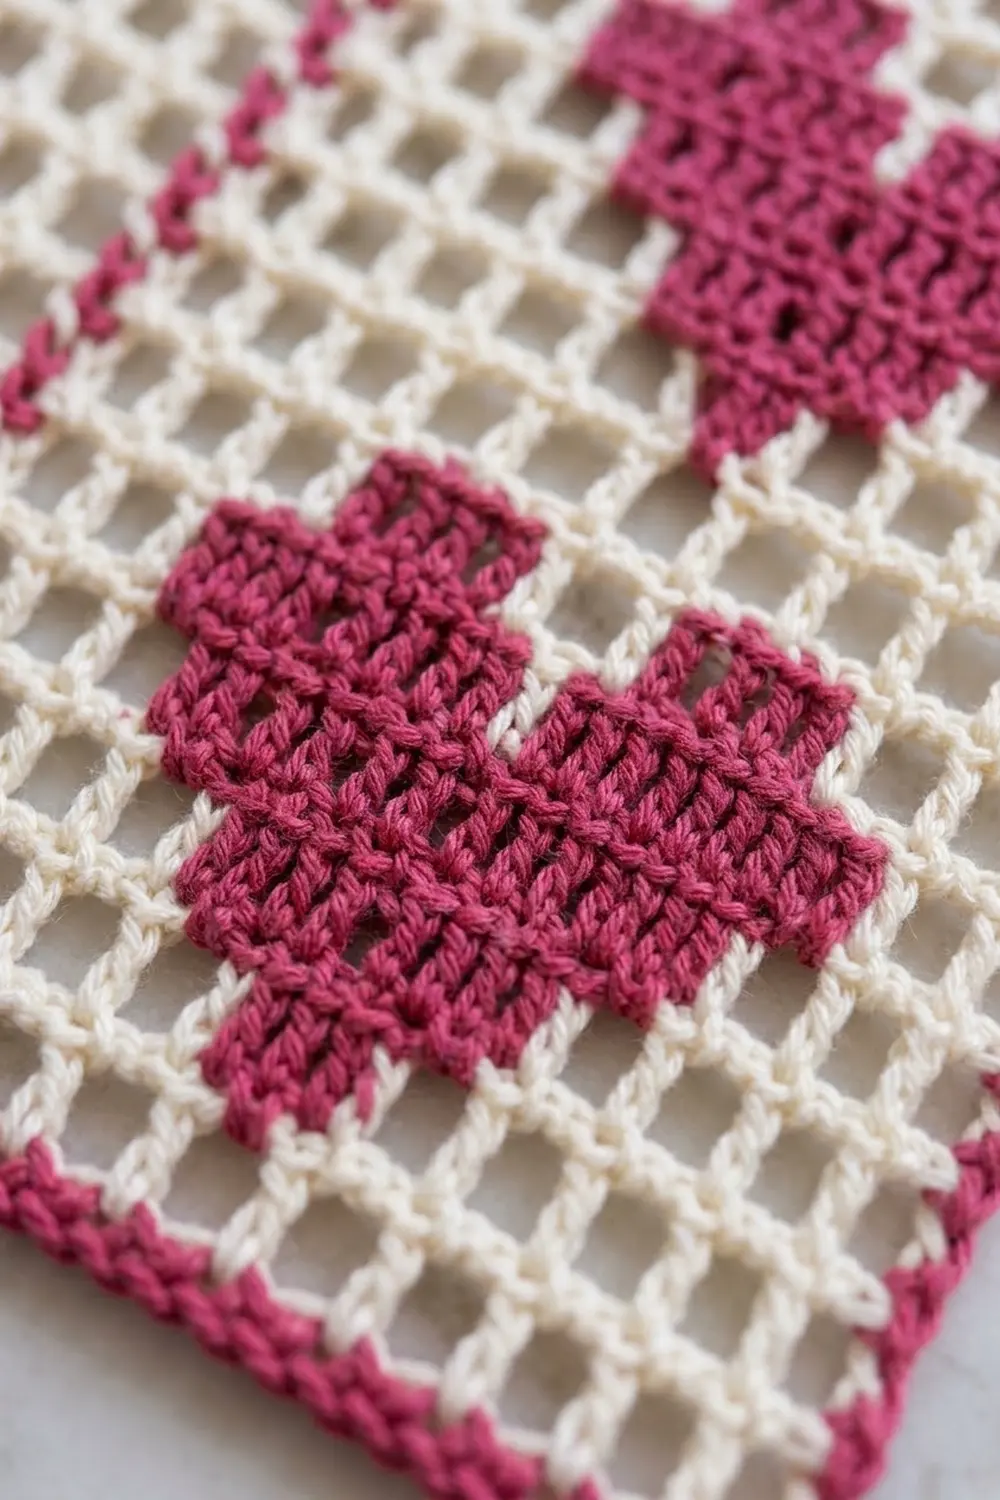
The heart uses columns 2–8, so there is always one open square on each side. Wind one raspberry butterfly per heart, plus a second one for the lobe row.
Carry the cream strand inside the raspberry blocks by working over it. When the raspberry needs to move outward one square, carry it inside the neighboring cream dc. This keeps both strands hidden.
Begin each row with ch 5 for a space. Read each line in working order. Each row has 28 sts.
- Heart Row 1 (Row 4): 4 sp, 1 bl, 4 sp
- Heart Row 2 (Row 5): 3 sp, 3 bl, 3 sp
- Heart Row 3 (Row 6): 2 sp, 5 bl, 2 sp
- Heart Row 4 (Row 7): 1 sp, 7 bl, 1 sp
- Heart Row 5 (Row 8): 1 sp, 7 bl, 1 sp
- Heart Row 6 (Row 9): 2 sp, 2 bl, 1 sp, 2 bl, 2 sp (use the second butterfly for the second lobe)
Fasten off the raspberry butterflies and weave in the ends inside the blocks. Because you work from the bottom up, the one-square tip forms first, so the finished heart points down.
Rows 10–72: Work 4 mesh rows (Row 2), then the 6 heart rows. Repeat this sequence six more times, ending with Rows 70–72 as plain mesh. Don’t fasten off after Row 72. You’ll edge the strip later.
Checkpoint: 72 rows, 7 hearts, 36 in (91.4 cm) long.
Pointed Tip
Turn the strip upside down so the foundation edge is on top, RS facing. Work into the bases of the Row 1 dc.
Point Row 1: Join cream with sl st at the base of the 2nd dc. Ch 3 (counts as dc). Ch 2, dc at the base of the next dc; rep from * 6 more times. Turn. (7 squares, 22 sts)*
Point Row 2: Sl st in each of the first 3 ch and in the next dc. Ch 3 (counts as dc). Ch 2, dc in the next dc; rep from * 4 more times, leaving the last square unworked. Turn. (5 squares, 16 sts)*
Point Row 3: Repeat Point Row 2, working 2 squares after the ch 3. (3 squares, 10 sts)
Point Row 4: Repeat Point Row 2, working 1 square only. (1 square, 4 sts) Fasten off.
Checkpoint: the tip is 2 in (5.1 cm) deep, and each step is one square in and one row down.
Strip Edging
Corner ch-1 spaces are not counted as stitches in the side counts.
Edging round: With RS facing, join raspberry in the first dc of Row 72 (the top right corner).
- Top edge: sc in each of the 28 sts across. Ch 1 (corner).
- Long side: work 3 sc around the post of each row-end dc. (216 sc) Ch 1 (corner).
- First diagonal: 2 sc in the exposed square edge, 2 sc around the end post of the next point row; rep from * 3 more times. (16 sc)* Ch 1.
- Tip: sc in the dc, 2 sc in the ch-2 sp, sc in the dc. (4 sc) Ch 1.
- Second diagonal: mirror the first diagonal. (16 sc) Ch 1.
- Second long side: 3 sc around each row-end. (216 sc) Ch 1.
Join with sl st to the first sc. Fasten off.
Total: 28 + 216 + 16 + 4 + 16 + 216 = 496 sc, plus 6 ch-1 corners.
Why the math works: across the top, 28 sc over 4.5 in (11.4 cm) is about 6 sc per inch. On the sides, each 0.5 in (1.3 cm) row gets 3 sc, which is also 6 sc per inch. Matching density keeps the edges from rippling or pulling in.
Checkpoint: the strip is 5 in (12.7 cm) wide and 38.5 in (97.8 cm) from tip to top.
Make All Pieces
Make 7 strips in total. The totals for the curtain are:
- Cream: 7 bodies, 7 points, 3 band rows’ worth of yarn shared across the curtain, 7 tabs
- Raspberry: 49 hearts (7 per strip), 7 edging rounds, 6 seams, 1 band row
Layout (front view):
[Tab] [Tab] [Tab] [Tab] [Tab] [Tab] [Tab]
[S1 ] [S2 ] [S3 ] [S4 ] [S5 ] [S6 ] [S7 ]
  V     V     V     V     V     V     V
Each strip shows 7 hearts in one centered column.
Block all strips lightly before you join them (see Final Blocking). Matching lengths make the seams much easier.
Joining
Method: raspberry slip-stitch seam, worked on the RS.
Hold Strip 1 and Strip 2 side by side, RS up, with the top edges aligned. Join raspberry by working a sl st through both top corner ch-1 sps. Then work 1 sl st through the back loops of each pair of facing side sc: 216 sl st in total, matched stitch to stitch. End with a sl st through both lower corner ch-1 sps. Fasten off.
The points stay free below the seam, which gives the hem its V-tips.
Repeat until all 7 strips are joined, for 6 seams in total.
Tension: keep each sl st about as tall as a sc. Tight seams pucker the mesh. If the seam gathers, go up to a 4.0 mm hook for joining.
Every 72 sl st (12 in / 30.5 cm), check that the hearts on neighboring strips still line up row for row. A mismatch means a skipped or doubled stitch.
Checkpoint: the joined panel measures 35 in (88.9 cm) wide (7 × 5 in / 12.7 cm).
Border: Top Band and Tabs
Border gauge: 6 sc per inch, 5 sc rows per inch (same as the sc gauge).
Band Row 1 (RS): Join cream in the first top sc of Strip 1. Sc in each top sc across all strips, skipping every corner ch-1 sp, including those at the seams. Turn. (7 × 28 = 196 sc)
Band Row 2: Ch 1, sc in each st across. Change to raspberry on the last st. Turn. (196 sc)
Band Row 3: Ch 1, sc in each st across. Fasten off. (196 sc)
The band adds 0.6 in (1.5 cm).
Why the math works: each strip gives exactly 28 top stitches, and no stitches are added at the seams. So the band is 196 sts, the same width as the joined panel at 6 sc per inch.
Tabs (make 7, one per strip)
Each strip’s section of the band is 28 sts. The tab sits on sts 10–19 of that section, leaving 9 sts free on each side.
Tab Row 1 (RS): Join cream in st 10. Ch 3 (counts as dc). Ch 2, sk 2 sts, dc in the next st; rep from * 2 more times, ending in st 19. Turn. (3 squares, 10 sts)*
Tab Rows 2–8: Work as Row 2 of the body over 3 squares. (10 sts)
Fasten off, leaving a 12-in (30.5-cm) tail. Fold the tab to the WS and whipstitch Row 8 to the back of Band Row 1.
Each tab is 1.5 in (3.8 cm) wide and 4 in (10.2 cm) long, which makes a 2-in (5.1-cm) loop. That fits rods up to 1 in (2.5 cm) in diameter.
Final Blocking
- Weave in all ends inside the solid blocks or the sc edging. Never weave them across open squares.
- Soak the curtain in cool water with a little wool or cotton wash for 15 minutes.
- Press out the water in a towel. Don’t wring it.
- Lay the curtain flat RS up and pin the top band straight at 35 in (88.9 cm).
- Pin each seam so that it is vertical and the body is 36 in (91.4 cm) long.
- Pin each tip to a sharp point, 2 in (5.1 cm) below the body.
- Square the mesh with your fingertips so that every space is open and square.
- Let it dry completely, then hang it and let gravity settle it for a day.
Final Quality-Control Checklist
- All 7 strips have 72 body rows and 7 hearts.
- Each heart is 7 squares wide and 6 rows tall, with its tip pointing down.
- Each strip edging has 496 sc and 6 corner ch-1 sps.
- The hearts line up across all 6 seams.
- The top band has 196 sc in every row.
- All 7 tabs are centered on sts 10–19 of each strip.
- The panel is 35 in × 39.1 in (88.9 cm × 99.3 cm) after blocking.
- No ends are visible in the open mesh.
Troubleshooting
- The mesh slants: you may be working the last dc into the wrong chain of the turning ch. Always end in the 3rd ch of the ch-5.
- The hearts look lumpy: the blocks are packed too tightly. Work 2 dc into the ch-2 sp rather than into the chains.
- Raspberry shows in the open squares: carry it only inside dc posts, never across a space.
- The strips are different lengths: count the rows (72), not the inches, then block them to match.
- The edging ruffles: you’re working 4 sc per row-end. Use exactly 3.
- The tips curl: pin them firmly during blocking and check that the diagonal has 16 sc.
- The band is wavy: recount it. It must be exactly 196 sc with the corners skipped.
Care
Hand wash in cool water, or machine wash on a gentle cycle in a mesh bag. Lay it flat to dry and reshape the tips while it is damp.
Final Notes
The measurement chain works like this:
- Squares: one square is 0.5 in (1.3 cm), and 9 squares make a 4.5-in (11.4-cm) body.
- Strips: the edging brings each strip to 5 in (12.7 cm) wide.
- Panel: seven strips make 35 in (88.9 cm).
- Length: 72 rows make 36 in (91.4 cm). The tip, edging, and band bring the total to 39.1 in (99.3 cm), with 2-in (5.1-cm) tab loops on top.
Check your gauge on the first strip, count every row, and the rest will fall into place.
Happy crocheting!