
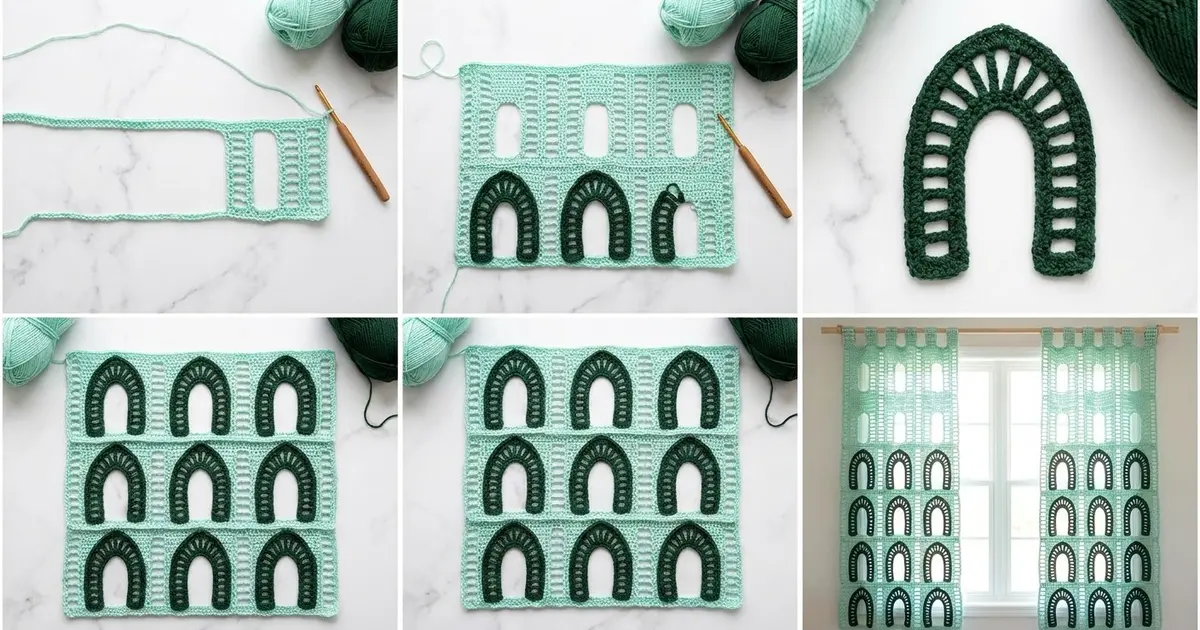
The Cathedral Window Lace Curtain is an airy panel in soft mint, crossed by rows of pointed dark green arches. Mint ladder columns run from top to bottom, with tall open windows between them. Thin mint bars divide the panel into tiers, and every tier holds a row of Gothic arches. Each arch is a curved dark green ladder with a small fan at its point.
The style is light and architectural, a bit like a cathedral window seen through spring leaves. Daylight passes through the open windows, and the dark arches give the panel a clear rhythm from a distance.
This pattern uses US crochet terms. One finished panel measures 25.75 in (65.4 cm) wide by 71.25 in (181.0 cm) long, plus 6 tab loops at the top. Make two panels for a pair.
The construction is simple to follow. The mint background is worked sideways in one piece, so each row becomes one vertical column of the curtain. Ladder rows and window rows alternate. You then crochet the dark green arches separately and sew them onto the mesh. Two rounds of single crochet finish the edges, and the tabs are worked straight off the top border.
Finished Size and Construction
- Finished size: 25.75 in x 71.25 in (65.4 cm x 181.0 cm), excluding tabs
- Skill level: Intermediate
- Terminology: US crochet terms
- Yarn weight: Worsted (#4), cotton or cotton blend
- Hook: 5.0 mm (H-8)
- Number of pieces: 1 background panel + 84 arch appliqués + 6 tabs worked directly onto the border
- Layout: 6 arches across x 14 tiers down
- Background size before border: 24.75 in x 70.25 in (62.9 cm x 178.4 cm)
- One tier: 5 in (12.7 cm) tall; one arch repeat is 4 in (10.2 cm) wide
- Border depth: 0.5 in (1.3 cm) per side
Materials
Choose a smooth worsted-weight cotton with clear stitch definition. Cotton holds the ladder shapes crisply and does not stretch out of shape when it hangs. The amounts below assume about 183 m per 100 g.
Per panel:
- Color A, mint: 175 g (320 m) for the background, border, and tabs
- Color B, dark green: 175 g (320 m) for the 84 arches, including sewing tails
For a pair, double these amounts.
Tools:
- 5.0 mm (H-8) crochet hook
- Tapestry needle
- Rust-proof pins
- Measuring tape
- Blocking boards or a clean carpet covered with a towel
- Spray bottle
All quantities include a margin of about 20% for your gauge swatch and small differences in tension.
Abbreviations (US Terms)
- ch – chain
- sl st – slip stitch
- sc – single crochet
- dc – double crochet
- tr – treble crochet
- dtr – double treble crochet (yo 3 times, insert hook, pull up a loop, [yo, pull through 2 loops] 4 times)
- sk – skip
- sp(s) – space(s)
- st(s) – stitch(es)
- yo – yarn over
Special stitch – Peak fan: In the same space work (2 dc, tr, ch 3, sl st in 3rd ch from hook to make a picot, tr, 2 dc). This makes 6 sts plus 1 picot.
Gauge and Checkpoints
Make one test swatch and one test arch before starting the panel.
Background gauge:
- 20 sts in a ladder row (10 dc + 10 ch-1 sps) = 5 in (12.7 cm), which is one tier
- 1 ladder row = 0.75 in (1.9 cm) wide
- 1 window row = 1.25 in (3.2 cm) wide
- 1 ladder row + 1 window row = 2 in (5.1 cm)
- Border: 4 sc = 1 in (2.5 cm); each sc round = 0.25 in (0.6 cm)
Test swatch: Ch 44 and work Rows 1–5 of the background. This gives 41 sts per row (2 tiers + 1 st). Your swatch should measure 4.75 in (12.1 cm) across the rows and 10.25 in (26.0 cm) along them.
Checkpoints on the full panel:
- After Row 1: 70.25 in (178.4 cm) long, laid flat without stretching
- After Row 13: 12.75 in (32.4 cm) wide
- After Row 25: 24.75 in x 70.25 in (62.9 cm x 178.4 cm)
- After the border: 25.75 in x 71.25 in (65.4 cm x 181.0 cm)
- Test arch: about 4 in (10.2 cm) between foot centers and about 3.75 in (9.5 cm) tall, including the fan
If your swatch is too big, go down 0.5 mm. If it is too small, go up 0.5 mm. If only the window rows are off, adjust how high you pull up the dtr loops rather than changing hooks. Check the length of Row 1 carefully, because a 1-stitch difference per tier adds up to 3.5 in (8.9 cm) over the full panel.
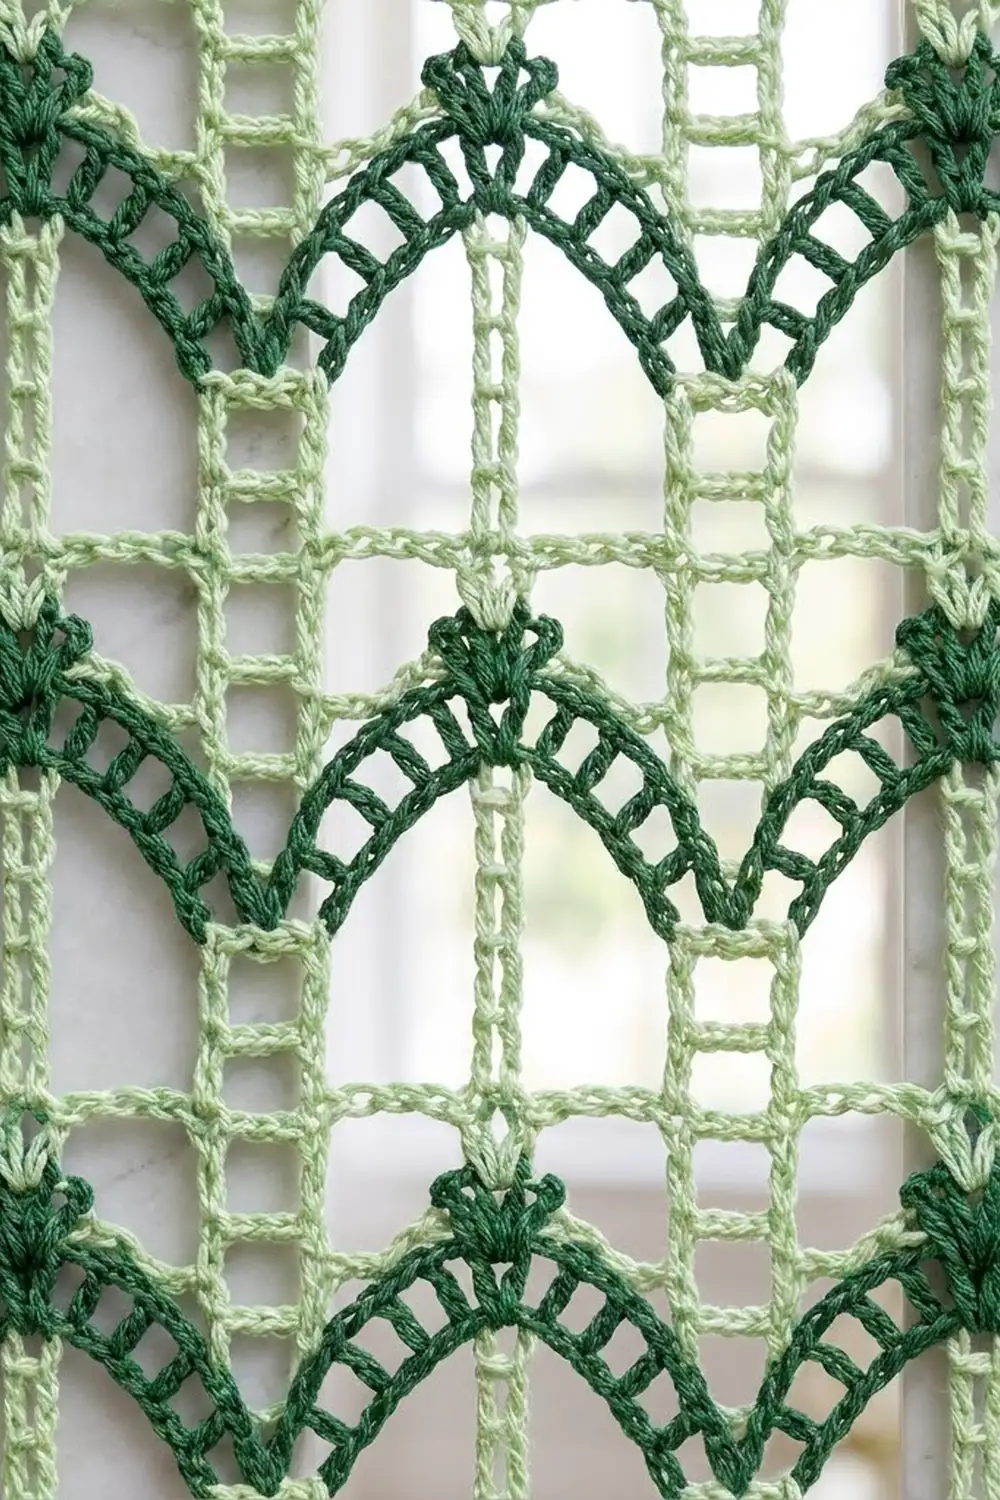
Background Panel (Color A)
The background is worked sideways. Row 1 is the left edge of the curtain and Row 25 is the right edge. Every 20 sts along a row makes one tier.
Foundation: With Color A, ch 284.
Row 1 (ladder row): Dc in 6th ch from hook (the skipped chs count as dc, ch-1 sp, and 1 skipped base ch). Ch 1, sk next ch, dc in next ch; rep from * across. (141 dc, 140 ch-1 sps = 281 sts)*
The dc posts form the horizontal rungs. The foundation chain and the ch-1 tops form the two vertical rails.
Row 2 (window row): Turn. Ch 5 (counts as first dtr). Ch 19, sk next 19 sts (10 ch-1 sps and 9 dc), dtr in next dc; rep from * 13 more times, working the last dtr in the 4th ch of the beginning ch-5. (15 dtr, 14 ch-19 sps = 281 sts)*
Each dtr becomes one of the horizontal mint bars between tiers. The ch-19 spans become the rail of the next ladder, leaving a tall open window underneath.
Row 3 (ladder row): Turn. Ch 3 (counts as dc). [Ch 1, sk next ch, dc in next ch] 9 times, ch 1, sk next ch, dc in next dtr; rep from * 13 more times, working the last dc in the 5th ch of the turning ch-5. (141 dc, 140 ch-1 sps = 281 sts)*
Every tier now has 10 dc: 9 dc in the chain span and 1 dc on the dtr bar.
Row 4: Work as Row 2, but work the last dtr in the 3rd ch of the turning ch-3. (15 dtr, 14 ch-19 sps = 281 sts)
Row 5: Work as Row 3. (141 dc, 140 ch-1 sps = 281 sts)
Rows 6–25: Repeat Rows 4–5 ten more times, ending with a ladder row. Do not fasten off.
You now have 13 ladder rows (odd rows) and 12 window rows (even rows). The width is (13 x 0.75 in) + (12 x 1.25 in) = 24.75 in (62.9 cm).
Pick your top edge now. Either short edge can be the top. Mark it with a stitch marker so all the arches point the same way.
Arch Appliqué (Color B)
Each arch is a single curved ladder strip. The outer rail has more chain than the inner rail, so the strip bends into an arch on its own.
Foundation: With Color B, ch 30.
Row 1: Dc in 6th ch from hook (rungs 1 and 2, with a ch-1 gap). [Ch 2, sk next ch, dc in next ch, ch 1, sk next ch, dc in next ch] twice (rungs 3–6). Ch 2, sk next ch, dc in next ch (rung 7). Ch 3, sk next ch, dc in next ch (rung 8, center gap). Ch 2, sk next ch, dc in next ch (rung 9). [Ch 1, sk next ch, dc in next ch, ch 2, sk next ch, dc in next ch] twice (rungs 10–13). Ch 1, sk next ch, dc in last ch (rung 14). (14 dc rungs, 13 gaps)
The gap sizes run 1, 2, 1, 2, 1, 2, 3, 2, 1, 2, 1, 2, 1. The sequence is symmetrical, so both halves curve the same amount. The ch-3 gap in the center makes room for the fan.
Row 2 (outer rail and fan): Turn. Ch 1, sc in first dc. [Sc in each ch of next gap, sc in next dc] 6 times. (16 sc) Work a Peak fan in the center ch-3 sp. Sc in next dc, [sc in each ch of next gap, sc in next dc] 6 times, working the last sc in the top of the beginning chain. (16 sc)
Row 2 total: 32 sc + 1 Peak fan.
Fasten off, leaving an 18 in (45.7 cm) tail for sewing. Weave in the starting tail.
The base chain is the inner rail, and the sc row is the solid outer rail. Pin the arch with its two halves meeting at the fan in a soft point.
Make All Arches
Make 84 arches per panel in Color B (168 for a pair). Make them in batches of 14 and pin one batch to a test tier from time to time so they all stay the same size.
Layout grid (one panel, viewed from the front):
Ladder row:  1  3  5  7  9 11 13 15 17 19 21 23 25
Position:    F  P  F  P  F  P  F  P  F  P  F  P  F

TOP (tab edge)
Tier 14:      ^     ^     ^     ^     ^     ^
Tier 13:      ^     ^     ^     ^     ^     ^
Tiers 12-3:   (same: 6 arches each)
Tier 2:       ^     ^     ^     ^     ^     ^
Tier 1:       ^     ^     ^     ^     ^     ^
BOTTOM
F = foot ladder (rows 1, 5, 9, 13, 17, 21, 25). P = peak ladder (rows 3, 7, 11, 15, 19, 23). Each ^ is one arch: 6 across x 14 tiers = 84.
Attaching the Arches
Method: Whipstitch each arch to the background with its own tail.
Placement: Center the fan over a peak ladder, with the fan tip just touching the tier’s top bar. Set each foot on the neighboring foot ladder, about 0.75 in (1.9 cm) above the lower bar. Neighboring arches share a foot ladder, so their feet butt together there. The outermost feet sit on Rows 1 and 25.
Stitch-to-stitch logic: Tack the outer sc rail wherever it crosses a ladder rail or rung. Tack the inner chain rail at the same crossings. Stitch each foot securely to both rails of its ladder, and tack the fan’s picot to the top bar. Over the open windows the arch floats freely, which keeps the lace effect.
Tension: Pin the background flat to the blocking surface while you sew. Each stitch should hold the arch in place without pulling the mesh. If a tier starts to cup, take out the last few tacks and redo them more loosely.
Size checkpoint: After each finished tier, measure across. The panel should still be 24.75 in (62.9 cm) wide. Fasten off each tail on the wrong side.
Border and Tabs (Color A)
Border gauge: 4 sc = 1 in (2.5 cm). Per-side counts include that side’s first and last sc. The corner ch-2 spaces are not counted.
Round 1: Continue with the loop from Row 25 and turn the work so the long edge is along the top. Ch 1, sc in each st of Row 25. (281 sc) Ch 2 for the corner. Work along the short edge over the row ends: 3 sc over each ladder row end and 5 sc over each window row end. (13 x 3 + 12 x 5 = 99 sc) Ch 2. Work along the foundation chain: sc in the free loop of the 5th through 284th ch (280 sc), plus 1 sc into the base of the beginning chain at the corner. (281 sc) Ch 2. Work the second short edge the same way. (99 sc) Ch 2, sl st to first sc. (760 sc, 4 corner ch-2 sps)
Round 2: Ch 1, sc in each sc around, working (sc, ch 2, sc) in each corner ch-2 sp. Sl st to first sc. (Long sides 283 sc each, short sides 101 sc each = 768 sc, 4 corner ch-2 sps) Fasten off.
Why the math works: The ladder mesh and the sc border share the same gauge of 4 sts per inch. That means 1 sc per mesh stitch keeps the long sides flat. On the short sides, a 0.75 in (1.9 cm) ladder row end needs 3 sc and a 1.25 in (3.2 cm) window row end needs 5 sc. Each round adds 0.25 in (0.6 cm) on every side, so 2 rounds bring the panel to 25.75 in x 71.25 in (65.4 cm x 181.0 cm).
Tabs: Work along the marked top edge (101 sc). Each tab is 6 sc wide and each gap is 13 sc: 6 x 6 + 5 x 13 = 101.
- Tab Row 1: Join Color A in the first sc of the top edge. Ch 1, sc in same st and next 5 sts. (6 sc)
- Tab Rows 2–20: Ch 1, turn, sc in each sc. (6 sc)
Fasten off, leaving a 12 in (30.5 cm) tail. Skip 13 sc and work the next tab. Tabs begin on sc 1, 20, 39, 58, 77, and 96.
Each tab is 1.5 in (3.8 cm) wide and 5 in (12.7 cm) long. Fold each tab to the back and whipstitch its last row to the back of Round 1, making a 2.5 in (6.4 cm) loop. The loops fit a rod up to about 1.25 in (3.2 cm) in diameter.
Final Blocking
- Weave in all remaining ends along the rails, where they will not show.
- Soak the panel in cool water for 15 minutes, then gently press the water out. Do not wring it.
- Roll the panel in towels to remove excess moisture.
- Lay it face up and pin the corners to 25.75 in x 71.25 in (65.4 cm x 181.0 cm).
- Pin along each tier bar so the bars run straight across the panel.
- Shape each arch so both halves match and the fan points straight up.
- Let the panel dry completely before you unpin it.
Final Quality-Control Checklist
- [ ] 25 rows: 13 ladder rows and 12 window rows
- [ ] Every ladder row has 141 dc; every window row has 15 dtr
- [ ] 14 tiers, each 5 in (12.7 cm) tall
- [ ] 84 arches, all pointing toward the tab edge
- [ ] Every fan sits centered over a peak ladder
- [ ] Border: 283 sc on each long side and 101 sc on each short side
- [ ] 6 tabs, evenly spaced, with the outer tabs flush to the corners
- [ ] Finished size: 25.75 in x 71.25 in (65.4 cm x 181.0 cm)
Troubleshooting
- Window rows are too short: Pull the first loop of each dtr up to full height.
- Tier bars drift out of line: Recount the 19 sts skipped in each tier. One extra or missing st shifts every tier after it.
- Arches curl too tightly: Your ch-2 gaps are too loose compared with the base chain. Work the foundation chain one hook size larger.
- Arches lie too flat: Make the ch-2 gaps slightly looser, or ease the outer rail as you sew it down.
- Border ripples: Check the 99-sc count on the short edges. Too many sc there makes the edge flare.
- Panel puckers around the arches: Your tacks are too tight. Resew them over a flat, pinned background.
Care
Hand wash in cool water with mild detergent, then lay flat or re-pin to dry. Do not hang the panel while wet, or the cotton may lengthen.
Final Notes
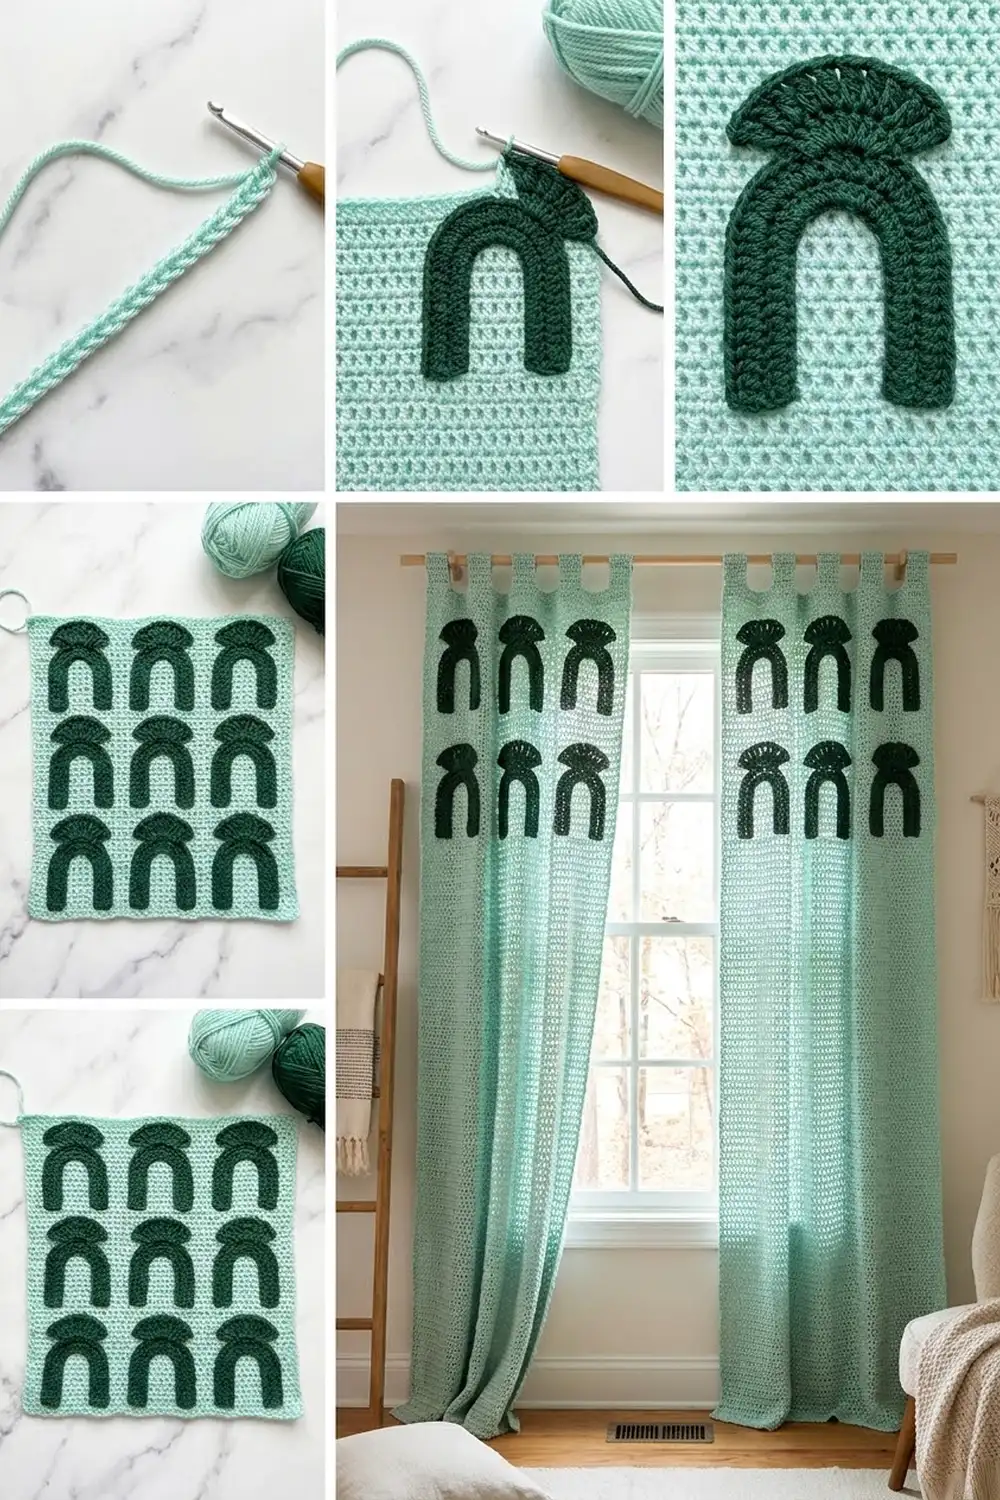
The measurement chain is simple. 20 sts make one 5 in (12.7 cm) tier, and 14 tiers plus 1 st give 70.25 in (178.4 cm). Thirteen 0.75 in (1.9 cm) ladder rows and twelve 1.25 in (3.2 cm) window rows give 24.75 in (62.9 cm). Two 0.25 in (0.6 cm) border rounds bring the panel to 25.75 in x 71.25 in (65.4 cm x 181.0 cm). Each 4 in (10.2 cm) arch fits one ladder-and-window repeat. Check your gauge early and the rest falls into place.
Happy crocheting!