
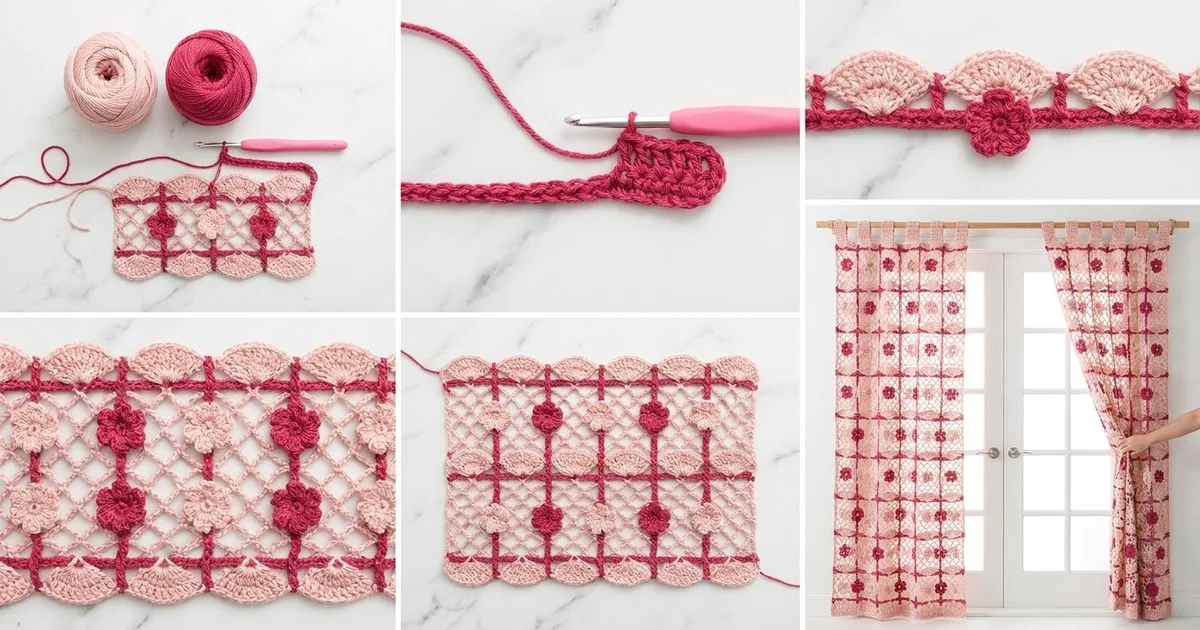
The Rosy Lattice Curtain is an airy lace panel that lets daylight through a soft pink net. Bands of open diamond mesh are separated by deep raspberry divider rows. Little fans of clustered double crochet sit along each divider, and a small five-petal flower rests in the middle of every diamond.
Two colors carry the whole design. Raspberry pink is used for the divider rows, border, tabs and half of the flowers. Blush pink is used for the fans, the net and the other half of the flowers. The flowers alternate colors in a checkerboard, so from across the room the panel looks like a scattered blossom print.
This pattern uses US crochet terms. One finished panel measures 40.25 in (102.2 cm) wide by 78.25 in (198.8 cm) long, plus 3 in (7.6 cm) hanging tabs, for a total hanging length of 81.25 in (206.4 cm). Make two panels for a pair.
You work the panel flat in rows as one continuous piece, from bottom to top, and each 6-row band adds one row of diamonds. You make the flowers separately and stitch them into the diamonds. Then a two-round border frames the panel, and you work nine tabs straight off the top edge.
Finished Size and Construction
- Finished size (one panel): 40.25 in x 78.25 in (102.2 cm x 198.8 cm), plus 3 in (7.6 cm) tabs
- Skill level: Intermediate
- Terminology: US
- Yarn weight: DK / light (3), cotton
- Hook: 4.0 mm (US G-6)
- Number of pieces: 1 lace panel worked in one piece, plus 286 small appliqué flowers sewn into the net
- Layout: 13 pattern repeats across x 22 bands up
- Repeat size: 3 in (7.6 cm) wide x 3.5 in (8.9 cm) tall
- Size before border: 39.25 in x 77.25 in (99.7 cm x 196.2 cm)
- Border depth: 0.5 in (1.3 cm) on every side
Materials
Choose a smooth mercerized or combed DK-weight cotton with about 120 m per 50 g. Cotton holds the lace shape, washes well and stretches little on a rod.
- Color A, raspberry pink: 300 g / 720 m (divider rows, border, tabs, 143 flowers)
- Color B, blush pink: 600 g / 1440 m (fans, net, 143 flowers)
These quantities are for one panel and include about a 10% margin. Double them for a pair.
Tools:
- 4.0 mm (US G-6) crochet hook
- Tapestry needle
- Stitch markers
- Rust-proof pins and a large blocking surface
- Tape measure
Abbreviations (US Terms)
- ch – chain
- sl st – slip stitch
- sc – single crochet
- hdc – half double crochet
- dc – double crochet
- sp – space
- st(s) – stitch(es)
- RS / WS – right side / wrong side
Special stitches:
- Fan: 5 dc in the same stitch.
- Half fan: 3 dc in the same stitch. When a half fan starts a row, the ch 3 counts as the first dc.
Gauge and Checkpoints
Gauge:
– 16 sc and 16 sc rows = 4 in (10.2 cm).
– One band (Rows 1–6) = 3.5 in (8.9 cm) tall.
– One 12-stitch repeat = 3 in (7.6 cm) wide.
Before you start the panel, work a test piece 3 repeats wide. With A, ch 38. Work Rows 1–6 once, repeating the bracketed sequence across, then work Row 1 once more. After light blocking, the swatch should measure 9.25 in (23.5 cm) wide by 3.75 in (9.5 cm) tall. Also make one flower in each color; each should be 2 in (5.1 cm) across.
Checkpoints:
- After Row 1: 39.25 in (99.7 cm) wide.
- After 2 bands: 7 in (17.8 cm) tall.
- After 10 bands: 35 in (88.9 cm) tall.
- After the closing row: 77.25 in (196.2 cm) tall.
If the swatch is too big, go down one hook size. If it’s too small, go up one size. If only the height is off, change the loops in Rows 3–5: use ch 4 to shorten them or ch 6 to lengthen them, and use the same number in all three rows.
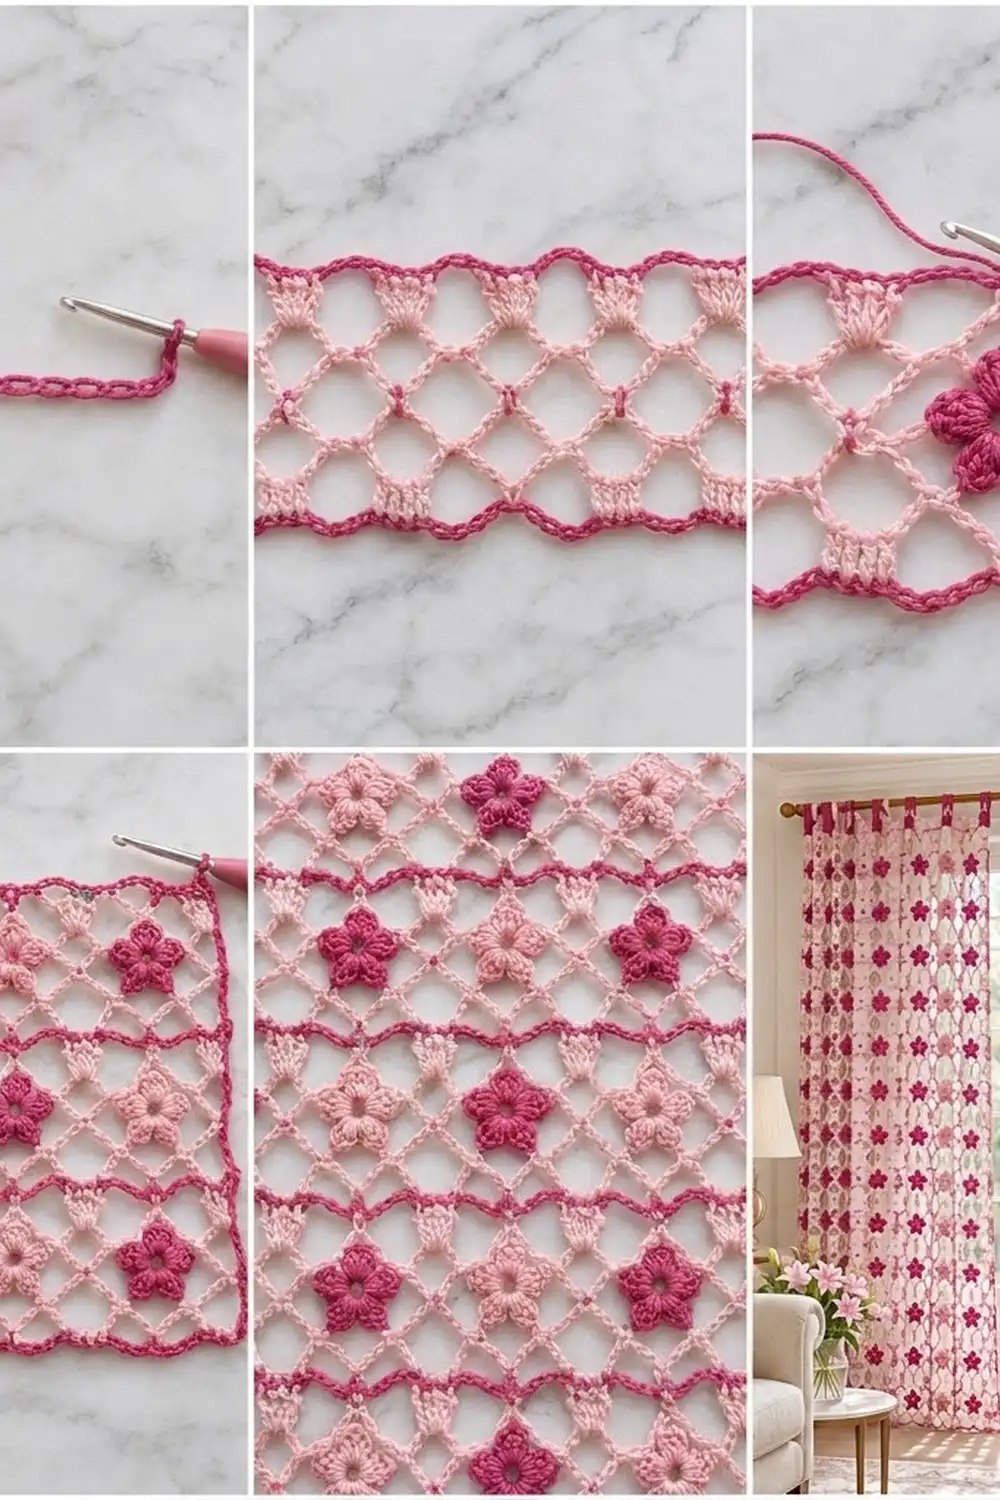
Panel
The stitch count is a multiple of 12 + 1. Positions are counted from the first stitch of Row 1. The fans sit at positions 0, 12, 24 and so on. The diamonds, and their flowers, are centered at positions 6, 18, 30 and so on.
Cut the yarn at every color change, leaving a 6 in (15.2 cm) tail. You’ll work over these tails in the border.
Foundation: With A, ch 158.
Row 1 (A, RS): Sc in 2nd ch from hook and in each ch across, turn. (157 sc) Fasten off A.
Row 2 (B): Join B in the first st. Ch 3 (counts as dc), 2 dc in same st (half fan made). Ch 4, skip 5 sts, sc in next st, ch 4, skip 5 sts, fan in next st; rep from * to * 11 more times. Ch 4, skip 5 sts, sc in next st, ch 4, skip 5 sts, 3 dc in last st (half fan made), turn. (12 fans, 2 half fans, 13 sc, 26 ch-4 sps)
Row 3 (B): Ch 1, sc in first dc. Ch 5, sc in next sc, ch 5, sc in center dc of next fan; rep from * to * across, working the last sc in the top of the turning ch-3, turn. (27 sc, 26 ch-5 loops)
Row 4 (B): Ch 5 (counts as dc + ch 2), sc in first ch-5 loop. Ch 5, sc in next ch-5 loop; rep from * to * across. Ch 2, dc in last sc, turn. (26 sc, 25 ch-5 loops, 2 ch-2 half loops)
Row 5 (B): Ch 1, sc in first dc, skip ch-2 sp. Ch 5, sc in next ch-5 loop; rep from * to * 24 more times. Ch 5, sc in 3rd ch of turning ch-5, turn. (27 sc, 26 ch-5 loops)
The Row 5 sc now line up with the Row 3 sc, which closes one row of diamonds.
Row 6 (B): Ch 3 (counts as dc), 2 dc in first sc (half fan made). Ch 1, sc in next ch-5 loop, ch 1, sc in next sc, ch 1, sc in next ch-5 loop, ch 1, fan in next sc; rep from * to * 11 more times. Ch 1, sc in next ch-5 loop, ch 1, sc in next sc, ch 1, sc in next ch-5 loop, ch 1, 3 dc in last sc (half fan made), turn. (157 sts: 66 dc, 39 sc, 52 ch) Fasten off B.
To check the count: the 2 half fans and 12 fans give 3 + 3 + 60 = 66 dc. Each of the 13 gaps holds 3 sc and 4 ch, or 7 sts, for 91 sts. 66 + 91 = 157, so the band ends at the same width it started.
Next Row 1 (A): Join A in the first st. Ch 1, sc in each dc, sc and ch across, turn. (157 sc) Fasten off A. This row makes the raspberry divider.
Bands 2–22: Work Rows 2–6, then Row 1. Repeat this 21 more times.
Closing row: After the last Row 6, work Row 1 once more in A. Do not fasten off.
The panel now has 133 rows and measures 39.25 in x 77.25 in (99.7 cm x 196.2 cm).
Flowers (make 286)
Each band holds 13 flowers. Make 143 in A and 143 in B.
Rnd 1: Make a magic ring. Ch 1, 10 sc in ring, sl st to first sc. (10 sc) Pull the ring nearly closed, leaving an open center about 0.25 in (0.6 cm) across.
Rnd 2: (Hdc, 3 dc, hdc) in next sc, sl st in next sc; rep from * to * 4 more times. (5 petals, 30 sts) Fasten off, leaving a 10 in (25.4 cm) tail.
Each flower should measure 2 in (5.1 cm) across.
Attaching the Flowers
Lay the panel RS up. Each diamond sits above a Row 2 sc and below a Row 6 sc, at positions 6, 18, 30 and so on. In the middle of each diamond, a Row 4 ch-5 loop crosses from side to side. That loop is the anchor.
- Center a flower over the 3rd ch of that Row 4 loop.
- Using the tail, tack the flower’s center ring to the loop with 2 small stitches.
- Tack each petal tip to the nearest chain of the net.
- Weave the tail through the back of the petals and trim it.
Color layout: In odd-numbered bands, start at the right edge with A and alternate colors across (7 A, 6 B). In even-numbered bands, start with B (6 A, 7 B). This uses exactly 143 flowers of each color and makes a checkerboard.
Border
Border gauge: 4 sc = 1 in (2.5 cm) on every edge.
Side edges: In each band, work 13 sc into the ends of Rows 2–6: 2 sc in the Row 2 end, 3 sc in each of the Row 3, 4 and 5 ends, and 2 sc in the Row 6 end. Also work 1 sc in each inner Row 1 end. There are 21 inner Row 1 ends; the first Row 1 is the bottom edge and the closing row is the top edge.
So each side gets 22 x 13 + 21 = 307 sc.
Rnd 1 (A): Continuing from the closing row, ch 1.
1. Top edge: 3 sc in first st (corner), sc in next 155 sts, 3 sc in last st (corner).
2. First side: work 307 sc down the side as described above.
3. Bottom edge, working across the bottom of the foundation chain: 3 sc in first st (corner), sc in next 155 sts, 3 sc in last st (corner).
4. Second side: work 307 sc up the side.
5. Sl st to first sc.
Work over all the tails as you go.
Rnd 1 counts, including both corner sc on each side: top and bottom 159 sc each, sides 311 sc each. Total: 936 sc.
Rnd 2 (A): Ch 1, sc in each st around, working 3 sc in each corner sc. Sl st to first sc. (Top and bottom 161 sc each, sides 313 sc each, total 944 sc) Fasten off and trim the tails you worked over.
Why the math works:
– Top and bottom start from Row 1’s 157 sts.
– The 307 side sc spread over 77 in (195.6 cm) of row ends, or almost exactly 4 sc per inch, which matches the border gauge.
– Each corner gains 2 sc per round, so the corners lie flat.
– The two rounds add 0.5 in (1.3 cm) on every side.
Tabs (make 9)
Place markers to divide the 161 top sts of Rnd 2 into 9 tabs of 9 sts, with 8 gaps of 10 sts (81 + 80 = 161). The tabs start at sts 1, 20, 39, 58, 77, 96, 115, 134 and 153.
Each tab: Join A in the first marked st. Ch 1, sc in the same st and the next 8 sts, turn. (9 sc) Work 23 more rows of 9 sc. The tab should measure 6 in (15.2 cm) long and 2.25 in (5.7 cm) wide.
Fold the tab to the WS and whipstitch its last row to the base of the border, forming a 3 in (7.6 cm) loop.
Final Blocking
- Weave in any remaining ends.
- Soak the panel in cool water for 15 minutes, then gently squeeze it out. Never wring it.
- Roll it in towels to remove excess water.
- Pin it to 40.25 in x 78.25 in (102.2 cm x 198.8 cm), working from the center outward.
- Open every diamond evenly and pin the fan tips in straight lines.
- Flatten each flower with your fingers.
- Let the panel dry completely before you unpin it.
Final Quality-Control Checklist
- Every divider row has 157 sc.
- Each band measures 3.5 in (8.9 cm) tall.
- The fans line up vertically from band to band.
- Every diamond holds one centered flower, and the colors form a checkerboard.
- The border lies flat, with crisp corners.
- All 9 tabs are evenly spaced and the same length.
- No tails show on the RS.
Troubleshooting
The net rows pull narrower than the dividers. Your chains are too tight. Loosen them or use ch 6, and block firmly.
The fans flare. Tighten your dc, or work 4-dc fans and add 1 ch to the next gap so the row still has 157 sts.
Row 6 doesn’t come to 157 sts. Count the ch-1 sps; it’s easy to miss one beside a fan.
The flowers curl. Steam them lightly before sewing, and tack all 5 petal tips.
The side edges wave. Recount 13 sc per band, then rework border Rnd 1.
The curtain grows on the rod. Cotton relaxes when it hangs. Block the panel 1 in (2.5 cm) shorter if your window clearance is tight.
Care
Hand wash in cool water with a mild detergent and dry flat. Don’t hang the panel while it’s wet, because the weight will stretch the lace.

Final Notes
The measurements build on each other:
– 16 sc = 4 in (10.2 cm), so 157 sc gives 39.25 in (99.7 cm) of width.
– Each band adds 3.5 in (8.9 cm), so 22 bands plus the closing row give 77.25 in (196.2 cm) of length.
– Two border rounds bring the panel to 40.25 in x 78.25 in (102.2 cm x 198.8 cm).
– Nine 3 in (7.6 cm) tabs finish the curtain.
If your swatch and each checkpoint match, your panel will too.
Happy crocheting!