
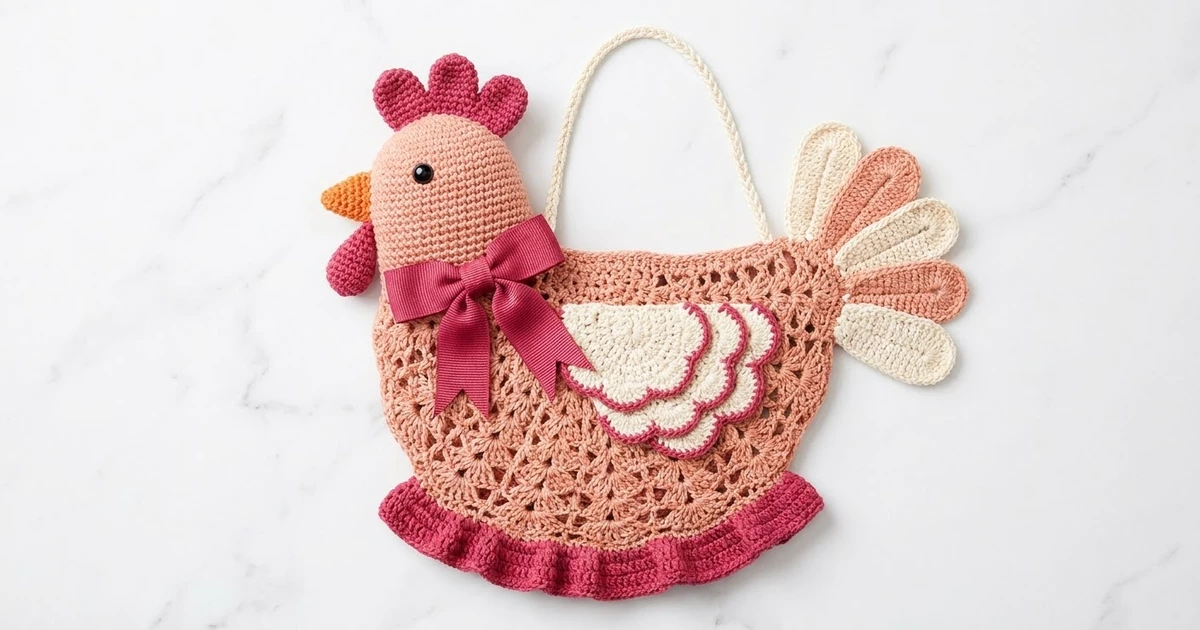
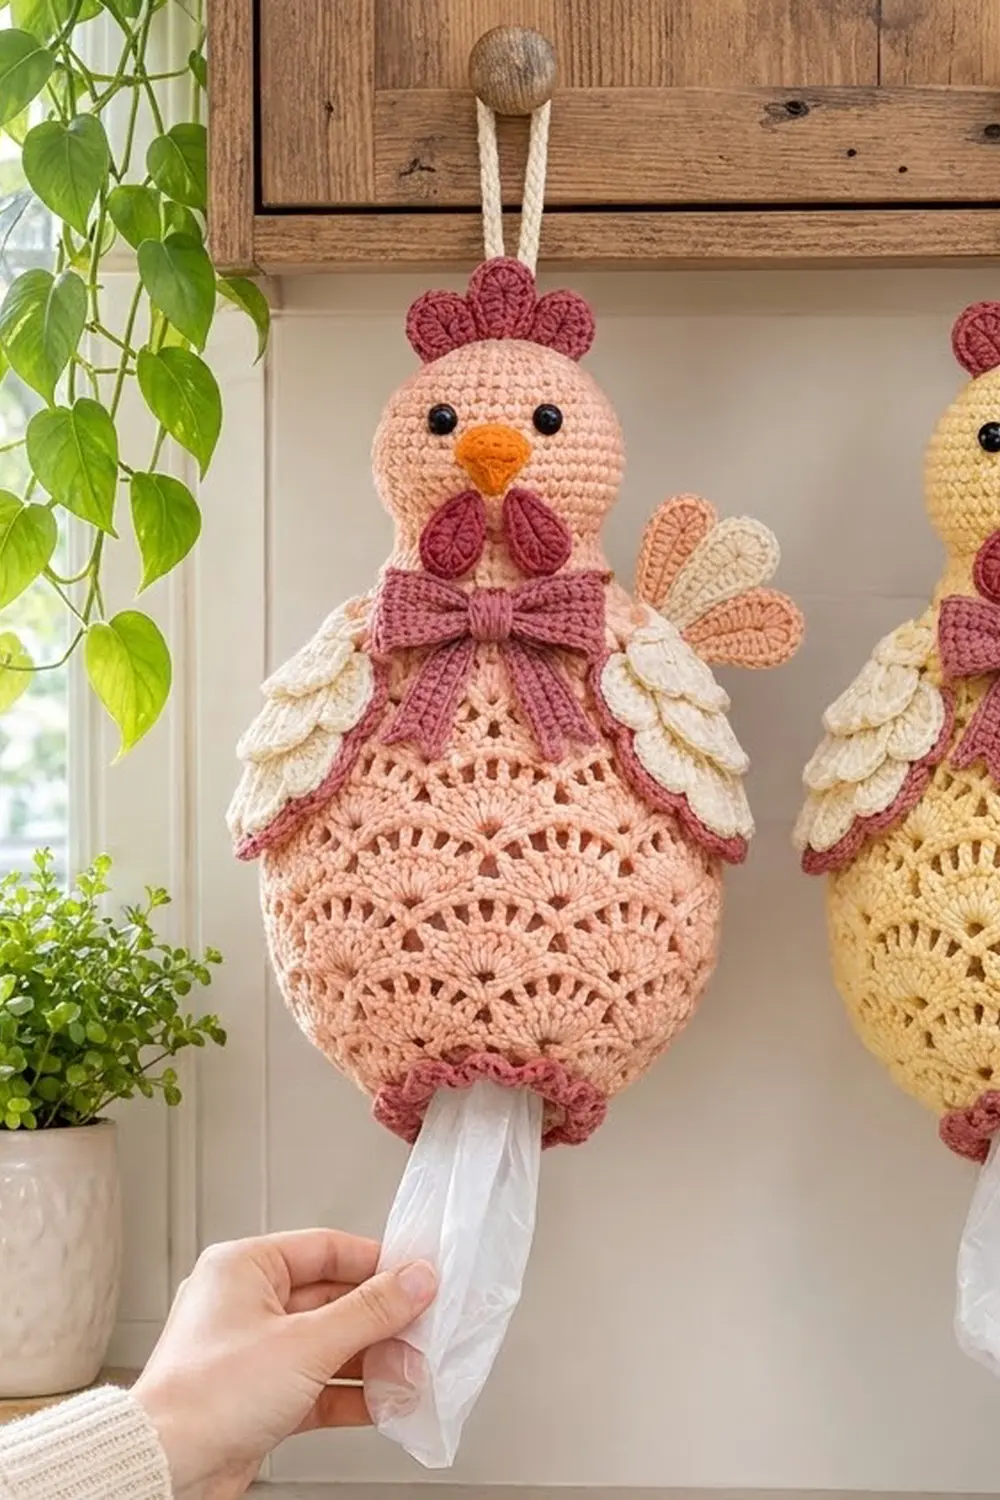
This cheerful hen is a hanging plastic bag holder. Her lacy peach body opens at the bottom so you can pull bags out one at a time. Rounds of fan shells widen into a full belly and then narrow to a closed neck.
The body, head and two tail petals are dusty peach. Cream is used for the layered wings, tail and loop, and raspberry for the comb, wattles, bow, wing edging and bottom ruffle. She has an orange beak and black safety eyes.
The pattern uses US terms. The finished hen is about 16 in (40.6 cm) tall from the ruffle to the top of the comb, not counting the loop. Her body is 7.5 in (19.1 cm) wide laid flat, and she measures 9.5 in (24.1 cm) across the wings.
You work the body bottom-up in joined rounds. The stuffed head is made separately and sewn over the neck. The small parts are worked flat and sewn on. A two-round ruffle finishes the bottom opening.
Finished Size and Construction
- Finished size: 16 in (40.6 cm) tall x 7.5 in (19.1 cm) wide; 9.5 in (24.1 cm) across the wings
- Skill level: Intermediate
- Terminology: US
- Yarn weight: Worsted (#4) cotton
- Hook: 5.0 mm (H-8)
- Number of pieces: 13 (body, head, comb, beak, 2 wattles, bow band, bow knot, 2 bow tails, 2 wings, loop), plus a 5-petal tail fan
- Layout: one hen; head on the body, wings on the sides, tail at the upper back right
- Piece size: body 7.5 x 12 in (19.1 x 30.5 cm); head 5.25 x 4 in (13.3 x 10.2 cm)
- Size before border: 15.25 in (38.7 cm) tall x 7.5 in (19.1 cm) wide
- Border depth: 0.75 in (1.9 cm)
Materials
Use a smooth worsted cotton. It shows the lace clearly and holds up when bags rub against it. The amounts below assume about 92 m per 50 g.
- Dusty peach (MC): 75 g, about 138 m
- Cream (A): 30 g, about 55 m
- Raspberry (B): 25 g, about 46 m
- Orange (C): 5 g, about 9 m
- Black (D): 2 g, about 4 m (optional, for embroidered eyes)
These quantities include a margin of about 15 percent.
Tools: 5.0 mm (H-8) hook, two 10 mm safety eyes, a handful of fiberfill, stitch markers, tapestry needle, scissors, pins, spray bottle.
Abbreviations (US Terms)
ch = chain; sl st = slip stitch; sc = single crochet; hdc = half double crochet; dc = double crochet; sc2tog / sc3tog = single crochet 2 / 3 together; MR = magic ring; BLO / FLO = back / front loop only; st(s) = stitch(es); RS / WS = right / wrong side.
Shell: the stated number of dc (5, 7 or 9) worked into one stitch. The center dc is the 3rd of 5, the 4th of 7 or the 5th of 9.
Gauge and Checkpoints
- Single crochet: 16 sts x 18 rnds = 4 in (10.2 cm)
- Shell rounds: 4 rnds = 3 in (7.6 cm), so each round is 0.75 in (1.9 cm) tall
Make the head first. It is all sc, so it works as your gauge test. Check these measurements as you go:
- Head after Rnd 7: 3.1 in (7.9 cm) across
- Body after Rnd 3: 4.5 in (11.4 cm) wide laid flat
- Body after Rnd 7: 7.5 in (19.1 cm) wide laid flat
- Body after Rnd 17: 11.2 in (28.4 cm) tall
- Finished body: 12 in (30.5 cm) tall
If your pieces are too big, go down 0.5 mm in hook size. If they are too small, go up 0.5 mm. Don’t change the stitch counts, because every repeat depends on 36 base stitches.
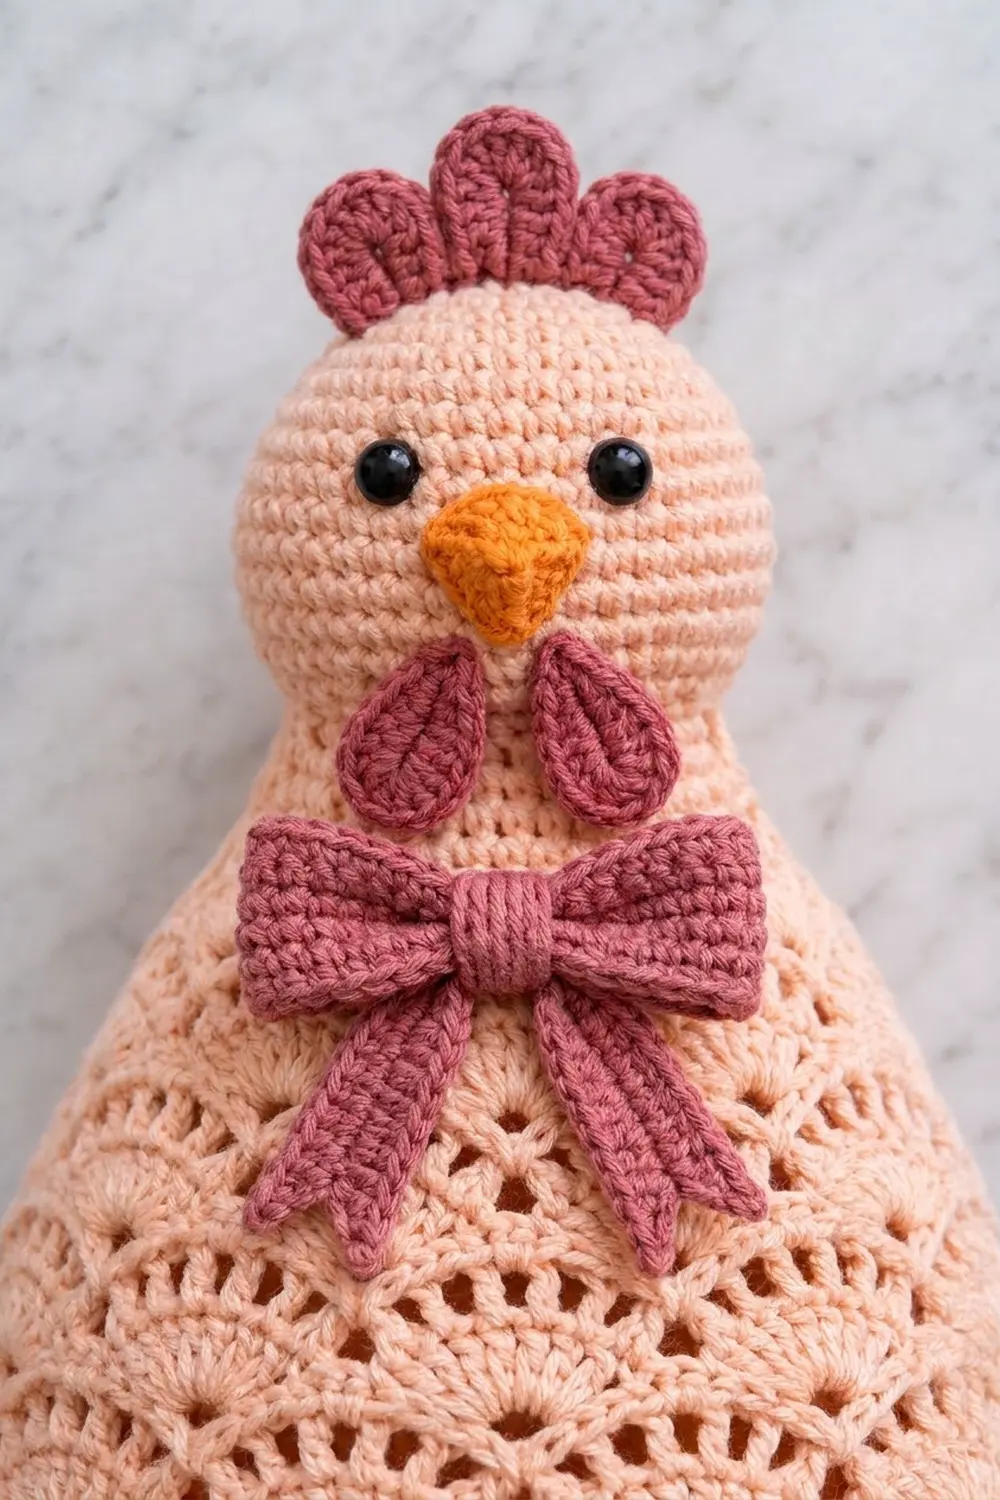
Body
Use MC. Work in joined rounds with the RS facing. Don’t turn.
Foundation: Ch 36 loosely. Join with a sl st, taking care not to twist the chain.
Rnd 1: Ch 1, sc in each ch around, join. (36)
Rnds 2–3: Ch 1, sc in each st around, join. (36)
Checkpoint: 4.5 in (11.4 cm) wide laid flat and 0.7 in (1.8 cm) tall.
Rnd 4 (setup): Ch 1, sc in next st, skip 2 sts, 5 dc in next st, skip 2 sts. Repeat 6 times total and join. (36: 6 sc + 30 dc)
Rnd 5: Sl st in next 3 dc. Ch 1, sc in same st, ch 1, 7 dc in next sc, ch 1, sc in center dc of next shell. Repeat around, omitting the last sc, and join. (60: 6 sc + 42 dc + 12 ch)
Rnd 6: Sl st to the center dc of the first shell. Ch 1, sc in same st, ch 2, 7 dc in next sc, ch 2, sc in center dc of next shell. Repeat around, omitting the last sc, and join. (72: 6 sc + 42 dc + 24 ch)
Rnd 7: Work as Rnd 6, but with 9-dc shells. (84: 6 sc + 54 dc + 24 ch)
Checkpoint: 7.5 in (19.1 cm) wide laid flat. Each 14-st repeat measures 2.5 in (6.4 cm).
Rnds 8–10: Repeat Rnd 7. (84 each)
Rnds 11–12: Repeat Rnd 6. (72 each)
Rnds 13–14: Work as Rnd 6, but ch 1 on each side of the shell. (60 each: 6 sc + 42 dc + 12 ch)
Rnds 15–16: Work as Rnds 13–14, but with 5-dc shells. (48 each: 6 sc + 30 dc + 12 ch)
Rnd 17: Sl st to the center dc. Ch 1, sc in same st, 5 dc in next sc, sc in center dc of next shell. Repeat around, omitting the last sc, and join. (36: 6 sc + 30 dc)
Checkpoint: 11.2 in (28.4 cm) tall and 4.5 in (11.4 cm) wide at the top.
Rnd 18 (conversion): Ch 1, sc in each st around, join. (36 worked 1 per st + 0 added = 36)
Rnd 19: Ch 1, sc 4, sc2tog. Repeat around and join. (30)
Rnd 20: Ch 1, sc 3, sc2tog. Repeat around and join. (24)
Rnd 21: Ch 1, sc in each st around, join. (24)
Rnd 22: Ch 1, sc2tog 12 times, join. (12)
Rnd 23: Ch 1, sc2tog 6 times. (6) Fasten off and cinch the top closed.
The bottom opening stretches, so bags go in and come out there. The finished body is 12 in (30.5 cm) tall.
Head
Use MC. Work in continuous spiral rounds and mark the first stitch of each round.
- Rnd 1: 6 sc in MR. (6)
- Rnd 2: 2 sc in each st. (12)
- Rnd 3: Sc 1, 2 sc in next. Repeat around. (18)
- Rnd 4: Sc 2, 2 sc in next. Repeat around. (24)
- Rnd 5: Sc 3, 2 sc in next. Repeat around. (30)
- Rnd 6: Sc 4, 2 sc in next. Repeat around. (36)
- Rnd 7: Sc 5, 2 sc in next. Repeat around. (42) Checkpoint: 3.1 in (7.9 cm) across.
- Rnds 8–16: Sc in each st. (42)
- Rnd 17: Sc 5, sc2tog. Repeat around. (36)
- Rnd 18: Sc 4, sc2tog. Repeat around. (30)
Sl st to join and fasten off, leaving a 20 in (50.8 cm) tail. Flattened, the head is 4 in (10.2 cm) tall and 5.25 in (13.3 cm) wide.
Insert the safety eyes between Rnds 10 and 11, with 7 sts between them. You can also embroider the eyes with D.
Small Pieces
Comb (B): Ch 7.
– Row 1: Sc in 2nd ch from hook and in each ch across. (6) Turn.
– Row 2: 5 dc in next st, sl st in next st. Repeat 3 times total. (18: 3 scallops)
– Row 3: Ch 1, then sl st in the BLO of each st around the scallops to outline them. (18)
The comb measures 2 in (5.1 cm) wide x 1 in (2.5 cm) tall.
Beak (C): Ch 6.
– Row 1: Sc in 2nd ch from hook and in each ch across. (5) Turn.
– Row 2: Ch 1, sc2tog, sc 1, sc2tog. (3) Turn.
– Row 3: Ch 1, sc3tog. (1)
The beak measures 1.25 in (3.2 cm) wide x 1 in (2.5 cm) tall.
Wattles (make 2, B): Ch 5. Sc in 2nd ch from hook, hdc in next ch, dc in next ch, 6 dc in last ch. Working along the other side of the chain, dc in next ch, hdc in next ch, sc in last ch. (12) Sl st to join. Each wattle is a 1.25 in (3.2 cm) teardrop.
Bow (B):
– Band: Ch 7. Row 1: Sc in 2nd ch from hook and in each ch across. (6) Rows 2–28: Ch 1, turn, sc in BLO across. (6) The band is 6.25 in (15.9 cm) long. Sew the short ends together. Flatten the ring with the seam at the center back so it measures 3 x 1.5 in (7.6 x 3.8 cm).
– Knot: Ch 5. Rows 1–6: Sc 4, turning after each row. Wrap the knot tightly around the center of the band and sew it in place.
– Tails (make 2): Ch 10. Row 1: Sc in 2nd ch from hook and in each ch across. (9) Row 2: Ch 1, turn, sc in BLO across. (9) Each tail is 2.25 in (5.7 cm) long.
Hanging loop (A): Ch 45. Sl st in the back bump of the 2nd ch from hook and of each ch across. (44) The cord is 10 in (25.4 cm) long.
Wings (make 2)
Use A. Rows 2–4 are worked into one loop only, which leaves free loops on the RS for the layered scallops.
- Row 1 (RS): In MR, ch 3 (counts as dc), then 6 dc. (7) Turn.
- Row 2 (WS): Ch 3 (counts as dc), dc in FLO of same st, 2 dc in FLO of each st across. (14) Turn.
- Row 3 (RS): Ch 3 (counts as dc), 2 dc in BLO of next st, dc in BLO of next st, 2 dc in BLO of next st. Repeat across. (21) Turn.
- Row 4 (WS): Ch 3 (counts as dc), dc in FLO of next st, 2 dc in FLO of next st, dc in FLO of next 2 sts, 2 dc in FLO of next st. Repeat across. (28) Turn.
- Row 5 (RS): Ch 1, sc in first st, skip 1, 5 dc in next st, skip 1, sc in next st. Repeat 6 times total. Then skip 1, 5 dc in next st, sc in last st. (43: 35 dc + 8 sc; 7 scallops) Fasten off.
- Tier 1: Join A in the first free loop of Row 3. Sl st in next loop, 5 dc in next loop, sl st in next loop. Repeat 7 times total. (49: 7 scallops)
- Tier 2: Join A in the first free loop of Row 2. Sl st in next loop, 3 dc in next loop. Repeat 7 times total. (28: 7 small scallops)
- Edging (B): Join B at the end of Row 5. Sc in each st across Row 5 (43), then work 2 sc in each row end along the straight edge (16). Join. (59)
Each wing measures 6 in (15.2 cm) wide x 3 in (7.6 cm) tall, with three stacked cream tiers outlined in raspberry.
Tail
Petals (make 3 in A and 2 in MC): Ch 9. Sc in 2nd ch from hook, hdc in next ch, dc in next 5 chs, 6 dc in last ch. Working along the other side of the chain, dc in next 5 chs, hdc in next ch, sc in last ch. (20) Sl st to join. Each petal is 2.25 in (5.7 cm) long.
Arrange the petals in the order A, MC, A, MC, A. Overlap their bases by 0.5 in (1.3 cm) and sew them into a fan. The fan measures 4 in (10.2 cm) wide x 2.75 in (7.0 cm) tall.
Make All Pieces
- MC: body, head, 2 petals
- A: 2 wings, 3 petals, loop
- B: comb, 2 wattles, bow parts, wing edgings, ruffle
- C: beak
            [loop]
            [comb]
        [head + eyes]
       [beak + wattles]
            [bow]
[wing]     [body]     [wing][tail]
           [ruffle]
Assembly
- Sew the comb across the top of the head over Rnds 1–3.
- Fold the loop in half and sew both ends behind the comb. The loop should rise 4.5 in (11.4 cm).
- Sew the beak point-down, centered 2 rnds below the eyes. Sew the wattles side by side under the beak.
- Stuff the head lightly and slip it over the neck so Body Rnds 20–23 sit inside.
- Whipstitch Head Rnd 18 (30 sts) to Body Rnd 19 (30 sts), one stitch to one stitch. Because the counts match, the seam won’t pucker. Keep your tension firm, but don’t cinch the seam.
- Sew the bow over the front of the seam, with the tails angling down from the knot.
- Sew a wing to each side along Body Rnds 9–15. Sew only the straight edge so the scallops stay free.
- Sew the tail fan behind the right wing at Rnds 12–15.
Checkpoint: the hen is 15.25 in (38.7 cm) tall before the border.
Border
Border gauge: each scallop is 1 in (2.5 cm) wide and 0.75 in (1.9 cm) deep.
Rnd 1: Join B in any free loop of the foundation ch. Ch 1, sc in each loop around, join. (36 worked 1 per loop + 0 added = 36; 18 per side laid flat)
Rnd 2: Ch 1, sc in next st, skip 1, 5 dc in next st, skip 1. Repeat 9 times total and join. (54: 9 sc + 45 dc; 27 per side laid flat) Fasten off.
Why the math works: each scallop uses 4 sts, and 36 ÷ 4 = 9 with nothing left over. The opening is 9 in (22.9 cm) around, so each scallop gets exactly 1 in (2.5 cm).
Final Blocking
- Weave in all ends.
- Mist the hen until she is damp.
- Fill the body with a rolled towel to open up the shells.
- Pin the wings and tail flat and fan the scallops open.
- Space the ruffle scallops evenly.
- Let her dry completely, then remove the towel.
Final Quality-Control Checklist
- [ ] The body is 12 in (30.5 cm) tall and 7.5 in (19.1 cm) wide
- [ ] All 6 shell columns run straight
- [ ] The 30-st head seam is smooth
- [ ] The eyes are level and the beak is centered
- [ ] The wing scallops lie free
- [ ] The ruffle has 9 even scallops
- [ ] The loop is secure
Troubleshooting
- Belly too wide: Rnds 7–10 should have exactly 9 dc per shell.
- Shells spiral: start each round at the center dc of the first shell.
- Opening too tight: rework the foundation with a 5.5 mm hook.
- Head wobbles: add a little fiberfill and sew a second pass around the seam.
- Wing tiers curl: mist them and pin flat until dry.
- Ruffle uneven: recount Rnd 1. It must have 36 sts.
Care
Hand wash in cool water, reshape and lay flat to dry.
Final Notes
Here is how the measurements build on each other. A 36-st band 4.5 in (11.4 cm) wide leads to an 84-st belly 7.5 in (19.1 cm) wide and a 12 in (30.5 cm) body. The 30-st head meets the 30-st neck exactly. The 36-st opening divides into nine 1 in (2.5 cm) scallops, which brings the hen to about 16 in (40.6 cm) tall.
Happy crocheting!