

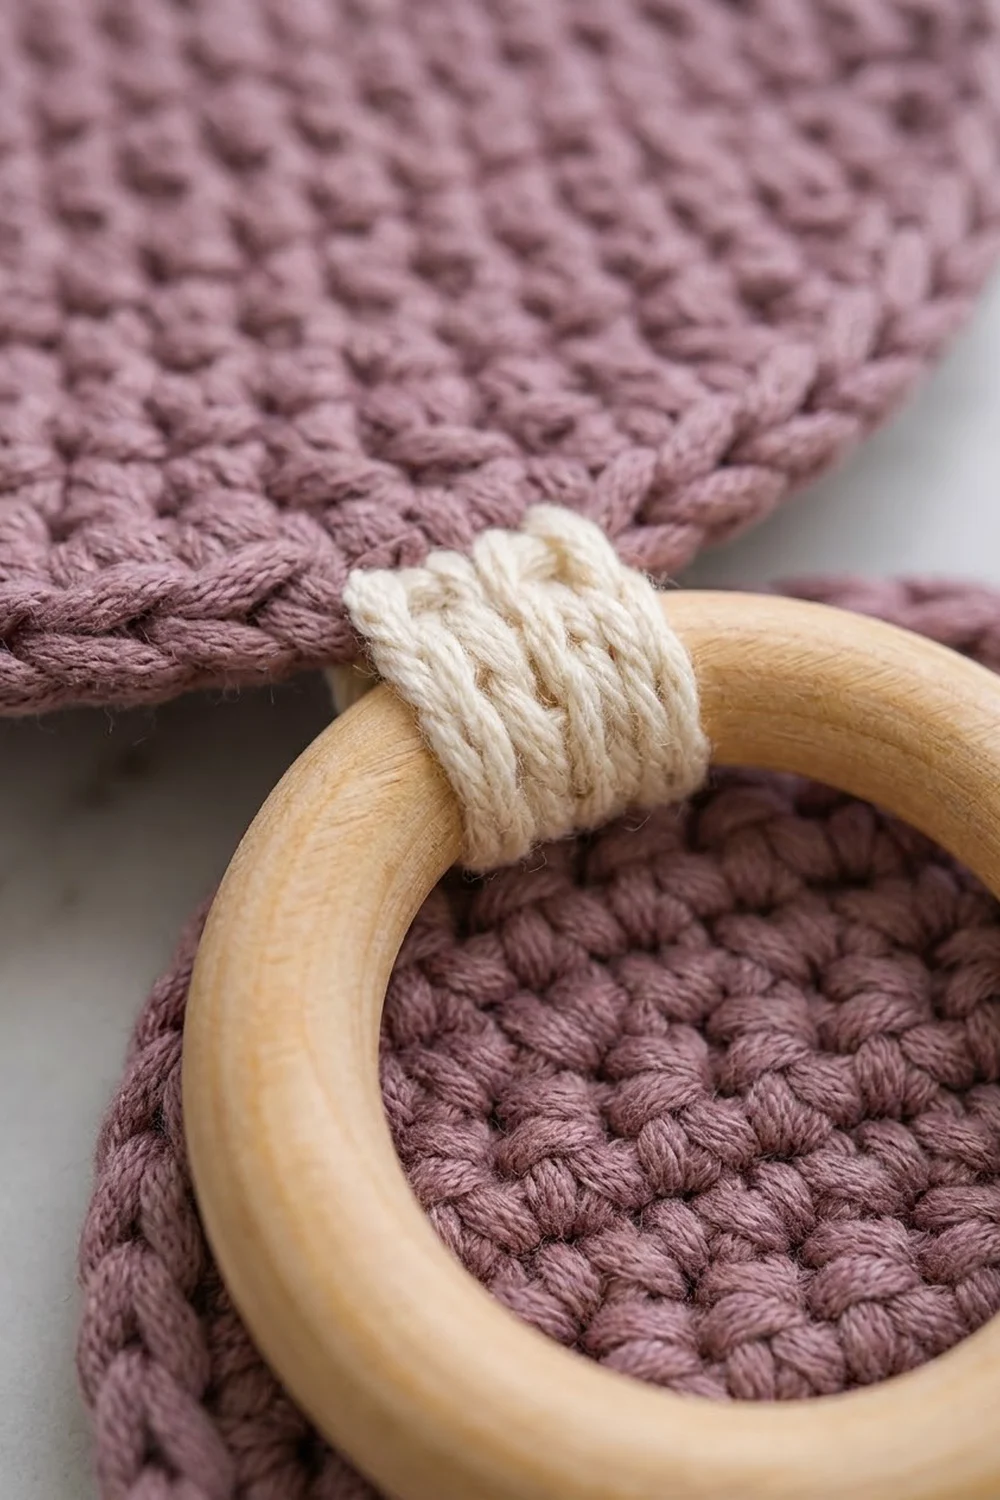
This wall organizer gets the hairbrush, comb and hair dryer off the bathroom counter. It has an arched back panel, two deep cups with knit-look ribs and a wooden ring for hanging.
The main color is a soft dusty mauve. A cream band around each cup rim matches the light wood of the ring. The look is calm and modern, and it fits easily into a neutral bathroom.
This pattern uses US terms. The finished organizer is about 11 in (27.9 cm) wide and 13.25 in (33.7 cm) tall, not counting the ring. Each cup is about 7 in (17.8 cm) tall and 3.8 in (9.7 cm) across.
You’ll make six pieces: a back panel in single crochet rows, two cups in waistcoat stitch rounds, two flat bases and a hanging tab. You crochet each base onto its cup, sew the cups to the panel, and attach the ring with the tab.
Finished Size and Construction
- Finished size: 11 in x 13.25 in (27.9 cm x 33.7 cm), ring not included
- Skill level: Easy-intermediate
- Terminology: US
- Yarn weight: Worsted / aran (#4) cotton or cotton blend
- Hook: 5.0 mm (H-8)
- Number of pieces: 6 (1 panel, 2 cups, 2 bases, 1 tab) plus a wooden ring
- Layout: Two cups side by side across the lower front of the panel
- Panel size before border: 10 in x 12.25 in (25.4 cm x 31.1 cm)
- Border depth: 2 rounds, about 0.5 in (1.3 cm) per side
- Cup size: 12 in (30.5 cm) around, about 7 in (17.8 cm) tall
- Base size: about 3.75 in (9.5 cm) across
Materials
Use a firm cotton or cotton blend. Cotton keeps the cups upright when they’re full and stands up well to bathroom humidity. Avoid fuzzy or very stretchy yarns.
- Color A, dusty mauve: about 180 g / 325 m
- Color B, cream: about 20 g / 36 m
- Tools:
- 5.0 mm (H-8) crochet hook
- 1 wooden ring, 2 in (5.1 cm) across
- Tapestry needle
- 4 to 6 locking stitch markers
- Rust-proof pins and a tape measure
- Blocking mat
These amounts include a margin of about 10 to 15 percent for your swatch and for differences in tension.
Abbreviations (US Terms)
- ch – chain
- sl st – slip stitch
- sc – single crochet
- sc2tog – single crochet 2 together (1 decrease)
- sc3tog – single crochet 3 together (2 decreases)
- inc – 2 sc in the same stitch
- MR – magic ring
- ws – waistcoat stitch
- st(s) – stitch(es)
- rnd(s) – round(s)
- RS / WS – right side / wrong side
Waistcoat stitch (ws): Push the hook through the center of the next stitch, between its two vertical legs (not under the top loops). Yarn over, pull up a loop, yarn over and pull through both loops. When you work it in a spiral, the stitches stack into vertical knit-look columns.
Gauge and Checkpoints
Gauge: 14 sts and 15 rows = 4 in (10.2 cm) in sc worked flat. Waistcoat stitch in the round should give the same gauge: 14 sts and 15 rnds = 4 in (10.2 cm).
Make one base first. It works as a gauge test, and you’ll need it anyway.
Checkpoints:
– Base after Rnd 7: about 3.75 in (9.5 cm) across.
– Cup after Rnd 1: 12 in (30.5 cm) around. After Rnd 23: about 6.1 in (15.5 cm) tall. After Rnd 26: about 7 in (17.8 cm) tall.
– Panel after Row 1: 10 in (25.4 cm) wide. After Row 31: about 8.25 in (21.0 cm) tall. After Row 46: about 12.25 in (31.1 cm) tall.
– After the border: 11 in x 13.25 in (27.9 cm x 33.7 cm).
If your base is too big, go down half a hook size. If it’s too small, go up half a size. The base and the cup both have 42 stitches, so the base should match the cup’s starting ring.
Bases (Make 2)
With Color A, work in a continuous spiral and move a marker up each round.
- Rnd 1: 6 sc in MR. (6 sts)
- Rnd 2: Inc in each st around. (12 sts)
- Rnd 3: Sc 1, inc 6 times. (18 sts)
- Rnd 4: Sc 1, inc, sc 1 6 times. (24 sts)
- Rnd 5: Sc 3, inc 6 times. (30 sts)
- Rnd 6: Sc 2, inc, sc 2 6 times. (36 sts)
- Rnd 7: Sc 5, inc 6 times. (42 sts)
Sl st in the next st and fasten off. In Rnds 4 and 6 the increases shift over, which keeps the base round instead of turning it into a hexagon.
Cups (Make 2)
- Rnd 1: With Color A, ch 42 and sl st to the first ch, without twisting the chain. Ch 1, sc in each ch around. Continue in a spiral. (42 sts)
- Rnds 2–23: Ws in each st around. (42 sts per round)
Waistcoat stitch is dense, so keep your loops relaxed. Each stitch sits right on top of the one below, which keeps the ribs straight and upright.
- Rnd 24: Change to Color B on the last yarn over of Rnd 23. Sc in each st around. (42 sts)
- Rnds 25–26: Sc in each st around. (42 sts per round)
Sl st in the next 2 sts to smooth out the step at the end of the spiral, then fasten off. The cream band is about 0.8 in (2.0 cm) deep.
Attach a Base to Each Cup
Turn the cup so the starting chain is at the top. Set a base into the opening with the RS facing out. With Color A, sc through each stitch of base Rnd 7 together with the matching free loop of the starting chain. (42 sts) Sl st to the first sc and fasten off. Both edges have 42 stitches, so you don’t need to ease anything in, and you get a rounded ridge around the bottom.
Back Panel (Make 1)
With Color A, work in rows. Start every row after Row 1 with ch 1 and turn. The ch 1 doesn’t count as a stitch.
- Row 1: Ch 36, sc in the 2nd ch from the hook and in each ch across. (35 sts)
- Rows 2–31: Sc in each st across. (35 sts per row)
Check that the panel is 10 in (25.4 cm) wide and about 8.25 in (21.0 cm) tall.
Arch shaping:
– Row 32: Sc2tog, sc 31, sc2tog. (33 sts)
– Rows 33–34: Sc across. (33 sts)
– Row 35: Sc2tog, sc 29, sc2tog. (31 sts)
– Row 36: Sc across. (31 sts)
– Row 37: Sc2tog, sc 27, sc2tog. (29 sts)
– Row 38: Sc across. (29 sts)
– Row 39: Sc2tog, sc 25, sc2tog. (27 sts)
– Row 40: Sc across. (27 sts)
– Row 41: Sc2tog, sc 23, sc2tog. (25 sts)
– Row 42: Sc across. (25 sts)
– Row 43: Sc2tog, sc 21, sc2tog. (23 sts)
– Row 44: Sc2tog, sc 19, sc2tog. (21 sts)
– Row 45: Sc2tog, sc 17, sc2tog. (19 sts)
– Row 46: Sc3tog, sc 13, sc3tog. (15 sts)
Don’t fasten off. The decreases start out spaced apart and come closer together near the top, so the arch rounds into a dome instead of a point. The arch adds 15 rows, about 4 in (10.2 cm). The panel is now about 12.25 in (31.1 cm) tall, and the top edge is about 4.3 in (10.9 cm) wide.
Make All Pieces
- Color A: 1 back panel, 2 cups (Rnds 1–23), 2 bases, 1 tab
- Color B: cup rims (Rnds 24–26, both cups)
Assembly layout (front view):
        [ ring ]
        [ tab  ]
   /--------------\
  |   back panel   |
  |   (arch top)   |
  |                |
  | [cup 1][cup 2] |
  | [cup 1][cup 2] |
  | [base ][base ] |
   ----------------
     0.75 in ledge
Border
Add the border to the panel before you attach anything else.
Border gauge: Work at your normal sc tension. Along the sides, 1 sc per row end gives 15 sts per 4 in (10.2 cm). That’s close enough to the 14-stitch gauge for the edge to lie flat.
Rnd 1: Keep going from Row 46 and work down the left side.
– Left side: 2 sc in each row end of Rows 46–43 (8 sts), then 1 sc in each row end of Rows 42–2 (41 sts). (49 sts)
– Bottom left corner: 3 sc in the first foundation ch.
– Bottom: Sc in the next 33 foundation chs. (33 sts)
– Bottom right corner: 3 sc in the last foundation ch.
– Right side: 1 sc in each row end of Rows 2–42 (41 sts), then 2 sc in each row end of Rows 43–46 (8 sts). (49 sts)
– Top: Sc in each of the 15 sts of Row 46. (15 sts)
– Sl st to the first sc. Total: 49 + 3 + 33 + 3 + 49 + 15 = 152 sts
Rnd 2: Ch 1, sc in each st around, with 3 sc in the center st of each bottom corner.
– Sides: 50 sts each (49 + the outer st of the corner group)
– Bottom: 35 sts between the corner centers (33 + 1 from each corner group)
– Corners: 3 sts each
– Top: 15 sts
– Sl st to join. Total: 50 + 50 + 35 + 3 + 3 + 15 = 156 sts
Fasten off. The panel now measures 11 in x 13.25 in (27.9 cm x 33.7 cm).
Why the math works: Along the bottom, 33 stitches plus the 2 corner chains use all 35 foundation chains, so nothing is gained or lost. Each 3-sc corner adds the 2 stitches a flat right-angle turn needs. Rows 43–46 slope steeply, so each of their row ends covers more distance and gets 2 sc. Rnd 2 grows by exactly 4 stitches: 2 at each corner.
Hanging Tab
With Color A, ch 5, then sc in the 2nd ch from the hook and in each ch across. (4 sts) Rows 2–12: Ch 1, turn, sc across. (4 sts per row) Fasten off and leave a 12 in (30.5 cm) tail. The tab measures about 1.1 in (2.8 cm) by 3.2 in (8.1 cm).
Joining
Tab: Slide the ring onto the tab and fold the tab in half to make a loop about 1.6 in (4.1 cm) long. Center both ends on the WS of the panel so they overlap the top border by 0.5 in (1.3 cm), then whipstitch them in place.
Cups: On each cup, mark one rib column, then mark the column 17 stitches away. These two columns are your sewing lines, about 4.9 in (12.4 cm) apart. The back of the cup flattens slightly between them.
Set the bottom of each cup 0.75 in (1.9 cm) above the bottom edge of the panel to leave the small ledge. Center the back of each cup 2.75 in (7.0 cm) in from its side of the panel. The outer sewing line then sits about 0.3 in (0.8 cm) from the edge, and the two cups meet in the middle.
Pin the cups. With Color A, whipstitch each sewing line from the base up to the cream rim, catching 1 panel stitch for each cup round (about 23 per line). Then sew the back half of each base seam to the panel, because that seam carries most of the weight.
Tension: Keep each stitch snug but not tight. If you pull too hard, the panel puckers. If the stitches are too loose, a full cup sags forward.
Size check: The panel should still be 11 in x 13.25 in (27.9 cm x 33.7 cm). The tops of the cups should sit about 7.75 in (19.7 cm) above the bottom edge.
Final Blocking
- Weave in all ends, running each one through stitches of its own color.
- Mist the panel lightly, or steam it from above without touching the fabric.
- Pin the panel to 11 in x 13.25 in (27.9 cm x 33.7 cm) with straight sides and an even arch.
- Stuff each cup with a rolled towel to round it out and straighten the ribs.
- Let it dry completely, at least 12 hours.
- Unpin it and take out the towels.
Final Quality-Control Checklist
- Bases: 42 sts, about 3.75 in (9.5 cm) across, flat.
- Cups: 42 sts per round, straight ribs, 3-round cream rim.
- Panel: 35 sts wide and 46 rows before the border, with a symmetrical arch.
- Border: 152 sts in Rnd 1, 156 sts in Rnd 2, flat corners.
- Tab centered and secure.
- Cups level and touching, with a 0.75 in (1.9 cm) ledge below.
Troubleshooting
- Ribs slant: You’re working under the top loops. Put the hook between the two legs of the stitch instead.
- Cup too tight to work: Pull each loop up a little taller, or use a hook half a size larger for the cups only.
- Base cups or ruffles: If it cups, go up a hook size. If it ruffles, go down a size.
- Lopsided arch: Recount Rows 32–46. Each row has to decrease the same way at both ends.
- Border sides ripple: Skip 1 row end in every 15 on the straight sections.
- Cups lean forward: Sew the back of the base seam to the panel more firmly.
Care
Hand wash in cool water and roll the organizer in a towel to press out the water. Dry it flat with a rolled towel inside each cup.

Final Notes
Each measurement leads to the next. A gauge of 14 sts and 15 rows per 4 in (10.2 cm) gives a 42-stitch base 3.75 in (9.5 cm) across. That base fits a 42-stitch cup 12 in (30.5 cm) around. On the panel, 35 stitches make it 10 in (25.4 cm) wide and 46 rows make it 12.25 in (31.1 cm) tall. The border brings it to 11 in x 13.25 in (27.9 cm x 33.7 cm), which is wide enough for both cups side by side. Check each stage before you move on, and the pieces will fit together when you assemble them.
Happy crocheting!