
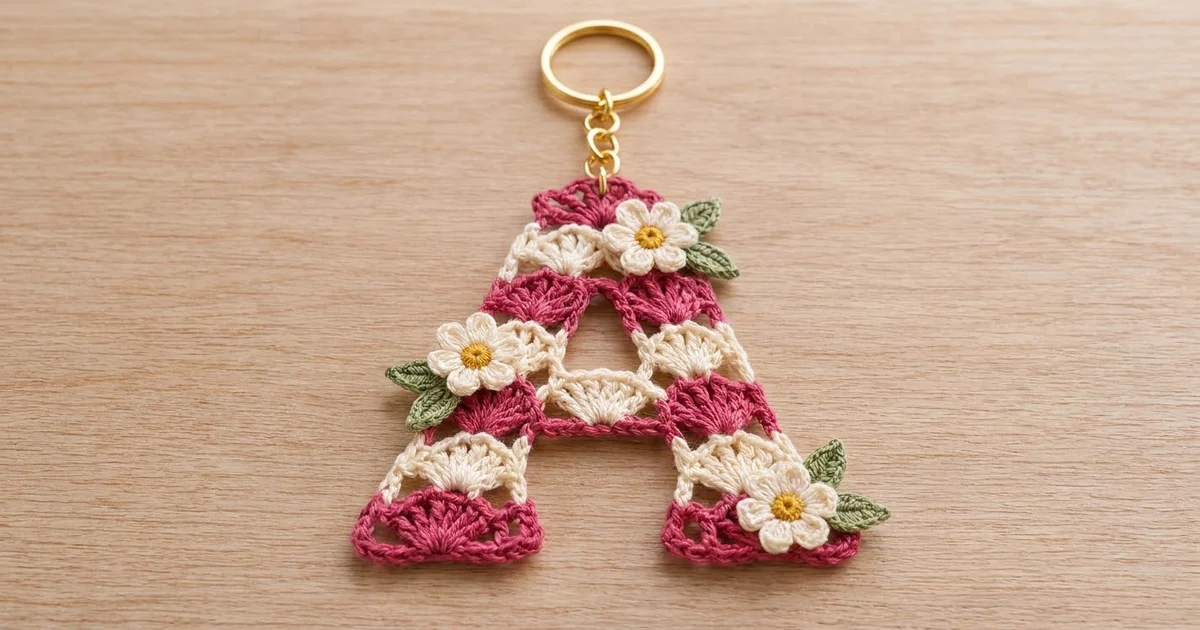
This little letter A is made of stacked shell fans in raspberry pink and cream, one stripe per row. A pink border outlines every edge. Three tiny cream daisies with yellow centers and green leaves sit on top, and a gold key ring hangs from the peak.
The style is cottage-sweet: warm pink, soft cream, a touch of green, and a bit of gold. The open fans keep the letter airy and light enough to carry on keys, a tote, or a backpack zipper.
All instructions use US crochet terms. The finished letter measures about 3.75 in x 3.75 in (9.5 cm x 9.5 cm), not counting the hardware.
You crochet two identical leg strips from the bottom up and then tilt them together into an A. A cream crossbar bridges the legs, and one pink apex row joins them at the top. A pink single crochet border and a small window trim finish the edges. Then you sew on the daisies and leaves and add the ring.
Finished Size and Construction
- Finished size: about 3.75 in x 3.75 in (9.5 cm x 9.5 cm)
- Skill level: Easy-intermediate
- Terminology: US crochet terms
- Yarn weight: Sport-weight (#2 fine) mercerized cotton
- Hook: 2.5 mm (US B-1/C-2)
- Number of pieces: 1 letter (two legs joined as you work), plus 3 daisies and 6 leaves sewn on
- Layout: two slanted legs, 1 crossbar, 1 apex row
- Leg strip size: 1.25 in x 3.0 in (3.2 cm x 7.6 cm)
- Size before border: 3.5 in x 3.5 in (8.9 cm x 8.9 cm)
- Border depth: 0.125 in (0.3 cm) on each side
Materials
Choose a smooth mercerized cotton. It gives the fans crisp edges and holds up to daily handling. Avoid fuzzy or stretchy yarns, because they blur the shells and the letter loses its shape.
- Color A, raspberry pink: 6 g, about 19 m
- Color B, cream: 5 g, about 16 m
- Color C, golden yellow: 1 g, about 3 m
- Color D, leaf green: 2 g, about 6 m
All quantities include a margin for swatching and tails.
Tools:
- 2.5 mm (US B-1/C-2) crochet hook
- Tapestry needle
- Small sharp scissors
- Gold split key ring, about 1 in (2.5 cm) across, with a short chain and jump ring
- 2 flat-nose pliers
- Rustproof pins and a foam blocking mat
- Optional: fabric stiffener or spray starch
Abbreviations (US Terms)
- ch – chain
- sl st – slip stitch
- sc – single crochet
- hdc – half double crochet
- dc – double crochet
- st(s) – stitch(es)
- sk – skip
- sp – space
- RS / WS – right side / wrong side
Special stitches:
- Fan: 7 dc in the same st.
- Joined dc: insert the hook through the st on the left leg, then through the st on the right leg, and complete the dc as usual. One st is worked through both legs at once.
Gauge and Checkpoints
Make one leg strip and measure it before you make the second.
- Gauge: one 9-st leg row = 1.25 in (3.2 cm) wide across the fan; 2 rows = 1.0 in (2.5 cm) tall.
- Checkpoint 1 (after Row 2): the strip is 1.25 in (3.2 cm) wide and 1.0 in (2.5 cm) tall.
- Checkpoint 2 (after Row 6): the strip is 1.25 in x 3.0 in (3.2 cm x 7.6 cm).
- Checkpoint 3 (after the apex row): the letter is 3.5 in x 3.5 in (8.9 cm x 8.9 cm).
- Checkpoint 4 (after the border): the letter is 3.75 in x 3.75 in (9.5 cm x 9.5 cm).
If your strip is too big, go down to a 2.25 mm hook. If it’s too small, go up to a 2.75 mm hook. Don’t change the stitch counts, because the border math depends on them.

Legs (Make 2)
Make both legs the same way. Row 1 is the RS. The color changes every row, so cut the yarn at the end of each row and leave a 4 in (10.2 cm) tail. You’ll crochet over these tails in the border, so there’s very little weaving in.
Foundation: With A, ch 10.
Row 1 (RS, A): Sc in 2nd ch from hook, sk next 3 ch, Fan in next ch, sk next 3 ch, sc in last ch. Fasten off. (9 sts: 2 sc, 7 dc)
Row 2 (WS, B): Join B in the last st. Ch 3 (counts as dc), turn, sk next 3 sts, Fan in next st (the center dc of the fan below), sk next 3 sts, dc in last st. Fasten off. (9 sts)
Each fan stacks directly on the fan below it. The dc at each end forms a straight post up the side of the strip.
Row 3 (RS, A): Join A in the last st. Ch 3 (counts as dc), turn, sk next 3 sts, Fan in center dc, sk next 3 sts, dc in top of turning ch. Fasten off. (9 sts)
Row 4 (WS, B): Work as Row 3 with B. (9 sts)
Row 5 (RS, A): Work as Row 3 with A. (9 sts)
Row 6 (WS, B): Work as Row 3 with B. (9 sts)
Each leg has 6 rows in the order pink, cream, pink, cream, pink, cream. Check it against Checkpoint 2.
Assembling the Shape
Lay both legs RS up with the foundation chains at the bottom. Tilt them together so their inner top corners (the top of Row 6) touch. Spread the bottoms until the inner base corners are 1.0 in (2.5 cm) apart, then pin.
The legs are straight, so the gap grows evenly from top to bottom. The top of Row 4 is two rows below the peak, a third of the way down to the base, which is six rows below. The gap there should be one-third of the base gap, or 0.33 in (0.8 cm).
Crossbar (B)
With RS facing, join B with a sl st in the top of the inner-edge st of Row 4 on the right leg. Ch 3, then sl st in the top of the inner-edge st of Row 4 on the left leg. Don’t turn. Work 7 dc in the ch-3 sp, then sl st in the same st where you joined on the right leg. Fasten off. (Bridge: 3 ch; fan: 7 dc)
The bridge holds the legs 0.33 in (0.8 cm) apart. The 7-dc fan opens upward into the window, which gives you the cream crossbar shell.
Apex Row (Row 7, A)
With RS facing, join A in the outer top corner st of Row 6 on the left leg. Count sts on each leg from its outer edge.
Row 7 (RS, A): Ch 1, sc in st 1, sk sts 2–4, hdc in st 5, sk sts 6–7, 2 dc in st 8, 3 Joined dc through st 9 of the left leg and st 1 of the right leg, 2 dc in st 2 of the right leg, sk sts 3–4, hdc in st 5, sk sts 6–8, sc in st 9. Fasten off.
(11 sts: 1 sc, 1 hdc, 7-dc fan [2 + 3 joined + 2], 1 hdc, 1 sc)
The joined dc lock the legs together at the peak. The 7 dc make one pink fan centered on the join. The hdc and sc at each end step down toward the outer edges. Check the letter against Checkpoint 3.
Daisies and Leaves
Daisy (Make 3)
Rnd 1 (C): Make a magic ring, ch 1, work 5 sc in the ring, and sl st in the first sc. Pull the ring closed and fasten off. (5 sc)
Rnd 2 (B): Join B in any sc. In the same sc, work (ch 2, 2 dc, ch 2, sl st). Sl st in the next sc, then work (ch 2, 2 dc, ch 2, sl st) in that same sc. Repeat from * to * 3 more times. Fasten off and leave a 6 in (15.2 cm) tail. (5 petals)
Each daisy is about 0.75 in (1.9 cm) across.
Leaf (Make 6)
With D, ch 5. Sl st in 2nd ch from hook, sc in next ch, hdc in next ch, sc in last ch. Ch 1, then rotate to work along the other side of the chain: sc in next ch, hdc in next ch, sc in next ch, sl st in last ch. Fasten off and leave a tail for sewing. (8 sts)
Each leaf is about 0.6 in (1.5 cm) long. Set the daisies and leaves aside until the letter is blocked.
Border
Border gauge: 3 sc per row end, which is 6 sc per inch (2.5 cm) along the sides. Work 1 sc in each foundation ch along the base. Crochet over the color tails as you go.
Border Round (A)
With RS facing, join A in the outer corner ch at the base of the left leg.
- Left leg base: 3 sc in corner ch, sc in next 7 ch, 3 sc in inner corner ch. (13 sc, corners included)
- Left leg inner edge, Rows 1–4 up: 3 sc in each row end. (12 sc)
- Crossbar underside: 4 sc worked under and around the ch-3 bridge. (4 sc)
- Right leg inner edge, Rows 4–1 down: 3 sc in each row end. (12 sc)
- Right leg base: 3 sc in inner corner ch, sc in next 7 ch, 3 sc in outer corner ch. (13 sc, corners included)
- Right leg outer edge, Rows 1–6 up: 3 sc in each row end. (18 sc)
- Apex top: sc in sc, 2 sc in the gap over the skipped sts, sc in hdc, 1 sc in the next gap, sc in next 3 dc, 3 sc in center dc, sc in next 3 dc, 1 sc in the gap, sc in hdc, 2 sc in the gap, sc in sc. (19 sc)
- Left leg outer edge, Rows 6–1 down: 3 sc in each row end. (18 sc)
Sl st in the first sc to join. Fasten off.
Round total: 13 + 12 + 4 + 12 + 13 + 18 + 19 + 18 = 109 sc
Window Trim (A)
With RS facing, join A on the left leg’s inner edge just above the crossbar.
- Work 3 sc in each row end of Rows 5 and 6 going up. (6 sc)
- Work 3 sc in each row end of Rows 6 and 5 on the right leg going down. (6 sc)
- Work sc in each of the 7 crossbar dc. (7 sc)
Sl st to join. (19 sc)
Why the Math Works
Each row is 0.5 in (1.3 cm) tall. Three sc fill that height at 6 sc per inch, so the edges lie flat. The outer leg edges are 3.0 in (7.6 cm) long and take 18 sc. The inner edges up to the crossbar are 2.0 in (5.1 cm) long and take 12 sc. The base gets 1 sc per chain, and the corner increases are counted only in the base sections, never again in the side counts. One round of sc adds 0.125 in (0.3 cm) per side, so 3.5 in (8.9 cm) becomes 3.75 in (9.5 cm).
Final Blocking
- Weave in any remaining tails through stitches of the same color.
- Dampen the letter and press it gently between towels.
- Pin it to 3.75 in x 3.75 in (9.5 cm x 9.5 cm), with pins at the base corners and the apex.
- Use a pin tip to spread each fan evenly.
- Check that the crossbar is level and that the base gap is about 0.75 in (1.9 cm) after the border.
- For a firmer keychain, brush on a little diluted stiffener.
- Let it dry completely.
- Sew on the daisies:
- Daisy 1: right leg, Row 6, near the apex, with leaves at its upper and lower right
- Daisy 2: left leg, Row 4, level with the crossbar, with leaves at its upper and lower left
- Daisy 3: right leg, Row 2, with leaves above and to its right
Tuck each leaf end under the petals, and stitch through the center and each petal base.
9. Open the jump ring and pass it through the center apex sc and the sc on each side of it. Hook on the chain and split ring, then close the jump ring fully.
Final Quality-Control Checklist
- Each leg has 6 rows of 9 sts in the stripe order pink, cream, pink, cream, pink, cream.
- The crossbar has a ch-3 bridge and a 7-dc cream fan.
- The apex row has 11 sts, with the joined dc at the peak.
- The border round has 109 sc and the window trim has 19 sc.
- The letter measures 3.75 in x 3.75 in (9.5 cm x 9.5 cm).
- All 3 daisies and 6 leaves are secure.
- The jump ring is closed and anchored through 3 sts.
Troubleshooting
- Fans ruffle: go down a hook size or tighten your dc.
- Strip is narrower than 1.25 in (3.2 cm): check that you skip exactly 3 sts on each side of every fan.
- Legs don’t meet neatly at the peak: re-pin so the inner top corners touch before you work Row 7.
- Border waves: use 2 sc per row end, and do the same on both legs.
- Border puckers: add 1 sc per side, spaced evenly, and match it on the other leg.
- Crossbar sags: tighten the bridge chains, or use ch 2 if your chains run large.
- Letter twists on the ring: anchor the jump ring through 3 sts, not 1.
Care
Remove the metal hardware, hand wash in cool water with mild soap, and dry flat. Reshape the fans while the piece is still damp.
Final Notes
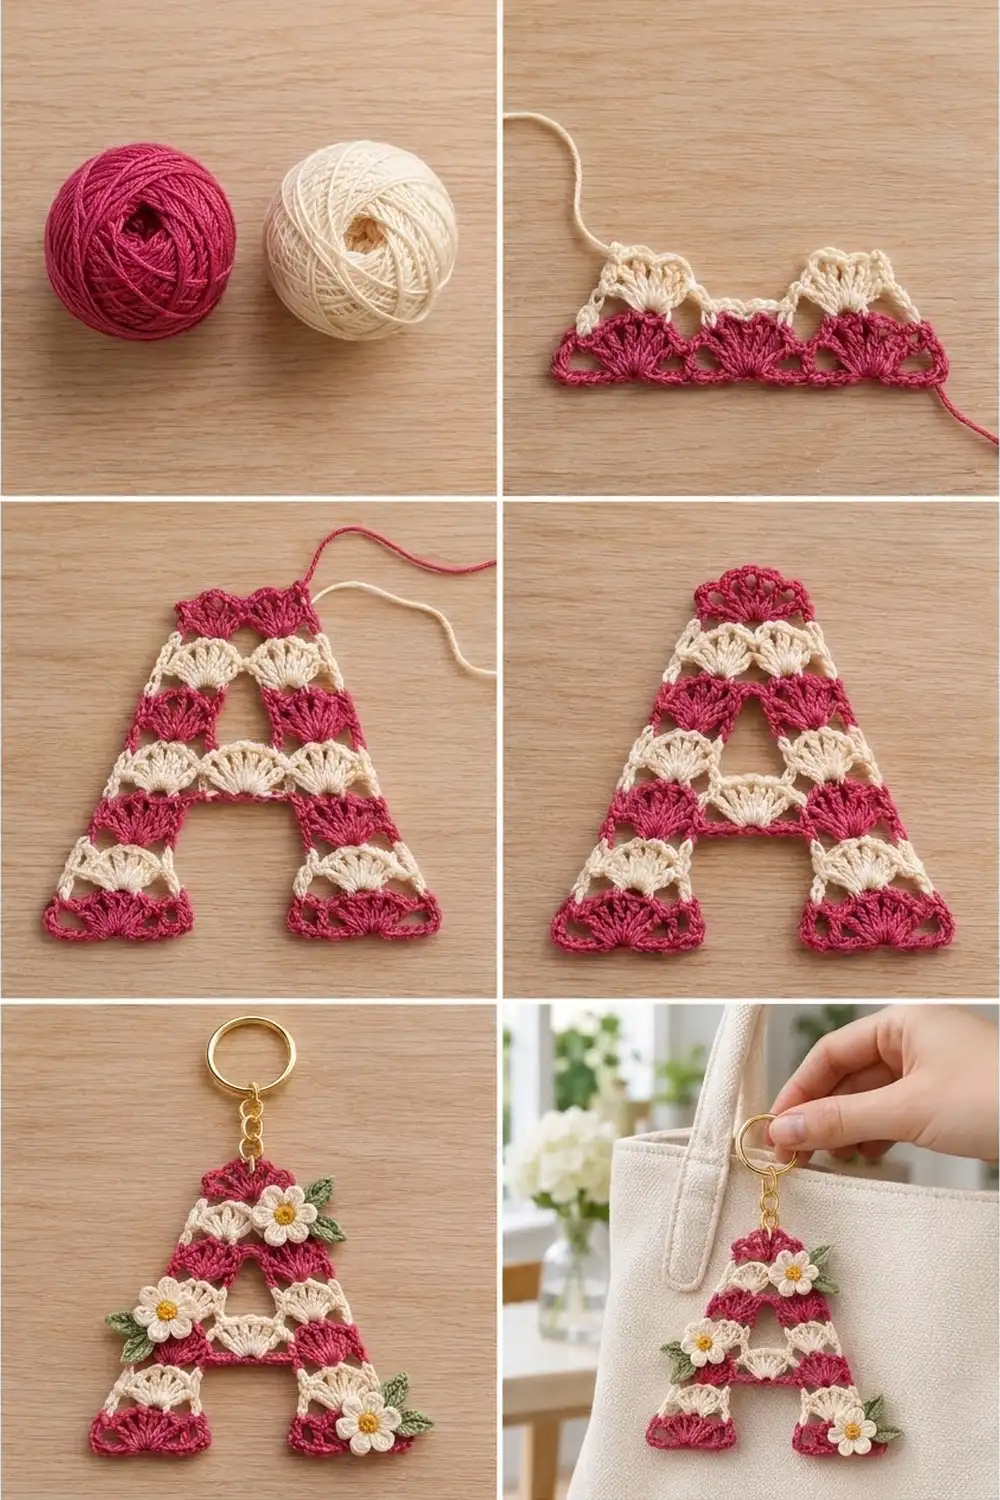
Each 9-st leg strip measures 1.25 in x 3.0 in (3.2 cm x 7.6 cm). Tilting the legs to a 1.0 in (2.5 cm) base gap and a 0.33 in (0.8 cm) crossbar gap shapes the A. The apex row brings the letter to 3.5 in x 3.5 in (8.9 cm x 8.9 cm), and the 109-sc border adds 0.125 in (0.3 cm) per side for a finished 3.75 in x 3.75 in (9.5 cm x 9.5 cm). Add three daisies and a gold ring, and your initial is ready to clip on.
Happy crocheting!