
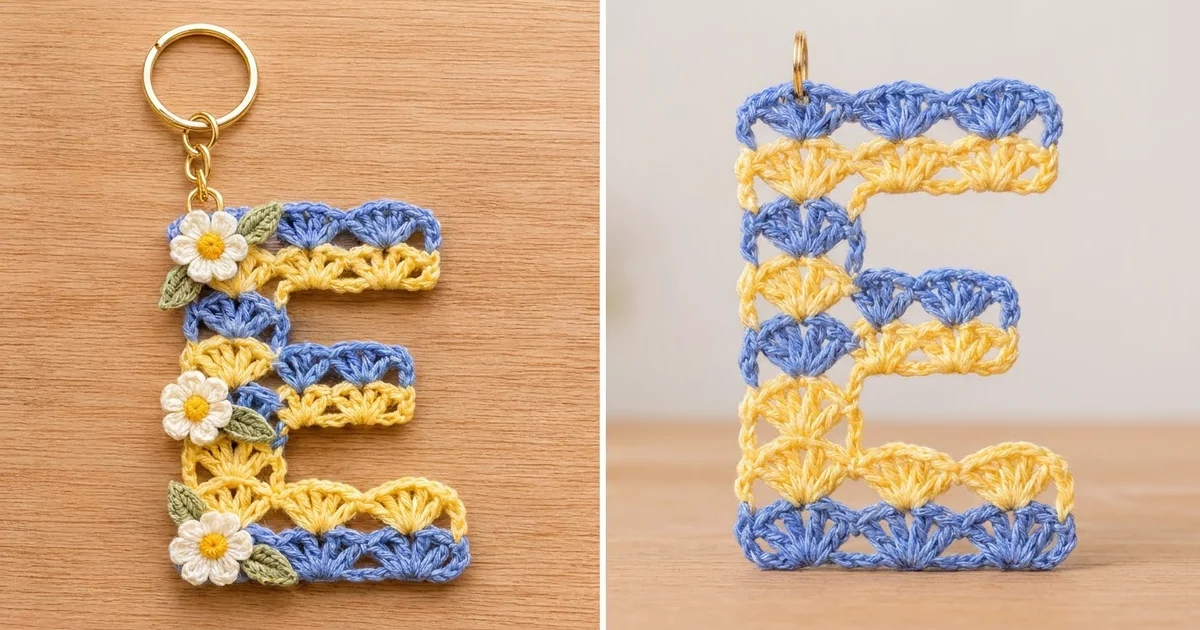
This little letter E is a bag charm with plenty of character. Rows of fan-shaped shells alternate between cornflower blue and soft butter yellow. Three white daisies with sunny centers and sage green leaves run down the spine, and a gold split ring lets you clip it onto a handbag, backpack, or keys.
The letter is worked flat as one single piece in shell-stitch rows. It has 9 striped rows that start and end with blue. The daisies and leaves are tiny separate appliqués that you sew onto the left side before you add the hardware.
All instructions use US crochet terms. The finished letter measures about 2.75 in (7.0 cm) wide by 3.6 in (9.1 cm) tall, not counting the hardware.
Construction is simple. The bottom arm is worked on a foundation chain, and the spine rows cover only the left 7 stitches. Each remaining arm is added with a short chain extension at the start of a row. You cut the yarn after every row, which keeps the color changes clean and lets you start each row exactly where the shape needs it.
Finished Size and Construction
- Finished size: 2.75 in (7.0 cm) wide x 3.6 in (9.1 cm) tall
- Skill level: Advanced beginner
- Terminology: US crochet terms
- Yarn weight: #2 sport-weight cotton
- Hook: 2.75 mm (US C-2)
- Number of pieces: 1 letter, plus 3 daisy and 5 leaf appliqués
- Layout: One letter E, 9 rows, 19 columns at its widest
- Piece size: Spine 1 in (2.5 cm) wide; middle arm 1.9 in (4.8 cm) wide; top and bottom arms 2.75 in (7.0 cm) wide
- Size before border: 2.75 in x 3.6 in (7.0 cm x 9.1 cm)
- Border depth: 0 in (0 cm); there’s no border round, only an edge finish
Materials
Smooth mercerized cotton gives crisp shells and holds up to the handling a keychain gets. Acrylic also works, but the fans will look softer.
- Cornflower blue (A): 5 g, about 10 m (11 yd)
- Butter yellow (B): 4 g, about 8 m (9 yd), including the daisy centers
- White (C, petals): 2 g, about 4 m (4.5 yd)
- Sage green (D, leaves): 1 g, about 2 m (2 yd)
Tools:
- 2.75 mm (US C-2) crochet hook
- Tapestry needle with a small eye
- Scissors and rust-proof pins
- 1 in (2.5 cm) gold split keyring with about 1.25 in (3.2 cm) of chain
- One 6 mm gold jump ring and two pairs of flat-nose pliers
- Optional: spray starch or light fabric stiffener
All quantities include a margin of about 30 percent for swatching and weaving in ends.
Abbreviations (US Terms)
- ch: chain
- sl st: slip stitch
- sc: single crochet
- hdc: half double crochet
- dc: double crochet
- st(s): stitch(es)
- RS / WS: right side / wrong side
- col: column
Special stitches
- Shell: 5 dc in the same stitch.
- Half shell: 3 dc in the same stitch. At the start of a row, work it as ch 3 (counts as 1 dc) and 2 dc in the same stitch.
- Standing sc: With a slip knot on your hook, insert the hook into the stitch and complete a sc.
Column numbering: With the RS facing, col 1 is the outer (left) edge of the spine and col 19 is the tip of the long arms. The spine covers cols 1–7, and the middle arm reaches col 13. Every key stitch falls on col 1, 4, 7, 10, 13, 16, or 19.
Gauge and Checkpoints
Gauge: Rows 1–2 form a strip of 19 sts that measures 2.75 in (7.0 cm) wide and 0.8 in (2.0 cm) tall. Each row is about 0.4 in (1.0 cm) tall.
Use Rows 1–2 as your test piece. If they match the gauge, keep going, because the swatch is the start of the letter.
Checkpoints (measure flat):
- After Row 2: 2.75 in (7.0 cm) wide, 0.8 in (2.0 cm) tall
- After Row 4: spine 1 in (2.5 cm) wide, height 1.6 in (4.1 cm)
- After Row 6: middle arm 1.9 in (4.8 cm) wide, height 2.4 in (6.1 cm)
- After Row 7: height 2.8 in (7.1 cm)
- After Row 9: 2.75 in x 3.6 in (7.0 cm x 9.1 cm)
Too big? Switch to a 2.5 mm hook. Too small? Switch to a 3.0 mm hook. Being off by up to 0.25 in (0.6 cm) is fine. Anything more will make the daisies look out of scale.
Letter E Pattern
Cut the yarn after every row and leave a 4 in (10.2 cm) tail.
Row 1 (blue, RS): Ch 20. Sc in 2nd ch from hook (col 19). Skip 2 ch, shell in next ch, skip 2 ch, sc in next ch; repeat from * 2 more times. The last sc lands at col 1. (19 sts: 3 shells + 4 sc)* Fasten off.
Row 2 (yellow, WS): Turn. Join yellow with sl st in the sc at col 1. Ch 3, 2 dc in the same st. Sc in center dc of next shell (col 4), shell in next sc (col 7), sc in center dc (col 10), shell in next sc (col 13), sc in center dc (col 16), 3 dc in last sc (col 19). (19 sts: 2 half shells + 2 shells + 3 sc) Fasten off. The bottom arm is now complete.
Row 3 (blue, RS, spine): Turn. Make a standing sc in the center dc of the shell at col 7. Skip 2 sts, shell in the sc at col 4, skip 2 sts, sc in the top of the ch-3 at col 1. (7 sts) Fasten off. Cols 8–19 of Row 2 stay unworked.
Row 4 (yellow, WS): Turn. Join yellow with sl st in the sc at col 1. Ch 3, 2 dc in the same st, sc in center dc of shell (col 4), 3 dc in last sc (col 7). (7 sts) Fasten off.
Row 5 (blue, RS, middle arm): Turn. Join blue with sl st in the last dc at col 7, then ch 7 and lay the chain to the right. Sc in 2nd ch from hook (col 13), skip 2 ch, shell in next ch (col 10), skip 2 ch, sc in the joining st (col 7), skip 2 sts, shell in the sc at col 4, skip 2 sts, sc in top of ch-3 (col 1). (13 sts: 6 on the chain + 7 on the spine) Fasten off.
Row 6 (yellow, WS): Turn. Join yellow with sl st in the sc at col 1. Ch 3, 2 dc in the same st, sc in center dc (col 4), shell in sc (col 7), sc in center dc (col 10), 3 dc in last sc (col 13). (13 sts) Fasten off.
Row 7 (blue, WS, spine): Do not turn; keep the WS facing. Make a standing sc in the top of the ch-3 at col 1. Skip 2 sts, shell in the sc at col 4, skip 2 sts, sc in the center dc at col 7. (7 sts) Fasten off. Cols 8–13 of Row 6 stay unworked.
Row 8 (yellow, RS, top arm): Turn. Join yellow with sl st in the sc at col 7, then ch 15 and lay the chain to the right. Work 2 dc in 4th ch from hook (col 19). The 3 skipped ch count as 1 dc, so this makes a half shell. Skip 2 ch, sc in next ch (col 16), skip 2 ch, shell in next ch (col 13), skip 2 ch, sc in next ch (col 10), skip 2 ch, shell in the joining st (col 7), skip 2 sts, sc in center dc (col 4), skip 2 sts, 3 dc in the sc at col 1. (19 sts: 12 on the chain + 7 on the spine) Fasten off.
Row 9 (blue, WS): Turn. Make a standing sc in the last dc at col 1. Skip 2 sts, shell in next sc, skip 2 sts, sc in center dc of next shell; repeat from * once more. Skip 2 sts, shell in next sc (col 16), skip 2 sts, sc in the top of the skipped ch-3 (col 19). (19 sts: 3 shells + 4 sc)* Fasten off.
Count check: Rows 1, 2, 8, and 9 have 19 sts. Rows 5 and 6 have 13 sts. Rows 3, 4, and 7 have 7 sts. That gives 5 blue rows and 4 yellow rows. Each width is a 6-st repeat plus 1, so every arm tip ends on a sc or a half shell.
Daisy Appliqués (make 3)
Center (yellow): Make a magic ring. Ch 1, work 6 sc in the ring, then sl st to the first sc. (6 sc) Fasten off.
Petals (white): Join white with sl st in any sc. (Ch 2, 2 dc, ch 2, sl st) all in the same sc, then sl st in next sc; repeat from * 5 more times, with the final sl st going into the first sc. (6 petals)* Fasten off and leave a 10 in (25.4 cm) tail. Each daisy measures about 0.8 in (2.0 cm) across.
Leaf Appliqués (make 5)
Leaf (green): Ch 6. Starting in the 2nd ch from hook, work sc, hdc, dc, hdc, sc. Rotate and work along the underside of the same chains: sc, hdc, dc, hdc, sc. Ch 2 for the tip, then sl st to the first sc. (10 sts + ch-2 tip) Fasten off and leave an 8 in (20.3 cm) tail. Each leaf measures about 0.7 in (1.8 cm) long.
Edge Finish (No Border Round)
The letter has no contrasting outline, so there’s no border round. The shells form their own scalloped edge, and the border depth is 0 in (0 cm).
Edge counts: The top edge has 19 sts (Row 9). The bottom edge has 19 foundation ch loops. The outer spine edge has 9 row ends, and each arm tip has 2 row ends. On the inner edges, the top of the bottom arm has 12 unworked sts. The middle arm has 6 ch underneath and 6 unworked sts on top, and the top arm has 12 ch underneath.
Why the math works: Each extension chain covers exactly 6 or 12 columns, which is one or two full repeats. That keeps every tip straight. Every inner corner sits on col 7, which has a stitch in every row, so there are no gaps where an arm meets the spine.
Tails: Weave each tail into a stripe of the same color for at least 1 in (2.5 cm), then go back the other way for 0.5 in (1.3 cm).
Final Blocking
- Mist the letter until it’s damp, not soaked.
- With the RS up, pin it to 2.75 in x 3.6 in (7.0 cm x 9.1 cm). Square the arm tips, and pin the middle arm to 1.9 in (4.8 cm).
- Use a pin to spread each shell into an even fan.
- If you want a firmer charm, add a light coat of starch or stiffener. Let it dry for at least 4 hours.
- Pin the daisy petals open and let them dry flat.
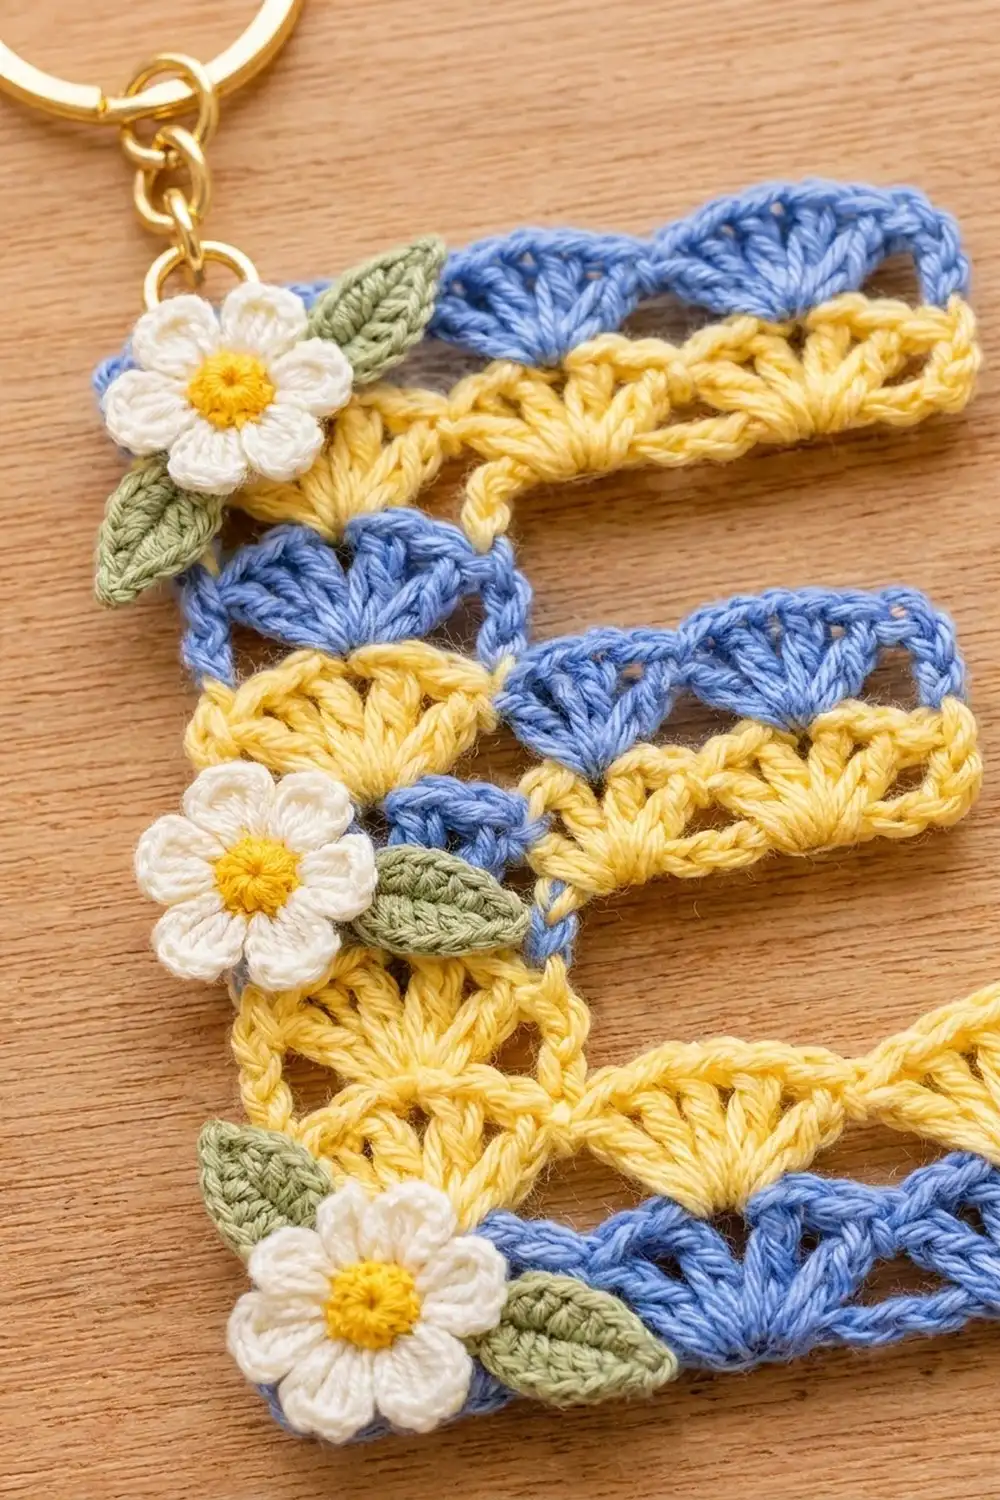
- Tuck the leaf bases under the daisies. The top daisy gets 2 leaves (pointing right and down-left), the middle daisy gets 1 (pointing right), and the bottom daisy gets 2 (pointing up-left and right).
- Sew the daisies over Rows 8–9, Rows 4–5, and Rows 1–2, all at cols 1–4. Each one should overhang the outer edge by 0.125 in (0.3 cm). Tack down the leaf tips with the green tails.
- Open the jump ring and thread it through col 1 of both Row 9 and Row 8. Add the keyring chain, then close the ring tightly.
Final Quality-Control Checklist
- Letter measures 2.75 in x 3.6 in (7.0 cm x 9.1 cm)
- 9 rows, 5 blue and 4 yellow, with blue at the top and bottom
- Stitch counts: 19 / 19 / 7 / 7 / 13 / 13 / 7 / 19 / 19
- Spine is 1 in (2.5 cm) wide, and all arm tips are square
- 3 six-petal daisies and 5 leaves sit along the spine
- All tails are woven in and reversed
- Jump ring is closed and passes through two rows
Troubleshooting
Arms slant upward: The extension chain is too tight. Chain loosely, or use a hook one size larger for the chain only.
Shells look crowded: Make sure you skip exactly 2 sts on each side of every shell.
Gaps at the inner corners: Work into col 7 in every row, including the joining stitch in Rows 5 and 8.
Daisies cup: Block them flat before sewing, or work the petal dc a little looser.
Letter bends when it hangs: Add stiffener, and make sure the jump ring goes through two rows.
Care
Hand wash in cool water with mild soap and dry flat. Take off the keyring first, and reshape the shells while the letter is damp.

Final Notes
Everything depends on the 6-stitch repeat. The 19-st strip measures 2.75 in (7.0 cm). The 7-st spine is 1 in (2.5 cm) wide, and the 13-st middle arm is 1.9 in (4.8 cm) wide. At 0.4 in (1.0 cm) per row, the 9 rows reach 3.6 in (9.1 cm). If your swatch matches, the arms, daisies, and gold ring will all fall into place.
Happy crocheting!