
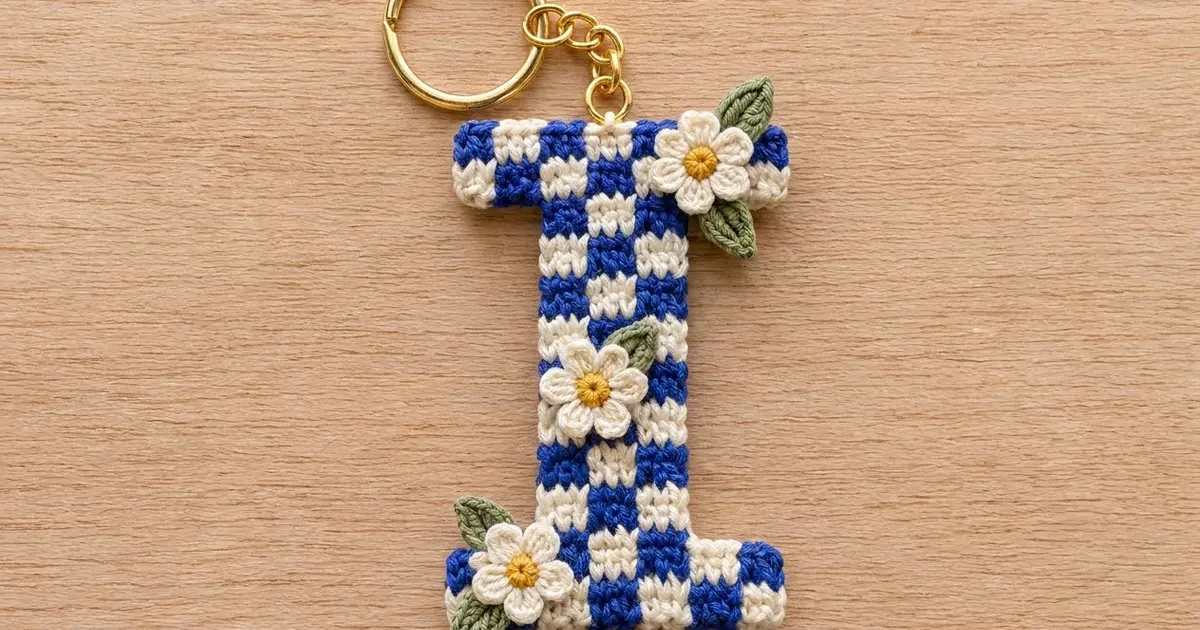
This little letter “I” keychain is a quick, satisfying make with a big personality. It is worked in crisp royal blue and cream checks, has a neat serif outline, and is finished with three tiny cream daisies with mustard-yellow centers and sage-green leaves. A gold key ring finishes it, so it can hang from a tote, a backpack or your keys.
The checkerboard comes from simple single-crochet tapestry work. Every check is 2 stitches wide and 2 rows tall, and the colors swap every two rows to make the classic gingham-style grid. The pattern uses US crochet terms throughout.
The finished letter measures 2.6 in (6.6 cm) wide and 4 in (10.2 cm) tall, not counting the hardware. The stem is 1.4 in (3.6 cm) wide.
The construction is easy to follow. You work the letter flat from the bottom up as one piece: first the bottom bar, then the stem, then you extend the row on both sides to form the top bar. A slip-stitch outline neatens the edges. Finally you make the daisies and leaves, sew them on and add the key ring.
Finished Size and Construction
- Finished size: 2.6 in (6.6 cm) wide x 4 in (10.2 cm) tall
- Skill level: Easy–Intermediate (basic tapestry color changes)
- Terminology: US crochet terms
- Yarn weight: Fingering/sport-weight (#1–#2) cotton
- Hook: 2.5 mm (US B/1 or C/2)
- Number of pieces: 1 letter, plus 3 daisy appliqués and 5 leaf appliqués sewn on
- Layout: Single letter “I”: bottom bar, centered stem, top bar
- Piece size: Bars 18 sts x 4 rows, which is 2.6 in x 0.5 in (6.6 cm x 1.3 cm). Stem 10 sts x 24 rows, which is 1.4 in x 3 in (3.6 cm x 7.6 cm).
- Size before border: 2.6 in x 4 in (6.6 cm x 10.2 cm)
- Border depth: Slip-stitch outline only, adding 0 in (0 cm) of measurable size
Materials
Use a smooth, tightly plied mercerized or combed cotton. Cotton shows the checks clearly, holds a firm shape for a keychain and resists fuzzing from handling. Avoid fuzzy or very stretchy yarns, because they blur the check edges.
- Royal blue: 5 g (17 m)
- Cream: 6 g (20 m), covering the letter, the edging and the daisy petals
- Mustard yellow: 1 g (3 m), for the daisy centers
- Sage green: 1 g (3 m), for the leaves
All quantities include a safety margin of roughly 30%.
Tools:
– 2.5 mm crochet hook
– Tapestry needle
– Scissors
– 4 stitch markers
– 1 gold split key ring, 1 in (2.5 cm), with a 1.5 in (3.8 cm) chain and jump ring
– 2 pairs of small pliers
– Blocking mat and pins
– Spray bottle
Abbreviations (US Terms)
- ch – chain
- sl st – slip stitch
- sc – single crochet
- hdc – half double crochet
- dc – double crochet
- st(s) – stitch(es)
- B – royal blue
- C – cream
- MR – magic ring
Special stitches
- Tapestry color change: Work the stitch before the color change until 2 loops are on the hook. Yarn over with the new color and pull through to finish the stitch. Carry the unused color along the top of the row and work over it, so it stays hidden inside the stitches.
- Foundation single crochet (fsc): Insert the hook into the base “chain” of the last stitch and pull up a loop. Yarn over and pull through 1 loop to make the new chain. Yarn over and pull through 2 loops. Each fsc adds 1 sc to the end of the row.
Gauge and Checkpoints
Gauge: 28 sc and 32 rows = 4 in (10.2 cm) in tapestry sc, which is 7 sts and 8 rows per inch.
The letter itself is your gauge swatch. Work Rows 1–4 and measure before continuing.
- After Row 4: Bottom bar is 2.6 in (6.6 cm) wide and 0.5 in (1.3 cm) tall.
- After Row 28: Total height is 3.5 in (8.9 cm). Stem is 1.4 in (3.6 cm) wide.
- After Row 32: Total height is 4 in (10.2 cm). Top bar is 2.6 in (6.6 cm) wide.
If your piece is too big, go down to a 2.25 mm hook. If it is too small or very stiff, go up to a 2.75 mm hook. Carrying a strand makes tapestry rows slightly taller than plain sc rows, so check the height as carefully as the width.
Color Bands
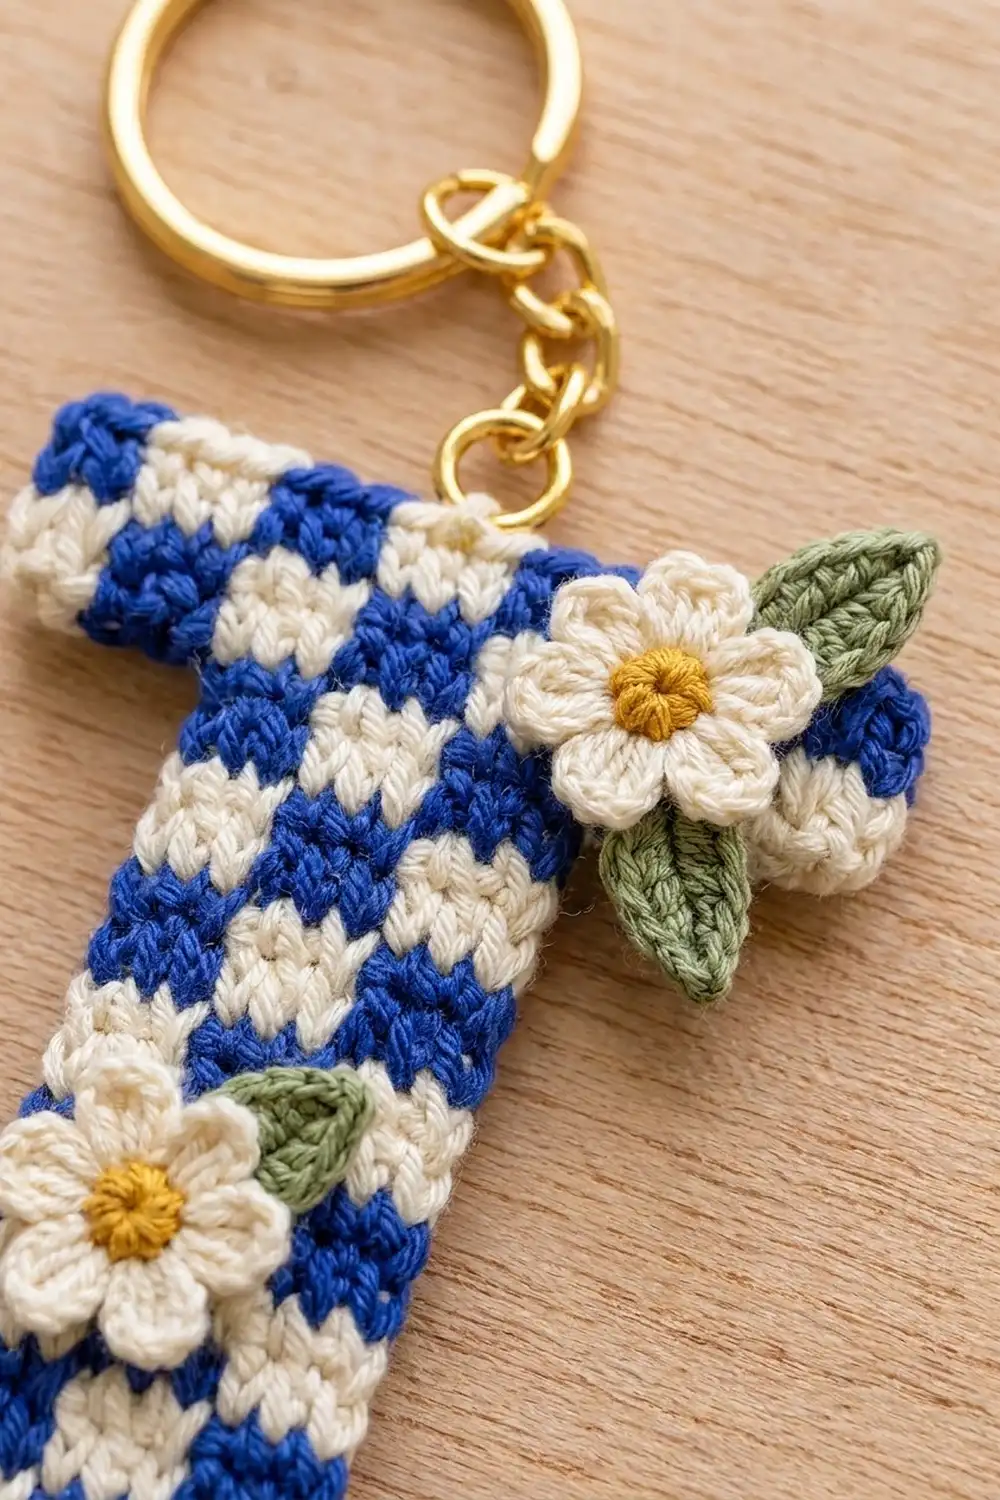
The checks are arranged in 2-row bands. In both bars, each band has 9 checks of 2 sts each.
- Band A (rows 1–2, 5–6, 9–10, and so on): 2B, 2C, 2B, 2C, 2B, 2C, 2B, 2C, 2B
- Band B (rows 3–4, 7–8, 11–12, and so on): 2C, 2B, 2C, 2B, 2C, 2B, 2C, 2B, 2C
The stem sits over checks 3 to 7, so its colors line up with the bars below and above it.
- Stem Band A: 2B, 2C, 2B, 2C, 2B
- Stem Band B: 2C, 2B, 2C, 2B, 2C
Every sequence reads the same in both directions, so you do not need to reverse anything when you turn the work.
Letter Pattern
Bottom Bar
Foundation: With B, ch 19.
Row 1 (Band A): Sc in the 2nd ch from the hook and in each ch across, following the Band A sequence and carrying C. Turn. (18 sc)
Row 2 (Band A): Ch 1 (does not count as a st). Sc in each st across in the Band A sequence. Turn. (18 sc)
Rows 3–4 (Band B): Ch 1, sc in each st across in the Band B sequence. Turn. (18 sc)
Checkpoint: the bar is 2.6 in x 0.5 in (6.6 cm x 1.3 cm). Place a marker in st 4 and st 15 of Row 4. These mark the stem edges.
Stem
Row 5 (Band A): Do not ch. Sl st in each of the first 4 sts. Ch 1, then sc in the next 10 sts (sts 5–14) in the Stem Band A sequence. Leave the last 4 sts unworked. Turn. (10 sc)
The 4 sl sts and the 4 unworked sts become the flat “shoulders” on top of the bottom bar.
Row 6 (Band A): Ch 1, sc in each st across in the Stem Band A sequence. Turn. (10 sc)
Rows 7–8 (Band B): Ch 1, sc in each st across in the Stem Band B sequence. Turn. (10 sc)
Rows 9–28: Keep working 10 sc per row, alternating 2 rows of Stem Band A with 2 rows of Stem Band B. Row 28 ends a Band B pair. (10 sc in each row)
Checkpoint: the stem is 24 rows, which is 3 in (7.6 cm) tall and 1.4 in (3.6 cm) wide. Total height is 3.5 in (8.9 cm). The edges should be straight. If the stem leans, you are adding or skipping a stitch at one end, so count each row.
Top Bar
Row 29 (Band A, conversion row): With B, ch 5. Then:
– Sc in the 2nd ch from the hook and the next 3 ch in the order 2B, 2C (4 new sc).
– Sc in each of the 10 stem sts in the Stem Band A sequence (10 sc, 1 per existing st).
– Make 4 fsc off the last st in the order 2C, 2B (4 new sc).
– Turn.
Count: 10 worked 1-per-existing-stitch + 8 added = 18 sc. Read across, the row is the full Band A sequence.
Row 30 (Band A): Ch 1, sc in each st across. Turn. (18 sc)
Rows 31–32 (Band B): Ch 1, sc in each st across in the Band B sequence. (18 sc) Do not fasten off C yet. Cut B, leaving a 4 in (10.2 cm) tail.
Checkpoint: the letter is 2.6 in x 4 in (6.6 cm x 10.2 cm). The top bar should match the bottom bar exactly.
Border (Slip-Stitch Outline)
Border gauge: 1 sl st in each st along top and bottom edges, and 1 sl st in each row end along the sides. A sl st outline lies flat and adds no measurable size. That is why the measurements before and after the border are the same.
Work the outline loosely with C, on the right side. Start at the top-left corner of Row 32 and work counterclockwise.
- Left side of the top bar: 1 sl st in each of the 4 row ends (Rows 32–29). (4)
- Underside of the top bar, left: 1 sl st in each of the 4 chains at the base of Row 29. (4)
- Left side of the stem: 1 sl st in each of the 24 row ends. (24)
- Left shoulder of the bottom bar: 1 sl st in each of the 4 sl sts from Row 5. (4)
- Left side of the bottom bar: 1 sl st in each of the 4 row ends. (4)
- Bottom edge: 1 sl st in each of the 18 foundation chains. (18)
- Right side of the bottom bar: 1 sl st in each of the 4 row ends. (4)
- Right shoulder of the bottom bar: 1 sl st in each of the 4 unworked sts of Row 4. (4)
- Right side of the stem: 1 sl st in each of the 24 row ends. (24)
- Underside of the top bar, right: 1 sl st in the base of each of the 4 fsc. (4)
- Right side of the top bar: 1 sl st in each of the 4 row ends. (4)
- Top edge: 1 sl st in each of the 18 sts of Row 32. (18)
Join to the first sl st. Total: 116 sl sts.
Why the math works: The top and bottom edges each have 18 sl sts, matching their 18 sc. Each long side has 4 + 24 + 4 = 32 row ends, matching the 32 rows. The four inner edges (2 shoulders and 2 undersides) each have 4 sl sts, matching the 4 sts by which each bar extends past the stem on each side. That gives 36 + 64 + 16 = 116.
You do not need extra corner stitches, because the corner sts are already counted on the top and bottom edges. Fasten off and weave in all ends along same-color stitches.
Daisies (Make 3)
Rnd 1: With yellow, make a MR. Work 5 sc into the ring. Pull the ring tight and sl st to the first sc. Fasten off yellow. (5 sc)
Rnd 2: Join C in any st. In each st, work (sl st, ch 2, 2 dc, ch 2, sl st). Join and fasten off, leaving an 8 in (20.3 cm) tail for sewing. (5 petals)
Each daisy measures about 0.75 in (1.9 cm) across.
Leaves (Make 5)
With sage green, ch 6. Sl st in the 2nd ch from the hook, then sc in the next ch, hdc in the next ch, sc in the next ch and sl st in the last ch. (5 sts)
Fasten off, leaving a 6 in (15.2 cm) tail. Each leaf is about 0.6 in (1.5 cm) long.
Assembly
- Top daisy: Sew it over the top-right corner of the top bar, so it overlaps the edge slightly. Tuck one leaf under it pointing up and right, and one pointing down and right.
- Middle daisy: Sew it on the stem about halfway up, slightly left of center. Tuck one leaf under its upper-right edge.
- Bottom daisy: Sew it over the bottom-left corner of the bottom bar. Tuck one leaf under it pointing up and left, and one pointing down and left.
- Stitch through the leaf bases first, then around the yellow center of each daisy. Pass the needle only through the back loops of the letter, so the stitches stay invisible from the front.
- Key ring: Open the jump ring with the pliers. Pass it through the top edge between sts 9 and 10 of Row 32, under two strands, then close it.
Final Blocking
- Lightly mist the letter and the appliqués with water until they are damp.
- Pin the letter face up to 2.6 in x 4 in (6.6 cm x 10.2 cm). Put one pin at each of the 12 outer corners.
- Check that both bars measure 2.6 in (6.6 cm) and the stem measures 1.4 in (3.6 cm), and that the stem is centered.
- Gently open each daisy petal with your fingertips.
- Let everything dry completely, about 4–6 hours, before removing the pins.
Final Quality-Control Checklist
- [ ] Both bars have 18 sts; every stem row has 10 sts
- [ ] There are 32 rows in total and 116 sl sts in the outline
- [ ] The letter measures 2.6 in x 4 in (6.6 cm x 10.2 cm)
- [ ] The checks line up vertically from the bottom bar through the top bar
- [ ] No carried strands show on the front
- [ ] The daisies and leaves are secure and placed top-right, mid-left and bottom-left
- [ ] The key ring is fully closed and centered on the top edge
Troubleshooting
- Carried color peeks through: Tension is too loose, or the strand is not lying along the top of the stitches. Keep the carried strand snug and close to the work.
- Piece curls: You are carrying too tightly. Relax the carried strand, and block the piece flat while damp.
- Checks look jagged: Change color on the last yarn over of the previous stitch, not at the start of the new stitch.
- Stem is off-center: Count the 4 sl sts in Row 5 and the 4 extensions in Row 29. Both sides need exactly 4.
- Outline ruffles: The sl sts are too loose, or you made extra sl sts. Follow the per-edge counts exactly.
Care
Hand wash in cool water with mild soap, press out the water in a towel and dry flat. Remove the metal key ring before washing.

Final Notes
The measurement chain is simple. A gauge of 7 sts and 8 rows per inch makes 18-st bars 2.6 in (6.6 cm) wide and a 10-st stem 1.4 in (3.6 cm) wide. The 32 rows give a height of 4 in (10.2 cm), and the 116-st slip-stitch outline keeps that size unchanged. Check your work at Rows 4, 28 and 32, and the letter will come out square, centered and ready for its daisies.
Happy crocheting!