

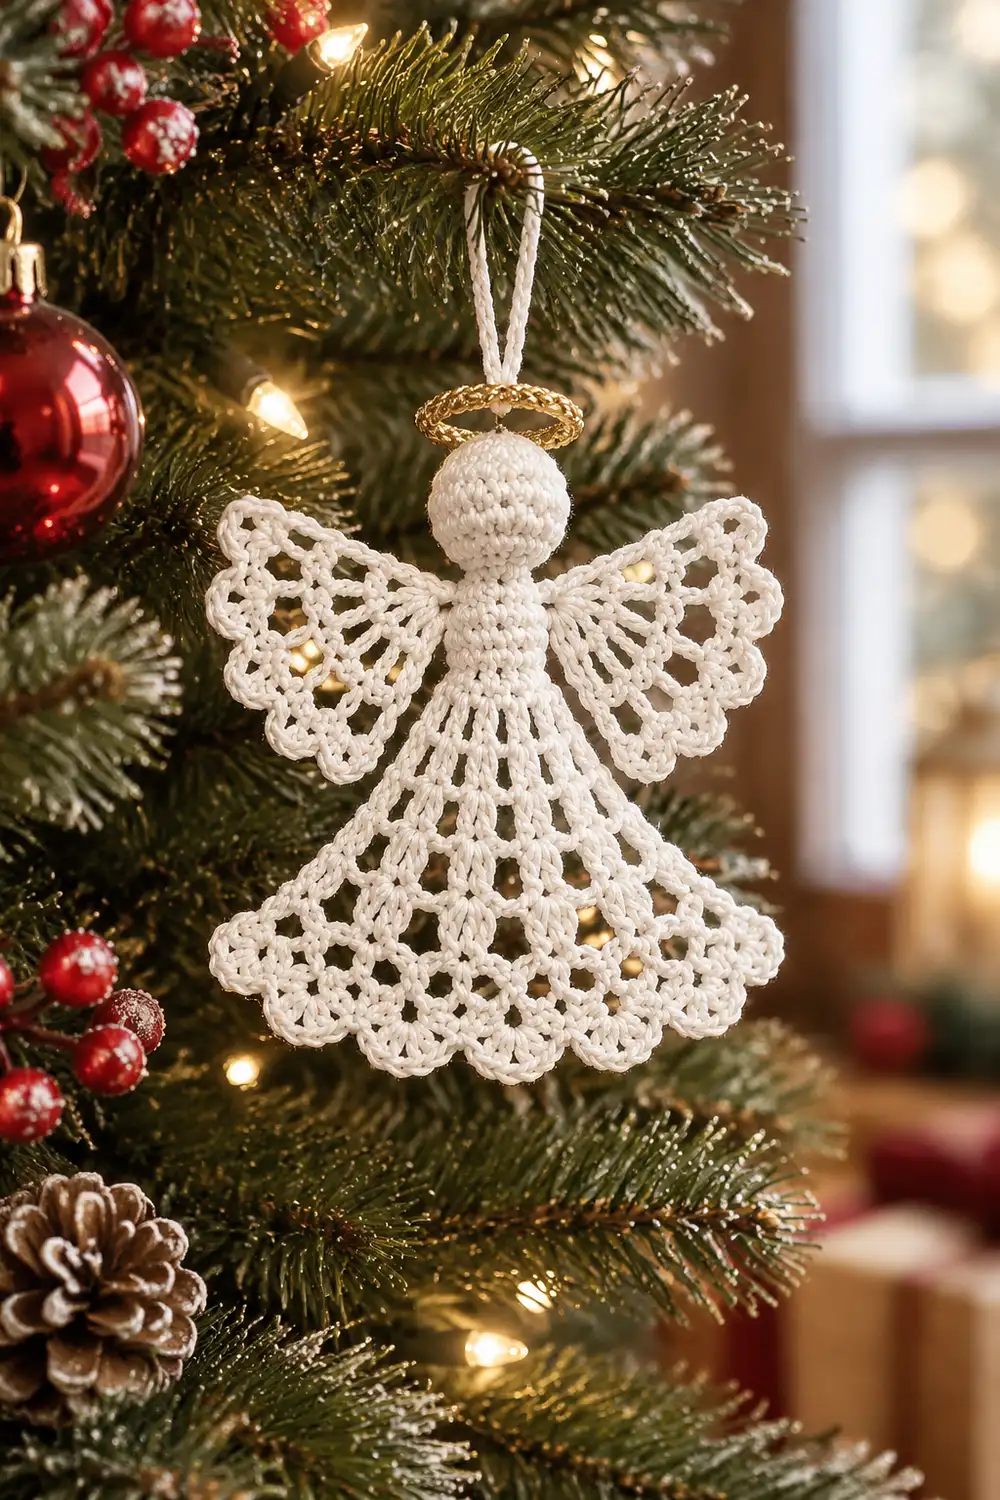
This little angel is a classic heirloom ornament. She is worked in cream cotton thread and has a softly stuffed round head and a slim lacy body made of vertical double crochet columns. Two pairs of wings sit at her sides, and her bell-shaped skirt flares into stacked scallops edged with picots. A gold metallic halo rings the base of her hanging loop.
The style is traditional thread lace: airy, symmetrical, and crisp after blocking. One color does all the main work. A few grams of gold metallic thread add the halo.
The pattern uses US crochet terms. The finished angel measures about 4.25 in (10.8 cm) from the top of the head to the hem, or about 5 in (12.7 cm) including the hanging loop. The skirt is about 4.5 in (11.4 cm) wide at the hem, and the wingspan is about 4 in (10.2 cm).
Construction is one continuous piece. You work the head in an amigurumi-style spiral, continue down through the neck and shoulders, then switch to joined rounds for the lacy body and skirt. The wings are worked directly into free front loops at the sides. The hanging loop and halo are crocheted straight onto the top of the head, so there is no sewing of separate parts.
Finished Size and Construction
- Finished size: 4.25 in (10.8 cm) tall without the loop, 5 in (12.7 cm) with it
- Skill level: Intermediate
- Terminology: US crochet terms
- Yarn weight: Lace (#0), size 10 cotton crochet thread
- Hook: 1.75 mm steel hook
- Number of pieces: 1, with wings, loop, and halo worked directly onto it
- Layout: Single ornament, no assembly
- Piece size: Head 0.75 in (1.9 cm) across; body 1 in (2.5 cm) wide flat; hem 4.5 in (11.4 cm) wide
- Size before border: 4 in (10.2 cm) tall, hem 4.25 in (10.8 cm) wide
- Border depth: 0.25 in (0.6 cm), one picot-scallop round
Materials
Use a mercerized cotton thread in size 10. It holds stitch definition and takes stiffener well. Avoid fuzzy or very stretchy fibers, because the lace columns will blur.
- Cream size 10 cotton thread: 8 g (about 42 m)
- Gold metallic crochet thread (size 10 equivalent): 1 g (about 3 m)
Quantities include a small margin for your gauge swatch and any ripping back.
Tools:
– 1.75 mm steel crochet hook
– Tapestry needle
– 2 stitch markers
– A small pinch of fiberfill, or a cotton ball
– Blocking board and rust-proof pins
– Fabric stiffener or heavy spray starch
– Small scissors
Abbreviations (US Terms)
- ch: chain
- sl st: slip stitch
- sc: single crochet
- dc: double crochet
- sc2tog: single crochet 2 together
- inc: 2 sc in the same stitch
- sk: skip
- sp: space
- st(s): stitch(es)
- BLO / FLO: back loop only / front loop only
- MR: magic ring
- rep: repeat
Special stitches:
– V-st: (dc, ch 2, dc) in the same space.
– Shell: the stated number of dc worked in the same stitch or space.
– Picot (p): ch 3, then sl st in the 3rd ch from the hook.
Gauge and Checkpoints
Gauge:
– Double crochet: 9 dc and 3 dc rounds = 1 in (2.5 cm)
– Single crochet in the head: 11 sc and 12 rounds = 1 in (2.5 cm)
Test one piece first. Work the head and Rounds 12–17, then measure before you continue.
- After Round 11: The stuffed head is about 0.75 in (1.9 cm) across, with a circumference of about 2.2 in (5.6 cm).
- After Round 14: The shoulders measure 0.8 in (2.0 cm) wide when laid flat.
- After Round 17: The body is 1 in (2.5 cm) wide flat. The total height from the top of the head is 2 in (5.1 cm).
- After Round 23: The angel is 4 in (10.2 cm) tall, and the hem is 4.25 in (10.8 cm) wide flat.
- After the border: The angel is 4.25 in (10.8 cm) tall, and the hem is 4.5 in (11.4 cm) wide.
If your piece measures more than about 0.25 in (0.6 cm) too big at any checkpoint, go down to a 1.5 mm hook. If it is too small, go up to a 2.0 mm hook. Skirt width matters most, so recheck after Round 20.
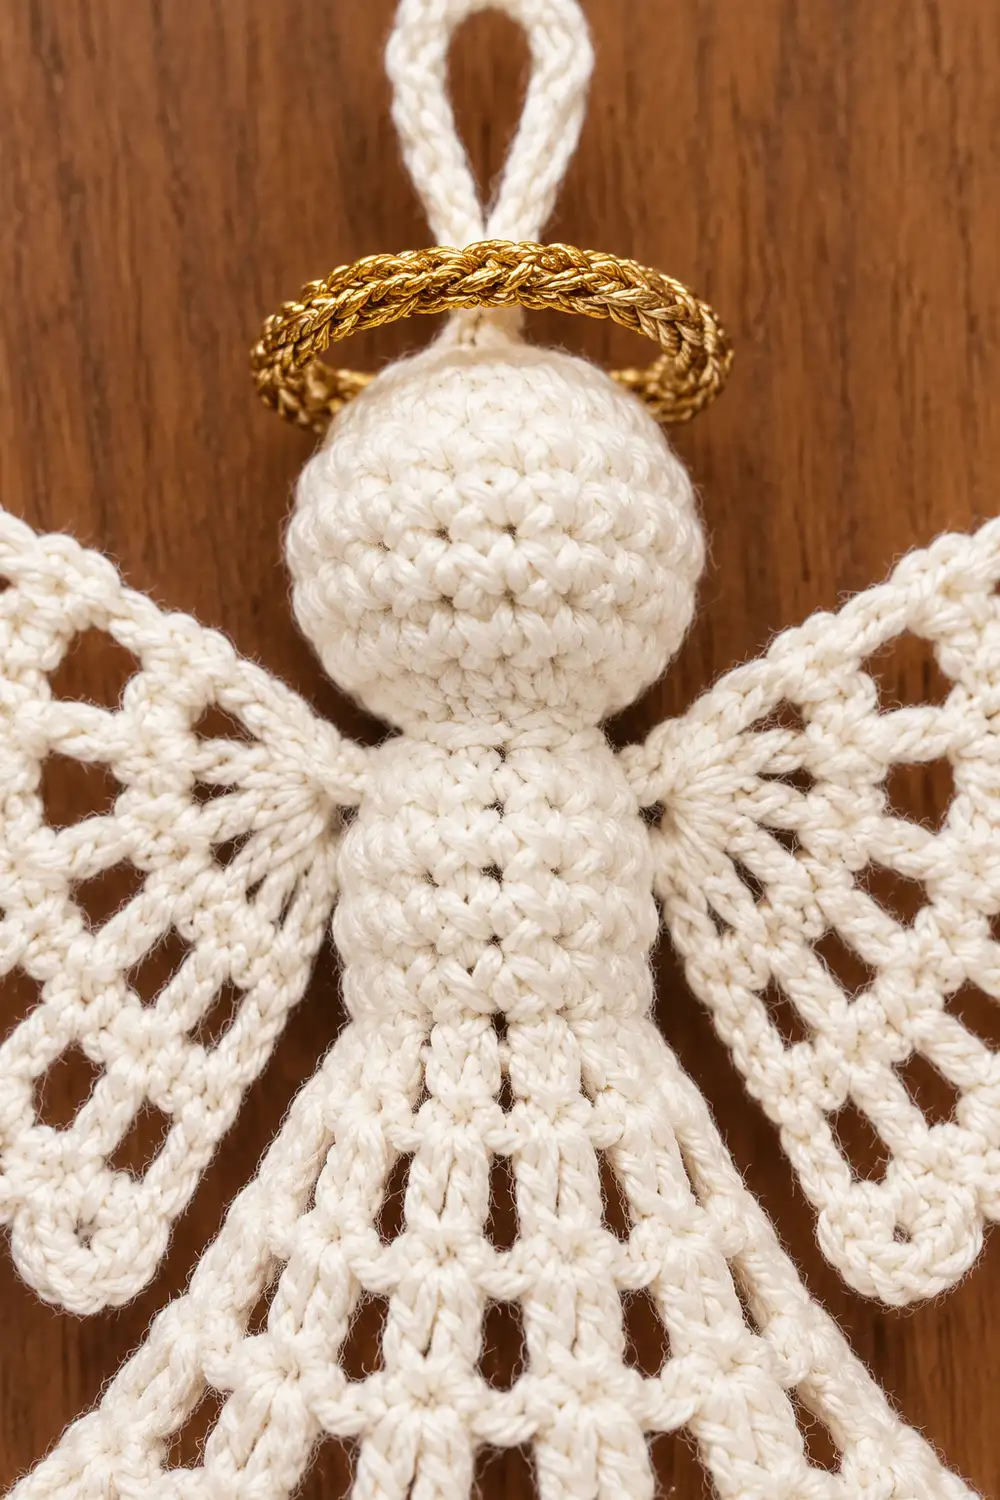
Head (Rounds 1–11)
Work in a continuous spiral without joining. Mark the first stitch of each round.
- R1: 6 sc in MR. (6)
- R2: inc in each st around. (12)
- R3: (sc, inc) 6 times. (18)
- R4: (sc 2, inc) 6 times. (24)
- R5–R8: sc in each st around. (24 per round)
- R9: (sc 2, sc2tog) 6 times. (18)
- R10: (sc, sc2tog) 6 times. (12)
Stuff the head firmly enough to make it round, but not so firmly that it bulges. Shape it into a sphere with your fingers.
- R11: sc2tog 6 times. (6)
The increases and decreases are spread evenly, so the head closes into a smooth dome at both ends instead of a cone.
Neck and Shoulders (Rounds 12–14)
Continue the spiral.
- R12 (neck): sc in each st around. (6)
- R13: inc in each st around. (12)
- R14: (sc, inc) 6 times. (18)
At the end of R14, place markers in the FLO of st 2 and st 11. These two stitches sit directly opposite each other, 9 stitches apart, and become the side folds where the upper wings attach.
Sl st in the first sc of R14 to finish the spiral.
Lacy Body (Rounds 15–17)
From here on, work joined rounds. The beginning ch-3 always counts as the first dc of a column.
R15 (BLO): ch 3, dc in BLO of the next st, ch 1, sk 1 st, *dc in BLO of the next 2 sts, ch 1, sk 1 st; rep from * 4 more times. Join with a sl st to the top of the ch-3.
– Count: 12 dc and 6 ch-1 sps, for 18 sts and 6 columns.
– The 2nd dc of column 1 sits above st 2, and the 2nd dc of column 4 sits above st 11. Move your markers to the front loops of these two dc. They are the lower-wing attachment points.
R16: ch 3, dc in BLO of the next dc, ch 1, *dc in BLO of the next 2 dc, ch 1; rep from * 4 more times. Join.
– Count: 12 dc and 6 ch-1 sps (18 sts).
– Working this round in back loops keeps the marked front loops free.
R17: Work as R16, but go through both loops. (18 sts)
The stitch count stays at 18 for all three rounds, so the body is a straight cylinder with 6 clean vertical columns.
Bell Skirt (Rounds 18–23)
The 6 columns continue all the way down the skirt. The shells between the columns build two scalloped layers. Each round’s total below is that round’s own complete count.
R18: ch 3, dc in the next dc, ch 3, sk the ch-1 sp, *dc in the next 2 dc, ch 3, sk the ch-1 sp; rep from * 4 more times. Join.
– Count: 12 dc and 6 ch-3 sps (30 sts).
R19: ch 3, dc in the next dc, ch 1, V-st in the ch-3 sp, ch 1, *dc in the next 2 dc, ch 1, V-st in the next ch-3 sp, ch 1; rep from * 4 more times. Join.
– Each repeat has 8 sts.
– Count: 48 sts.
R20 (first scallop layer): ch 3, dc in the next dc, ch 1, sk the ch-1 sp and the next dc, 5 dc in the V-st ch-2 sp, ch 1, sk the next dc and ch-1 sp, *dc in the next 2 dc, ch 1, sk the ch-1 sp and dc, 5 dc in the V-st sp, ch 1, sk the dc and ch-1 sp; rep from * 4 more times. Join.
– Each repeat has 9 sts.
– Count: 54 sts, made up of 42 dc and 12 ch-1 sps.
R21: ch 3, dc in the next dc, ch 2, sk the ch-1 sp and the 2 dc, (2 dc, ch 2, 2 dc) in the center (3rd) dc of the shell, ch 2, sk the 2 dc and the ch-1 sp, *dc in the next 2 dc, ch 2, sk the ch-1 sp and 2 dc, (2 dc, ch 2, 2 dc) in the center dc, ch 2, sk the 2 dc and ch-1 sp; rep from * 4 more times. Join.
– Each repeat has 12 sts.
– Count: 72 sts.
R22 (second scallop layer): ch 3, dc in the next dc, ch 2, sk the ch-2 sp and 2 dc, 7 dc in the center ch-2 sp, ch 2, sk the 2 dc and ch-2 sp, *dc in the next 2 dc, ch 2, sk the ch-2 sp and 2 dc, 7 dc in the center ch-2 sp, ch 2, sk the 2 dc and ch-2 sp; rep from * 4 more times. Join.
– Each repeat has 13 sts.
– Count: 78 sts, made up of 54 dc and 12 ch-2 sps.
R23: ch 3, dc in the next dc, ch 2, sk the ch-2 sp and 3 dc, (2 dc, ch 3, 2 dc) in the center (4th) dc of the shell, ch 2, sk the 3 dc and ch-2 sp, *dc in the next 2 dc, ch 2, sk the ch-2 sp and 3 dc, (2 dc, ch 3, 2 dc) in the center dc, ch 2, sk the 3 dc and ch-2 sp; rep from * 4 more times. Join.
– Each repeat has 2 + 2 + 7 + 2 = 13 sts.
– Count: 78 sts, made up of 36 dc, 6 ch-3 sps, and 12 ch-2 sps.
Check your measurements now: the angel should be 4 in (10.2 cm) tall and the hem 4.25 in (10.8 cm) wide flat.
Upper Wings (Make 2)
Each upper wing is worked in rows directly into a marked FLO of R14.
Join cream with a sl st in the marked front loop of st 2.
- Row 1: ch 4 (counts as dc + ch 1), (dc, ch 1) 2 times in the same loop, dc in the same loop. Turn.
- Count: 4 dc and 3 ch-1 sps.
Before you continue, check that Row 1 gives you a small fan. A correct Row 1 for this wing is: ch 4, (dc, ch 1) 3 times in the same loop, dc in the same loop. Use this version. It has 5 dc and 4 ch-1 sps.
- Row 2: ch 4 (counts as dc + ch 1), dc in the first ch-1 sp, ch 1, *dc in the next dc, ch 1, dc in the next ch-1 sp, ch 1; rep from * 2 more times, dc in the 3rd ch of the beginning ch-4. Turn.
- Count: 9 dc and 8 ch-1 sps.
- Row 3: ch 5 (counts as dc + ch 2), *dc in the next dc, ch 2; rep from * 6 more times, dc in the 3rd ch of the turning ch-4. Turn.
- Count: 9 dc and 8 ch-2 sps.
- Row 4 (shell edge): ch 1, sc in the first dc, *sk the ch-2 sp, 5 dc in the next dc, sk the ch-2 sp, sc in the next dc; rep from * 3 more times. Work the last sc in the 3rd ch of the turning ch-5.
- Count: 4 shells (20 dc) and 5 sc. Fasten off.
Repeat on the marked front loop of st 11. Each upper wing reaches about 1.5 in (3.8 cm) out from the shoulder.
Lower Wings (Make 2)
Join cream with a sl st in the marked front loop of the 2nd dc of column 1 on R15.
- Row 1: ch 5 (counts as dc + ch 2), (dc, ch 2) 2 times in the same loop, dc in the same loop. Turn.
- Count: 4 dc and 3 ch-2 sps.
- Row 2: ch 5 (counts as dc + ch 2), dc in the first ch-2 sp, ch 2, *dc in the next dc, ch 2, dc in the next ch-2 sp, ch 2; rep from * once more, dc in the 3rd ch of the beginning ch-5. Turn.
- Count: 7 dc and 6 ch-2 sps.
- Row 3 (openwork edge): ch 1, sc in the first dc, *ch 4, sc in the next dc; rep from * 5 more times. Work the last sc in the 3rd ch of the turning ch.
- Count: 7 sc and 6 ch-4 arches. Fasten off.
Repeat on column 4. Each lower wing reaches about 1 in (2.5 cm) and tucks just under its upper wing.
Border (Picot Scallop Hem)
Border gauge: Work the border at the same tension as the skirt. No density change is needed, because the border consumes R23’s stitches repeat by repeat.
R24: Join cream in the first dc of any column, or continue from R23 without fastening off. Then work:
*sc in each of the next 2 dc, 2 sc in the ch-2 sp, sk 2 dc, (dc, p) 4 times in the ch-3 sp, dc in the same sp, sk 2 dc, 2 sc in the ch-2 sp; rep from * 5 more times. Join and fasten off.
- Per repeat: 6 sc, 5 dc, and 4 picots.
- Front half (3 repeats): 18 sc, 15 dc, and 12 picots. The back half is identical.
- Total: 36 sc, 30 dc, and 24 picots.
Why the math works: Each R23 repeat has exactly 13 stitches: 2 column dc, a ch-2 sp, 2 dc, a ch-3 sp, 2 dc, and a ch-2 sp. The border uses every one of them:
- The 2 column dc become 2 sc.
- Each ch-2 sp takes 2 sc.
- The 4 dc that flank the shell top are skipped.
- The scallop sits in the ch-3 sp.
Six repeats match the 6 body columns, so the scallops land evenly centered under each shell layer. The border is not a 1-per-stitch conversion round. It replaces R23’s stitches with a fixed scallop unit.
Hanging Loop and Halo
Loop: Join cream with a sl st in the center of R1 at the top of the head. Ch 24, sl st in the same st, and fasten off. The loop stands about 0.75 in (1.9 cm) tall.
Halo:
1. Join the gold thread with a sl st in an R2 st just in front of the loop.
2. Ch 30.
3. Sl st in the R2 st directly behind the loop.
4. Sl st in each ch back across (30 sl st), then sl st into the starting st.
5. Fasten off.
Shape the halo into a ring about 0.7 in (1.8 cm) across.
Final Blocking
- Weave in all ends along the column dc so they stay hidden.
- Dip the body, skirt, and wings in fabric stiffener, or spray them heavily with starch. Keep the head mostly dry so it stays soft and round.
- Lay the angel on the board with the side folds at st 2 and st 11, so the columns center on the front.
- Pin the hem to 4.5 in (11.4 cm) wide. Put one pin in each picot and each scallop point.
- Pin each upper wing angled slightly upward, opening every shell. Pin each lower wing angled downward, opening every arch.
- Check the height: 4.25 in (10.8 cm) to the hem.
- Dab the halo with stiffener and prop it level. Let everything dry completely before unpinning.
Final Quality-Control Checklist
- [ ] The head is round and evenly stuffed, about 0.75 in (1.9 cm) across.
- [ ] The body shows 6 straight dc columns.
- [ ] Skirt counts are correct: 30, 48, 54, 72, 78, 78.
- [ ] The border has 6 scallops with 4 picots each.
- [ ] The upper wings have 4 shells each, and the lower wings have 6 arches each.
- [ ] The wings are symmetrical, attached at st 2 and st 11.
- [ ] Height is 4.25 in (10.8 cm), hem is 4.5 in (11.4 cm), and wingspan is about 4 in (10.2 cm).
- [ ] The loop is secure and the halo sits level.
Troubleshooting
- The skirt ruffles: Your tension is loose. Go down a hook size, or shorten the ch-2 spaces slightly as you work.
- The skirt cups inward: Your chains are too tight. Loosen them, or go up a hook size.
- The columns drift sideways: Make sure each round starts with ch 3 directly above the previous round’s first dc.
- The wings are uneven: Recheck the fold stitches. They must be exactly 9 stitches apart.
- The head is lumpy: Pull the stuffing into an even ball before working R11.
- The halo flops: Add the return row of sl sts and a little stiffener.
Care
Dust gently, or hand-rinse in cool water if needed. Re-stiffen, then reblock flat to the measurements above.
Final Notes
The measurement chain is simple to follow:
- Head: 0.75 in (1.9 cm)
- Height after the body: 2 in (5.1 cm)
- After the skirt: 4 in (10.2 cm) tall with a 4.25 in (10.8 cm) hem
- After the border: 4.25 in (10.8 cm) tall with a 4.5 in (11.4 cm) hem
- With the loop: 5 in (12.7 cm)
Keep the 6 columns aligned and count each repeat, and your angel will block into crisp, even lace.
Optional: Several angels in mixed colors make a lovely tree set. The pattern itself is one ornament.
Happy crocheting!