

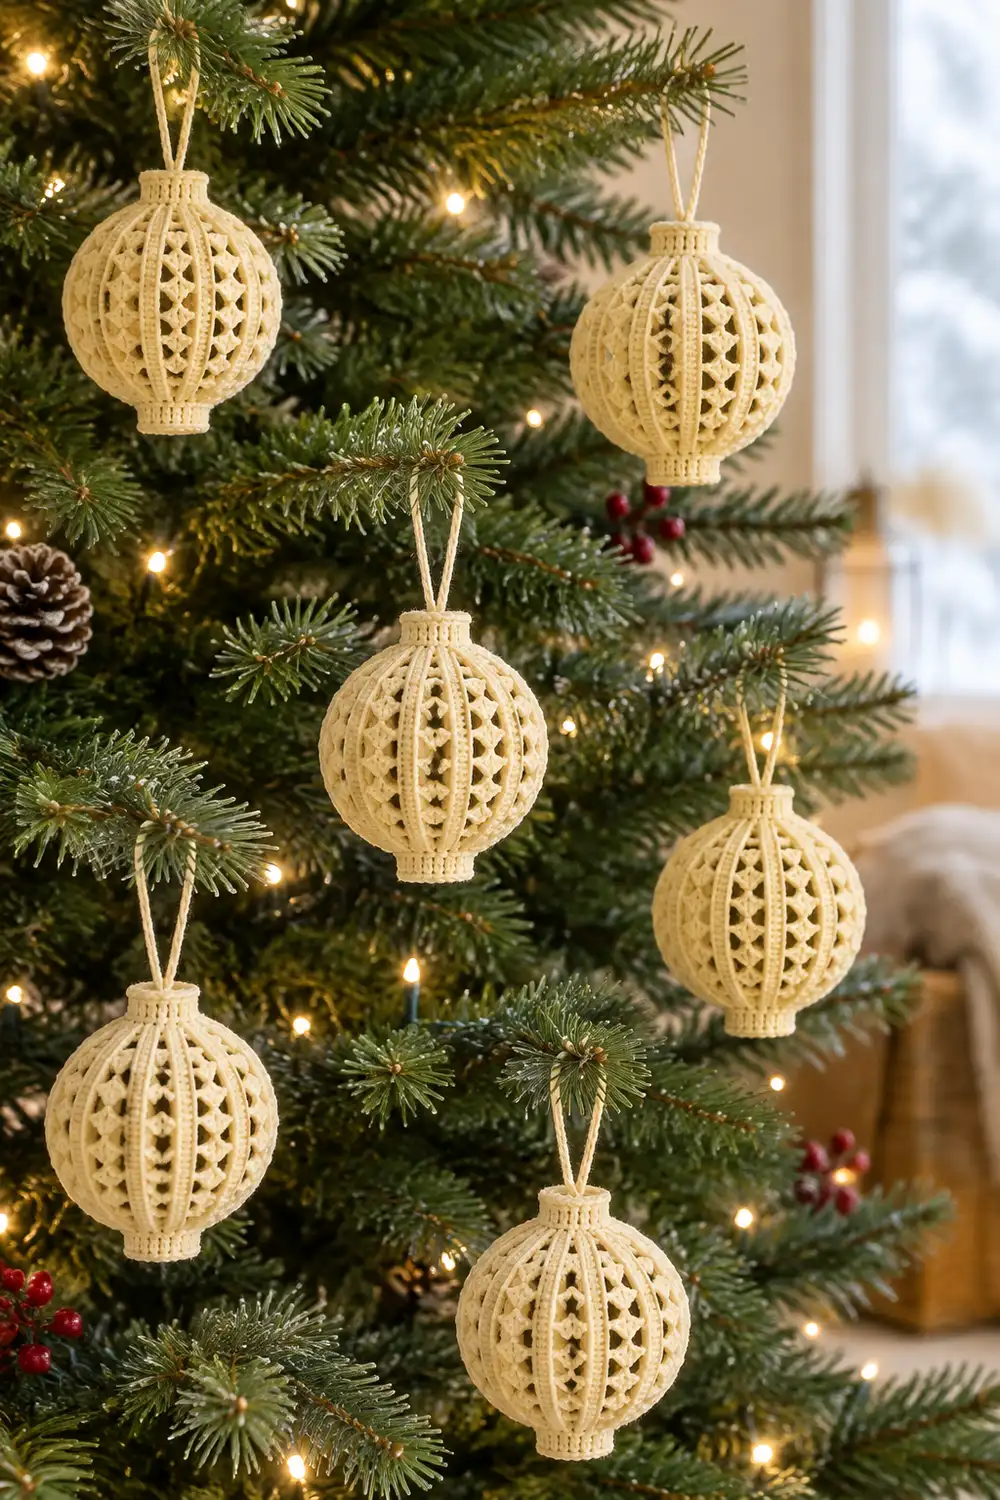
These little lace balls look delicate on the tree, yet each one is quick to make. Every ornament is a single round ball with vertical columns of solid stitches alternating with openwork panels of chain spaces. A small ribbed cap sits at the crown, and a cream yarn loop is used for hanging.
The ornaments are worked in cream or pale yellow cotton, so they glow softly against green branches and warm white fairy lights. The look is classic and a little vintage, like tiny lanterns. Make a set of matching ornaments and hang them all around the tree.
This pattern uses US crochet terms. Each finished ornament measures 2.25 in (5.7 cm) in diameter, which falls within the 2–2.5 in (5.1–6.4 cm) range of the ornaments shown. Height is about 2.75 in (7.0 cm) without the loop.
Each ball is worked in joined rounds from the bottom up. Rounds increase to the equator, stay even, and then decrease toward the neck, which gives a rounded sphere. The ribbed cap is worked straight off the neck. The ball is then stiffened over a small balloon so it holds its round shape.
Finished Size and Construction
- Finished size: 2.25 in (5.7 cm) diameter; about 2.75 in (7.0 cm) tall without the loop
- Skill level: Intermediate (small scale, post stitches)
- Terminology: US crochet terms
- Yarn weight: Fingering (#1 super fine) mercerized cotton
- Hook: 2.25 mm (B-1)
- Number of pieces: Multiple identical ornaments. Each ornament has 2 parts: the body with its integrated cap, and a chain hanging loop.
- Layout: Ornaments hang individually. They are never joined to each other.
- Piece size: 2.25 in (5.7 cm) diameter ball
- Size before border (cap): Body is 2.25 in (5.7 cm) across after blocking. The neck circumference is about 2.25 in (5.7 cm).
- Border (cap) depth: About 0.6 in (1.5 cm)
Materials
Choose a smooth mercerized cotton. Mercerized cotton shows stitch definition clearly and takes stiffener well. Avoid fuzzy or very stretchy yarns, because the lace panels will blur and the ball will sag.
Yarn:
– Cream: 4 g (15 m) per ornament, including the loop. For a set of 8 ornaments, have 40 g (148 m) on hand.
Tools:
– 2.25 mm (B-1) crochet hook
– Tapestry needle
– 2 stitch markers
– Fabric stiffener or heavy starch
– Small balloons (water-balloon size), 1 per ornament while drying
– Scissors
– Optional: 6 in (15.2 cm) of narrow cream ribbon to use instead of the chain loop
The set quantity includes about a 25% margin over the 32 g actually used by 8 ornaments. This margin covers your gauge swatch and any ripping back.
Abbreviations (US Terms)
- ch – chain
- sl st – slip stitch
- hdc – half double crochet
- dc – double crochet
- FPdc – front post double crochet: yarn over and insert the hook from front to back to front around the post of the stitch. Complete as a dc.
- BPdc – back post double crochet: yarn over and insert the hook from back to front to back around the post. Complete as a dc.
- MR – magic ring
- sk – skip
- sp – space
- st(s) – stitch(es)
- rep – repeat
Special stitch:
– V-st: (dc, ch 1, dc) in the same stitch or space.
Gauge and Checkpoints
Gauge: 14 dc and 7 dc rows = 2 in (5.1 cm), worked flat.
The fastest true test is to make one ornament body first, through Round 11, and check it against these checkpoints:
- After Rnd 1: The flat circle measures 0.6 in (1.5 cm) across.
- After Rnd 3: The shallow cup measures 1.25 in (3.2 cm) across when pressed flat.
- After Rnd 7 (equator): Relaxed circumference is 6.75 in (17.1 cm). It stretches to 7 in (17.8 cm) over the balloon.
- After Rnd 11 (neck): Neck circumference is about 2.25 in (5.7 cm), and the opening is about 0.75 in (1.9 cm) across.
If your piece is too big, go down to a 2.0 mm hook. If it is too small, go up to a 2.5 mm hook. Change only the hook and keep all stitch counts the same. Slight negative ease at the equator is intentional, because it keeps the lace taut over the form.
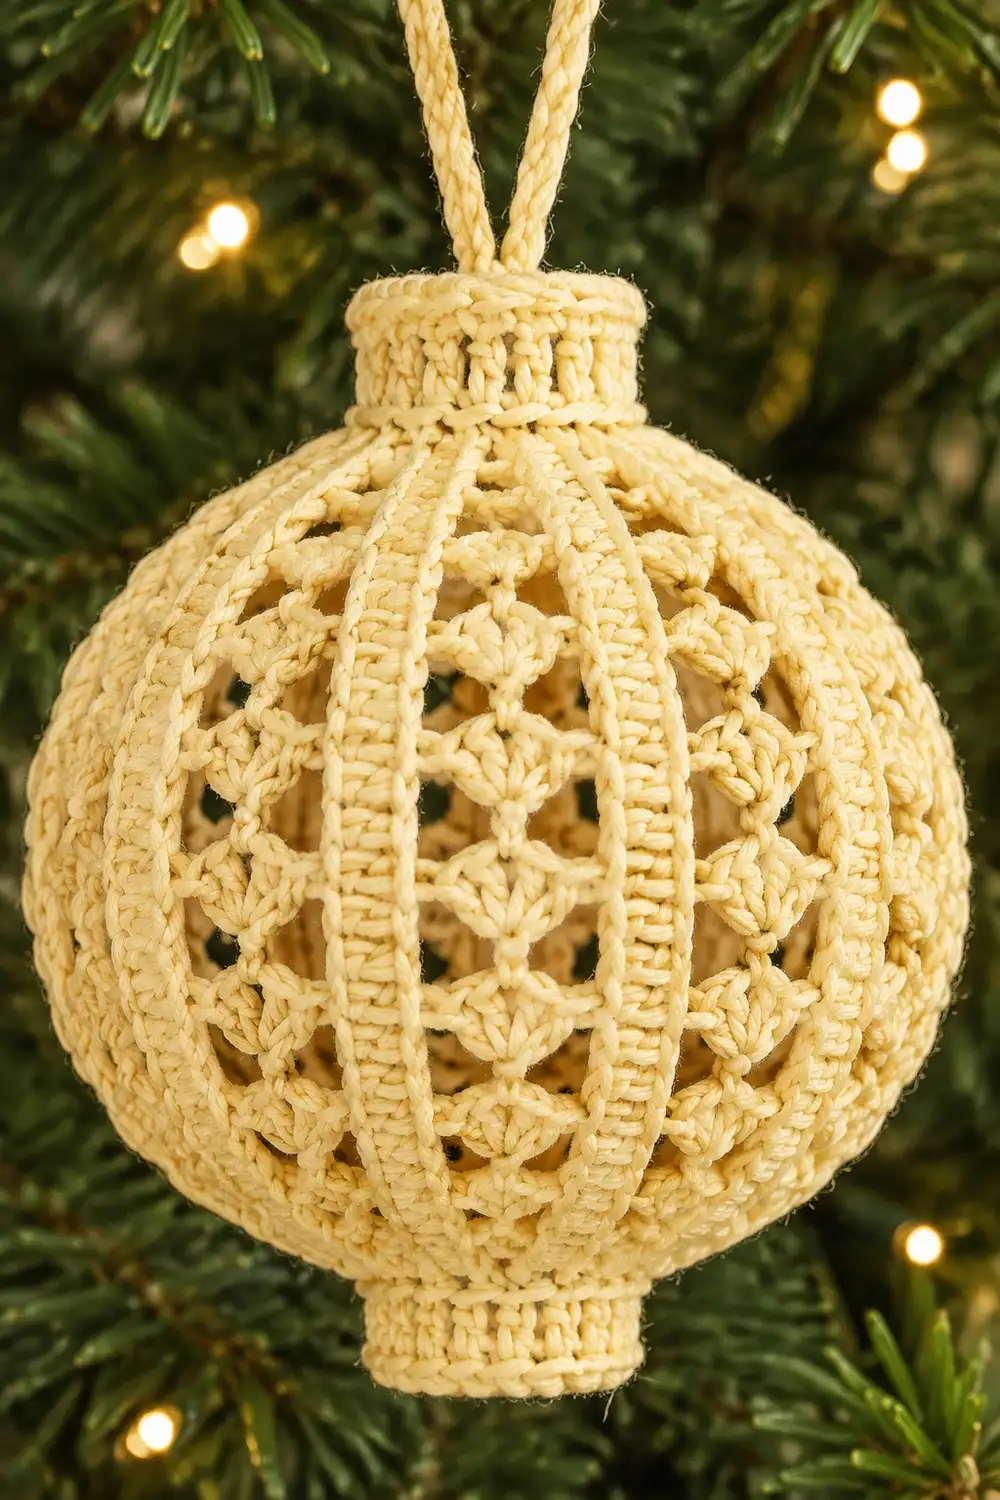
Ornament Body
The body has 8 repeats around. Each repeat is one rib (2 solid dc) and one panel (chain spaces and V-sts).
Every round starts at a rib. Because of this, the ribs stack straight up the ball.
Turning chains: In Rnds 1–10, ch 3 counts as the first dc. In Rnd 11, ch 2 does not count.
Rnd 1: MR, ch 3, 15 dc in the ring. Sl st to the top of the ch-3 and pull the ring closed. (16 dc)
Rnd 2: Ch 3, dc in the next dc, ch 1. Dc in each of the next 2 dc, ch 1; rep from * 6 more times. Sl st to the top of the ch-3. (16 dc, 8 ch-1 sp)*
Rnd 3: Ch 3, dc in the next dc, ch 1, dc in the next ch-1 sp, ch 1. Dc in each of the next 2 dc, ch 1, dc in the next ch-1 sp, ch 1; rep from * 6 more times. Join. (24 dc, 16 ch-1 sp)*
Rnd 4: Ch 3, dc in the next dc, ch 1, sk the ch-1 sp, V-st in the next dc, ch 1, sk the ch-1 sp. Dc in each of the next 2 dc, ch 1, sk the ch-1 sp, V-st in the next dc, ch 1, sk the ch-1 sp; rep from * 6 more times. Join. (32 dc, 24 ch-1 sp)*
Each repeat now has 2 rib dc, 1 V-st (2 dc and 1 ch-1 sp), and 2 flanking ch-1 sp.
Rnd 5: Ch 3, dc in the next dc, ch 2, sk the ch-1 sp, V-st in the ch-1 sp of the next V-st, ch 2, sk the ch-1 sp. Dc in each of the next 2 dc, ch 2, sk the ch-1 sp, V-st in the next V-st sp, ch 2, sk the ch-1 sp; rep from * 6 more times. Join. (32 dc, 16 ch-2 sp, 8 ch-1 sp)*
The dc count stays the same in this round. The longer chains are what widen the ball.
Rnds 6–7: Work as Rnd 5, skipping ch-2 sps instead of ch-1 sps. (32 dc, 16 ch-2 sp, 8 ch-1 sp each round)
These rounds form the equator. Check the equator measurement now.
Rnd 8: Ch 3, dc in the next dc, ch 1, sk the ch-2 sp, V-st in the next V-st sp, ch 1, sk the ch-2 sp. Dc in each of the next 2 dc, ch 1, sk the ch-2 sp, V-st in the next V-st sp, ch 1, sk the ch-2 sp; rep from * 6 more times. Join. (32 dc, 24 ch-1 sp)*
Rnd 9: Ch 3, dc in the next dc, ch 1, sk the ch-1 sp, dc in the next V-st sp, ch 1, sk the ch-1 sp. Dc in each of the next 2 dc, ch 1, sk the ch-1 sp, dc in the next V-st sp, ch 1, sk the ch-1 sp; rep from * 6 more times. Join. (24 dc, 16 ch-1 sp)*
Rnd 10: Ch 3, dc in the next dc, ch 1, sk the next ch-1 sp, dc, and ch-1 sp. Dc in each of the next 2 dc, ch 1, sk the next ch-1 sp, dc, and ch-1 sp; rep from * 6 more times. Join. (16 dc, 8 ch-1 sp)*
Rnd 11 (neck, conversion round): Ch 2 (does not count). Hdc in the same st as the join, then hdc in the next dc. Sk the ch-1 sp. Hdc in each of the next 2 dc, sk the ch-1 sp; rep from * 6 more times. Sl st to the first hdc. (16 hdc)*
This count is 16 stitches worked 1 per existing dc, plus 0 added. Do not fasten off.
Place one marker in hdc 1 and another in hdc 9. These two stitches are directly opposite each other.
Shaping check: Rnds 1–4 mirror Rnds 11–8. That symmetry is what produces an even dome at the top and bottom.
Make All Ornaments
Repeat the body and loop for every ornament in your set. The amounts below are for a set of 8.
- Cream: 8 bodies, 8 hanging loops (32 g used; 40 g with margin)
Suggested staggered hanging layout, with ornaments about 4 in (10.2 cm) apart:
TIER 1 (top):    CREAM . . CREAM
TIER 2:          . CREAM . . CREAM
TIER 3:          CREAM . . CREAM .
TIER 4 (bottom): . CREAM . . CREAM
Make and check one complete ornament before starting the rest. This keeps the whole set matching.
Joining
The ornaments are not joined to each other. The only join is attaching each hanging loop to its own neck before the cap is worked. The cap then covers the knots.
Make the loop: Ch 30. Fasten off, leaving a 4 in (10.2 cm) tail at each end. The chain measures about 4 in (10.2 cm).
Stitch-to-stitch logic:
1. With a tapestry needle, take one tail down through the top of marked hdc 1, from the outside of the ball to the inside.
2. Take the other tail down through marked hdc 9 in the same way.
3. Because the two stitches are 8 sts apart on a 16-st round, the loop sits exactly centered over the opening.
4. Tie each tail in a square knot around its own stitch on the inside, then weave the ends into the Rnd 10 dc.
Tension: Pull the knots snug, but not so tight that the neck puckers. The 16 hdc should still lie evenly spaced.
Checkpoint: The loop rises about 2 in (5.1 cm) above the neck. After the cap is worked, about 1.4 in (3.6 cm) of loop remains visible.
Optional: Use 6 in (15.2 cm) of narrow ribbon instead of the chain, attached the same way.
Border: Ribbed Crown Cap
The cap is worked directly into the Rnd 11 hdc. Re-insert your hook into the live loop.
Border gauge: 16 sts around the neck. This is 7 sts per inch, the same gauge as the body. The cap is a straight cylinder with no increases.
Rnd 12: Ch 2 (does not count). FPdc around the next hdc, BPdc around the next hdc; rep from * 7 more times. Sl st to the first FPdc. (16 sts: 8 FPdc, 8 BPdc)*
Per quarter of the round, this is 4 sts (2 FPdc, 2 BPdc).
Rnd 13: Ch 2 (does not count). FPdc around the next FPdc, BPdc around the next BPdc; rep from * 7 more times. Sl st to the first FPdc. (16 sts: 8 FPdc, 8 BPdc)*
Again, this is 4 sts per quarter.
Fasten off and weave in the end.
Why the math works:
– 16 is even, so the 1×1 rib (FPdc, BPdc) closes perfectly.
– 16 also equals 8 repeats × 2 rib dc. Because Rnd 11 skipped only the ch-1 spaces, every cap stitch sits directly above a body rib dc.
– As a result, the vertical rib lines continue up into the cap.
The 2 rounds measure about 0.6 in (1.5 cm) deep.
Final Blocking
- Weave in all remaining ends before stiffening.
- Mix the fabric stiffener according to its label, or use heavy starch.
- Soak the ornament fully, then squeeze out the excess. Leave the loop dry if you prefer it soft.
- Push a deflated balloon through the cap opening into the ball.
- Inflate the balloon until the ball measures 2.25 in (5.7 cm) across, which is about 7 in (17.8 cm) around the equator. Tie off the balloon so the knot sits inside the cap.
- Align the 8 ribs so they run straight from the bottom ring to the cap. Spread each panel’s chain spaces evenly.
- Roll the cap between your fingers to straighten the rib.
- Hang the ornament by the balloon knot, or stand it in a small cup, and let it dry for 24 hours.
- Pop the balloon and pull it out through the cap.
- Re-measure. The ball should be 2.25 in (5.7 cm) across and about 2.75 in (7.0 cm) tall without the loop.
Final Quality-Control Checklist
- 8 ribs, all vertical and evenly spaced
- Every panel shows the same number of V-sts and chain spaces
- Bottom ring is fully closed, with no hole
- Equator is 7 in (17.8 cm) around
- Ball is 2.25 in (5.7 cm) in diameter
- Neck has 16 hdc and is not puckered
- Cap has 16 sts in a clean 1×1 rib, 0.6 in (1.5 cm) deep
- Loop is centered, with knots hidden inside the cap
- Ball holds its shape when gently pressed
- All ornaments in the set match within 0.25 in (0.6 cm)
Troubleshooting
Ribs spiral around the ball. You are starting rounds in the wrong place. Always begin with ch 3 in the joining st, which is the first rib dc.
Equator is too loose and the lace sags. Use a smaller hook, or shorten the ch-2 sps in Rnds 5–7 to ch-1.
Ball looks pointed at the bottom. Your Rnd 1 ring was not pulled fully closed, or your Rnd 2–3 chains are too tight. Loosen the chains slightly.
Neck flares open. Make sure you skipped every ch-1 sp in Rnd 11. The neck should have 16 hdc, not 24.
Cap rib looks flat. You worked into the tops of the stitches instead of around the posts. Redo the round with FPdc and BPdc.
Ball dents after drying. Apply a second coat of stiffener over the balloon.
Loop tilts to one side. The tails are not in opposite stitches. Re-check hdc 1 and hdc 9.
Care
Spot clean only with a damp cloth, because washing removes the stiffener. Store the ornaments in a box with tissue so the balls are not crushed.
Final Notes
The measurement chain is simple:
– Rnd 1 measures 0.6 in (1.5 cm).
– Rnd 3 measures 1.25 in (3.2 cm).
– The equator is 6.75 in (17.1 cm) relaxed and 7 in (17.8 cm) blocked.
– The neck is 2.25 in (5.7 cm) around.
– The finished ball is 2.25 in (5.7 cm) in diameter, with a 0.6 in (1.5 cm) ribbed cap.
Hit these checkpoints on your first ornament and every one after it will match. Hang the set among warm lights and enjoy the glow through the lace.
Happy crocheting!