

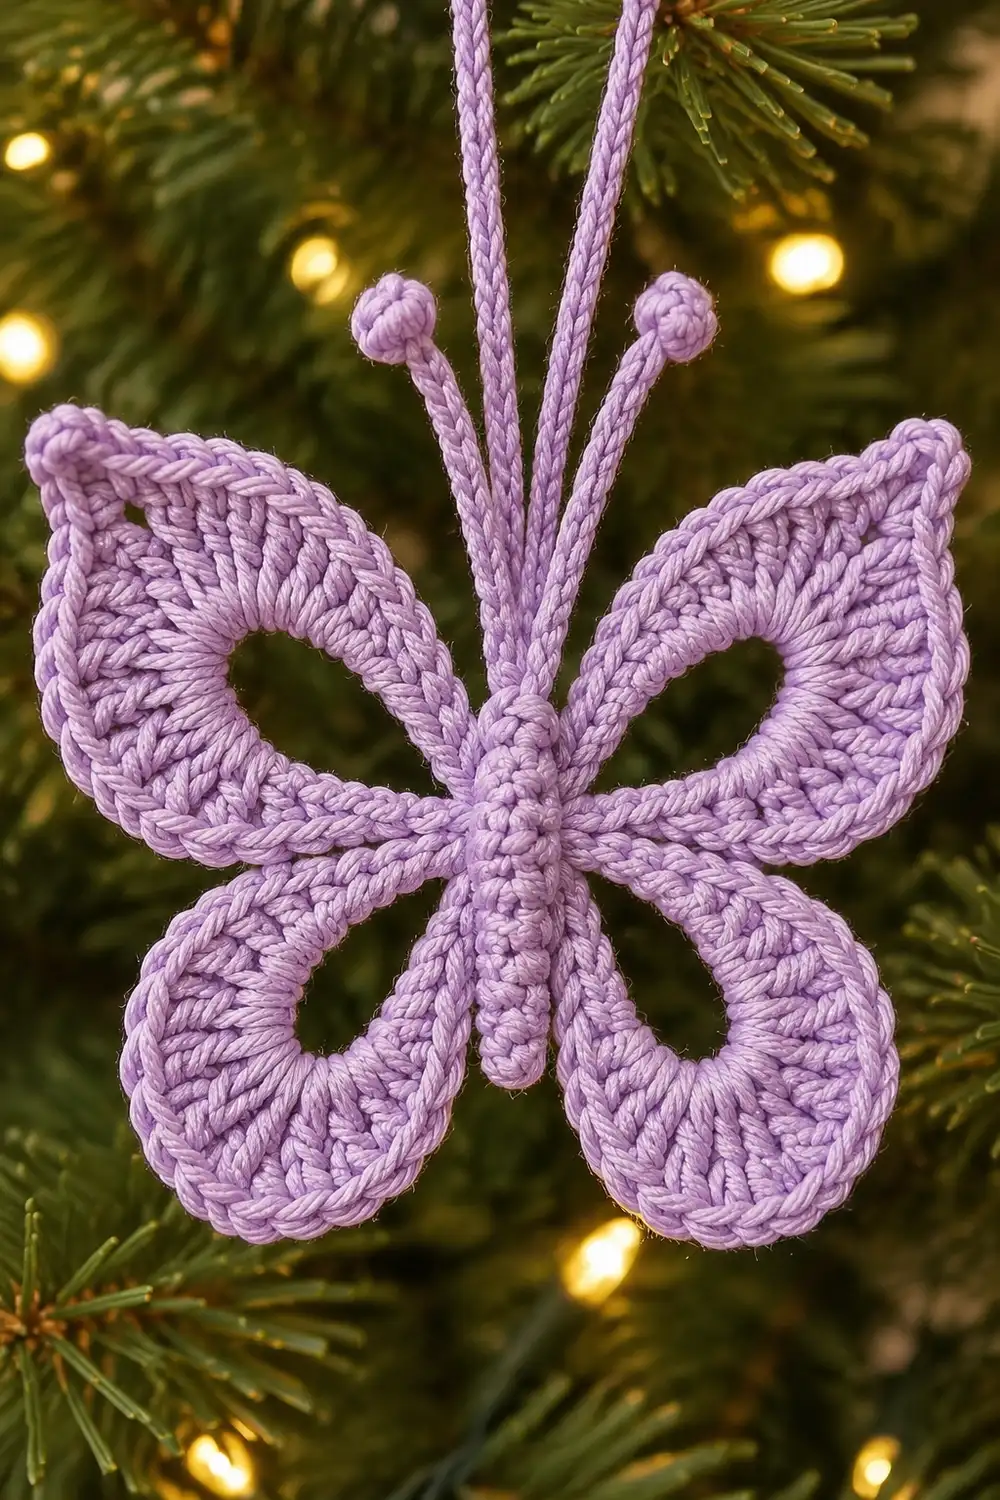
This little butterfly is a single crocheted motif in soft lavender. It has a solid, densely stitched center body, four symmetrical wing petals with open lacy centers, and two antennae tipped with round bobbles. A thin chain loop rises from the head between the antennae so the ornament can hang from a branch.
The wings are the main feature. Each wing is a chain loop covered in sc, hdc, and dc. The open center gives the wing its see-through, delicate silhouette. The upper wings end in a pointed tip with a tiny chain hole. The lower wings are smaller and rounded. One round of sc outlines the whole shape for a crisp edge.
This pattern uses US crochet terms. The finished butterfly measures about 3 in (7.6 cm) wide by 2.75 in (7.0 cm) tall, not counting the antennae or the hanging loop.
Construction overview: You work an oval sc body in the round. On the next round you build all four wings directly off the body’s sides. A final sc round outlines everything. Then you rejoin the yarn at the head to add the antennae and the hanging loop. There is no sewing, only weaving in ends.
Finished Size and Construction
- Finished size: 3 in (7.6 cm) wide × 2.75 in (7.0 cm) tall
- Skill level: Easy-intermediate
- Terminology: US crochet terms
- Yarn weight: Fine (#2, sport) mercerized cotton
- Hook: 2.75 mm (US C-2)
- Number of pieces: 1 (one continuous motif, with the yarn rejoined once at the head)
- Layout: Single motif, with the body vertical, two wings on each side, and antennae and loop at the top
- Piece size: 3 in (7.6 cm) × 2.75 in (7.0 cm)
- Size before border: about 2.75 in (7.0 cm) × 2.5 in (6.4 cm)
- Border depth: 1 round of sc, about 0.125 in (0.3 cm)
- Antennae: about 0.75 in (1.9 cm) long
- Hanging loop: about 3 in (7.6 cm) tall
Materials
Yarn advice: Choose a smooth, mercerized cotton in sport weight. Cotton holds the pointed wing tips and open centers well, and it takes starch nicely. Fuzzy or very soft acrylic yarns blur the lacy wing holes.
- Lavender: 4 g, about 10 m (11 yd) per butterfly
The quantity includes a margin for your gauge swatch and weaving in ends. A single butterfly actually uses closer to 3 g.
Tools:
– 2.75 mm (US C-2) crochet hook
– Tapestry needle
– Scissors
– Stitch marker
– Rustproof pins and a blocking mat
– Optional: fabric stiffener or spray starch
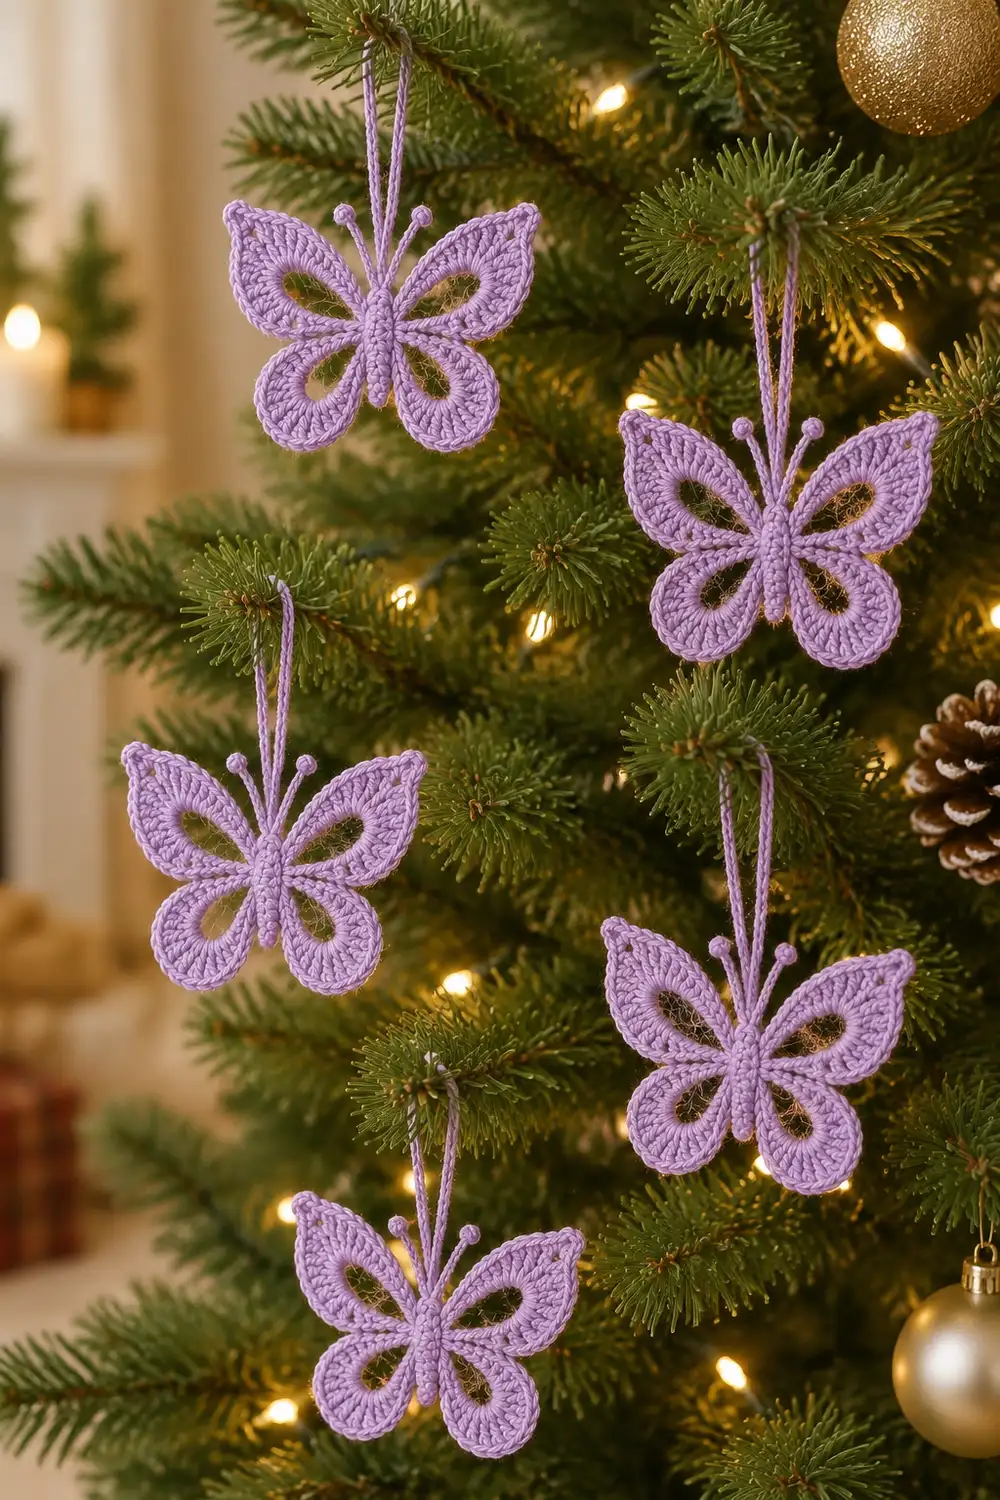
Optional: To fill a tree like the one in the photo, make as many identical butterflies as you like. Allow 4 g per ornament.
Abbreviations (US Terms)
- ch – chain
- sl st – slip stitch
- sc – single crochet
- hdc – half double crochet
- dc – double crochet
- st(s) – stitch(es)
- sp – space
- rnd – round
- bob – bobble (see below)
- FO – fasten off
Special stitch – Bobble (bob): [Yo, insert hook in st, yo, pull up a loop, yo, pull through 2 loops] 4 times in the same st. You now have 5 loops on the hook. Yo and pull through all 5 loops.
Gauge and Checkpoints
Gauge: 14 sc = 2 in (5.1 cm), which is 7 sc per inch. For chains, 8 ch = 1 in (2.5 cm).
Test one piece first. Make one full butterfly before you commit to a batch. Gauge on a small motif shows up fastest in the measurements below, so check each stage as you reach it.
Checkpoints:
1. After Rnd 2 (body): 1.75 in (4.4 cm) long × 0.5 in (1.3 cm) wide.
2. After Rnd 3 (wings): Each upper wing reaches about 1.25 in (3.2 cm) from the body to its tip. Each lower wing reaches about 1 in (2.5 cm). The width from tip to tip is about 2.75 in (7.0 cm).
3. After Rnd 4 (border): 3 in (7.6 cm) × 2.75 in (7.0 cm).
If your piece is too big: Go down one hook size to 2.5 mm, or tighten your chains.
If your piece is too small: Go up to 3 mm.
Wing chains matter most. A wing loop worked too tightly closes up the open center.
Pattern
Body
Foundation: Ch 11.
Rnd 1: Sc in the 2nd ch from the hook and in the next 8 ch. Work 3 sc in the last ch. Rotate the piece and work along the opposite side of the chain: sc in the next 8 ch, then 2 sc in the last ch (the same ch as the first sc). Join with a sl st to the first sc.
(22 sc: 8 on each long side, with 3 sts at each end.)
The end where you started is the tail. The far end is the head.
Rnd 2: Ch 1. Work 2 sc in the first st, sc in the next 8 sts, 2 sc in each of the next 3 sts, sc in the next 8 sts, and 2 sc in each of the last 2 sts. Join.
(28 sc = 22 sts worked once each + 6 extra at the ends.)
Here is the layout of Rnd 2:
– Tail: 6 sts
– Side 1: 8 sts
– Head: 6 sts
– Side 2: 8 sts
Check against Checkpoint 1.
Wings
Rnd 3: Every Rnd 2 st receives exactly one st this round, either a sc or a sl st. The wings grow off chain loops anchored to the sides.
Ch 1. Sc in the first 2 sts (tail).
Side 1 (tail toward head):
- Sc in the next st.
- Lower wing: Sc in the next st, ch 12, and sl st in the same st to form the loop. Working over the ch-12 loop, work 2 sc, 2 hdc, 12 dc, 2 hdc, and 2 sc (20 wing sts). Sl st in the next body st.
- Sc in the next st.
- Upper wing: Sc in the next st, ch 16, and sl st in the same st. Working over the ch-16 loop, work 2 sc, 2 hdc, 9 dc, ch 2, 9 dc, 2 hdc, and 2 sc (26 wing sts + ch-2 tip sp). Sl st in the next body st.
- Sc in the next 2 sts.
Head: Sc in the next 6 sts.
Side 2 (head toward tail):
- Sc in the next 2 sts.
- Work the upper wing the same as before.
- Sc in the next st.
- Work the lower wing the same as before.
- Sc in the next st.
Tail: Sc in the last 4 sts. Join.
Rnd 3 count: 28 body-edge sts (one per Rnd 2 st) + 92 wing sts (26 + 20 + 26 + 20) + 2 ch-2 tip sps.
Check that each side used exactly 8 body sts. Side 1 is 1 + 2 + 1 + 2 + 2 = 8. Side 2 is 2 + 2 + 1 + 2 + 1 = 8.
Push each chain loop open with a fingertip so the center hole stays round. Check against Checkpoint 2.
Border
Border gauge: The border is worked at the same 7 sc per inch as the body. The single round adds about 0.125 in (0.3 cm) on every edge. That takes the piece from 2.75 in × 2.5 in (7.0 cm × 6.4 cm) to 3 in × 2.75 in (7.6 cm × 7.0 cm).
Rnd 4: In each wing, skip the wing-base sc and the closing sl st. Both sit hidden under the wing.
Ch 1. Sc in the first 2 sts (tail), then sc in the next st.
Lower wing: Skip the base sc. Sc in the next 6 sts, 2 sc in the next st, sc in the next 6 sts, 2 sc in the next st, and sc in the next 6 sts. Skip the sl st.
(22 sc from 20 wing sts.)
Sc in the next st.
Upper wing: Skip the base sc. Sc in the next 9 sts, 2 sc in the next st, and sc in the next 3 sts. Work (sc, ch 2, sc) in the ch-2 tip sp. Sc in the next 3 sts, 2 sc in the next st, and sc in the next 9 sts. Skip the sl st.
(30 sc + ch-2 tip sp from 26 wing sts.)
Sc in the next 2 sts.
Head: Sc in the next 6 sts.
Side 2: Sc in the next 2 sts. Work the upper wing border. Sc in the next st. Work the lower wing border. Sc in the next st.
Tail: Sc in the last 4 sts. Join and FO.
Rnd 4 count: 124 sc + 2 ch-2 sps.
– Body segments: 20 sc (tail 2 + 1, sides 1 + 2 and 2 + 1, head 6, tail 1 + 4). These come from the 28 Rnd 3 body sts minus the 8 skipped base sc and sl sts.
– Wings: 104 sc (30 + 22 + 30 + 22).
Why the math works:
– Each upper wing border uses 13 sts on each side of the tip (9 + 1 + 3), which equals the 13 sts Rnd 3 placed on each side (2 sc + 2 hdc + 9 dc).
– Each lower wing border uses 6 + 1 + 6 + 1 + 6 = 20 sts.
– The 2 increases per wing side (4 per upper wing, 2 per lower) supply the extra length a curved outer edge needs, about 0.25 in (0.6 cm). This keeps the wings flat instead of cupped.
Antennae and Hanging Loop
Hold the butterfly with the right side facing and the head up. Label the 6 head sc of Rnd 4 as H1 to H6, from left to right.
- Join the yarn with a sl st in H2.
- Antenna: Ch 8, then work a bob in the 4th ch from the hook. Sl st in the same ch to round the ball. Sl st in each of the remaining 4 ch, then sl st in H2.
- Sl st in H3.
- Hanging loop: Ch 50, about 6 in (15.2 cm) of chain. Sl st in H4.
- Sl st in H5.
- Work a second antenna, ending with a sl st in H5.
- FO and weave in all ends.
Final Blocking
- Soak the butterfly in cool water for 5 minutes. Press out the water in a towel without wringing.
- Lay it right side up on the blocking mat.
- Pin the body straight down the center at 2.25 in (5.7 cm) long.
- Pin each upper wing tip through its ch-2 hole. Set the tips 3 in (7.6 cm) apart.
- Ease the lower wings into rounded teardrops and pin their outer curves.
- Open each wing center into a clean oval with a pin or knitting needle.
- Spread the antennae into a V, about 0.75 in (1.9 cm) apart at the bobbles.
- Optional: mist with spray starch or brush on diluted fabric stiffener for a firm ornament.
- Let it dry completely, at least 4 hours, before unpinning.
Final Quality-Control Checklist
- Body measures 2.25 in (5.7 cm) long and lies flat.
- All four wing centers are open and clearly see-through.
- Upper wings are pointed, with a visible ch-2 hole at each tip.
- Lower wings are rounded and match each other in size.
- Rnd 4 count is 124 sc + 2 ch-2 sps.
- Finished size is 3 in × 2.75 in (7.6 cm × 7.0 cm).
- Both bobbles are round and sit at the same height.
- The hanging loop is centered between the antennae and hangs about 3 in (7.6 cm).
- All ends are woven in invisibly.
Troubleshooting
Wings ruffle. Your dc are too loose for the loop. Go down a hook size, or recount: 20 sts for each lower wing and 26 for each upper.
Wings cup or curl inward. The border is too tight. Check that you worked every increase.
Wing center closed up. The chain loop was too tight. Chain more loosely, or chain with a hook one size larger.
Upper tip is rounded, not pointed. Make sure the ch 2 sits exactly between the two 9-dc groups. Pin the tip firmly while blocking.
Bobbles look flat. Pull each loop up to full dc height before closing, and keep the closing sl st snug.
Butterfly hangs crooked. The loop isn’t centered. Rework it between H3 and H4.
Body twists. You may have missed a st in Rnd 2. Recount to 28.
Care
Hand wash in cool water with mild soap, then reshape and dry flat. Re-starch after washing if you want the ornament stiff again.
Final Notes
Here is the measurement chain from start to finish:
– Gauge of 7 sc per inch
– Body of 1.75 in × 0.5 in (4.4 cm × 1.3 cm) after Rnd 2
– Wings reaching 1.25 in (3.2 cm) and 1 in (2.5 cm) after Rnd 3
– About 2.75 in × 2.5 in (7.0 cm × 6.4 cm) before the border
– A 124-sc border bringing it to 3 in × 2.75 in (7.6 cm × 7.0 cm)
If each checkpoint matches, your butterfly will block cleanly and hang straight on the tree. Make one, check it, then flutter on to the next.
Happy crocheting!