

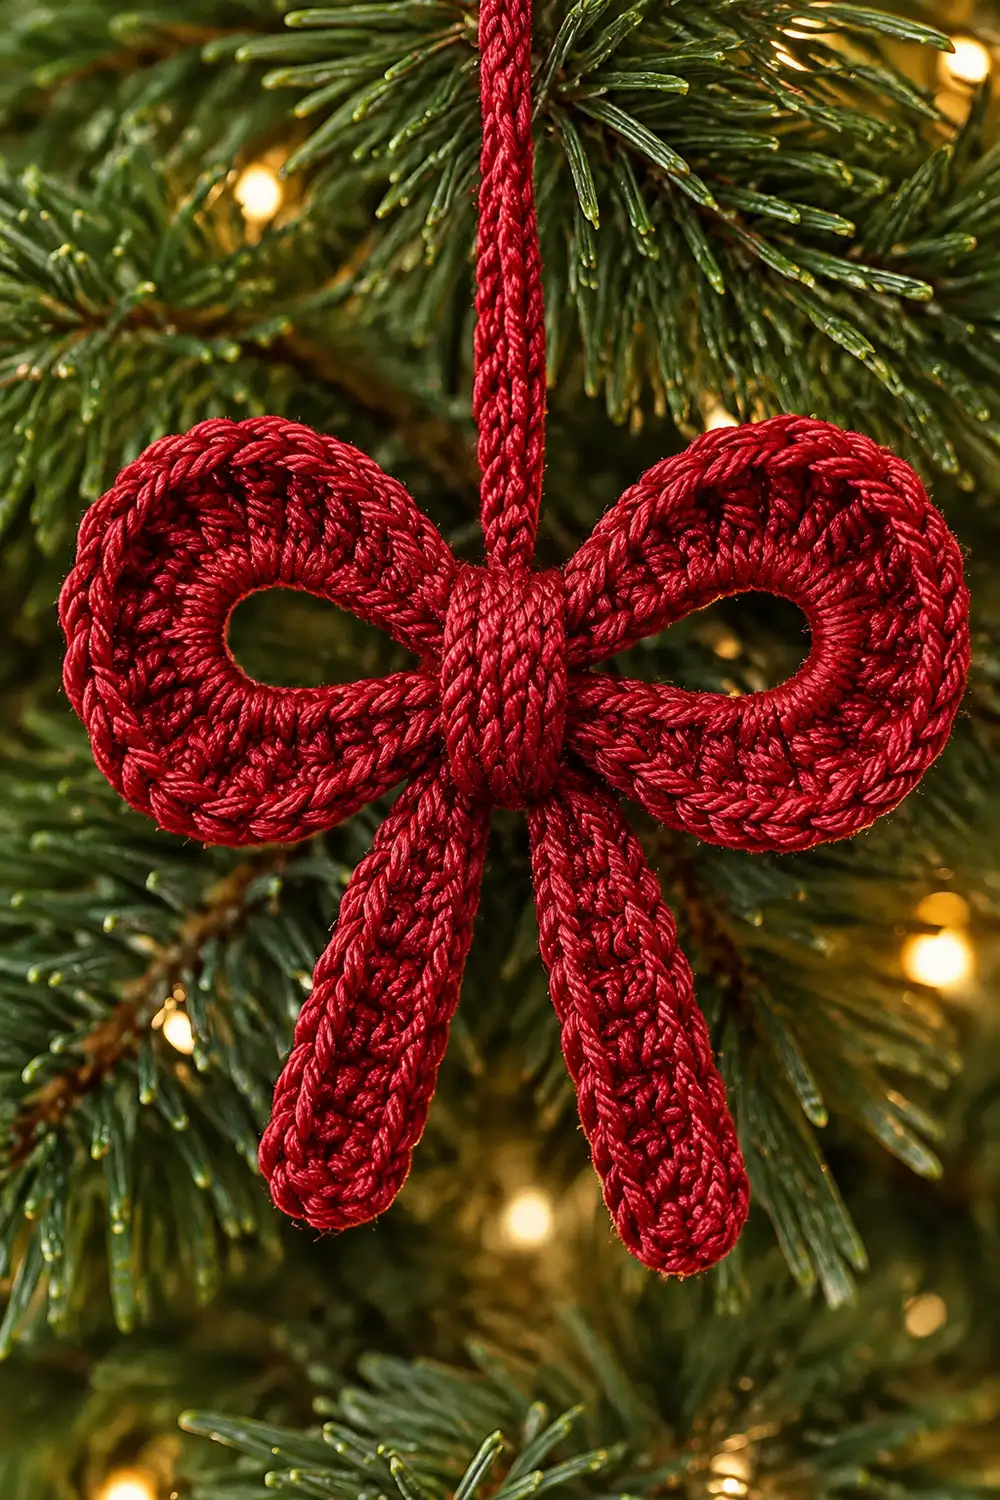
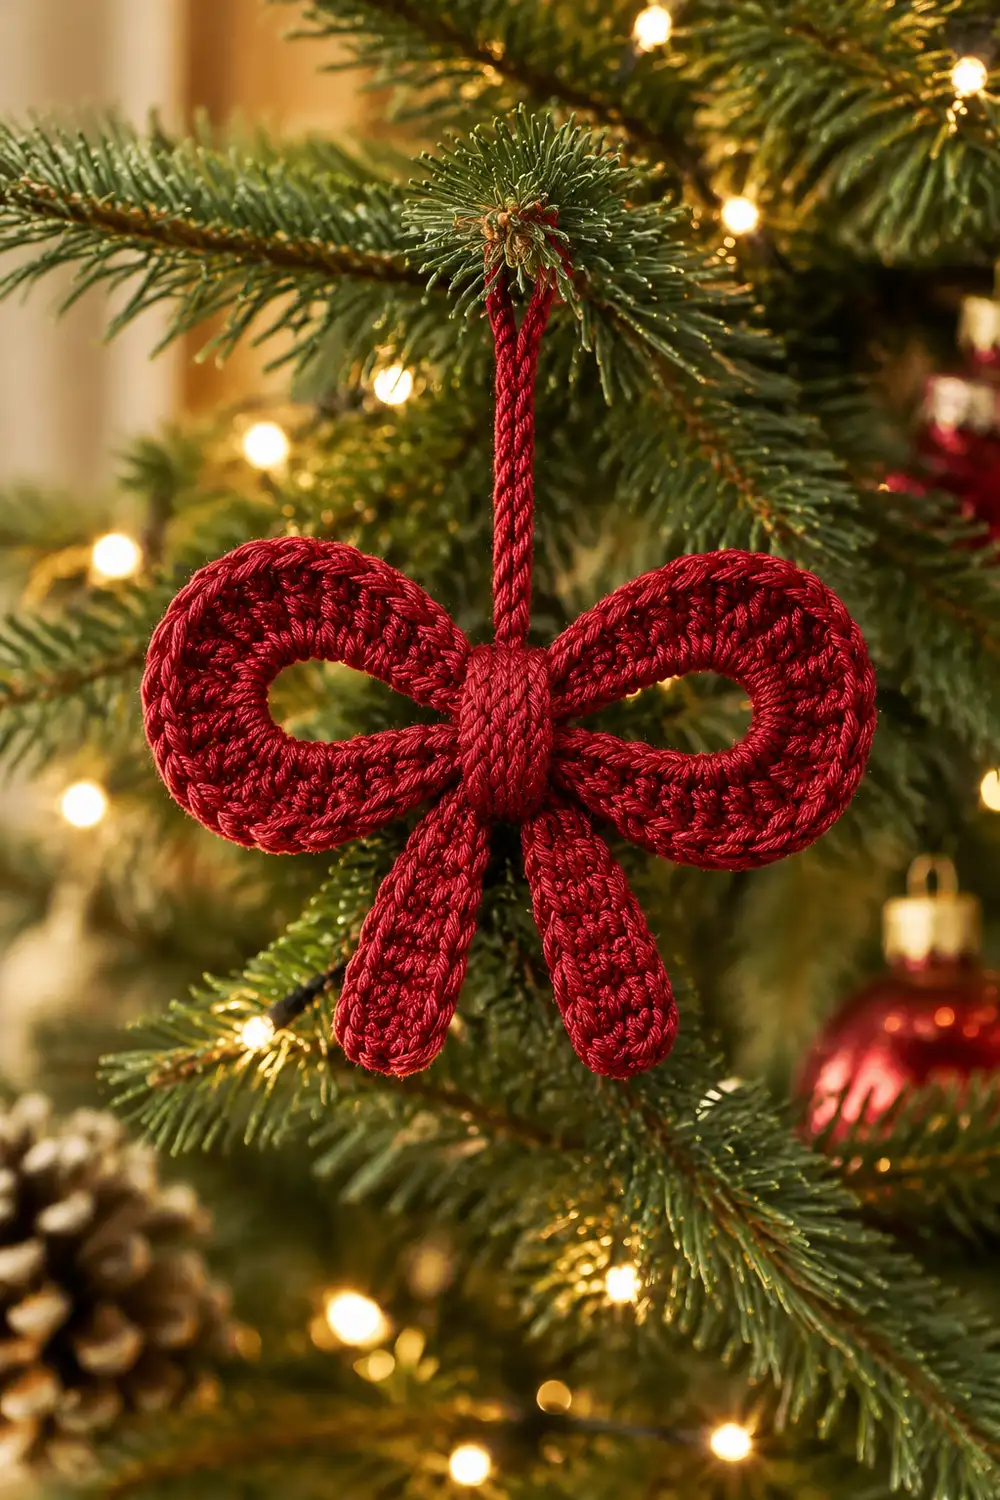
This little bow looks like a classic satin ribbon, made in yarn. It has two oval loop wings, a snug wrapped knot at the center, and four streamers that fall from the knot in two lengths. A chain hanging loop sits at the top, ready for a tree branch, a wreath, or a gift tag.
The sample is worked in one deep crimson red. Tight single crochet gives the bow a firm, slightly dimensional finish with clear stitch definition. A slip-stitch edging on each wing adds a crisp outline. The pattern uses US crochet terms throughout.
The finished bow measures about 3.5 in (8.9 cm) wide and 2.5 in (6.4 cm) tall, not counting the hanging loop.
The bow is one continuous piece. You work the left wing in joined rounds around a chain ring, chain directly into the right wing, add the four streamers from the center point, then crochet a small band and wrap it around the center as the knot. The hanging loop is the last step.
Finished Size and Construction
- Finished size: 3.5 in (8.9 cm) wide x 2.5 in (6.4 cm) tall, plus a 2.5 in (6.4 cm) hanging loop
- Skill level: Easy-intermediate
- Terminology: US crochet terms
- Yarn weight: DK (#3)
- Hook: 3.25 mm (US D/3)
- Number of pieces: 1, worked continuously
- Layout: two oval wings side by side, wrapped knot at center, four streamers below (long, short, short, long), hanging loop on top
- Piece size: each wing about 1.8 in (4.6 cm) long x 1.3 in (3.3 cm) tall
- Size before border: 3.5 in (8.9 cm) x 2.5 in (6.4 cm)
- Border depth: less than 1/16 in (0.2 cm). The slip-stitch edging outlines the wings without changing their size.
Materials
Choose a smooth DK yarn with good stitch definition. Acrylic, cotton-acrylic blends, and mercerized cotton all work well. Avoid fuzzy or brushed yarns, because they blur the outline of the wings. A slightly shiny yarn gives the most ribbon-like look.
Yarn:
– Deep crimson red, DK (#3): 8 g, about 18 m (20 yd)
This quantity includes a margin for the gauge swatch, the hanging loop, and weaving in ends. The bow itself uses about 6 g.
Tools:
– 3.25 mm (US D/3) crochet hook
– 1 stitch marker
– Tapestry needle
– Scissors
– Rustproof pins and a blocking mat or foam board
– Spray bottle with water
– Optional: fabric stiffener for a crisper ornament
Abbreviations (US Terms)
- ch – chain
- sl st – slip stitch
- sc – single crochet
- st(s) – stitch(es)
- rnd – round
- inc – increase: 2 sc in the same st
- free loop – the unused loop on the underside of a foundation chain
Special technique, joined rounds: Each rnd begins with ch 1, which does not count as a stitch. Work the first sc into the same st as the join. End by joining with sl st to the first sc of the rnd. Place your marker in the first sc of each rnd.
Gauge and Checkpoints
Gauge: 6 sc and 6 rows = 1 in (2.5 cm) in firm single crochet.
Use your first wing as your gauge test. Work the left wing through Rnd 3, then check it against the measurements below before going any further. This pattern is small, so the wing is the most accurate swatch you can make.
Checkpoint 1 (after Rnd 1): The ring holds 16 sc. The inner edge measures about 2.7 in (6.9 cm) around, and the ring lies flat without twisting.
Checkpoint 2 (after Rnd 3): The wing lies flat and measures about 1.8 in (4.6 cm) long x 1.3 in (3.3 cm) tall. The opening is about 1 in x 0.5 in (2.5 cm x 1.3 cm).
Checkpoint 3 (after the streamers): The long streamers measure about 2 in (5.1 cm) and the short streamers about 1.5 in (3.8 cm).
If your wing is too big: If it is more than 0.2 in (0.5 cm) over the target in either direction, go down to a 3.0 mm hook and remake it.
If your wing is too small: If it is more than 0.2 in (0.5 cm) under, go up to a 3.5 mm hook.
If the wing cups or ruffles: Your row height and stitch width are out of balance. See Troubleshooting before changing hooks.
Pattern
Left Wing
Foundation: Ch 16, sl st in the first ch to form a ring. Do not twist the chain. This join point is the inner (pinch) end of the wing.
Rnd 1: Ch 1, sc in each ch around, join. (16 sc)
Rnd 2: Ch 1, inc in each of the first 2 sts, sc 5, inc in each of the next 3 sts, sc 5, inc in the last st, join. (22 sc)
The 3 middle increases fall at the outer tip, opposite the join. The 3 increases near the join shape the pinch end.
Rnd 3: Ch 1, inc in each of the first 2 sts, sc 8, inc in each of the next 3 sts, sc 8, inc in the last st, join. (28 sc)
Each growth round adds 6 sts, 3 at the tip and 3 at the pinch end. That stretches the ring into an oval and keeps it flat.
Rnd 4 (edging): Work the slip-stitch edging now, as described in the Border section, then return here. (28 sl st)
Do not fasten off. Your yarn is at the pinch end of the left wing.
Right Wing
Foundation: Ch 16, sl st in the first of these 16 ch to form a second ring. The two rings now meet at one shared point, which is the bow’s center.
Rnds 1–4: Work exactly as for the left wing. (16 sc, 22 sc, 28 sc, then 28 sl st)
The right wing’s rounds also begin at its pinch end, beside the left wing. The stitches crowd together slightly at that spot. The knot will cover this area.
Do not fasten off. Your yarn is now at the center point.
Checkpoint: Lay the bow flat. Measured tip to tip, the two wings should span about 3.5 in (8.9 cm).
Streamers
All four streamers start and end at the center point. Turn the bow so the wings lie horizontally and work the streamers so they hang downward.
Streamer 1 (long, left outer): Ch 13, sc in the 2nd ch from hook and in each remaining ch back to the center, sl st in the center point. (12 sc)
Streamer 2 (short, left inner): Ch 10, sc in the 2nd ch from hook and in each remaining ch, sl st in the center point. (9 sc)
Streamer 3 (short, right inner): Repeat Streamer 2. (9 sc)
Streamer 4 (long, right outer): Repeat Streamer 1. (12 sc)
For each sl st, use the center stitch or one of the stitches directly beside it, so the streamers fan out slightly.
The long streamers measure about 2 in (5.1 cm) and the short ones about 1.5 in (3.8 cm). Each is about 0.25 in (0.6 cm) wide. The length difference creates the layered ribbon-tail look.
Knot Band
Foundation: From the center point, ch 4.
Row 1: Sc in the 2nd ch from hook and in the next 2 ch. (3 sc)
Rows 2–10: Ch 1, turn, sc in each st across. (3 sc)
The band measures about 0.5 in (1.3 cm) wide x 1.7 in (4.3 cm) long.
Wrap: Pinch the inner ends of both wings together at the center. Bring the band up over the front of the pinch, over the top, and down the back. It should cover the crowded join stitches and the tops of the streamers.
Join: Line up Row 10 with the free loops of the foundation chain beneath the bow. Sl st through each Row 10 st and its matching free loop. (3 sl st)
The pinched center measures about 1.6 in (4.1 cm) around. The band is cut slightly long so it wraps snugly without strain. If it is loose, remove one row. If it won’t meet, add one.
Hanging Loop
Sl st up the side edge of the band along the back, working 1 sl st into each of the row ends of Rows 10, 9, 8, 7, and 6. (5 sl st) Your yarn is now at the top center back of the knot.
Ch 30, then sl st into the same st to close the loop. The folded loop hangs about 2.5 in (6.4 cm) above the bow.
Fasten off. Weave in the end through the back of the knot.
Border
The border is the Rnd 4 edging on each wing. Work it as part of each wing, before moving on.
Border gauge: 6 sl st = 1 in (2.5 cm). This matches the wing gauge exactly. Work the slip stitches at the same firmness as your sc. If they pull the edge inward, go up half a hook size for this round only.
Rnd 4 (each wing): Do not ch 1. Sl st through both loops of each sc around. Work 14 sl st along the upper edge, from the pinch end to the tip, and 14 sl st along the lower edge, from the tip back to the pinch end. Join with a sl st to the first sl st.
Count: 28 sc in Rnd 3, with 1 sl st worked into each existing st, plus 0 extra sts = 28 sl st.
Why the math works: This is a trim round, not a growth round. Slip stitches add almost no height, so the oval needs no new stitches to stay flat. The outer edge of Rnd 3 measures about 4.7 in (11.9 cm), which is 28 sts at 6 sts per inch. One sl st per sc at the same gauge covers that edge exactly. The edge neither ruffles nor draws in.
The streamers are not edged. Their single row of sc already gives a smooth, finished edge.
Final Blocking
- Lightly spray the whole bow with water until it is damp but not soaked.
- Lay it face up on the blocking mat.
- Pin the wing tips so the bow measures 3.5 in (8.9 cm) across.
- Shape each wing opening into a smooth oval, about 1 in x 0.5 in (2.5 cm x 1.3 cm). Pin from the inside if needed.
- Straighten the streamers. Set the long ones at about 2 in (5.1 cm) and the short ones at about 1.5 in (3.8 cm). Angle them outward in a gentle fan.
- Center the knot band so its seam faces the back.
- Optional: brush a thin coat of fabric stiffener onto the back of the bow for a firmer ornament.
- Let it dry completely, at least 6 hours, before unpinning.
Final Quality-Control Checklist
- Each wing has 28 sc in Rnd 3 and 28 sl st in Rnd 4.
- Both wings measure about 1.8 in (4.6 cm) x 1.3 in (3.3 cm) and match each other.
- The wings lie flat, with no cupping or ruffling.
- The overall width is about 3.5 in (8.9 cm) and the overall height about 2.5 in (6.4 cm).
- There are four streamers: 12 sc, 9 sc, 9 sc, 12 sc, in long-short-short-long order.
- The knot band is 3 sc wide and 10 rows long, wraps snugly, and has its seam at the back.
- No join stitches are visible at the center front.
- The hanging loop is secure at the top back and about 2.5 in (6.4 cm) tall.
- All ends are woven in and invisible from the front.
Troubleshooting
Wings cup into a bowl shape: Your rounds are too tight for the increases. Loosen your tension slightly, or move up half a hook size for Rnds 2–3.
Wings ruffle or wave: Your stitches are too loose, or the increases are bunched in the wrong place. Check that the 3 tip increases fall opposite the join.
Opening looks round instead of oval: The increases have drifted toward the top and bottom of the ring. Re-count Rnd 2 and Rnd 3 from the join.
Edging pulls the wing inward: Your slip stitches are too tight. Redo Rnd 4 with a hook half a size larger.
Streamers curl: Single-row strips tend to curl. Block them flat, and use fabric stiffener if the curl returns.
Knot is loose or slides around: Remove one row from the band, or wrap it with the wings pinched more firmly.
Knot gaps at the seam: Add one row to the band.
Bow tilts when hanging: The hanging loop is off-center. Re-anchor the ch-30 loop at the exact top center of the knot.
Care
Hand wash in cool water and lay flat to dry, reshaping the wings while damp. If you used fabric stiffener, spot-clean only, and store the bow flat between seasons.
Final Notes
Everything in this bow builds from one measurement chain. Gauge of 6 sc = 1 in (2.5 cm) produces a 16-st ring of about 2.7 in (6.9 cm). That ring grows to a 28-st wing of 1.8 in x 1.3 in (4.6 cm x 3.3 cm). The two wings together span 3.5 in (8.9 cm), and the 28-st slip-stitch edging matches the wing gauge, so it adds no size. The 12-sc and 9-sc streamers bring the height to 2.5 in (6.4 cm), and the 10-row band wraps the 1.6 in (4.1 cm) center snugly. Check your first wing against these numbers, and the rest of the bow will fall into place.
Optional: if you’d like a set for a wreath, simply repeat this same single bow as many times as you need.
Happy crocheting!