

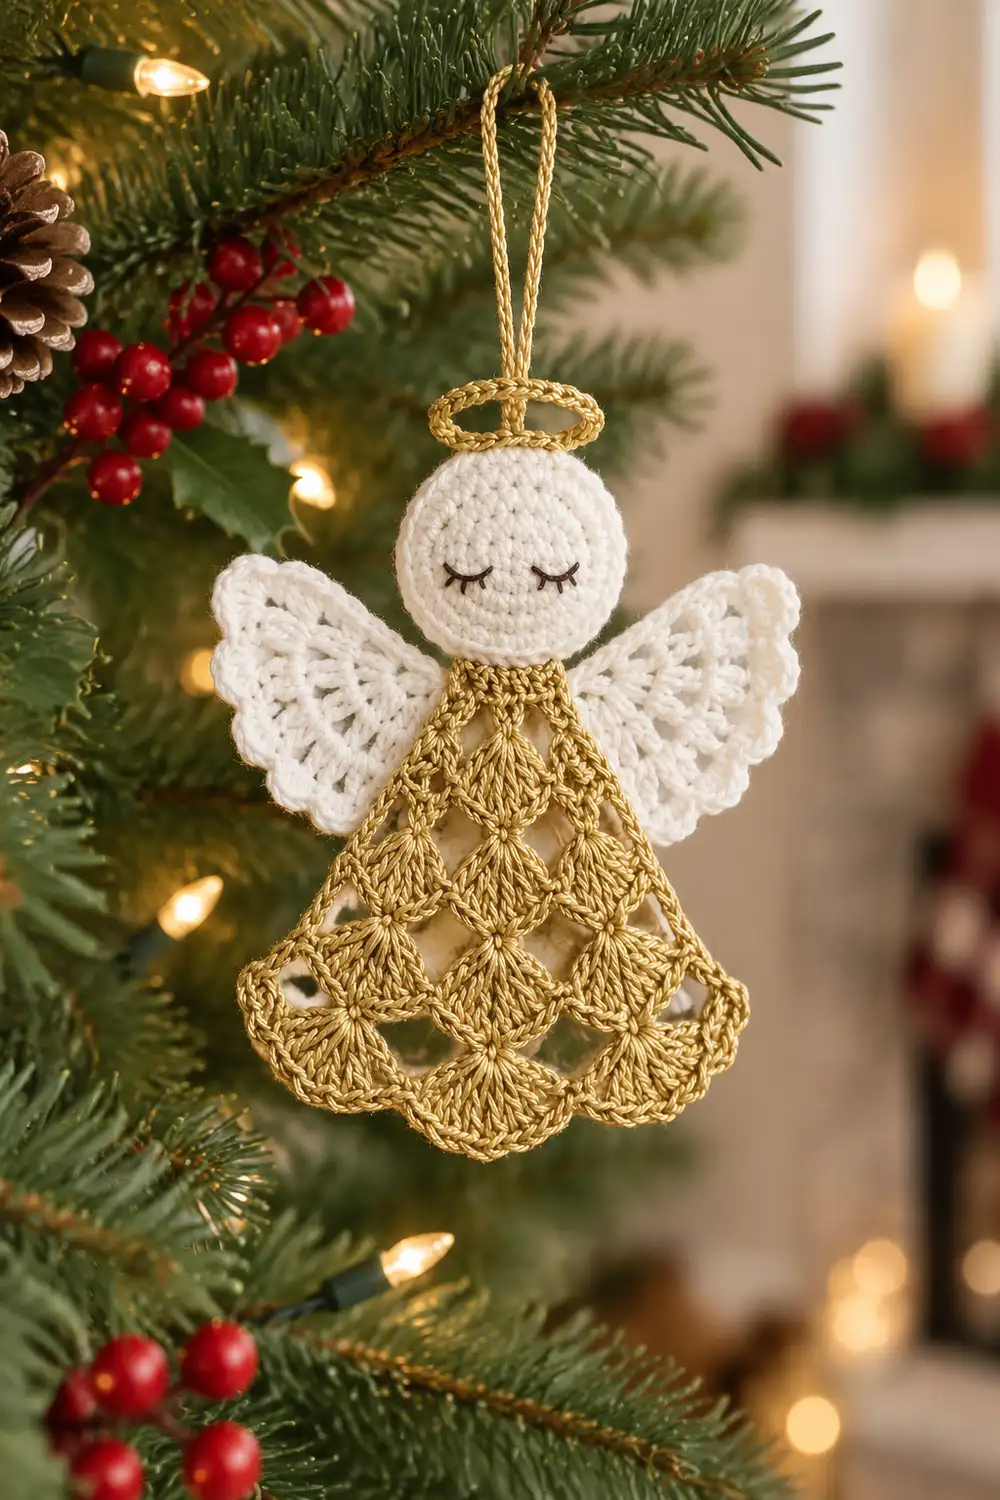
This little angel has a calm, sleepy face, lacy white wings, and a shimmering gold dress built from rows of shells. She is small, flat, and light, so she hangs well on a tree branch, a gift box, or a doorknob.
The palette uses only three yarn colors plus a little black for the eyes. The head is warm cream, and the wings are bright white with a scalloped fan texture. The dress and the twisted cord halo are metallic gold. The style is classic and soft, with a bit of shine.
This pattern uses US crochet terms. The finished angel measures about 4.5 in (11.4 cm) tall from the top of the halo to the hem, not counting the hanging loop. The wingspan is about 4.5 in (11.4 cm). The head is 1.5 in (3.8 cm) across.
You will make three pieces: a flat round head, a wing pair worked as one piece, and a triangular shell-stitch dress. You add a sc border to the dress, then sew the pieces together. A twisted gold cord forms the halo and the hanging loop. The eyes are embroidered last.
Finished Size and Construction
- Finished size: 4.5 in (11.4 cm) tall, halo to hem. The wingspan is 4.5 in (11.4 cm). The hanging loop adds about 1.5 in (3.8 cm).
- Skill level: Easy-intermediate
- Terminology: US
- Yarn weight: #2 fine (sport) cotton or cotton blend
- Hook: 2.75 mm (C-2)
- Number of pieces: 3. These are the head, the wing pair, and the dress. A twisted cord halo and embroidered eyes are added at the end.
- Layout: The halo sits above the head. The wings sit behind the head on either side, and the dress hangs below.
- Piece sizes:
- Head: 1.5 in (3.8 cm) across.
- Each wing: 1.75 in (4.4 cm) long.
- Center bar of the wing pair: 1 in (2.5 cm).
- Dress: 3 in (7.6 cm) tall and 3.5 in (8.9 cm) wide at the hem.
- Dress before border: 2.5 in (6.4 cm) tall and 3 in (7.6 cm) wide at the hem.
- Border depth: 0.25 in (0.6 cm) on every edge of the dress.
Materials
Yarn: Use a smooth, tightly plied fine (sport) weight yarn. Mercerized cotton holds stitch definition best. For gold, pick a metallic cotton blend rather than pure metallic thread, which is slippery and hard to tension.
- Cream (head): 2 g, about 7 m
- White (wings): 3 g, about 10 m
- Gold (dress, border, halo cord): 5 g, about 17 m
- Black (eyes): about 1 m of embroidery floss or fine yarn
All quantities include a margin of roughly 25% for swatching and tails.
Tools:
– 2.75 mm (C-2) crochet hook
– Tapestry needle
– Sharp embroidery needle for the eyes
– 3 stitch markers
– Rust-proof pins and a foam blocking mat
– Spray bottle, plus optional fabric stiffener or spray starch
– Scissors
Abbreviations (US Terms)
- ch: chain
- sl st: slip stitch
- sc: single crochet
- dc: double crochet
- sk: skip
- st(s): stitch(es)
- sp: space
- tch: turning chain
- MR: magic ring
- rep: repeat
- RS / WS: right side / wrong side
Special stitch: Shell = 5 dc worked into the same stitch or space.
Gauge and Checkpoints
The main gauge is 6 sc and 6 sc rows = 1 in (2.5 cm). Gauge matters more than usual here, because three pieces must line up. Make the head first and treat it as your swatch.
Checkpoints:
– Head: 1 in (2.5 cm) across after Round 3. 1.5 in (3.8 cm) across after Round 5.
– Wing: about 0.75 in (1.9 cm) long after Row 2. 1.75 in (4.4 cm) long after Row 4.
– Dress: 1.25 in (3.2 cm) tall and 1.5 in (3.8 cm) wide after Row 3. 2.5 in (6.4 cm) tall and 3 in (7.6 cm) wide after Row 6.
– Bordered dress: 3 in (7.6 cm) tall and 3.5 in (8.9 cm) wide.
If your head is too big, go down to a 2.5 mm hook. If it is too small, go up to a 3 mm hook. Remake the head before starting the other pieces. Do not change the stitch counts; change only the hook.
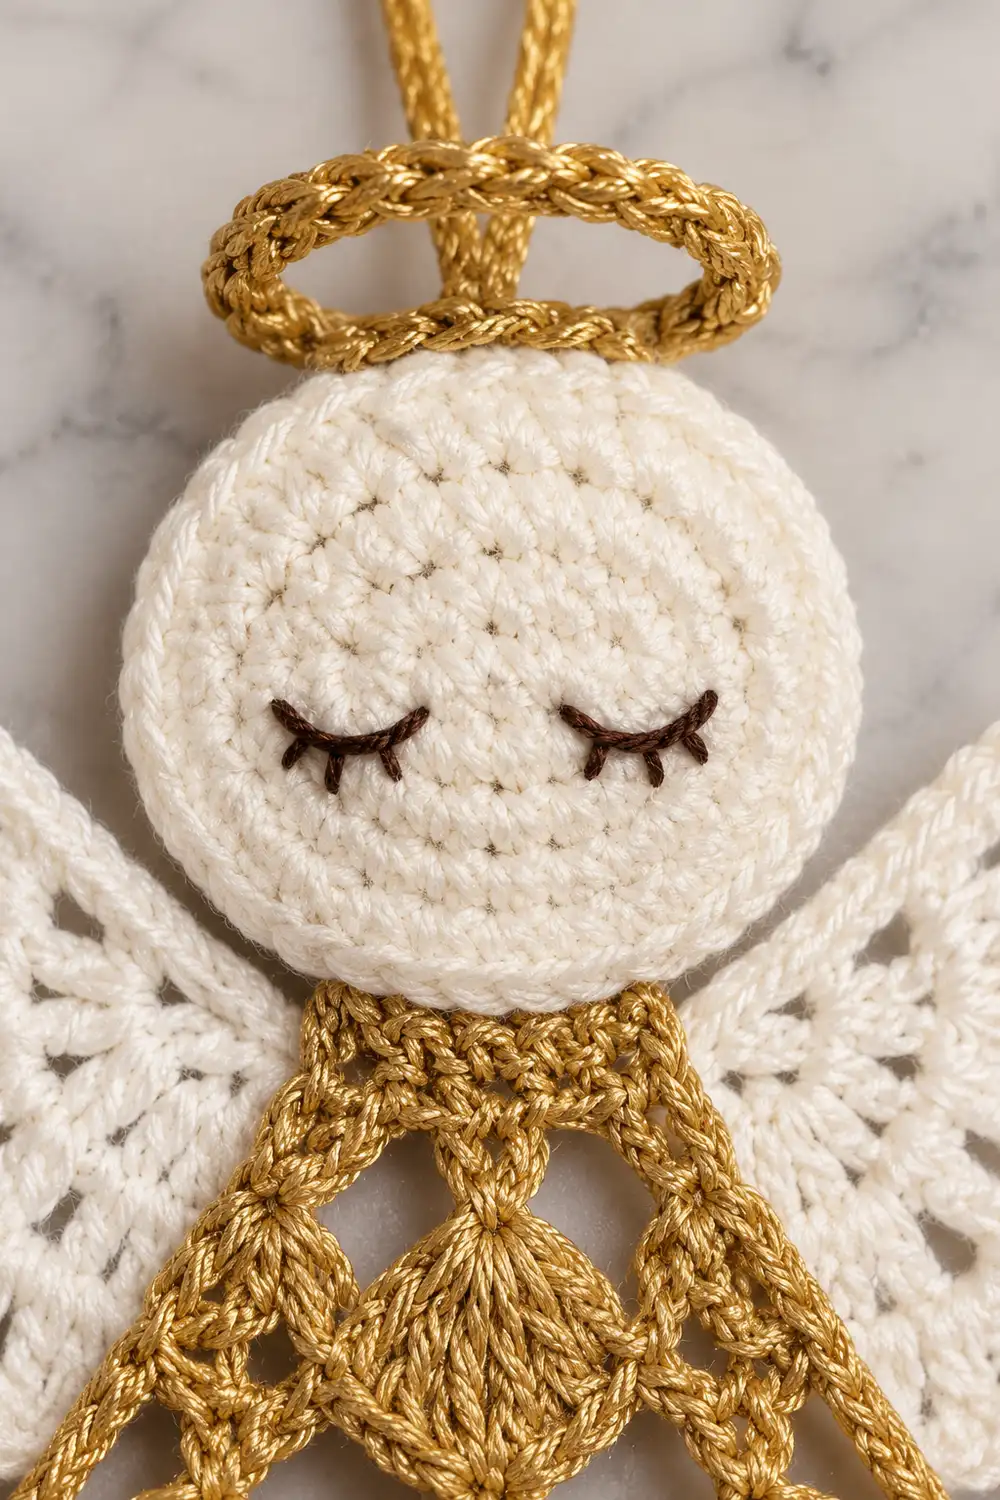
Head (Cream)
You will work in joined rounds with the RS facing throughout. The ch 1 at the start of a round does not count as a stitch.
Round 1: Make a MR. Ch 1, 6 sc in the ring. Sl st to the first sc. (6 sts)
Round 2: Ch 1, 2 sc in each st around. Sl st to the first sc. (12 sts)
Round 3: Ch 1, sc in next st, 2 sc in next st; rep from * around. Sl st to the first sc. (18 sts)*
Checkpoint: 1 in (2.5 cm) across.
Round 4: Ch 1, sc in next 2 sts, 2 sc in next st; rep from * around. Sl st to the first sc. (24 sts)*
Round 5: Ch 1, sc in next 3 sts, 2 sc in next st; rep from * around. Sl st to the first sc. (30 sts)*
Checkpoint: 1.5 in (3.8 cm) across and lying flat.
Fasten off, leaving a 10 in (25.4 cm) tail. Pull the MR tight and weave in the starting tail only.
Mark the head. Place a marker at the 6 o’clock stitch of Round 5. Then count 7 sts in each direction from it and place markers at 3 and 9 o’clock. Those two markers are 15 sts apart around the circle.
Wing Pair (White)
The two wings are one piece. They are worked from opposite ends of a single foundation chain. The unused middle of that chain becomes the center bar that sits behind the head.
Foundation: Ch 12.
First Wing
Row 1 (RS): Work 6 dc in the 4th ch from the hook. The 3 skipped chains count as the first dc. Turn. (7 dc)
Row 2:
– Ch 3 (counts as dc).
– Dc in the same st.
– 2 dc in each of the next 5 dc.
– Dc in the top of the tch.
– Turn.
(13 dc)
Row 3:
– Ch 4 (counts as dc + ch 1).
– *Dc in next dc, ch 1; rep from * across, ending with dc in the top of the tch.
– Turn.
(13 dc, 12 ch-1 sps)
Row 4:
– Ch 1, sc in the first dc.
– *Sk (ch-1 sp, dc), shell in next ch-1 sp, sk (dc, ch-1 sp), sc in next dc.
– Rep from * 3 more times. The last sc goes in the 3rd ch of the tch.
(4 shells, 5 sc = 25 sts)
Checkpoint: 1.75 in (4.4 cm) from base to scallop edge.
Fasten off.
Second Wing
Return to the other end of the foundation chain. This is the first chain you made, at the slip-knot end.
Row 1 (RS): Join white in that chain. Ch 3 (counts as dc), then 6 dc in the same ch. Turn. (7 dc)
Rows 2–4: Work as for the First Wing, with the same counts.
Fasten off. Weave in the tails.
Center bar check: 7 chains stay free between the two wings. These are the 5th through 11th chains from the original hook end. They should measure about 1 in (2.5 cm).
Dress (Gold)
The dress is worked flat from the neck down, turning at the end of each row. Every row adds one shell, which creates the triangle. Each shell stacks between the shells of the row above, so the skirt forms tiered scallops that fan out like a bell.
Row 1 (RS): Ch 4. Work 4 dc in the 4th ch from the hook. The skipped chains count as the first dc. Turn. (1 shell = 5 sts)
Row 2:
– Ch 3 (counts as dc), 4 dc in the first st (edge shell).
– Sk 1 dc, sc in the center dc of the shell.
– Shell in the top of the tch.
– Turn.
(2 shells, 1 sc = 11 sts)
Row 3:
– Ch 3 (counts as dc), 4 dc in the first st.
– *Sc in the center dc of the next shell, shell in the next sc; rep from * to the last shell.
– Sc in the center dc of the last shell, shell in the top of the tch.
– Turn.
(3 shells, 2 sc = 17 sts)
Checkpoint: 1.25 in (3.2 cm) tall and 1.5 in (3.8 cm) wide.
Rows 4–6: Rep Row 3. Each row has one more shell and one more sc than the row before.
– Row 4: 4 shells, 3 sc = 23 sts
– Row 5: 5 shells, 4 sc = 29 sts
– Row 6: 6 shells, 5 sc = 35 sts
The formula for any row is 6 × (row number) − 1 stitches.
Checkpoint: 2.5 in (6.4 cm) tall and 3 in (7.6 cm) wide at the hem.
Do not fasten off. Go straight to the Border section, then come back to assembly.
Make All Pieces
- Cream: 1 head
- White: 1 wing pair, worked as one piece
- Gold: 1 dress with border, plus 1 twisted cord for the halo and loop
- Black: eye embroidery only
Layout (front view):
ROW 1: GOLD HALO + HANGING LOOP
ROW 2: WHITE WING | CREAM HEAD | WHITE WING
ROW 3: GOLD DRESS
Joining
Finish the dress border before you join. The head is sewn to the neck stitches of the border.
Method: Whipstitch on the back of the work. Catch only the back loops or back bumps, so nothing shows on the front.
Wings to head:
1. Lay the head face down.
2. Center the wing bar horizontally across the back of the head, just above the 3 and 9 o’clock markers.
3. Using the cream tail, tack the bar at each end and once in the middle. Each end should sit about 0.25 in (0.6 cm) inside the rim.
4. Each wing should now emerge from behind the head at 3 and 9 o’clock.
5. Turn the wings so the scalloped edges point outward and slightly up.
Dress to head:
1. The 5 neck stitches of the dress border are the 3 neck sc plus 1 sc on each side. Center them on the 6 o’clock marker.
2. Tuck the neck about 0.25 in (0.6 cm) behind the head.
3. Whipstitch stitch-to-stitch: 5 border sc to 5 head stitches along the back of Round 5, centered on the marker.
Tension: Pull each stitch just snug. If you pull hard, the head will cup and the neck will pucker.
Size checkpoint: Measure from the top of the head to the hem. It should be about 4.25 in (10.8 cm): 1.5 in head + 3 in dress − 0.25 in overlap.
Border (Gold, Dress Only)
Border gauge: The side stitch counts are set by row-ends, not by a separate gauge. You work 3 sc into each shell row-end. Each slanted side is about 2.8 in (7.1 cm) long, so 18 sc works out to about 6.4 sc per inch. That is the same as the body gauge of 6 sc/in, just a touch snug, which keeps the sides from rippling.
Round 1: Ch 1 and rotate to work down the side.
– First side: 18 sc along the row-ends, 3 sc per row-end of Rows 6 through 1.
– Neck: 3 sc in the foundation ch at the neck point.
– Second side: 18 sc along the row-ends of Rows 1 through 6.
– Hem (across Row 6): 3 sc in the first st (corner), 1 sc in each of the next 33 sts, 3 sc in the last st (corner).
– Sl st to the first sc.
(78 sc)
Why the math works: Row 6 has 35 stitches, and the hem takes exactly 1 sc in each of them. That gives 35 sc. The two corner stitches each get 2 extra sc, which adds 4 more. Then add 18 + 18 for the sides and 3 at the neck: 35 + 4 + 18 + 18 + 3 = 78.
The hem looks dense, but the sc are following the curved scallop tops. That curved edge is much longer than the 3 in (7.6 cm) straight width, so the edge stays flat and the scallops keep their shape. Plain sc gives a smooth, defined outline.
Round 2: Sl st through the back loop of each sc around. (78 sl st)
Fasten off and weave in the ends.
Checkpoint: 3 in (7.6 cm) tall and 3.5 in (8.9 cm) wide at the hem.
Halo, Loop, and Eyes
Twisted cord:
1. Cut 2 strands of gold, each 36 in (91.4 cm).
2. Knot them together at both ends.
3. Anchor one end and twist the other until the strands kink back on themselves.
4. Fold the cord in half and let it twist together. Knot the loose end.
5. The cord will be about 12 in (30.5 cm) long.
Halo:
1. Form a ring about 1.25 in (3.2 cm) across and stitch the overlap closed.
2. Sew the back of the ring to the top of the head so it sits 0.25 in (0.6 cm) above the rim.
3. Fold the remaining cord into a 1.5 in (3.8 cm) loop rising from the halo’s center back.
4. Stitch the loop securely to the head back and trim the excess.
Eyes:
1. Use black floss to embroider each eye as a downward-curving arc between Rounds 3 and 4.
2. Make each arc 3 stitches wide.
3. Leave 5 stitches between the two eyes.
4. Add 3 tiny straight lashes below each arc.
Final Blocking
- Lightly mist the whole angel until it is damp, not wet.
- Pin the head into a true circle, 1.5 in (3.8 cm) across.
- Pin the dress into a symmetrical triangle, 3.5 in (8.9 cm) wide at the hem. Put one pin at the center dc of each of the 6 hem shells.
- Open each wing into a fan and pin the 4 scallops of each one evenly.
- Shape the halo into a round ring and stand the loop upright.
- Optional: brush a thin coat of stiffener on the wings and dress.
- Let everything dry fully, usually overnight, before unpinning.
Final Quality-Control Checklist
- [ ] The head is 1.5 in (3.8 cm) across and has 30 sts in Round 5.
- [ ] Each wing has 4 shells and 5 sc, and the two wings mirror each other.
- [ ] The dress Row 6 has 35 sts, with 6 shells and 5 sc.
- [ ] The border has 78 sc with 3 sc at each hem corner.
- [ ] The bordered dress is 3 in × 3.5 in (7.6 cm × 8.9 cm).
- [ ] The total height is 4.5 in (11.4 cm) from halo to hem.
- [ ] The eyes are level and centered.
- [ ] All tails are woven in on the back.
Troubleshooting
- Head ruffles: Your tension is too loose for the increases. Go down a hook size or tighten your sc.
- Head cups: Your tension is too tight. Go up a hook size.
- Dress leans to one side: You probably missed the shell in the top of the tch. Recount the row using 6 × (row number) − 1.
- Wings flop: Block them with stiffener, and check that you used ch 1 (not ch 2) in Row 3.
- Gold yarn splits: Use a hook with a rounded head and work more slowly.
- Halo droops: Add a second tack stitch at the front of the ring.
Care
Hand wash in cool water and lay flat to dry, re-pinning the scallops if needed. Store the angel flat in tissue so the wings and halo keep their shape.
Final Notes
Everything depends on the head. If it measures 1.5 in (3.8 cm) at 30 stitches, the 1.75 in (4.4 cm) wings and the 2.5 in (6.4 cm) dress should follow. The 0.25 in (0.6 cm) border brings the dress to 3 in (7.6 cm), and assembly brings the angel to 4.5 in (11.4 cm) tall. Check each stage as you go, and the pieces will line up.
Optional: make several angels in different dress colors for a matching set.
Happy crocheting!