

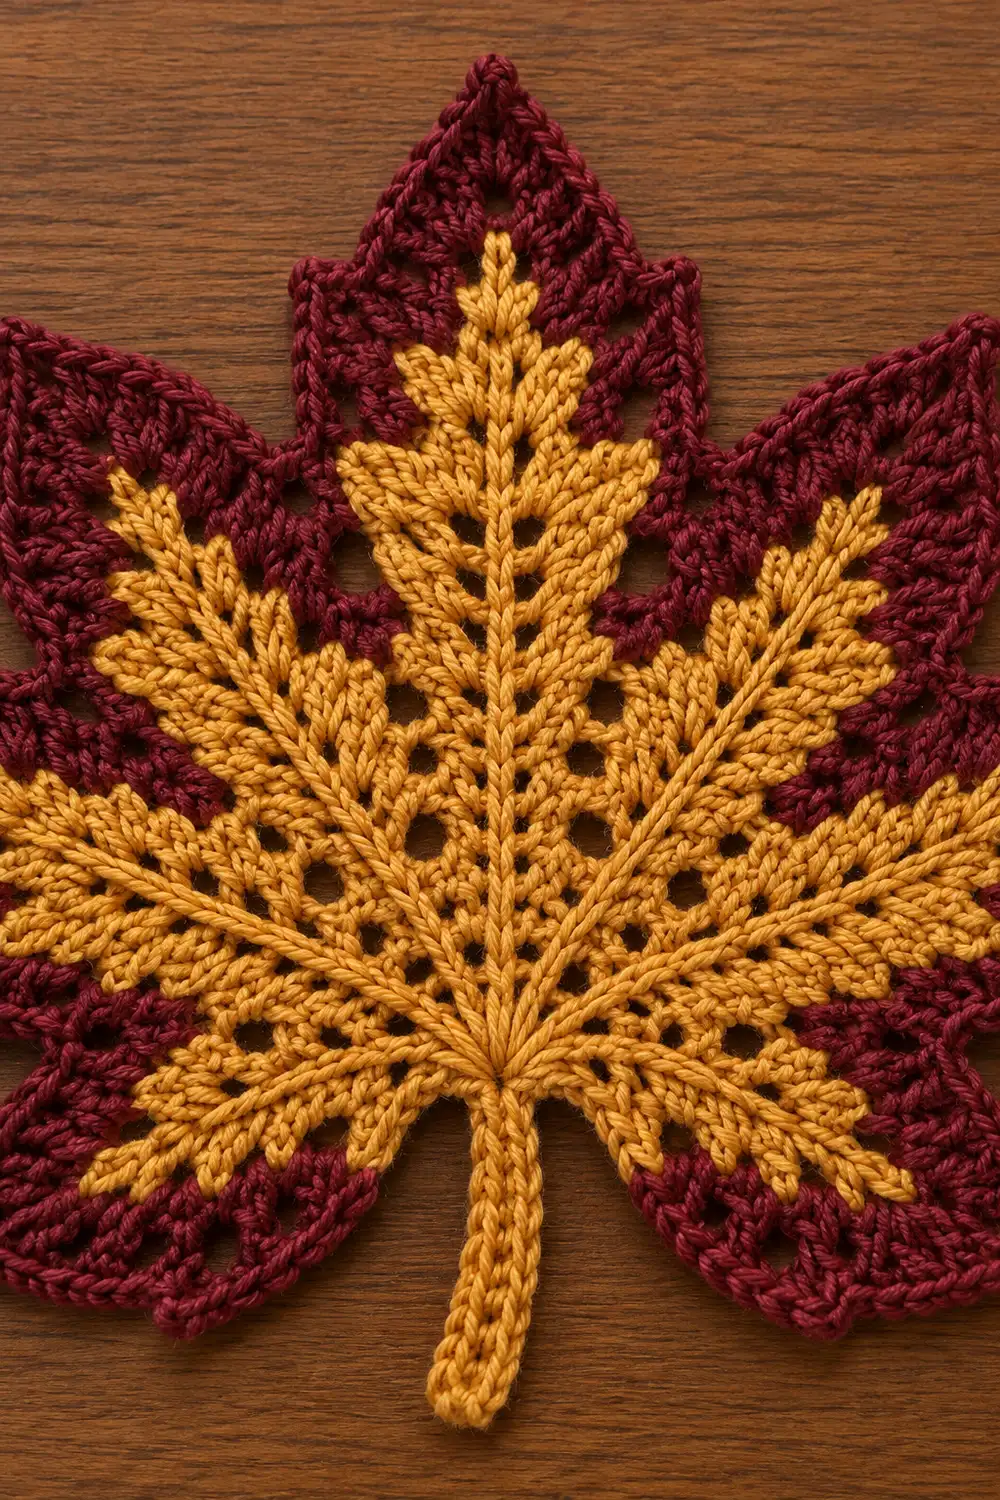
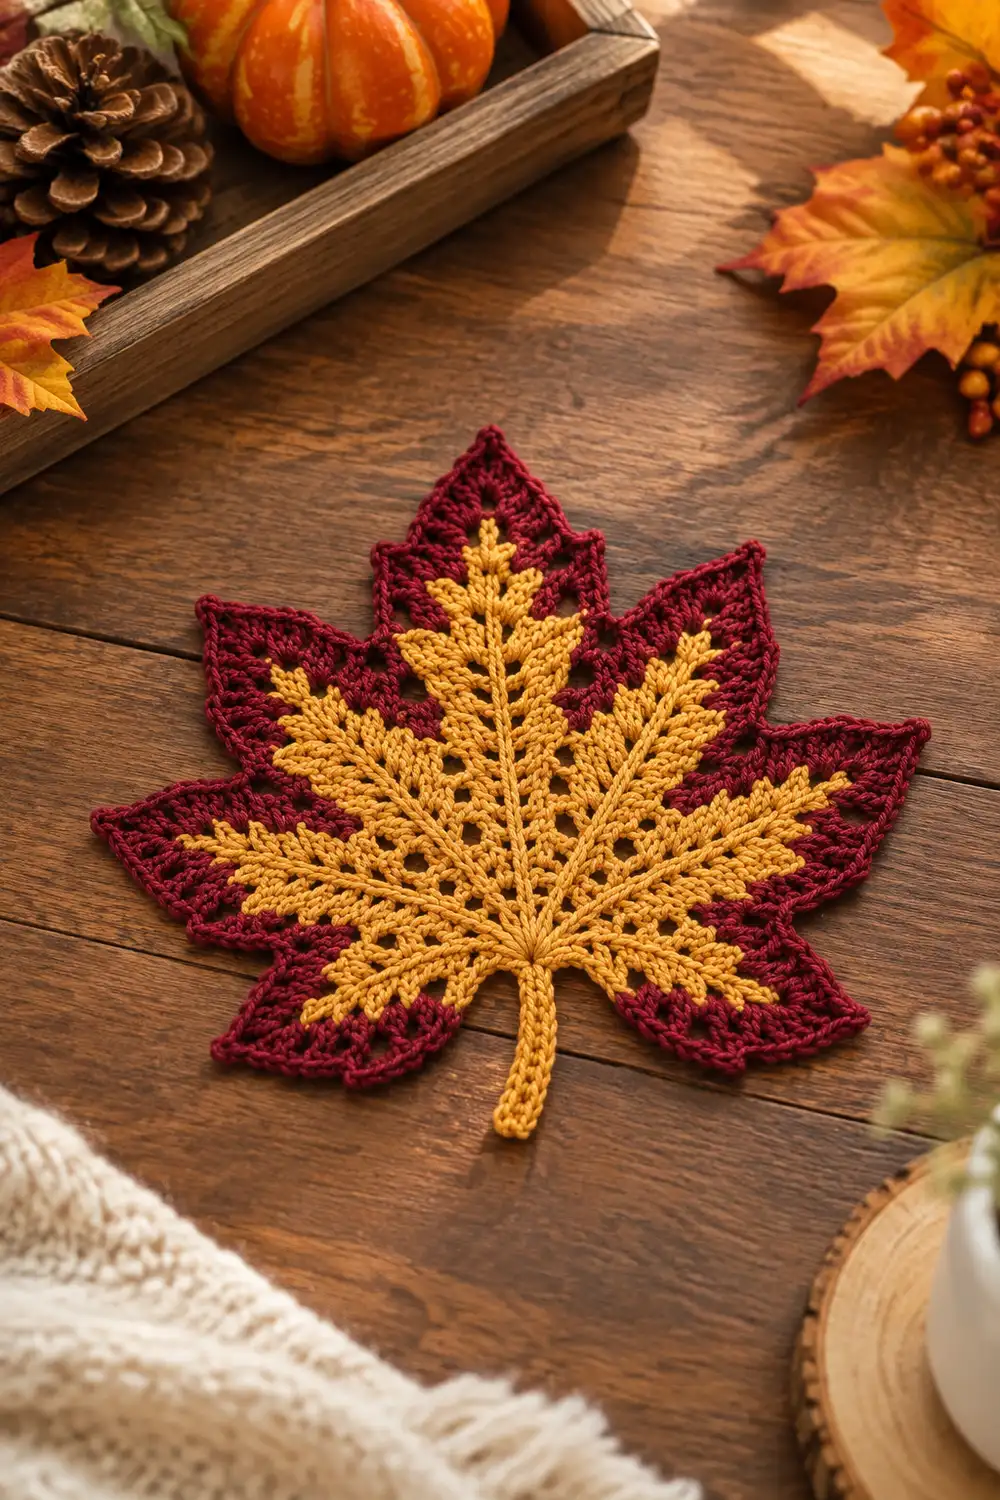
The Autumn Ember Maple Leaf is a single lacy crochet maple leaf with seven pointed lobes radiating from a central base. It pairs a golden yellow interior with a deep burgundy outer band, which gives it a warm autumn contrast that works well on a table, a wall, or a fall display.
The golden center is worked as a lacy fan with open chain spaces. Seven short lobes grow from it. A burgundy mesh round of dc and chain spaces then wraps the whole outline, and a single crochet round finishes the edge and sharpens each lobe tip. Gold surface slip stitch veins run from the base to every point, and a separate golden stem is sewn on at the base.
This pattern uses US crochet terms. The finished leaf measures 4.5 in (11.4 cm) wide and 3.5 in (8.9 cm) tall, not counting the stem. With the stem, the total height is 4.5 in (11.4 cm).
Construction overview: gold fan (3 rows), seven gold lobes (3 rows each), burgundy border (2 rounds), gold surface veins, and a stem sewn to the base.
Finished Size and Construction
- Finished size: 4.5 in (11.4 cm) wide x 3.5 in (8.9 cm) tall, plus 1 in (2.5 cm) of visible stem
- Skill level: Intermediate
- Terminology: US crochet terms
- Yarn weight: Sport (weight 2) cotton
- Hook: 2.75 mm (US C-2)
- Number of pieces: 2 (leaf and stem)
- Layout: One leaf with the stem sewn behind the base
- Piece size: Leaf 4.5 in (11.4 cm) x 3.5 in (8.9 cm). Stem 1.5 in (3.8 cm) long.
- Size before border: Gold leaf 3.25 in (8.3 cm) wide x 2.25 in (5.7 cm) tall
- Border depth: 0.625 in (1.6 cm) on every edge
Materials
Use a smooth mercerized cotton or a cotton blend in sport weight. Smooth cotton shows the lace and keeps the points crisp. Avoid fuzzy yarns, because they blur the veins.
- Golden yellow (Color A): 7 g, about 21 m (fill, veins, and stem)
- Burgundy (Color B): 6 g, about 18 m (border)
Tools:
- 2.75 mm (US C-2) hook
- Tapestry needle
- Scissors
- 3 stitch markers
- Rust-proof pins
- Blocking board or foam mat
- Spray bottle
- Ruler
All yarn quantities include a small margin for swatching and weaving in ends.
Abbreviations (US Terms)
- ch – chain
- sl st – slip stitch
- sc – single crochet
- hdc – half double crochet
- dc – double crochet
- tr – treble crochet
- MR – magic ring
- sp – space
- st(s) – stitch(es)
- RS – right side
Special stitches:
- V-st: (dc, ch 1, dc) in the same st or sp.
- Tip shell: (2 sc, ch 2, 2 sc) in the same sp.
- Surface sl st: Hold the yarn behind the work. Insert the hook from front to back through the fabric, pull up a loop, and draw it through the loop on the hook. Each stitch makes one raised “chain” on the RS.
Gauge and Checkpoints
Gauge: 24 dc and 14 dc rows = 4 in (10.2 cm). That works out to 6 dc and 3.5 rows per inch.
Test the pattern on the leaf itself. Work the gold fan (Rows 1–3) first and measure the straight base edge before you start the lobes.
Checkpoints (all measured flat, without stretching):
- After Row 1: base edge about 0.75 in (1.9 cm)
- After Row 2: base edge about 1.25 in (3.2 cm)
- After Row 3: base edge about 1.75 in (4.4 cm)
- Each finished lobe: about 0.75 in (1.9 cm) tall above Row 3
- Gold leaf complete: 3.25 in (8.3 cm) wide x 2.25 in (5.7 cm) tall
- After border Round 1: about 4.25 in (10.8 cm) wide
- After border Round 2: 4.5 in (11.4 cm) wide x 3.5 in (8.9 cm) tall
If your piece is too big: Go down to a 2.5 mm hook and restart.
If it is too small: Go up to a 3.0 mm hook.
A difference of 0.25 in (0.6 cm) or less at Row 3 can be corrected with blocking.
Gold Center Fan
With Color A, make an MR.
Row 1: Ch 3 (counts as dc), 6 dc in ring. Pull the ring closed. Turn.
(7 dc)
Row 2: Ch 4 (counts as dc + ch 1), dc in the same st. V-st in each of the next 6 sts. Turn.
(7 V-sts: 14 dc, 7 ch-1 sp)
Row 3: Ch 3 (counts as dc), dc in the next ch-1 sp, dc in the next dc. Ch 1, dc in the next dc, dc in the next ch-1 sp, dc in the next dc (or in the 3rd ch of the turning ch-4 on the last repeat). Repeat from * 5 more times. Do not fasten off.
(7 groups of 3 dc: 21 dc, 6 ch-1 sp)*
Each 3-dc group sits directly above one V-st. Each group becomes the base of one lobe. The ch-1 sps between the groups become the valleys between the lobes.
Check the base edge now: it should measure 1.75 in (4.4 cm).
Gold Lobes
Work each lobe in short rows over one 3-dc group. Call the three sts of a group A, B, and C, in working order.
Lobe Row 1: Turn. Ch 3 (counts as dc in A), ch 1, V-st in B, ch 1, dc in C. Turn.
(4 dc, 3 ch-1 sp)
Lobe Row 2: Ch 3 (counts as dc). Dc in the first ch-1 sp, skip the next dc. Work (dc, ch 2, dc) in the center ch-1 sp. Skip the next dc, dc in the last ch-1 sp, dc in the top of the turning ch. Turn.
(6 dc, 1 ch-2 sp)
Lobe Row 3: Ch 1. Work sc in the first dc, hdc in the next dc, dc in the next dc, (dc, ch 2, dc) in the ch-2 sp, dc in the next dc, hdc in the next dc, and sc in the top of the turning ch.
(8 sts, 1 ch-2 tip sp)
The shorter stitches at each end slope the sides toward the ch-2 tip, which forms the point.
Move to the next lobe: Work 3 sl sts evenly down the side of the lobe, one in each row end, to reach Row 3 of the fan. Skip the ch-1 sp. Sl st in A of the next group. On this lobe’s Lobe Row 1, the ch 3 rises from that sl st.
Repeat the lobe instructions until all 7 lobes are complete. Fasten off Color A.
Lay the leaf flat. It should measure 3.25 in (8.3 cm) wide and 2.25 in (5.7 cm) tall. The lobes should touch at their bases, with the Row 3 ch-1 sps forming deep valleys.
Border
Border gauge: The burgundy mesh in Round 1 is worked at about 4 (ch 1, dc) units per 1 in (2.5 cm) of edge.
- Each lobe side is about 0.75 in (1.9 cm) long and gets 3 units, one per row end.
- Each fan side is about 0.875 in (2.2 cm) long and gets 4 units: 1 in the Row 1 end, 1 in the Row 2 end, and 2 in the taller Row 3 end.
Round 1 (Mesh)
With RS facing, join Color B with a standing sc around the base of the MR, centered between the first and last dc of Row 1. This is the base sc.
- Fan side A: [Ch 1, dc] in the Row 1 end, in the Row 2 end, and twice in the Row 3 end. (4 dc, 4 ch-1 sp)
- Lobe 1, up side: [Ch 1, dc] in each of the 3 lobe row ends. (3 dc, 3 ch-1 sp)
- Lobe 1, tip: Ch 1, then (tr, ch 3, tr) in the ch-2 tip sp.
- Lobe 1, down side: [Ch 1, dc] in each of the 3 lobe row ends. (3 dc, 3 ch-1 sp)
- Valley: Ch 1, sc in the Row 3 ch-1 sp between the lobes.
- Lobes 2–7: Repeat steps 2–4 for each remaining lobe. Work step 5 between each pair of lobes.
- Fan side B: [Ch 1, dc] twice in the Row 3 end, then once each in the Row 2 end and the Row 1 end. (4 dc, 4 ch-1 sp)
- Ch 1, then sl st to the base sc.
Per lobe: 6 dc, 2 tr, 7 ch-1 sp, and 1 ch-3 sp.
Round 1 totals:
- 7 sc (1 base + 6 valleys)
- 50 dc (8 on the fan sides + 42 on the lobes)
- 14 tr
- That makes 71 sts, plus 64 ch-1 sp and 7 ch-3 sp.
The 64 ch-1 sp break down as 4 (fan A) + 49 (lobes) + 6 (valleys) + 4 (fan B) + 1 (closing).
Spaces alternate with stitches all the way around, so 64 + 7 = 71 spaces matches the 71 stitches.
Optional: For smaller bottom lobes, use dc instead of tr on lobes 1 and 7. The counts stay the same.
Round 2 (Single Crochet Edge)
This is a conversion round. Work 1 sc into each existing st and each ch-1 sp. The only changes are at the tips and valleys.
- Ch 1, sc in the base sc.
- Fan side A: Sc in each ch-1 sp and dc. (8 sc)
- Each lobe:
- Up side: 6 sc (3 sps + 3 dc)
- 1 sc in the ch-1 sp before the tip
- 1 sc in the tr
- Tip shell in the ch-3 sp
- 1 sc in the next tr
- Down side: 6 sc
- (19 sc and 1 ch-2 tip per lobe)
- Each valley: Sc in the ch-1 sp, then sl st in the valley sc.
- Fan side B: 8 sc, then sc in the closing ch-1 sp.
- Sl st to the first sc. Fasten off.
Round 2 count:
- Round 1 has 135 positions (71 sts + 64 ch-1 sp).
- Subtract the 6 valley positions, which are worked as sl sts: 129 sc.
- Add 7 tip shells x 4 sc = 28 sc.
- Total: 157 sc, plus 6 valley sl sts and 7 ch-2 tips.
Check by section: 133 (7 lobes x 19) + 16 (fan sides) + 1 (base) + 6 (valley sps) + 1 (closing sp) = 157.
Why the math works: The tr stitches and chain loops lift each tip, while the low sc valleys stay anchored to Row 3. The sl sts in Round 2 keep the valleys tight. The tip shells add 4 sc around a ch-2 point, so the edge sharpens without curling. The mesh gauge matches the edge length, so the border lies flat.
Veins
Using Color A, work surface sl sts with the RS facing.
- Central vein: Start at the base of the MR. Work straight up through Row 1, the center of the matching Row 2 V-st, the middle dc of the Row 3 group, and the Lobe Row 1 V-st center. Continue through the Lobe Row 2 ch-2 sp and up to the Lobe Row 3 tip.
- Branch veins: Start each branch just above the base. Follow the same path through the fan and lobe centers to each of the other six tips.
- Tension: Keep each surface sl st the same length as about 1 dc row, roughly 0.29 in (0.7 cm). Pull only snug enough to raise the line. Do not let it pucker the lace.
- Fasten off each vein on the WS.
Stem
With Color A, ch 10. Sc in the 2nd ch from the hook and in each ch across.
(9 sc, about 1.5 in / 3.8 cm long)
Fasten off, leaving a 6 in (15.2 cm) tail.
Overlap 0.5 in (1.3 cm) of the stem behind the base sc of Round 2. Whipstitch it in place so that 1 in (2.5 cm) extends below the leaf.
Final Blocking
- Weave in all ends along stitches of the matching color.
- Mist the leaf until it is evenly damp. Do not soak it.
- Pin the base sc first, then the tip of the top lobe, 3.5 in (8.9 cm) above the base.
- Pin the two widest tips 4.5 in (11.4 cm) apart.
- Pin the remaining four tips at even angles. Then pin each valley sl st toward the center.
- Pull each ch-2 tip into a sharp point with a pin.
- Lay the stem straight, or give it a slight curve, and pin it.
- Let the leaf dry completely before removing the pins.
Final Quality-Control Checklist
- [ ] Fan Row 3 has 21 dc in 7 groups.
- [ ] Each lobe ends with 8 sts and a ch-2 tip.
- [ ] Round 1 has 71 sts; Round 2 has 157 sc.
- [ ] All 7 tips are sharp, and all 6 valleys sit deep.
- [ ] The veins run straight to each tip without puckering.
- [ ] The leaf measures 4.5 in (11.4 cm) x 3.5 in (8.9 cm).
- [ ] The stem shows 1 in (2.5 cm) below the base.
- [ ] No loose ends show on the RS.
Troubleshooting
- Fan cups upward: Your tension is too tight. Go up a hook size, or loosen the Row 2 V-sts.
- Fan ruffles: The ch-1 sps are too loose. Shorten the chains or go down a hook size.
- Lobes overlap: Make sure you skipped the Row 3 ch-1 sp when moving between lobes.
- Border waves: You have placed extra dc in the row ends. Recount to 3 units per lobe side and 4 per fan side.
- Blunt tips: Check that the tr and the tip shell are in the correct sps, then re-pin while the leaf is damp.
- Puckered veins: Lengthen the surface sl sts and re-block.
Care
Hand wash in cool water and press out the water in a towel. Reshape and dry flat, re-pinning the tips if needed.
Final Notes
The measurement chain runs as follows:
- Gauge: 6 dc per inch
- Fan base edge: 1.75 in (4.4 cm)
- Gold leaf: 3.25 in (8.3 cm) x 2.25 in (5.7 cm)
- Border: 0.625 in (1.6 cm) on every edge
- Finished leaf: 4.5 in (11.4 cm) x 3.5 in (8.9 cm), plus 1 in (2.5 cm) of stem
Check each stage before moving on, and the leaf will finish true to size.
Optional: Several leaves in mixed autumn shades make a pretty seasonal scatter.
Happy crocheting!