

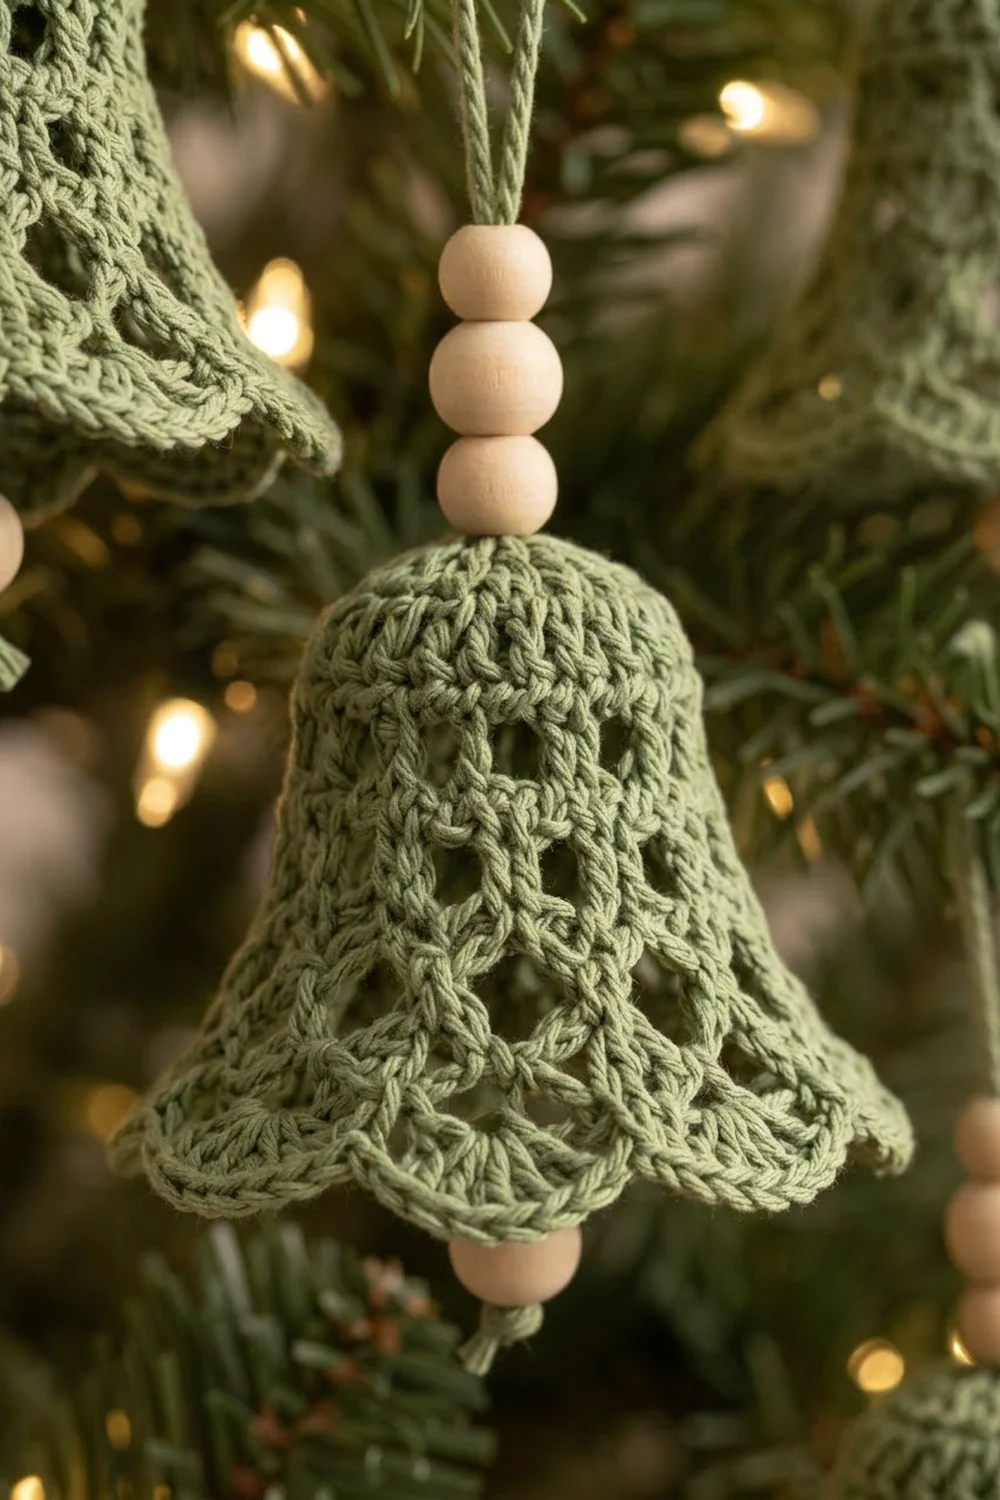
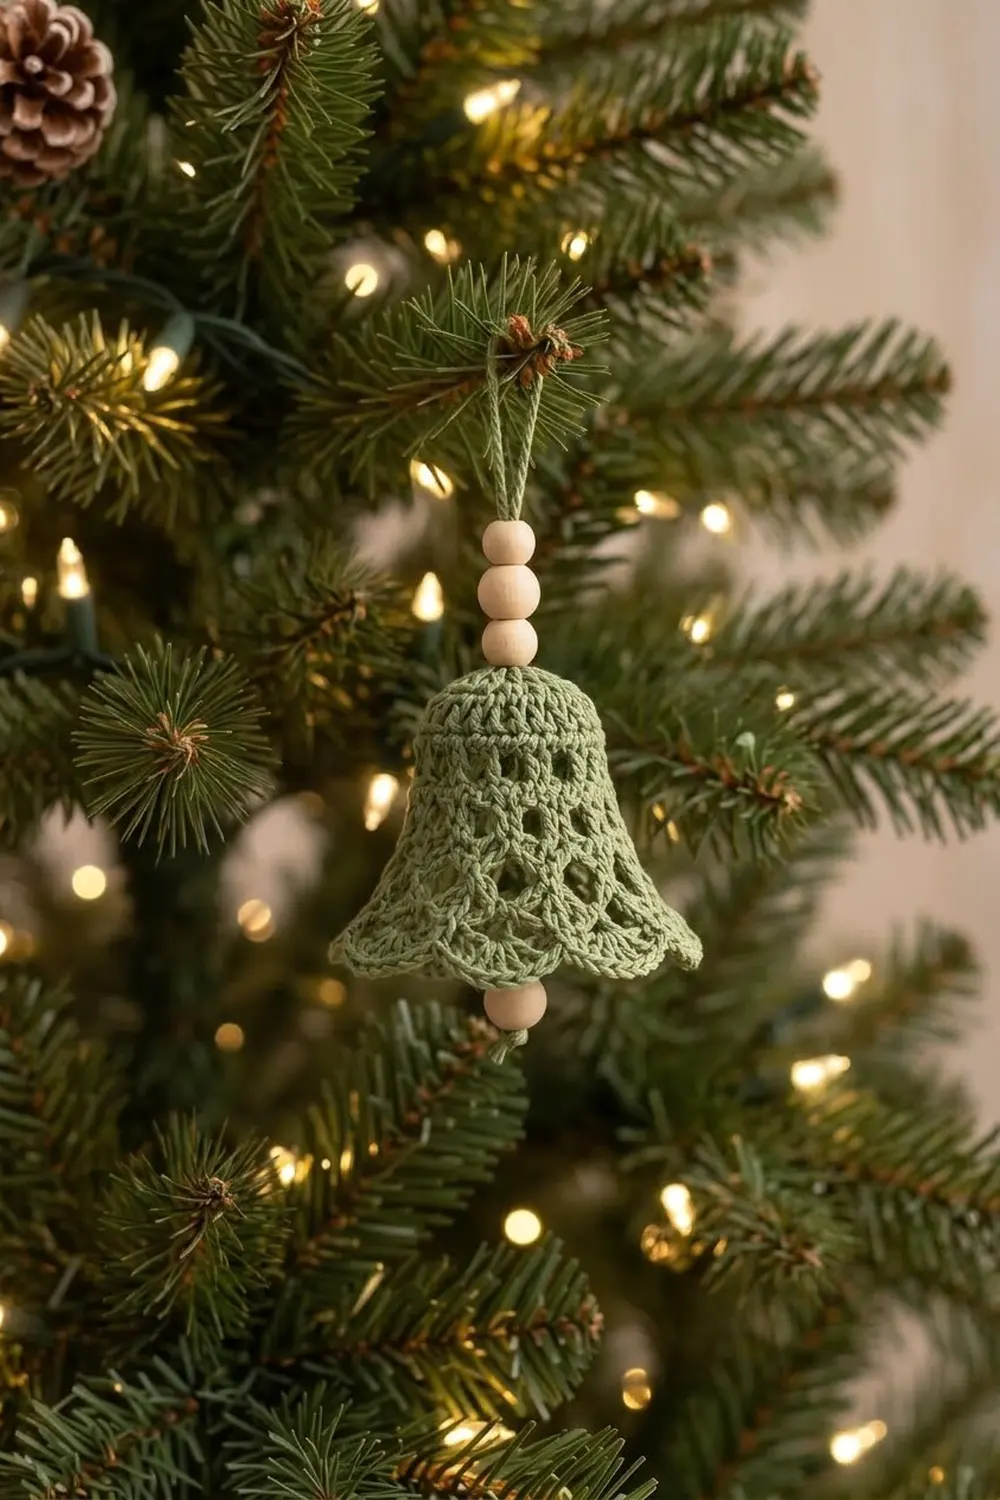
This little bell is a soft, vintage-style tree ornament worked in sage green yarn. A smooth, gently rounded dome crown opens into a lacy filet-style body with rows of small square windows. The bell then flares into a scalloped bottom edge finished with tiny picot points.
The hanger is a single strand of yarn threaded through natural wooden beads. Three beads stack above the crown and form a hanging loop, and a fourth bead hangs just below the rim as a clapper. The muted green and pale wood look lovely against evergreen branches and warm white lights.
This pattern uses US crochet terms. The finished bell measures about 2.5 in (6.4 cm) tall and 3 in (7.6 cm) across the flared rim after blocking.
The bell is one piece, worked top-down in joined rounds. You start with a magic ring and single crochet increases for the rounded crown. Next come alternating mesh and solid double crochet rounds for the lattice body, then V-stitches and shells for the flare. A final round of picot scallops forms the edge.
Finished Size and Construction
- Finished size: 2.5 in (6.4 cm) tall, 3 in (7.6 cm) across the rim
- Skill level: Easy-intermediate
- Terminology: US crochet terms
- Yarn weight: DK / light worsted (#3), cotton or cotton blend
- Hook: 3.0 mm
- Number of pieces: 1 bell, plus a beaded hanger
- Layout: Single ornament, worked top-down in the round
- Piece size: 2.5 in (6.4 cm) tall × 3 in (7.6 cm) rim
- Size before border (after Round 10): 2.2 in (5.6 cm) tall, 2.6 in (6.6 cm) across the rim
- Border depth (scallop round): about 0.3 in (0.8 cm)
Materials
Yarn advice: Choose a smooth, tightly plied cotton in DK weight. Cotton shows lace clearly and holds its shape well after stiffening. Fuzzy or very soft acrylic will blur the openwork and let the flare droop.
- Sage green, DK cotton: 6 g / 15 m (16 yd), for the bell and hanger
Tools and notions:
- 3.0 mm crochet hook
- 4 natural-wood round beads, 10–12 mm, with holes at least 3 mm wide (5 beads if you prefer a taller stack)
- Tapestry needle that fits through the bead holes
- 1 stitch marker
- Scissors
- Fabric stiffener, or a strong starch solution
- A blocking form, such as a small shot glass, egg cup, or narrow bottle neck about 1.5 in (3.8 cm) wide
- Rustproof pins and a foam block
The quantities include a margin of about 30% for your gauge swatch, the hanger, and weaving in ends. One bell actually uses about 4–5 g.
Abbreviations (US Terms)
- ch – chain
- sl st – slip stitch
- sc – single crochet
- dc – double crochet
- inc – 2 sc in the same stitch
- sk – skip
- sp – space
- st(s) – stitch(es)
- MR – magic ring
- rep – repeat
Special stitches:
- V-stitch (V): (dc, ch 1, dc) in the same stitch or space.
- Shell: (2 dc, ch 2, 2 dc) in the same space.
- Picot: ch 3, then sl st in the 3rd ch from the hook.
- Scallop: (3 dc, picot, 3 dc) in the same space.
Gauge and Checkpoints
Gauge is 22 sc = 4 in (10.2 cm), or 5.5 sc per inch. For a small piece like this, the bell itself is your swatch. Make one bell completely before deciding on yarn for a set. Check your size at these stages:
- After Round 4 (24 sc): Lay the crown flat. It should measure about 1.4 in (3.6 cm) across.
- After Round 8: The bell should measure about 1.6 in (4.1 cm) from the crown top to the edge, and about 1.5 in (3.8 cm) across the waist.
- After Round 10: The bell should measure 2.2 in (5.6 cm) tall and about 2.6 in (6.6 cm) across the rim.
- After blocking: The bell should measure 2.5 in (6.4 cm) tall and 3 in (7.6 cm) across the rim.
If your bell is too big: Go down to a 2.75 mm hook, or tighten your dc by pulling the first loop snug.
If your bell is too small: Go up to a 3.25 mm or 3.5 mm hook.
Small differences of 0.1–0.2 in (0.3–0.5 cm) are fine for an ornament. Bigger differences will change how the flare sits.
Pattern: Crown (Rounded Dome)
The crown is worked in sc with steady increases. The increases then stop, so the fabric curves down into a smooth dome instead of lying flat.
Round 1: MR, ch 1, 6 sc in the ring. Pull the ring closed, leaving a hole just big enough for the tapestry needle. Join with sl st to the first sc. (6 sts)
Round 2: Ch 1, inc in each st around. Join. (12 sts)
Round 3: Ch 1, (sc in next st, inc) 6 times. Join. (18 sts)
Round 4: Ch 1, (sc in next 2 sts, inc) 6 times. Join. (24 sts)
Checkpoint: The crown lies flat and measures 1.4 in (3.6 cm) across.
Round 5: Ch 1, sc in each st around. Join. (24 sts)
Because this round has no increases, the edge turns downward and forms the rounded top of the bell. Place a stitch marker in the joining stitch.
Pattern: Lattice Body
The body alternates open mesh rounds with a solid round. This creates the rows of square windows seen in filet-style lace.
Round 6 (mesh): Ch 4 (counts as dc + ch 1). Sk next st, dc in next st, ch 1, sk next st. Rep from * 10 more times. Join with sl st to the 3rd ch of the ch-4. (12 dc, 12 ch-1 sps)
Round 7 (solid): Ch 3 (counts as dc). Dc in next ch-1 sp, dc in next dc, dc in next ch-1 sp. Rep from * around. Join to the top of the ch-3.
This is a conversion round, not a growth round. You work 1 dc into each of the 12 dc and 1 dc into each of the 12 ch-1 sps, with nothing added. (12 + 12 = 24 dc)
Round 8 (mesh): Ch 4 (counts as dc + ch 1). Sk next st, dc in next st, ch 1, sk next st. Rep from * 10 more times. Join to the 3rd ch of the ch-4. (12 dc, 12 ch-1 sps)
Checkpoint: The bell measures 1.6 in (4.1 cm) tall and 1.5 in (3.8 cm) across the waist. The sides should hang fairly straight below the dome.
Pattern: Flare
Round 9 (V-stitches): Sl st into the first ch-1 sp. Ch 4 (counts as dc + ch 1), dc in the same sp to complete the first V. Ch 1. V in next ch-1 sp, ch 1. Rep from * 10 more times. Join to the 3rd ch of the ch-4.
This is a growth round. Its complete count is 12 V-stitches, made of 24 dc, 12 ch-1 sps inside the Vs, and 12 ch-1 sps between them.
Round 10 (shells): Sl st into the ch-1 sp of the first V. Ch 3 (counts as dc). Work (dc, ch 2, 2 dc) in the same sp to complete the first shell. Ch 1, sk the ch-1 sp between Vs. Shell in the ch-1 sp of the next V, ch 1. Rep from * 10 more times. Join to the top of the ch-3.
This round’s complete count is 12 shells, made of 48 dc, 12 ch-2 sps, and 12 ch-1 sps.
Checkpoint: The bell measures 2.2 in (5.6 cm) tall and 2.6 in (6.6 cm) across the rim. The lower edge should flare outward like a skirt.
Border: Scalloped Picot Edge
Border gauge: Each scallop covers about 0.8 in (2.0 cm) of the blocked rim and adds about 0.3 in (0.8 cm) of depth.
Round 11 (scallops): Sl st in the next dc, then sl st into the ch-2 sp. Ch 3 (counts as dc). Work (2 dc, picot, 3 dc) in the same sp to complete the first scallop. Sc in the next ch-1 sp. Scallop in the next ch-2 sp, sc in the next ch-1 sp. Rep from * 10 more times. Join to the top of the ch-3. Fasten off, leaving a 6 in (15.2 cm) tail.
This round’s complete count is 12 scallops, made of 72 dc, 12 picots, and 12 sc.
Per scallop count: 6 dc + 1 picot, plus 1 sc between scallops.
Why the math works: The bell has no sides or corners, so the border is counted per repeat instead of per side. Each round keeps the same 12-repeat structure:
- Round 5 has 24 sc, which is 12 pairs of stitches.
- Round 6 turns each pair into 1 mesh unit, for 12 units.
- Round 7 fills back in to 24 dc.
- Round 8 returns to 12 mesh units.
- Round 9 places 1 V in each of the 12 spaces.
- Round 10 places 1 shell in each of the 12 Vs.
- Round 11 places 1 scallop in each of the 12 shell spaces and anchors 1 sc in each of the 12 gaps between them.
Because every round divides evenly by 12, the scallops line up directly below the body’s windows.
The rim circumference grows from about 8.2 in (20.8 cm) after Round 10 to about 9.4 in (23.9 cm) after blocking. Divided by 12 scallops, that gives about 0.8 in (2.0 cm) per scallop, matching the border gauge.
Beaded Hanger and Clapper
- Cut a 16 in (40.6 cm) strand of sage yarn.
- Tie a firm double knot about 1 in (2.5 cm) from one end. Thread 1 bead onto the strand and slide it down to the knot. This is the clapper.
- Thread the long end onto the tapestry needle. Pass it from inside the bell up through the center of the magic ring.
- Adjust the strand so the clapper bead hangs about 0.25 in (0.6 cm) below the rim.
- Tie a small knot right on top of the crown so the clapper cannot slip back.
- Thread 3 beads onto the strand, stacking them snugly above the knot.
- Form a hanging loop about 3 in (7.6 cm) long. Pass the end back down through the top bead, tie it off under that bead, and trim.
For a 5-bead version, add a fourth bead to the stack in Step 6.
Final Blocking
- Weave in all ends along the inside of the solid Round 7. Leave the hanger in place.
- Wet the bell and squeeze out the excess water gently.
- Dip the bell in fabric stiffener, or brush it on. Blot off the excess so the lace windows stay open.
- Set the bell over your blocking form. Slide the hanger strand aside, or tape it to the form.
- Shape the crown into a smooth dome with your fingertips.
- Pull the flare outward gently until the rim measures 3 in (7.6 cm) across.
- Pin each picot point to the foam, spacing the scallops evenly at about 0.8 in (2.0 cm) apart.
- Open each mesh window with a hook tip or toothpick.
- Let the bell dry fully for 12–24 hours before removing it from the form.
- Measure again. The bell should be 2.5 in (6.4 cm) tall and 3 in (7.6 cm) across the rim.
Final Quality-Control Checklist
- The crown is a smooth, rounded dome with no flat ridge or point.
- Round 6 and Round 8 each have exactly 12 even windows.
- Round 7 has exactly 24 dc.
- There are 12 V-stitches, 12 shells, and 12 scallops.
- Every scallop has a picot centered at its tip.
- The bell measures 2.5 in (6.4 cm) tall and 3 in (7.6 cm) across the rim.
- The clapper bead hangs about 0.25 in (0.6 cm) below the rim.
- The 3 top beads sit snugly above the crown.
- The hanging loop is secure, and all ends are hidden.
Troubleshooting
The crown is pointed or cone-shaped. You probably skipped an increase or worked Round 5 too tightly. Recount Rounds 2–4 so each has 6 even increases.
The crown is flat and ruffled. You worked extra increases. Round 5 must have exactly 24 sts.
The windows look uneven. Check that you skip exactly 1 st between dc on the mesh rounds, and that each ch-1 is the same size.
The flare is too wavy. Your shells may be too loose. Try a smaller hook for Rounds 9–11 only.
The flare barely opens. Make sure Round 9 has a ch 1 between each V. Without it, the flare loses width.
A scallop is missing. Count your shells. A shell skipped in Round 10 means a missing scallop in Round 11.
The clapper bead slides up into the bell. Tie a bigger knot on top of the crown, or double the knot under the bead.
The bead holes are too tight. Use a thinner strand of cotton thread for the hanger, or ream out the holes gently.
Care
Spot clean only with a damp cloth, and reshape while damp. Store flat or hanging in a box so the stiffened flare and picots are not crushed.
Final Notes
Here is the measurement chain to keep your bell on track:
- The crown reaches 1.4 in (3.6 cm) across at 24 sts.
- The body reaches 1.6 in (4.1 cm) tall with 12 mesh units.
- The flare reaches 2.2 in (5.6 cm) tall and 2.6 in (6.6 cm) across with 12 shells.
- The scalloped edge adds 0.3 in (0.8 cm).
- Blocking settles the bell at 2.5 in (6.4 cm) tall and 3 in (7.6 cm) across.
Because every round builds on the same 12-repeat structure, the windows, shells, and scallops line up neatly. Once your first bell matches these checkpoints, the rest of the set will match too.
Optional: if you would like a matching set, simply make several bells. Each bell stays an individual ornament.
Happy crocheting!