

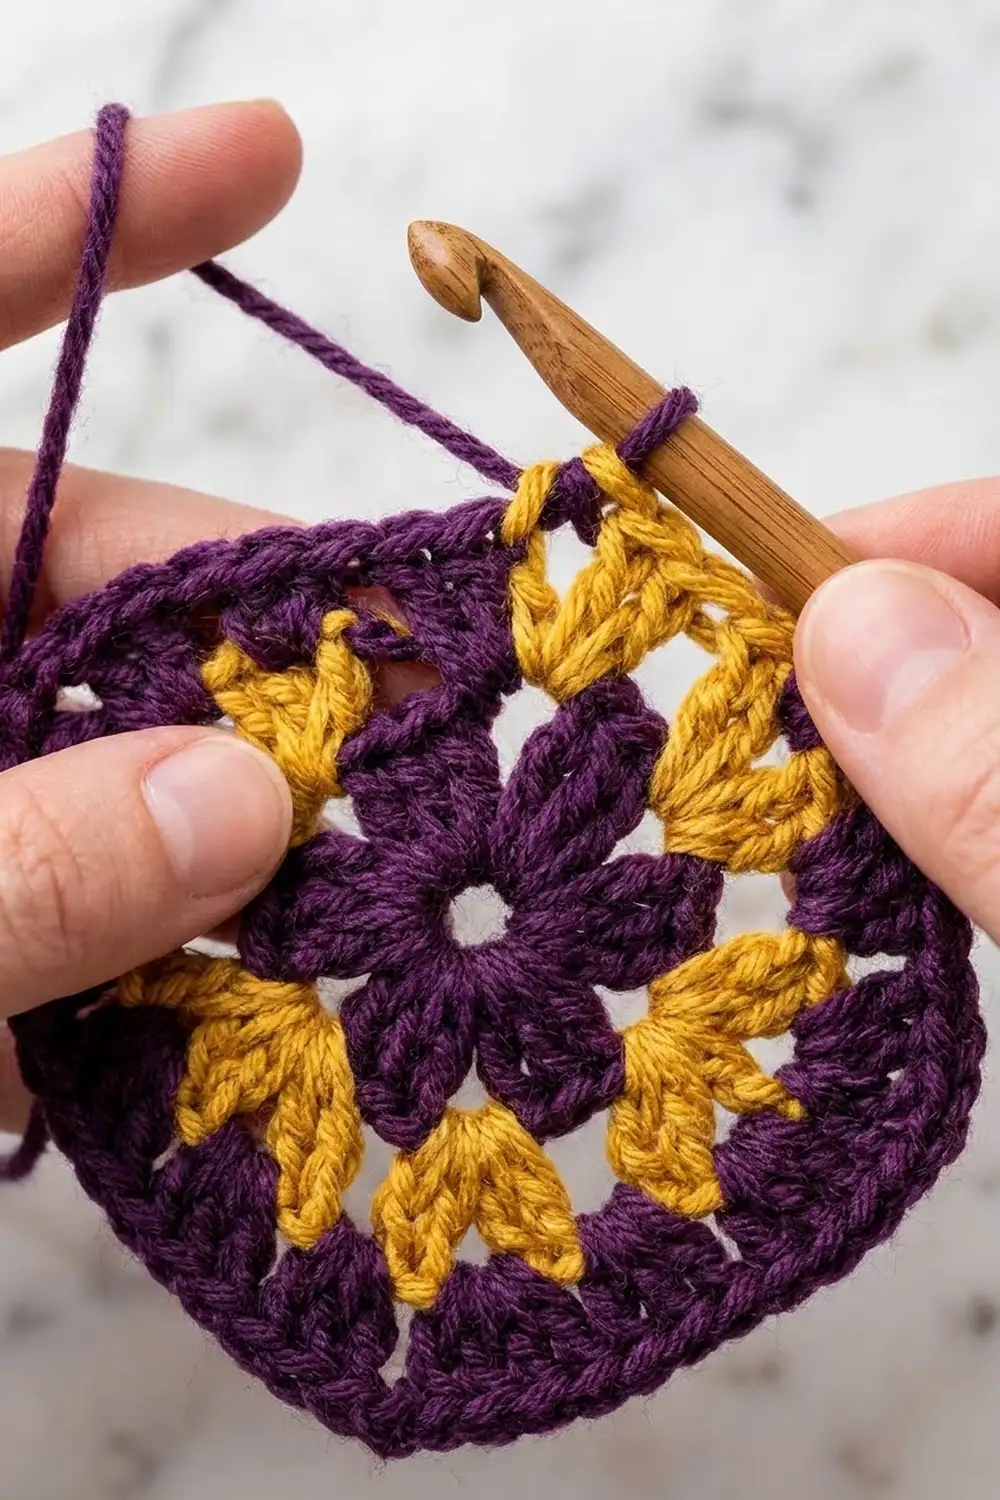
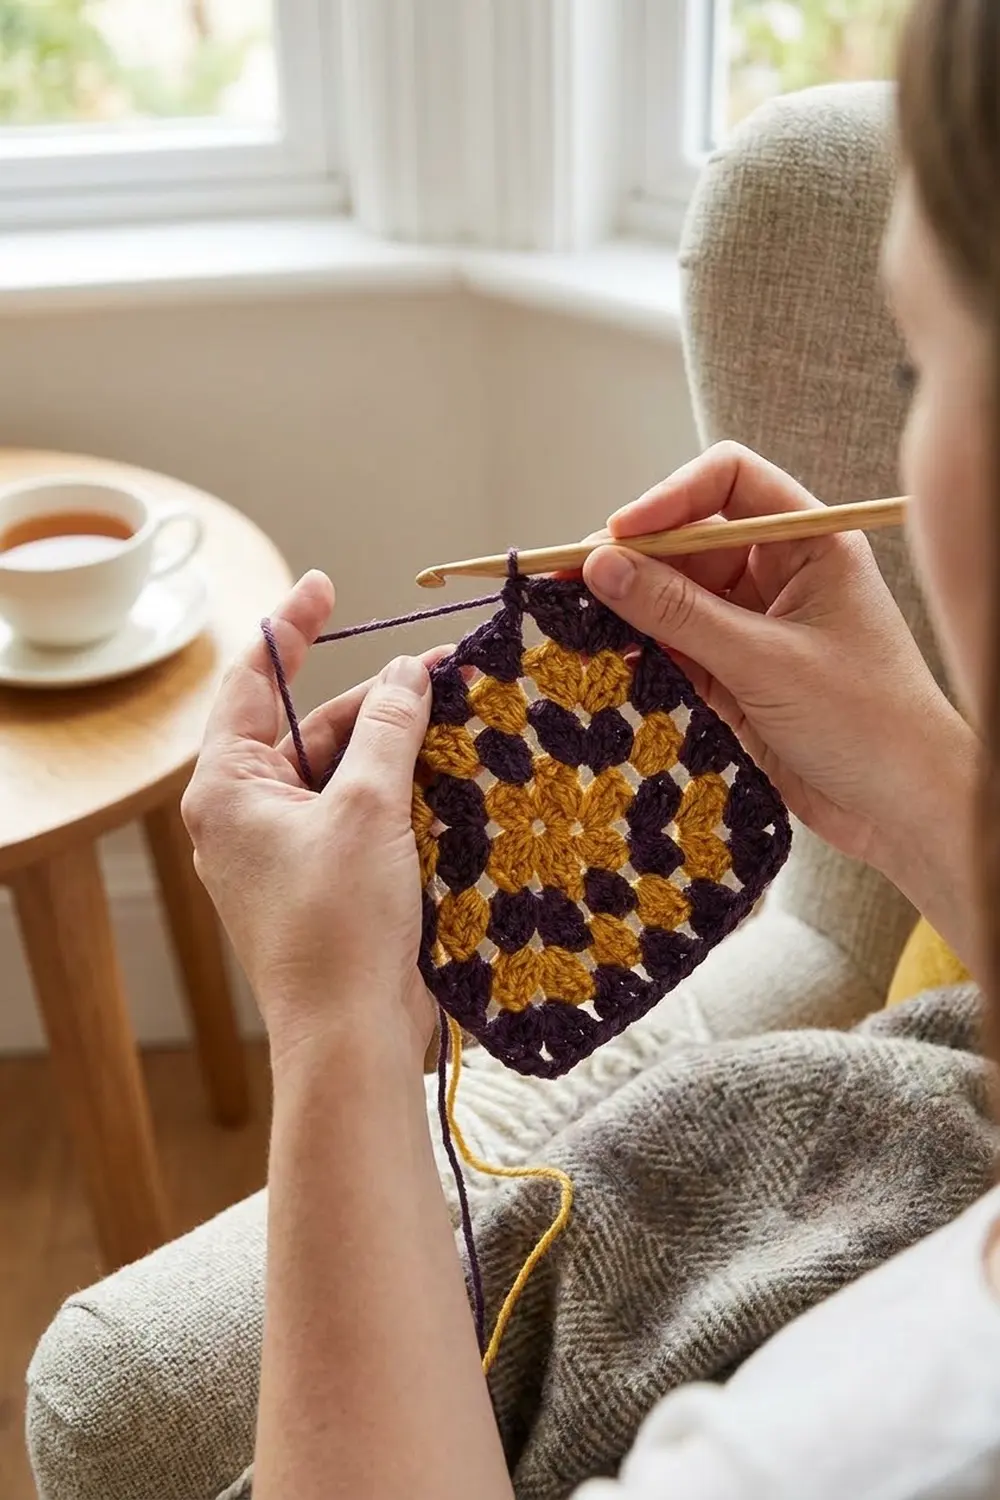
The Plum & Honey Checkerboard Granny Square is a small, lacy motif built from clusters of treble stitches in deep plum purple and warm golden yellow. The two colors alternate block by block around every round. Because each new round sits in the gaps of the round below, the blocks stagger into a checkerboard effect around a small open center.
The style is classic granny square: three-treble clusters separated by chain spaces, with open holes throughout. Tall trebles keep the fabric airy and quick to work, and the color alternation adds a graphic look without any complicated stitches.
This pattern uses US crochet terms. The finished square measures 3.5 in (8.9 cm) per side after a two-round border and blocking, within the 3 to 4 in (7.6 to 10.2 cm) range of the motif shown.
Construction overview: you work three rounds of treble clusters into a central ring, changing color at every cluster and carrying the unused color along. A smooth two-round single crochet border in purple squares up the edges. It is one piece, worked in the round, with no sewing.
Finished Size and Construction
- Finished size: 3.5 in x 3.5 in (8.9 cm x 8.9 cm)
- Skill level: Easy to intermediate (basic stitches plus frequent color changes)
- Terminology: US crochet terms
- Yarn weight: DK (weight 3), cotton or cotton blend
- Hook: 3.5 mm (E-4)
- Number of pieces: 1
- Layout: Single motif, worked in the round from the center out
- Piece size before border: 3 in (7.6 cm) per side after Round 3
- Border depth: 0.25 in (0.6 cm) per side, 2 rounds
- Size after border: 3.5 in (8.9 cm) per side
Materials
Yarn advice: Choose a smooth, mercerized or combed DK cotton for crisp clusters and clean holes. Cotton holds its blocked shape well. Avoid fuzzy or highly textured yarns, which hide the openwork and the color blocks.
- Color P (dark purple / plum): 5 g, about 11 m
- Color Y (golden yellow): 3 g, about 7 m
Quantities assume DK cotton at roughly 2.2 m per gram and include a margin for swatching, carried strands, and weaving in ends.
Tools:
- 3.5 mm (E-4) crochet hook
- Tapestry needle
- Scissors
- Rustproof pins
- Blocking mat or folded towel
- Ruler or tape measure
- Spray bottle with water
Abbreviations (US Terms)
- ch – chain
- sl st – slip stitch
- sc – single crochet
- tr – treble crochet (yo twice, insert hook, yo and pull up a loop, [yo and pull through 2 loops] 3 times)
- sp(s) – space(s)
- beg – beginning
- rep – repeat
- yo – yarn over
- P – Color P (purple)
- Y – Color Y (yellow)
Special stitch – Group: 3 tr worked into the same space or ring. At the start of a round, beg group = ch 4 (counts as first tr) + 2 tr in the same space.
Color change method: Work the last tr of a group until 2 loops remain on the hook. Drop the old color, yo with the new color, and pull through. The chains that follow are worked in the new color. Lay the inactive strand along the top of the previous round and work the next group’s trebles over it so it is enclosed. Behind the chain spaces, leave the carried strand lying loosely at the back.
Gauge and Checkpoints
Test the motif first. Since this is a single small piece, the motif is your swatch. Work Rounds 1 and 2, then measure flat without stretching.
Gauge: Rounds 1–2 = 2 in (5.1 cm) per side.
Measurement checkpoints (side edge, corner to corner):
- After Round 1: about 1 in (2.5 cm)
- After Round 2: 2 in (5.1 cm)
- After Round 3: 3 in (7.6 cm)
- After Border Round A: about 3.25 in (8.3 cm)
- After Border Round B: 3.5 in (8.9 cm)
If your square is too big: Go down to a 3.25 mm hook and check that your trebles are not loose and loopy at the top.
If your square is too small: Go up to a 3.75 mm hook and make sure carried strands are not pulling the clusters together.
A difference of 0.125 in (0.3 cm) is normal and will block out. Anything beyond 0.25 in (0.6 cm) at Round 2 calls for a hook change.
Pattern
Center Ring
With P, ch 6 and sl st to the first ch to form a ring. The ring opens to an open center about 0.5 in (1.3 cm) across, which squares off as the corners form.
Round 1
Hold Y alongside the ring so it is enclosed as you work.
With P, beg group in ring. Change to Y.
With Y, ch 1, group in ring. Change to P.
With P, ch 3, group in ring. Change to Y. With Y, ch 1, group in ring. Change to P. Rep from * to * 2 more times.
With P, ch 3, sl st to top of beg ch-4.
Count: 8 groups (4 P, 4 Y) = 24 tr, 4 ch-1 side sps, 4 ch-3 corner sps. That is 40 sts in total (24 tr + 16 ch).
Per side: 2 groups + 1 ch-1 = 7 sts between corner ch-3 sps.
The ch-3 spaces are your corners. Each corner always falls after a Y group.
Round 2
Sl st in the next 2 tr and into the first ch-1 sp, changing to Y on the final sl st. Carry P.
Change color at the end of every group, alternating Y, P, Y, P around.
With Y, beg group in ch-1 sp.
Ch 1, (group, ch 3, group) in next ch-3 corner sp, ch 1, group in next ch-1 sp. Rep from * to * 2 more times.
Ch 1, (group, ch 3, group) in next corner sp, ch 1, sl st to top of beg ch-4.
Count: 12 groups (6 Y, 6 P) = 36 tr, 8 ch-1 sps, 4 ch-3 corner sps. That is 56 sts in total (36 tr + 20 ch).
Per side: 3 groups + 2 ch-1 = 11 sts between corner ch-3 sps.
This is a growth round. The 12 groups come from 1 group in each of the 4 side spaces plus 2 groups in each of the 4 corners. Each new group sits between two groups of Round 1, which starts the staggered checkerboard.
Checkpoint: 2 in (5.1 cm) per side.
Round 3
Sl st in the next 2 tr and into the next ch-1 sp, changing to P on the final sl st. Carry Y.
Alternate P, Y, P, Y around, starting with P.
With P, beg group in ch-1 sp.
Ch 1, (group, ch 3, group) in next corner sp, [ch 1, group in next ch-1 sp] twice. Rep from * to * 2 more times.
Ch 1, (group, ch 3, group) in next corner sp, ch 1, group in next ch-1 sp, ch 1, sl st to top of beg ch-4.
Count: 16 groups (8 P, 8 Y) = 48 tr, 12 ch-1 sps, 4 ch-3 corner sps. That is 72 sts in total (48 tr + 24 ch).
Per side: 4 groups + 3 ch-1 = 15 sts between corner ch-3 sps (12 tr + 3 ch-1 sps).
Again this is a growth round. Each side’s 2 ch-1 sps take 1 group each (8 groups), and each corner takes 2 groups (8 groups), for 16 in total.
Checkpoint: 3 in (7.6 cm) per side. Fasten off Y, leaving a 6 in (15.2 cm) tail. Keep P attached.
Border
The border is worked in P only. It uses plain sc for a smooth, firm edge that frames the lacy center.
Border gauge: about 5.4 sc per in (2.1 sc per cm) along each finished side.
Stitch count convention: Corners in the border are ch-2 spaces. They are not counted as stitches. Each “per side” count runs from the corner sc after one ch-2 sp to the corner sc before the next.
Border Round A (conversion round)
Ch 1. Work 1 sc in each tr and 1 sc in each ch-1 sp along the side. In each ch-3 corner sp work (sc, ch 2, sc). Sl st to the first sc.
Per side: 15 sc worked 1 per existing st/sp (12 tr + 3 ch-1 sps) + 2 corner sc = 17 sc.
Round total: 60 sc (1 per existing st/sp) + 8 corner sc = 68 sc, plus 4 ch-2 corner sps.
This round converts the cluster edge into a solid row. It does not continue the cluster growth.
Checkpoint: about 3.25 in (8.3 cm) per side. The sc over the chain spaces sits slightly spread, so this round measures a little looser than the border gauge.
Border Round B (trim round)
Ch 1. Sc in each sc along the side. Work (sc, ch 2, sc) in each ch-2 corner sp. Sl st to the first sc. Fasten off, leaving a 6 in (15.2 cm) tail.
Per side: 17 sc (1 per existing sc) + 2 corner sc = 19 sc.
Round total: 68 sc (1 per existing sc) + 8 corner sc = 76 sc, plus 4 ch-2 corner sps.
Why the Math Works
Round 3 gives exactly 15 workable sts per side. Round A keeps all 15 and adds 1 sc at each end, for 17. Round B keeps all 17 and adds 1 sc at each end, for 19.
At the border gauge of about 5.4 sc per in, 19 sc spans about 3.5 in (8.9 cm). That matches the target of 3 in (7.6 cm) from the clusters plus 0.25 in (0.6 cm) of border on each side.
The (sc, ch 2, sc) corners add the extra length each corner needs, so the square stays flat rather than cupping.
Final Blocking
- Weave in all ends. Run each tail through several stitches of its own color, then back the opposite way.
- Spray the square evenly with water until damp but not dripping. For heavier shaping, soak it in cool water for 10 minutes and press out the excess in a towel.
- Lay it right side up on the blocking mat.
- Pin each corner first, making a 3.5 in (8.9 cm) square. Check the diagonals with a ruler; they should be equal.
- Pin the midpoint of each side, then add pins between to keep the edges straight.
- Gently open the central hole and the chain spaces with a fingertip so the holes look even.
- Let it dry completely, usually 6 to 12 hours, before unpinning.
Final Quality-Control Checklist
- Square measures 3.5 in (8.9 cm) on all four sides.
- Diagonals are equal, and the corners are sharp, not rounded.
- Round 3 shows 16 groups: 8 purple and 8 yellow, strictly alternating.
- Colors stagger from round to round in a checkerboard effect.
- Border Round B shows 19 sc per side and 4 ch-2 corners.
- Carried strands are hidden and do not pucker the fabric.
- The central opening is open and roughly square.
- All ends are woven in securely, with no tails visible on the front.
Troubleshooting
Square cups or curls up: Your carried strand is too tight. Ease out the slack every few groups and keep it lying flat along the stitch tops.
Square ruffles or waves: Your trebles are too loose, or you have added extra chains. Recount: 1 ch between side groups and 3 ch at corners only.
Colors don’t alternate correctly: You likely missed a color change at a corner. Check that the two groups in each corner are different colors.
Wrong group count: Round 1 = 8, Round 2 = 12, Round 3 = 16. If you are off, frog back to the last correct round. These rounds are short.
Carried yarn peeks through the holes: Keep the inactive strand along the top of the previous round, not across the open spaces. Work the trebles snugly over it.
Border corners look blunt: Make sure each corner has (sc, ch 2, sc) in the space, not a single sc.
Square measures under 3.5 in (8.9 cm) after the border: Block a little more firmly, or rework with a 3.75 mm hook.
Care
Hand wash in cool water with mild soap, press out water in a towel, and dry flat. Reshape to 3.5 in (8.9 cm) while damp if needed.
Final Notes
The measurement chain for this motif is simple. Round 1 measures about 1 in (2.5 cm), Round 2 measures 2 in (5.1 cm), and Round 3 measures 3 in (7.6 cm) with 15 sts per side. Border Round A brings each side to 17 sc at about 3.25 in (8.3 cm). Border Round B finishes at 19 sc and 3.5 in (8.9 cm).
The group counts run 8, 12, and 16, so every round alternates purple and yellow evenly and the checkerboard always closes cleanly at the join.
Optional: because the finished size is predictable, the motif works well as a stand-alone coaster-sized square or as a practice piece for color carrying.
Happy crocheting!