

The Rosewood Teardrop is a small, lacy motif shaped like a leaf or teardrop. An open oval void sits at its center, framed by a ring of airy chain spaces. A soft shell edge runs around the whole silhouette, and a full yarn tassel hangs from the pointed bottom.
This design uses two tones. The body is worked in dusty mauve and the scalloped edge is worked in cream, which keeps the outline crisp and the lace easy to see. The tassel is mauve to match the body. It looks vintage and romantic, and it also suits cozy seasonal decor.
The pattern uses US crochet terms throughout. The finished motif measures 3.5 in (8.9 cm) long by 2.75 in (7.0 cm) wide, not including the tassel. The tassel adds 3 in (7.6 cm), for a total hanging length of 6.5 in (16.5 cm).
The motif is worked in the round in a single piece. You start with a chain ring that becomes the open center, then build outward: a sc round, a dc round with chain spaces, a chain-loop framework round, and finally a cream shell round. A pointed corner is carried through every round so the bottom forms a clean point for the tassel.
Finished Size and Construction
- Finished size: 3.5 in (8.9 cm) long x 2.75 in (7.0 cm) wide, motif only
- Tassel length: 3 in (7.6 cm)
- Total hanging length: 6.5 in (16.5 cm)
- Skill level: Easy-intermediate
- Terminology: US crochet terms
- Yarn weight: DK (weight 3), cotton or cotton blend
- Hook: 3.5 mm (E-4)
- Number of pieces: 1 crocheted motif plus 1 attached tassel
- Layout: Single motif hung point-down, tassel at the point
- Piece size: 3.5 in (8.9 cm) x 2.75 in (7.0 cm) after blocking
- Size before border (after Rnd 3): 3 in (7.6 cm) x 2.25 in (5.7 cm)
- Border depth: 0.25 in (0.6 cm) on each edge
- Open center (void): about 1.5 in (3.8 cm) x 0.75 in (1.9 cm)
Materials
Yarn advice: Choose a smooth, tightly plied DK cotton. Cotton holds the lace open, shows stitch definition well, and makes a tassel that hangs straight. Avoid fuzzy or brushed yarns, since they blur the chain spaces.
- Dusty mauve (body and tassel): 10 g, about 22 m (24 yd)
- Cream (shell edge): 5 g, about 11 m (12 yd)
These quantities include a comfortable margin for your gauge swatch, tails, and tassel trimming. The motif itself uses much less.
Tools:
- 3.5 mm (E-4) crochet hook
- Tapestry needle
- Sharp scissors
- Stitch marker
- Stiff card cut to 3.5 in (8.9 cm) tall, for the tassel
- Blocking mat, rustproof pins, and a spray bottle
- Ruler or measuring tape
Abbreviations (US Terms)
- ch – chain
- sl st – slip stitch
- sc – single crochet
- dc – double crochet
- st(s) – stitch(es)
- sp(s) – space(s)
- beg – beginning
- rep – repeat
- rnd – round
Special stitches:
- Shell: 5 dc worked into the same ch-3 loop.
- Point shell: (3 dc, ch 2, 3 dc) worked into the same ch-3 loop.
- Standing sc: With a slip knot on your hook, insert the hook into the stitch, yarn over, pull up a loop, yarn over, and pull through both loops.
Gauge and Checkpoints
Gauge: 20 sc and 22 rows = 4 in (10.2 cm) in flat sc with a 3.5 mm hook.
For a motif this small, the best test is the motif itself. Work Rnds 1–2 first, lay the piece flat, and measure. Each checkpoint below should be within 0.25 in (0.6 cm).
Checkpoints:
- After Rnd 1: 2 in (5.1 cm) long x 1.25 in (3.2 cm) wide
- After Rnd 2: 2.75 in (7.0 cm) long x 2 in (5.1 cm) wide
- After Rnd 3: 3 in (7.6 cm) long x 2.25 in (5.7 cm) wide
- After Rnd 4, blocked: 3.5 in (8.9 cm) long x 2.75 in (7.0 cm) wide
If your piece is too big, go down to a 3.25 mm hook, or 3 mm if needed.
If your piece is too small, go up to a 3.75 mm or 4 mm hook.
If it cups or ruffles at the right size, see Troubleshooting. That points to tension, not hook size.
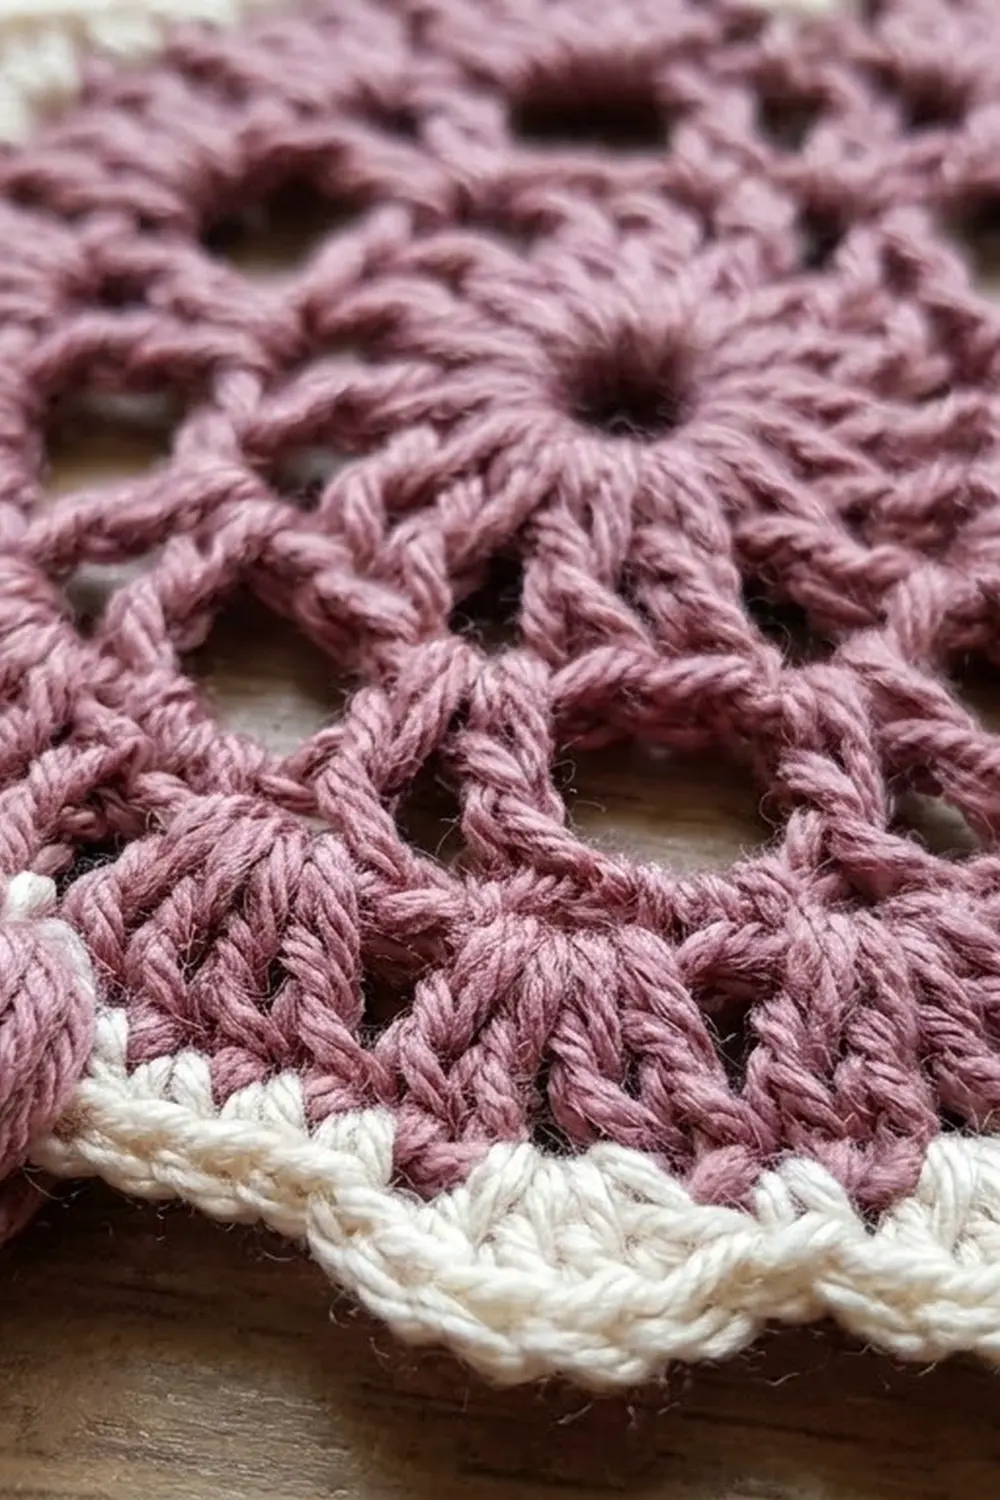
Pattern: The Motif Body (Mauve)
Foundation Ring
With mauve, ch 24. Sl st into the first ch to form a ring. Do not twist the chain.
This ring becomes the open oval at the center of the motif.
Round 1 – Smooth Sc Base
Ch 1. Work 28 sc over the ring, inserting your hook through the center of the ring and enclosing the chain. Sl st to the first sc to join.
Stitch count: 28 sc.
Place a marker in the first sc. This is the point stitch, and it marks the bottom of the teardrop. Push the sc evenly around the ring so none bunch up.
Round 2 – Lacy Dc Framework
Ch 5. This counts as 1 dc + ch 2. Work 1 dc into the same point stitch to form the point.
Ch 1, dc in each of the next 3 sts. Rep from * 8 more times, for 9 repeats in total. These repeats use sts 2–28.
Ch 1 and sl st into the 3rd ch of the beg ch-5 to join.
Stitch count: 29 dc (2 at the point + 27 in groups), 10 ch-1 sps, and 1 ch-2 point sp.
The 9 three-dc groups are separated by ch-1 spaces, which creates the first ring of lace around the void. Lay the piece flat and check the Rnd 2 measurement now.
Round 3 – Chain-Loop Framework
Sl st into the ch-2 point sp.
Ch 1. Work (sc, ch 3, sc) in the ch-2 point sp.
Ch 3, sc in the next ch-1 sp. Rep from * 9 more times, for 10 repeats in total.
Ch 3 and sl st to the first sc to join.
Stitch count: 12 sc and 12 ch-3 loops.
Here is how the loops are arranged:
- Loop 1: the point loop, between the 2 sc in the point sp
- Loop 2: spans the single dc beside the point
- Loops 3–11: each spans one 3-dc group
- Loop 12: spans the beg ch-3 dc and closes the round
Loop 7 sits over the 5th of the 9 groups, which is the top center of the motif. That leaves 5 loops on each side between the point and the top.
Fasten off mauve and weave in the ends now. Check the size before border: 3 in (7.6 cm) x 2.25 in (5.7 cm).
Border: Cream Shell Edge
Border Gauge
Each 5-dc shell plus its sc covers about 0.75 in (1.9 cm) of edge. Twelve scallops x 0.75 in (1.9 cm) = about 9 in (22.9 cm) of outer edge. That matches the outer edge of the Rnd 3 teardrop, so the scallops sit flat instead of crowding or stretching.
Round 4 – Scalloped Shell Trim
With cream, make a standing sc in the first sc of Rnd 3. This is the first of the 2 point sc.
Work a point shell, (3 dc, ch 2, 3 dc), in the point loop (loop 1). Sc in the next sc.
Shell (5 dc) in the next ch-3 loop, sc in the next sc. Rep from * 9 more times, for 10 repeats in total. These repeats cover loops 2–11 and sc 3–12.
Shell in the last ch-3 loop (loop 12). Sl st to the first sc to join. Fasten off.
Stitch count: 61 dc + 12 sc = 73 sts, plus 1 ch-2 point sp.
Counts per section:
- Point (loop 1): 6 dc + ch-2 sp
- Left side (loops 2–6): 5 shells = 25 dc
- Top center (loop 7): 1 shell = 5 dc
- Right side (loops 8–12): 5 shells = 25 dc
- Sc between shells: 12, one in each Rnd 3 sc
Check the dc total: 6 + 25 + 5 + 25 = 61 dc.
Why the Math Works
Every ch-3 loop from Rnd 3 gets exactly one shell. The 12 loops come from two sources:
- The 10 ch-1 sps of Rnd 2
- The 2 loops created by framing the point sp with sc
Because the 9 dc groups are odd in number, one group sits exactly at the top. That gives a centered top scallop with 5 matching scallops on each side.
The point shell has a ch-2 at its tip instead of a sixth dc. This keeps the bottom sharp and gives the tassel a clear anchor point. The ch-2 point space lines up vertically through Rnds 2, 3, and 4, so the point stays straight.
Tassel (Mauve)
- Wrap mauve 25 times around the 3.5 in (8.9 cm) card.
- Slide an 8 in (20.3 cm) strand under the wraps at the top edge and tie it tightly. Leave both ends long.
- Cut through all the wraps along the bottom edge.
- Take a 12 in (30.5 cm) strand and wrap it firmly 6–8 times around the bundle, 0.5 in (1.3 cm) below the top tie. Knot it, then thread the ends down into the tassel with a needle.
- Thread the long top-tie ends through the ch-2 point sp of Rnd 4. Knot them securely on the back and bury the ends inside the tassel head.
- Trim the strands evenly to 3 in (7.6 cm), measured from the top of the tassel head.
Final Blocking
- Weave in all yarn ends before blocking.
- Spray the motif until it is evenly damp, or soak it briefly and press out the water in a towel. Do not wet the tassel.
- Place the motif on the mat with the point facing down.
- Pin the tip of the point shell first. Then pin the top-center shell so the length measures 3.5 in (8.9 cm).
- Pin the widest points of the sides to 2.75 in (7.0 cm).
- Pin each shell out at its center so the scallops fan evenly.
- Use two pins inside the void to open it into an oval of about 1.5 in (3.8 cm) x 0.75 in (1.9 cm).
- Let it dry completely before you unpin it.
- Comb the tassel strands with your fingers, steam them lightly from a distance, and re-trim them to 3 in (7.6 cm) if needed.
Final Quality-Control Checklist
- Motif measures 3.5 in (8.9 cm) x 2.75 in (7.0 cm), within 0.25 in (0.6 cm)
- Rnd 1 shows 28 sc evenly spaced around the void
- Rnd 2 has 9 three-dc groups and a clean ch-2 point
- Rnd 3 has 12 even ch-3 loops
- Rnd 4 has 11 five-dc shells plus 1 point shell
- Top scallop is centered, with 5 scallops on each side
- The open center is oval, not collapsed
- The cream/mauve join is tidy and the ends are secure
- Tassel is firmly attached at the ch-2 point and measures 3 in (7.6 cm)
- Total hanging length is 6.5 in (16.5 cm)
Troubleshooting
Motif cups after Rnd 2: Your dc are too tight. Loosen your grip, or work the ch-1 spaces slightly looser.
Motif ruffles after Rnd 2: Check that you have 3 dc per group, not 4, and exactly 9 groups.
Void closes up: The Rnd 1 sc are bunched together. Spread them evenly along the ring, and pin the void open during blocking.
Point looks rounded: Make sure the point is worked into the ch-2 sp in every round, not into a neighboring stitch.
Top scallop is off-center: Recount your Rnd 2 groups. Loop 7 must sit over the 5th group.
Shells are crowding: Your cream tension is tighter than your mauve tension. Go up 0.25 mm for Rnd 4 only.
Tassel is lopsided: Re-tie the neck wrap so it sits level, then trim the strands while the tassel hangs freely.
Care
Hand wash in cool water, press out the water gently, and dry flat with the motif pinned to shape. Keep the tassel dry where possible and comb it straight once it is dry.
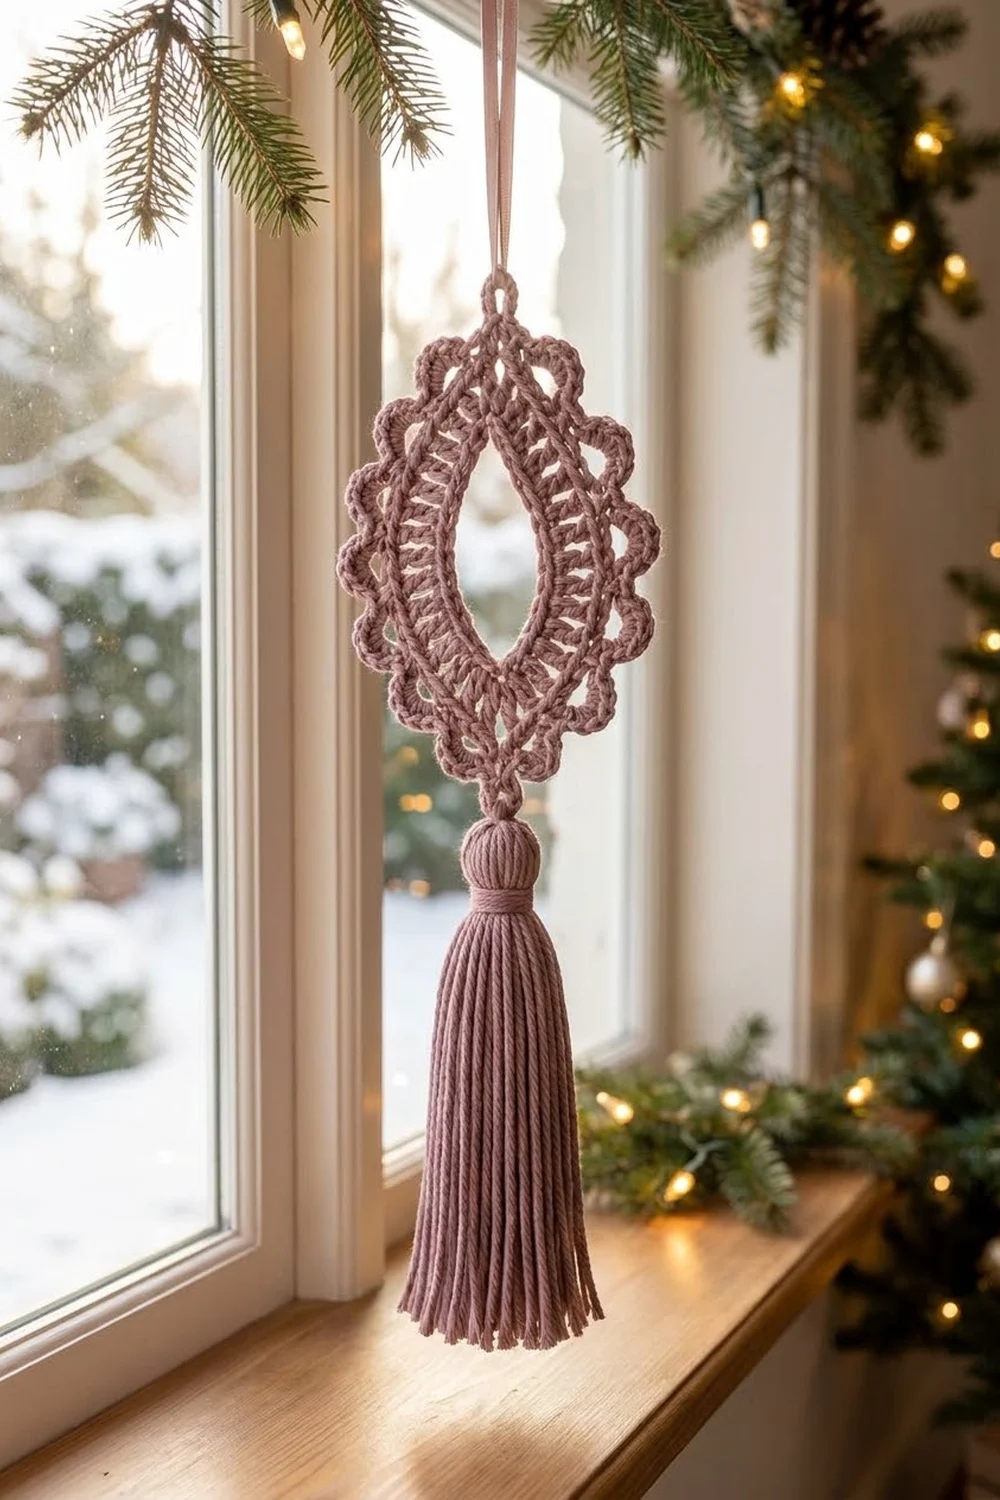
Final Notes
The measurement chain is simple:
- A 24-ch ring holding 28 sc gives 2 in (5.1 cm).
- The lacy dc round brings it to 2.75 in (7.0 cm).
- The chain-loop framework gives 3 in (7.6 cm) before the border.
- The cream shell edge adds 0.25 in (0.6 cm) on each side, for a blocked size of 3.5 in (8.9 cm) x 2.75 in (7.0 cm).
- The tassel adds 3 in (7.6 cm), for a total of 6.5 in (16.5 cm).
If your numbers match at each checkpoint, the finished motif will too.
Optional: once you have mastered one motif, you can make more in alternating colors for a hanging decoration. The pattern above is complete as a single motif.
Happy crocheting!