

This small triangle motif pairs a soft cream shell-stitch body with a crisp sage green trim. The bottom edge follows the natural curve of the shells, so the trim forms gentle scallops. Three tiny green bobbles hang from the lowest point of each full shell.
The look is quiet and cozy: two muted colors, open fans of double crochet, and a neat outline. It is a single motif worked from one point downward, and it is a satisfying piece to make in one sitting.
This pattern uses US crochet terms. The finished motif measures 3 in (7.6 cm) wide by 2.5 in (6.4 cm) tall, not counting the hanging drops. With the drops, it is about 3 in (7.6 cm) tall.
The construction is simple. You work the cream body flat in 5 rows of shells, starting at the top point and widening by one shell each row. Then you add a 2-round sage border in sc. The second round adds three bobble drops along the bottom.
Finished Size and Construction
- Finished size: 3 in (7.6 cm) wide x 2.5 in (6.4 cm) tall, plus about 0.5 in (1.3 cm) of hanging drops
- Skill level: Easy / advanced beginner
- Terminology: US crochet terms
- Yarn weight: Sport weight (#2) cotton
- Hook: 2.5 mm
- Number of pieces: 1
- Layout: Single triangle, worked flat in rows from the top point down, border worked in rounds
- Piece size: 3 in (7.6 cm) x 2.5 in (6.4 cm)
- Size before border: 2.5 in (6.4 cm) wide x 2 in (5.1 cm) tall
- Border depth: 0.25 in (0.6 cm), 2 rounds of sc
Materials
Yarn: Choose a smooth, mercerized or matte sport weight cotton. Cotton holds the shell shapes and scallops well and blocks crisply. Avoid fuzzy or very stretchy yarns, because they blur the fan texture and make the drops droop.
- Cream (body): about 5 g (15 m)
- Sage green (border and drops): about 4 g (12 m)
These quantities include a margin for your gauge swatch and weaving in ends.
Tools:
- 2.5 mm crochet hook
- Tapestry needle
- Small scissors
- 1 stitch marker
- Rust-proof pins
- Blocking mat or folded towel
- Ruler or measuring tape
- Spray bottle
Abbreviations (US Terms)
- ch – chain
- sl st – slip stitch
- sc – single crochet
- dc – double crochet
- st(s) – stitch(es)
- rep – repeat
- RS – right side
- yo – yarn over
Special stitches:
- Shell: 5 dc in the same st.
- Half shell (beginning): Ch 3 (counts as dc), 2 dc in the same st.
- Half shell (end): 3 dc in the same st.
- Bobble: (Yo, insert hook in st, yo and pull up a loop, yo and pull through 2 loops) 4 times in the same st. You now have 5 loops on the hook. Yo and pull through all 5 loops.
- Drop: Ch 5, bobble in 3rd ch from hook, sl st in each of next 2 ch, sl st in the same sc at the base of the ch-5. The 2 ch above the bobble give it height. The 2 sl sts form the hanging stem.
Gauge and Checkpoints
Gauge matters here because the triangle’s shape depends on how wide each shell fans out.
Body gauge: 1 shell repeat (shell + sc) = 0.625 in (1.6 cm) wide. 1 row = 0.4 in (1.0 cm) tall.
Border gauge: 10 sc = 1 in (2.5 cm).
This piece is small enough to serve as its own swatch. Work Rows 1–3 and measure before continuing.
Checkpoints:
- After Row 3: 1.25 in (3.2 cm) wide x 1.2 in (3.0 cm) tall
- After Row 5: 2.5 in (6.4 cm) wide x 2 in (5.1 cm) tall
- After Border Rnd 1: about 2.75 in (7.0 cm) wide
- After Border Rnd 2: 3 in (7.6 cm) wide x 2.5 in (6.4 cm) tall
If your piece is too big, go down to a 2.25 mm hook. If it is too small, go up to a 2.75 mm hook. Check your tension on the dc too: tall, loose dc make the triangle long and narrow.
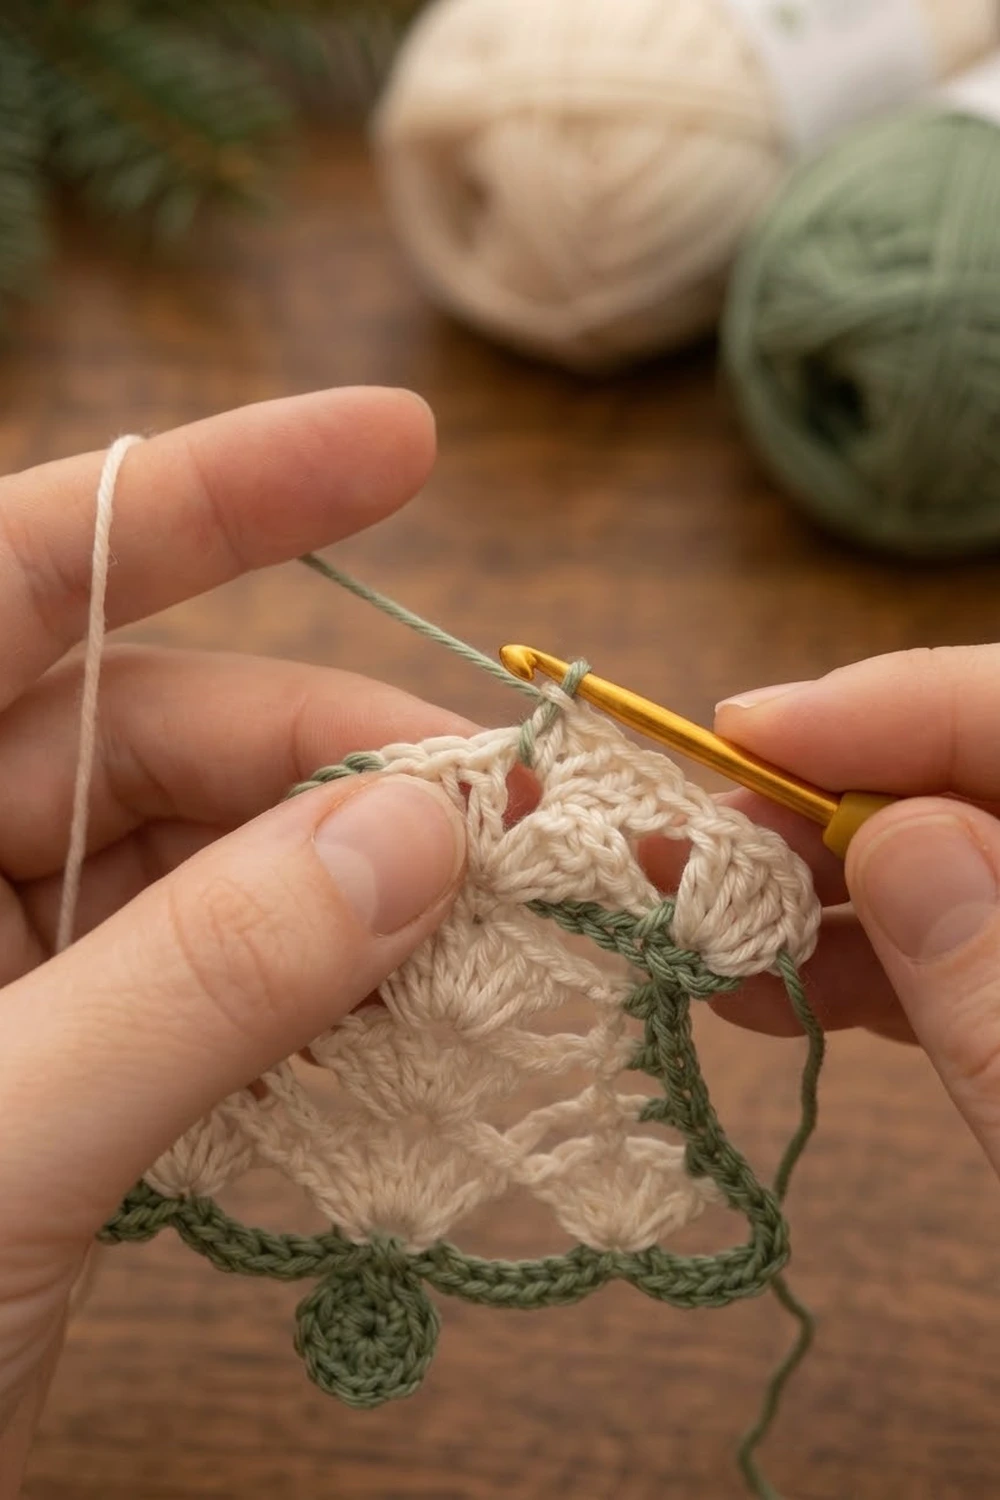
Cream Body
Work with cream throughout. Each row is turned. The ch-3 at the start of each row counts as a dc.
Row 1: Ch 3. Work 5 dc in the 3rd ch from hook. Turn. (5 dc = 1 shell)
The 2 skipped ch do not count as a st. They form the top point of the triangle.
Row 2: Ch 3, 2 dc in first dc (beginning half shell). Skip next dc, sc in next dc (the center of the shell). Skip next dc, 3 dc in last dc (end half shell). Turn. (7 sts: 3 dc, 1 sc, 3 dc)
Row 3: Ch 3, 2 dc in first dc. Sc in next dc (middle of the half shell). Skip next dc, shell in next sc. Skip next dc, sc in next dc (middle of the half shell). 3 dc in top of turning ch. Turn. (13 sts: half shell, sc, shell, sc, half shell)
From here, the sc always lands in the middle dc of a half shell or the center dc of a full shell. Each new shell always goes into an sc.
Row 4: Ch 3, 2 dc in first dc. Sc in next dc, skip next dc.
Repeat section: Shell in next sc, skip 2 dc, sc in next dc (center of shell), skip 2 dc; rep from * once more.
Row end: Shell in last sc, skip next dc, sc in next dc, 3 dc in top of turning ch. Turn. (19 sts: half shell, sc, 2 shells with 1 sc between, sc, half shell)
Row 5: Ch 3, 2 dc in first dc. Sc in next dc, skip next dc.
Repeat section: Shell in next sc, skip 2 dc, sc in next dc, skip 2 dc; rep from * once more.
Row end: Shell in last sc, skip next dc, sc in next dc, 3 dc in top of turning ch. Do not turn. Fasten off cream. (25 sts)
Stitch count logic: From Row 2 onward, each row adds exactly one shell (5 dc) plus one sc, so each row’s total is 6 more than the row before: 7, 13, 19, 25.
Row 5 reads, in order: half shell (sts 1–3), sc (st 4), shell (sts 5–9), sc (st 10), shell (sts 11–15), sc (st 16), shell (sts 17–21), sc (st 22), half shell (sts 23–25). The center dc of the three full shells are sts 7, 13, and 19. These are the lowest points of the bottom edge, and the drops will hang from them.
Checkpoint: 2.5 in (6.4 cm) wide x 2 in (5.1 cm) tall. The bottom edge should show three clear scallops between two half-shell corners.
Border
The border is worked in sage green, in rounds, with RS facing. Hold the piece so that Row 5 runs along the bottom.
Border gauge: 10 sc = 1 in (2.5 cm). Two rounds add about 0.25 in (0.6 cm) on every edge.
Round 1 (sc outline)
Join sage with a sl st in st 1 of Row 5 (bottom corner).
- Ch 1. Work 3 sc in the same st (corner).
- Sc in each of the next 23 sts (sts 2–24).
- Work 3 sc in st 25 (corner).
- Work 2 sc in each of the 5 row-ends going up the side.
- Work 3 sc in the top point, working around the skipped ch-2 of Row 1.
- Work 2 sc in each of the 5 row-ends going down the other side.
- Sl st to the first sc. (52 sc)
Counts per side: Each corner has 3 sc. The center sc of each group is the corner stitch, and it is shared by the two sides that meet there.
- Bottom: 1 corner + 1 + 23 + 1 + 1 corner = 27 sc
- Each slanted side: 1 corner + 1 + 10 + 1 + 1 corner = 14 sc
- Total: 27 + 14 + 14 − 3 shared corners = 52 sc
You can check this another way by adding up the stitches as you worked them: 3 + 23 + 3 + 10 + 3 + 10 = 52.
Why the math works:
- A dc row-end is about as tall as 2 sc, so 2 sc per row-end keeps the slanted sides flat.
- Along the bottom, 1 sc per st follows the curve of the shells exactly, so the scallops stay defined.
- The 3-sc corners give 2 extra sts at each point, which is enough to turn the corner without cupping.
Round 2 (sc with drops)
This is a trim round. You work 1 sc into each existing sc, add 2 extra sc at each corner, and work drops along the bottom.
Place a marker in the center sc of each corner before you begin, so the corners are easy to find.
- Ch 1, sc in the first sc. Work 3 sc in the next sc (corner center).
- Sc in each of the next 7 sc, then work a drop. This sc sits above st 7 of Row 5.
- Sc in each of the next 6 sc, then work a drop. This sc sits above st 13, the exact center of the bottom.
- Sc in each of the next 6 sc, then work a drop. This sc sits above st 19.
- Sc in each of the next 6 sc.
- Work 3 sc in the corner center.
- Sc in each of the next 12 sc. Work 3 sc in the top corner center.
- Sc in each of the next 11 sc.
- Sl st to the first sc. Fasten off.
Count: 52 sc worked 1-per-existing-st + 6 extra corner sc (2 per corner x 3 corners) = 58 sc, plus 3 drops. The drops are not included in the sc count.
Bottom check: The 25 sc between the two bottom corner centers are worked as 7 + 6 + 6 + 6 = 25. The drops land at positions 8, 14, and 20 of the 27-st bottom side. These positions mirror each other around the center (position 14), so the drops hang evenly.
Checkpoint: 3 in (7.6 cm) wide x 2.5 in (6.4 cm) tall, with the drops extending about 0.5 in (1.3 cm) below the trim.
Optional: If you would like to scale up later, several motifs can be sewn edge to edge as a trim. That is outside this pattern, which is for one motif.
Final Blocking
- Weave in all ends along the stitches of the same color. Trim them to about 0.25 in (0.6 cm).
- Mist the motif lightly with water until it is damp, not soaked.
- Lay it RS up on your blocking mat.
- Pin the three corners first so the piece is 3 in (7.6 cm) wide and 2.5 in (6.4 cm) tall.
- Pin the slanted sides straight.
- Pin each shell tip along the bottom to sharpen the scallops. Place the pins in the trim, not in the drops.
- Let the drops hang straight down. Roll each bobble gently between your fingers to round it.
- Leave the motif to dry completely before you unpin it, usually 2–4 hours.
Final Quality-Control Checklist
- [ ] The body has 5 rows, with 25 sts in Row 5.
- [ ] Row 5 shows 3 full shells and 2 half-shell corners.
- [ ] Border Rnd 1 has 52 sc: 27 on the bottom and 14 on each slanted side, with corners shared.
- [ ] Border Rnd 2 has 58 sc plus 3 drops.
- [ ] The drops hang from the center dc of each full shell, and the middle drop is exactly centered.
- [ ] The finished size is 3 in (7.6 cm) x 2.5 in (6.4 cm), and the drops are about 0.5 in (1.3 cm) long.
- [ ] The edges lie flat, with no ruffling or cupping.
- [ ] All ends are woven in securely.
Troubleshooting
The triangle is narrow and long.
Your dc are too tall, or your shells are too tight. Try a looser yo on the shells, or go up one hook size.
The triangle is not widening each row.
Check that every row begins with ch 3 + 2 dc in the first st and ends with 3 dc in the turning ch. Recount: 7, 13, 19, 25.
The shells sit crooked.
Make sure each shell goes into an sc and each sc goes into a center dc. Count the skips carefully.
The sides ruffle in the border.
You are working too many sc per row-end, or your border tension is loose. Keep to 2 sc per row-end.
The sides pull in or pucker.
Your border tension is too tight. Relax your grip, or go up 0.25 mm for the border only.
The bottom scallops look flat.
You may have skipped sts along the bottom. Rnd 1 needs 1 sc in every one of the 23 middle sts. Block the shell tips firmly.
The drops twist or curl up.
Keep the ch-5 relaxed. Make sure the sl sts go into the back bumps of the chain, then block the drops hanging straight.
The bobbles look flat.
Pull each loop up to the same height before the final yo, and do not over-tighten the closing loop.
Care
Hand wash in cool water with a mild soap. Press out the water in a towel, then reshape and dry flat, pinning the scallops again if needed.
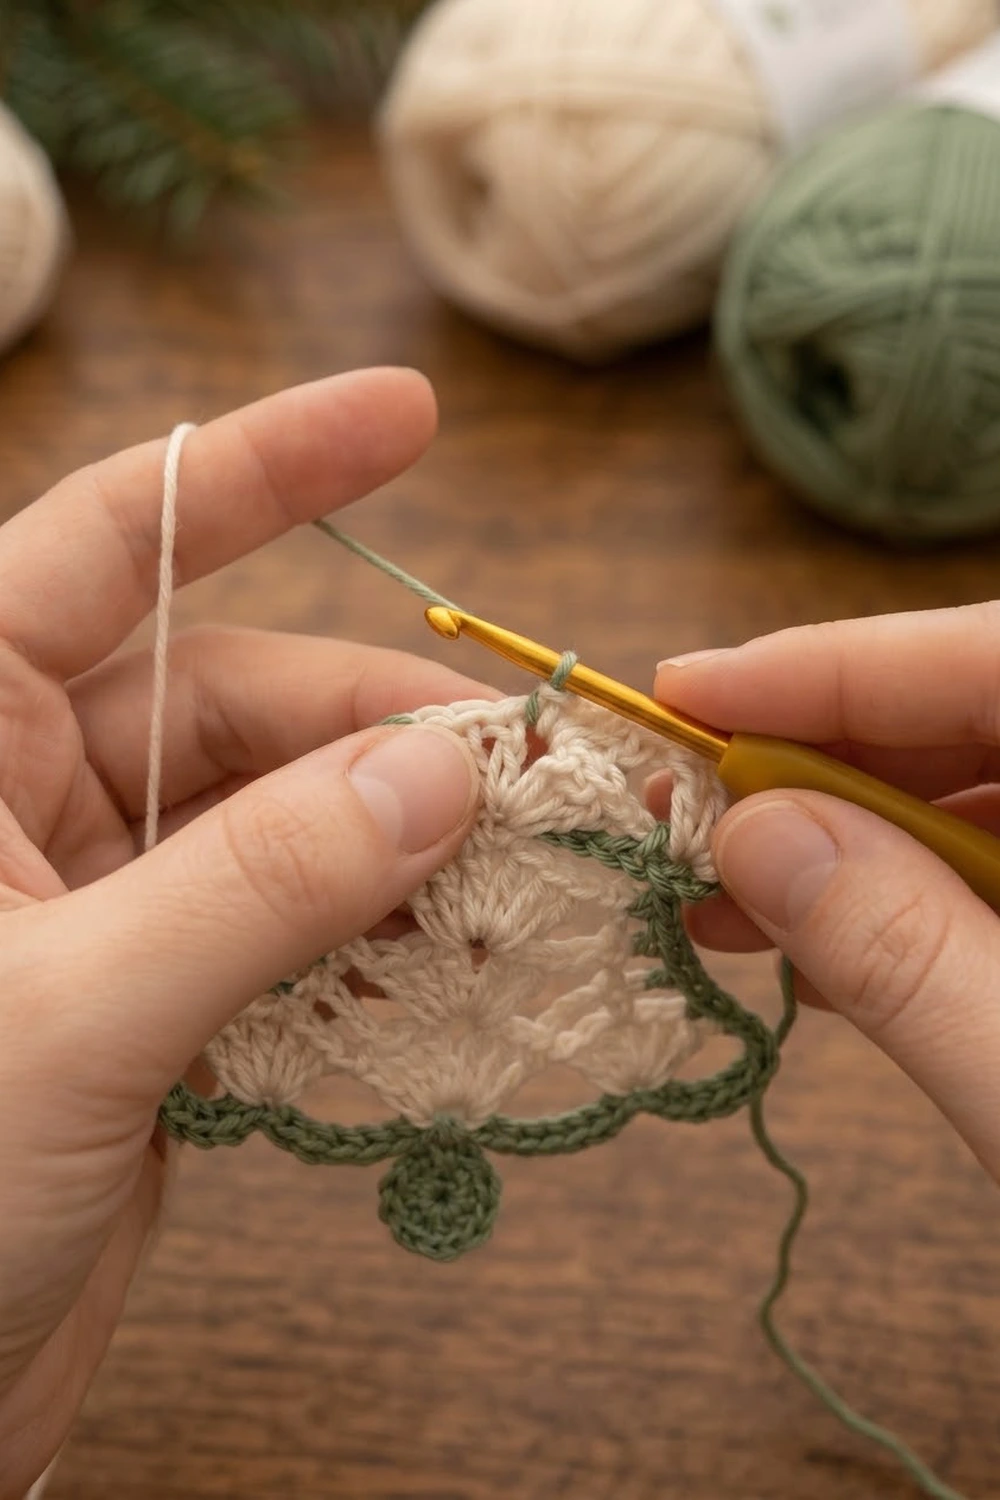
Final Notes
The measurement chain is short and easy to check:
- Row 3 measures 1.25 in (3.2 cm) wide.
- Row 5 measures 2.5 in (6.4 cm) x 2 in (5.1 cm), with 25 sts.
- Border Rnd 1 has 52 sc and measures about 2.75 in (7.0 cm) wide.
- Border Rnd 2 has 58 sc plus 3 drops, and the motif measures 3 in (7.6 cm) x 2.5 in (6.4 cm).
If each checkpoint matches, the shells, scallops, and drops will line up exactly as designed. Measure early, block gently, and enjoy this little cream-and-sage piece.
Happy crocheting!