

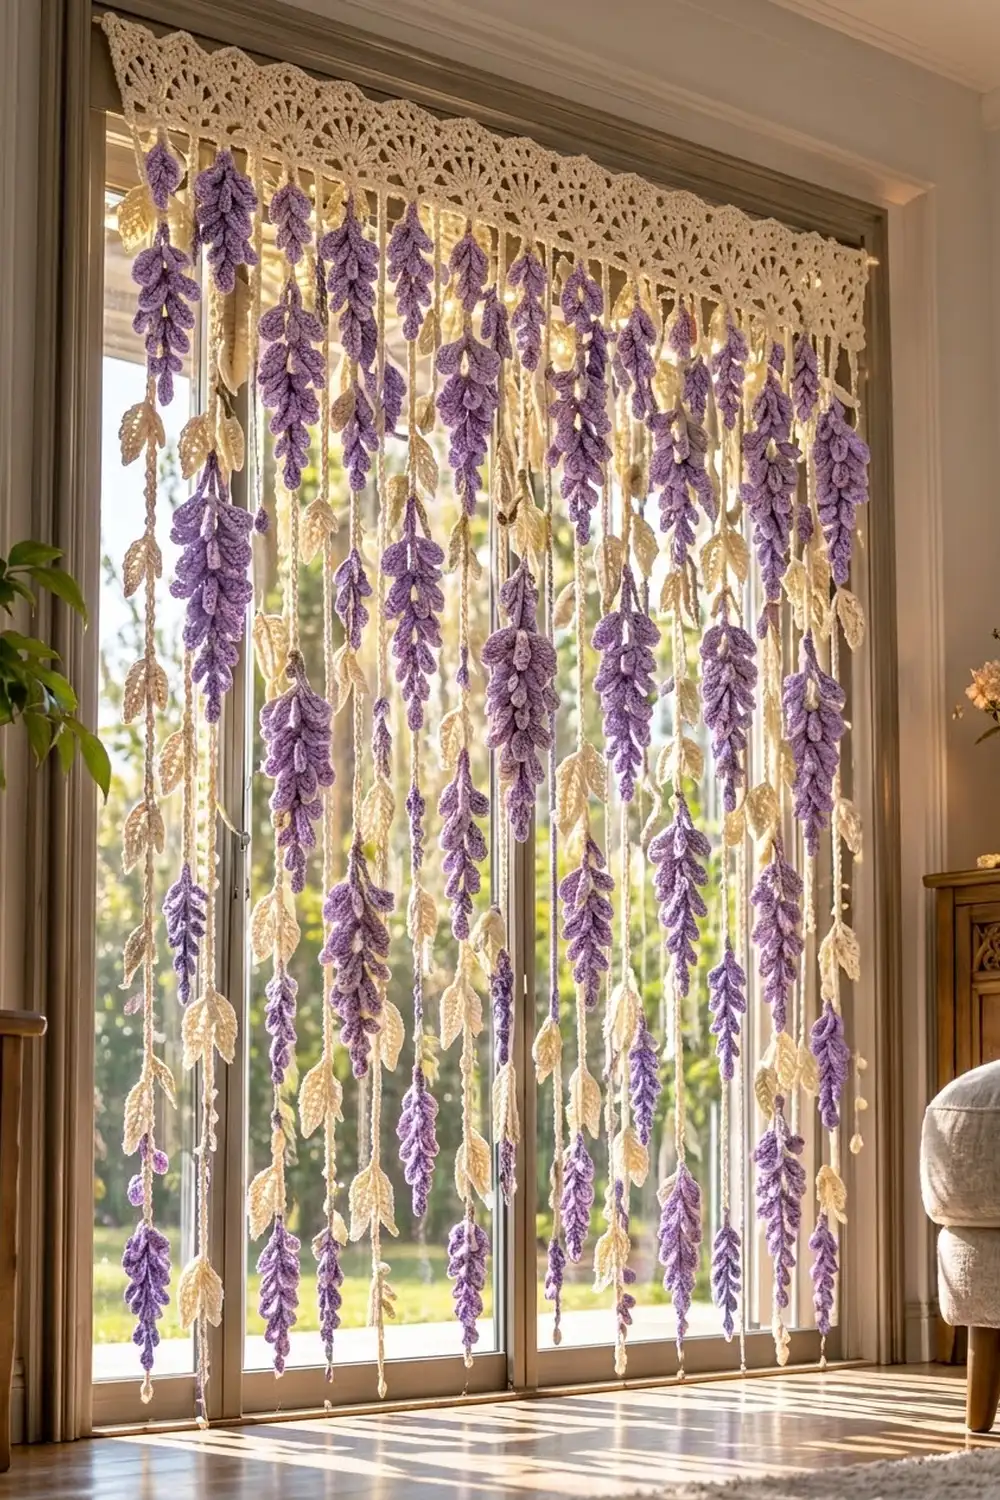
This curtain is a soft wall of wisteria for a doorway. A cream lace header carries 25 hanging cords. Some cords have lavender wisteria clusters and some have small cream leaves. When light comes through, the clusters glow and the cream lace looks like a trellis.
The palette is two colors only: cream for the header, cords and leaves, and lavender for the clusters. The look is romantic and a little cottage-style. It suits a glass door, a closet opening or a wide window.
The finished curtain is 36.25 in (92.1 cm) wide. It measures 68 in (172.7 cm) from the top of the header to the end of the cords, and 71.5 in (181.6 cm) at the tip of the longest clusters. This pattern uses US crochet terms throughout.
Construction is all one piece. First you work a flat header in rows and finish it with a fan border along the top edge. Then you crochet each cord directly from the header’s lower edge, adding leaves as you work back up the cord. Last, you work the lavender clusters onto the marked cords. There is no sewing and no joining of separate panels.
Finished Size and Construction
- Finished size: 36.25 in (92.1 cm) wide × 68 in (172.7 cm) to the cord ends; 71.5 in (181.6 cm) at the cluster tips
- Skill level: Intermediate
- Terminology: US crochet terms
- Yarn weight: DK / light (#3) cotton
- Hook: 4.0 mm (G-6)
- Number of pieces: 1 (a header with 25 cords worked directly onto it)
- Layout: 25 cords, 1.5 in (3.8 cm) apart, alternating wisteria and leaf cords
- Header width: 145 stitches = 36.25 in (92.1 cm)
- Header height before border: 2 in (5.1 cm)
- Border depth: 1 in (2.5 cm), so the full header is 3 in (7.6 cm) tall
Materials
Use a smooth mercerized or matte cotton DK. Cotton hangs straight, holds the petal shapes and doesn’t stretch much under the weight of the cords. Avoid acrylic for this project: long acrylic cords can grow by several inches over time.
The amounts below assume about 115 m per 50 g.
- Cream: 250 g (about 575 m) for the header, the cords and 135 leaves
- Lavender: 150 g (about 345 m) for 39 wisteria clusters
Tools:
– 4.0 mm (G-6) hook
– Tapestry needle
– Scissors
– About 30 locking stitch markers
– Tape measure
– Rustproof pins and a blocking board
– Spray bottle
– A slim curtain rod or tension rod for hanging
The yarn amounts include roughly a 20% margin for your gauge swatch and small tension differences.
Abbreviations (US Terms)
- ch – chain
- sl st – slip stitch
- sc – single crochet
- hdc – half double crochet
- dc – double crochet
- tr – treble crochet
- sk – skip
- sp – space
- st(s) – stitch(es)
- RS – right side
Special stitches:
- Fan: In one stitch, work [tr, (ch 1, tr) 8 times]. That is 9 tr and 8 ch-1 spaces, for 17 sts.
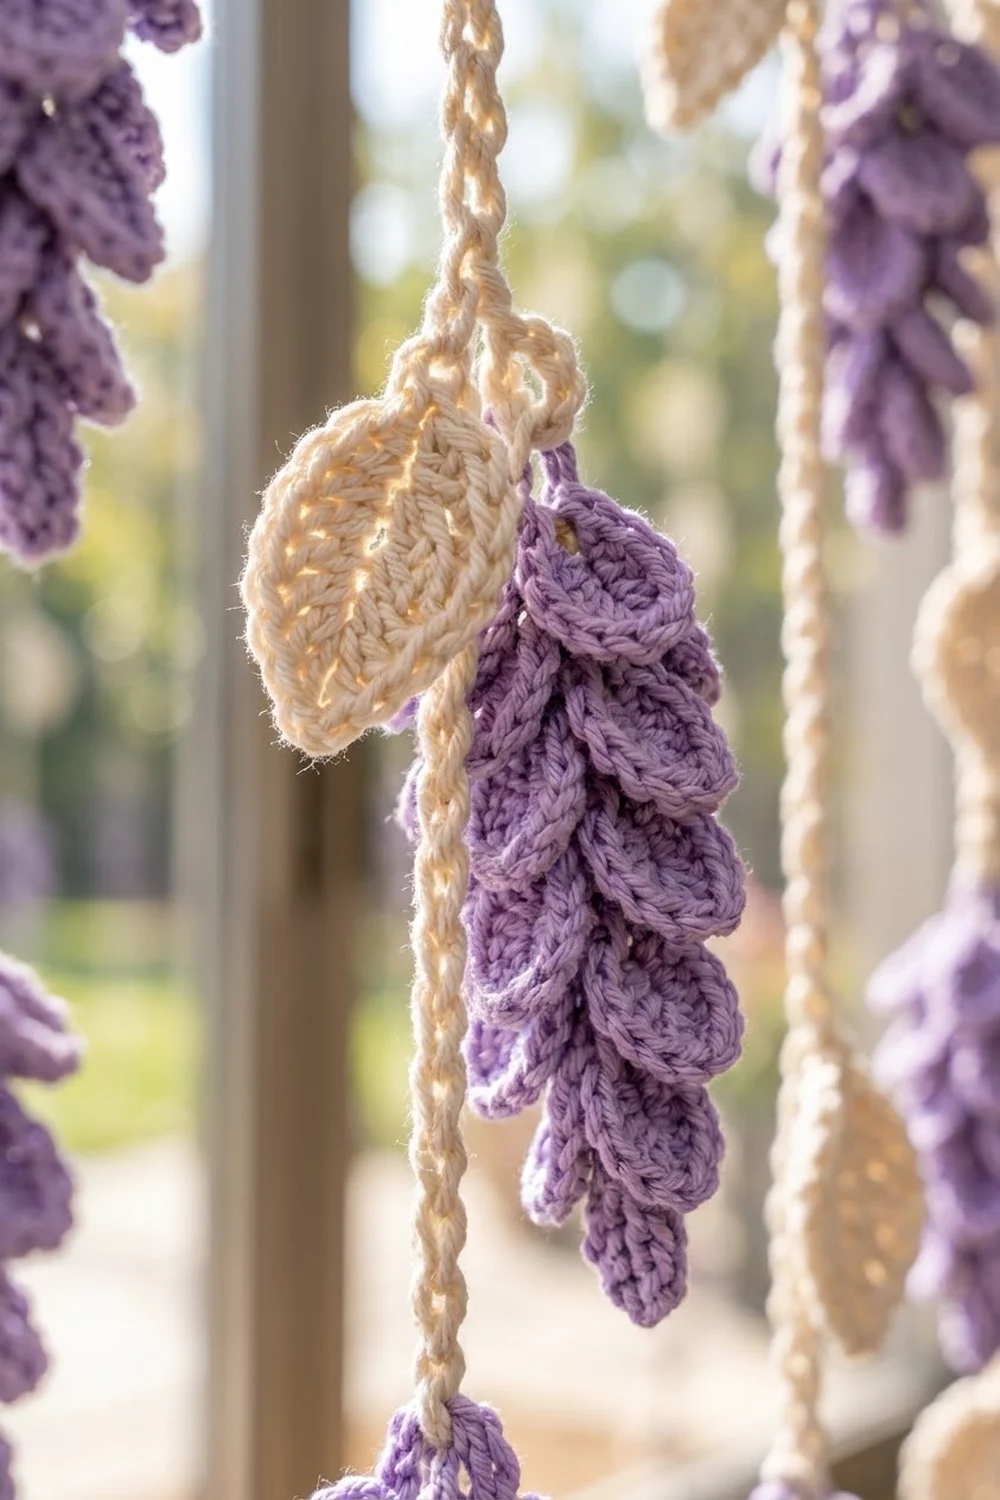
- Leaf: Ch 7. Sc in the 2nd ch from the hook, then hdc, dc, dc, hdc and sc in the next 5 ch. Ch 1, turn the leaf, and work along the free loops of the same 6 ch: sc, hdc, dc, dc, hdc, sc. That is 12 sts plus a ch-1 tip. The leaf is about 1.25 in (3.2 cm) long and 0.75 in (1.9 cm) wide.
- Small petal: (sc, hdc, sc) in one ch = 3 sts.
- Medium petal: (sc, hdc, dc, hdc, sc) in one ch = 5 sts.
- Large petal: (sc, hdc, 3 dc, hdc, sc) in one ch = 7 sts.
Gauge and Checkpoints
Header gauge: 16 sts and 8 dc rows = 4 in (10.2 cm), worked in dc.
Cord gauge: 10 ch = 2 in (5.1 cm), measured relaxed after the sl st return pass.
Test first. Before starting the curtain, make a small test sample:
– A header swatch of 25 sts worked through Row 5
– One 50-ch test cord with one leaf
– One wisteria cluster
The 25-st swatch should measure 6.25 in (15.9 cm) wide. The test cord should be 10 in (25.4 cm) long. The cluster should be about 3.5 in (8.9 cm) long and 2 in (5.1 cm) wide at the top.
Checkpoints:
1. After header Row 1: 36.25 in (92.1 cm) wide, within 0.5 in (1.3 cm). Anything between 35.75 in (90.8 cm) and 36.75 in (93.3 cm) is fine.
2. After header Row 5: 2 in (5.1 cm) tall.
3. After the border: 3 in (7.6 cm) tall at the fan peaks.
4. Each cord: 65 in (165.1 cm) from the header to the bottom, within 1 in (2.5 cm).
If your work is too big, go down half a hook size. If it is too small, go up half a size. For cords only, you can also adjust the chain count: add or remove 5 ch for each 1 in (2.5 cm) of length. Keep the same count on all cords of the same type.
Header
The header uses cream yarn and is worked flat in rows.
Foundation: Ch 146.
Row 1 (RS): Sc in the 2nd ch from the hook and in each ch across. Turn. (145 sc)
Row 2 (mesh): Ch 4 (counts as dc + ch 1), sk next st, dc in next st. Ch 1, sk next st, dc in next st; repeat from * across, ending with a dc in the last st. Turn. (73 dc + 72 ch-1 sps = 145 sts)*
Row 3 (conversion): Ch 3 (counts as dc). Dc in each ch-1 sp and each dc across, with the last dc in the 3rd ch of the turning ch-4. Turn. (73 dc worked into dc + 72 dc worked into spaces = 145 dc)
Row 4 (mesh): Repeat Row 2. (73 dc + 72 ch-1 sps = 145 sts)
Row 5 (conversion): Ch 1. Sc in each dc and each ch-1 sp across. Turn. (73 + 72 = 145 sc)
Checkpoint: The header should now be 36.25 in × 2 in (92.1 cm × 5.1 cm). Don’t fasten off. Go straight on to the border.
Border
The border runs along the top edge of the header, with a narrow sc edging down each short side.
Border gauge: One fan repeat covers 12 sts, which is 3 in (7.6 cm). The finished border is 1 in (2.5 cm) deep.
Border Row 1 (fans): Ch 1, sc in the first st. Sk 5 sts, Fan in the next st, sk 5 sts, sc in the next st; repeat from * 11 more times. Turn. (13 sc + 12 fans × 17 sts = 217 sts)*
Border Row 2 (spokes edge): Ch 1, sc in the first sc. Sc in the first tr of the fan, (ch 2, sc in the next tr) 8 times, sc in the next sc; repeat from * across. (Each fan: 9 sc + 8 ch-2 = 25 sts. Total: 12 × 25 + 13 valley sc = 313 sts)*
Each ch-2 space sits over a ch-1 spoke from Border Row 1, so the fans read as radiating arches.
Side edging: Don’t turn. Ch 1, then sc evenly down the short side of the header. Work:
– 1 sc in the end of Border Row 2
– 2 sc in the end of Border Row 1 (the tr row)
– 1 sc in the end of Row 5
– 2 sc in the end of each of Rows 4, 3 and 2
– 1 sc in the end of Row 1
That makes 11 sc. Fasten off. Join cream at the top corner of the other short side and work the same 11 sc down to the bottom. Fasten off and weave in the ends.
Why the math works: 145 = (12 × 12) + 1. Each fan repeat uses exactly 12 sts: 5 skipped, 1 fan, 5 skipped and 1 sc. The extra 1 is the opening sc. So Border Row 1 starts and ends with a valley sc, and the arches sit perfectly symmetric across the width.
Cords
Hold the header RS facing, with the foundation-chain edge at the bottom. Count the free loops of the foundation ch from right to left, 1 to 145. Mark loops 1, 7, 13, 19 and so on, every 6th loop through loop 145. That gives (144 ÷ 6) + 1 = 25 cord positions, 1.5 in (3.8 cm) apart.
Cord order (right to left): A B A B A B A B A B A B A B A B A B A B A B A B A
– 13 Type A (wisteria) cords fall at loops 1, 13, 25 … 145, directly under the border valleys.
– 12 Type B (leaf) cords fall at loops 7, 19 … 139, directly under each fan center.
Type B Leaf Cord (make 12)
Step 1: Join cream with a sl st in the marked loop. Ch 332.
Step 2 (tip leaf): Sc in the 2nd ch from the hook, then hdc, dc, dc, hdc and sc in the next 5 ch. Ch 1, then work along the free loops of the same 6 ch: sc, hdc, dc, dc, hdc, sc. (Tip leaf complete: 12 sts + ch-1 tip; 1 + 6 = 7 ch used)
Step 3 (return pass): Sl st in the back bump of each of the remaining 325 ch, working up toward the header. After the 45th, 90th, 135th, 180th, 225th, 270th and 315th sl st, work a side Leaf and then sl st again into the same stem ch. The side leaves don’t count toward the 325.
Step 4: After the 325th sl st, sl st into the same header loop where you joined. Fasten off.
Per cord: 325 stem sts, 1 tip leaf and 7 side leaves = 8 leaves, spaced 9 in (22.9 cm) apart.
Type A Wisteria Cord (make 13)
Step 1: Join cream with a sl st in the marked loop. Ch 326.
Step 2: Sl st in the back bump of the 2nd ch from the hook and in each ch up to the header. (325 stem sl sts) The skipped first ch is the cord tip.
Work side Leaves after the 60th, 170th and 280th sl st, counting from the bottom. As you go, place markers on the 110th and 220th stem sl sts.
Step 3: Sl st into the header loop. Fasten off.
Per cord: 3 leaves, plus 3 cluster positions: the tip, sl st 110 at 22 in (55.9 cm) up, and sl st 220 at 44 in (111.8 cm) up.
Checkpoint: Hang the header and let the cords drop. Every cord should measure 65 in (165.1 cm) from the header to the stem end.
Wisteria Clusters (make 39: 3 on each Type A cord)
Each cluster hangs on its own chain spine, with layered petals on both sides of the spine.
Spine: Join lavender with a sl st at the cluster position: either a marker, or the tip ch of the cord. Ch 17, letting the chain hang down.
Side 1 (working upward):
– Sl st in the 2nd ch from the hook (the bottom of the cluster).
– Small petal in each of the next 4 ch.
– Medium petal in each of the next 5 ch.
– Large petal in each of the last 6 ch.
(1 + 12 + 25 + 42 = 80 sts; 15 petals)
Side 2 (working downward): Rotate the spine and work along the free loops of the same chains:
– Large petal in each of the next 6 ch.
– Medium petal in each of the next 5 ch.
– Small petal in each of the next 4 ch.
– Sl st in the last free loop.
(42 + 25 + 12 + 1 = 80 sts; 15 petals)
Cluster total: 160 sts and 30 petals. Fasten off at the tip and weave the tail up through the spine.
The large petals sit at the top and the small ones at the bottom. This is what gives each cluster its tapered cone shape. Because the petals on the two sides alternate, they overlap into the stacked, scaly texture of real wisteria.
Checkpoint: Each cluster should be about 3.5 in (8.9 cm) long and 2 in (5.1 cm) wide at the top. The clusters at the cord tips bring those cords to 71.5 in (181.6 cm) overall.
Final Blocking
- Weave in all the ends, burying each one at least 1 in (2.5 cm) along a stem.
- Pin the header flat to 36.25 in × 3 in (92.1 cm × 7.6 cm), with each fan peak pinned into a rounded arch.
- Spray the header until it is damp. Let it dry completely.
- Hang the curtain from its rod.
- Mist the cords lightly. Gently pull each cord straight and clip a clothespin to the end of each leaf cord for a few hours.
- Fluff the petals with your fingers so the clusters look full. Let everything air-dry while hanging.
To hang: Weave a slim rod in and out through the ch-1 spaces of header Row 4, or sew small rings along the back of Row 5.
Final Quality-Control Checklist
- [ ] The header is 36.25 in (92.1 cm) wide and 3 in (7.6 cm) tall.
- [ ] There are 12 even fans with 13 valley sc.
- [ ] There are 25 cords spaced 1.5 in (3.8 cm) apart, alternating A and B.
- [ ] Every cord stem is 65 in (165.1 cm), within 1 in (2.5 cm).
- [ ] Each Type B cord has 8 leaves; each Type A cord has 3 leaves and 3 clusters.
- [ ] There are 39 clusters in total, each with 30 petals.
- [ ] No knots or tails are visible from either side.
Troubleshooting
The header ripples: Your foundation ch is too loose. Restart with a hook one size smaller for the chain only.
The fans cup or curl: The tr stitches are too tight. Work them more loosely, or block the fans firmly.
The cords are different lengths: Count your chains in groups of 25 and mark each group. Even out the lengths at blocking.
The cords twist: Always sl st into the back bump, not the top loops. Hang the curtain damp so the cords relax.
The clusters look flat: Push the petals of the two sides so they alternate. Use a looser tension on the dc stitches in the large petals.
The leaves curl: Steam them lightly and pin them flat to dry.
Care
Hand wash in cool water with mild soap and press out the water gently. Lay the curtain flat to dry most of the way, then rehang it so the cords dry straight.
Final Notes
Everything in this curtain follows one measurement chain:
- Header: 16 sts = 4 in (10.2 cm), so 145 sts = 36.25 in (92.1 cm).
- Border: 145 sts = 12 fan repeats of 12 sts, plus 1, which makes 313 sts in the edge row.
- Cords: a cord every 6 sts gives 25 cords; 325 stem sts = 65 in (165.1 cm).
- Clusters: 30 petals each, 3.5 in (8.9 cm) long.
If you check your gauge at the header and on your first cord, the rest of the curtain will come out right.
Happy crocheting!